As an administrative member of a company or organization, you always need to be on your toes when the next breach in security occurs. This can be closer than you think — with a simple mailing of a file you can potentially create a hazard that can inflict a huge catastrophe on your companies online performance and presence. File sharing is key to the success of time management in Office 365. Gone are the days of physical printed copies of documents being required to relay information; this can be done remotely through both SharePoint and email. However certain files may have the potential to inflict harm on your PC such as spreading malware and other viruses to steal and affect your information.
Let us explain how you can prevent this with something called a common attachment filter. The Administrator can specify the file types (based on file extension) that need to be prohibited in emails using the ‘Common attachment filter’ option in the ‘Anti-malware’ policy. When the file type of any attachment in the email matches this configured file type list, this block action is applied. In this blog, we will show users how to properly use the new anti-malware feature and some potential drawbacks. Follow the step by step guide to see how you can use the common attachment filter in Microsoft 365.
Step by step process – How to use the common attachment filter Microsoft 365
- First, sign in to your Office 365 account.
- Use the app launcher and navigate to admin.
- Under admins click on “Security”.
- Under the “Threat management” dropdown select “Policy”.
- Under “Policies” select “Anti-malware”.
- Double click on “Default.”
- Click “Edit protection settings”.
- Ensure “Common Attachment Types Filter” is on.
- Select the file types.
- Finally, click on “Save”.
File types with extensions that match the ones that have been filtered out as restricted will no longer be able to send on email. You will not be able to send these files nor attach them to an email as a reply. While the more common attachments such as .pdf or .jpg can be assessed as safe since they are only visual files with nothing that can affect your PC. the more malicious file types can hurt your computer and can cause significant damage to your security. This is why it’s crucial to properly manage your domain.
There are 96 file types in the current pre-configured list. In the block list, 10 of these 96 file types are selected by default. By default, when a new policy is formed, these ten file types are selected to be banned. This selection can be changed by the administrator by adding new file types or changing current file types. If the Administrator wants to extend this behavior to other file kinds, he or she can do so with PowerShell.
| .cgi .chm .cmd .com .cpl .dll .exe .hta .inf .ini .ins .jar .js .jse .lnk .mht .mhtm .mhtml .msi .ocx .pcd .pif .pl .py .reg .scr .sct .sh .shb .shs .url .vb .vbe .vbs .vbx .ws .wsc .wsf .wsh |
The retention filer can be applied to any file with these extensions mentioned above, if you happen to come across articles and media outlets stating not to allow for these file extensions or to watch out for these file extensions, ensure that you have them restricted on your malware protentions area.

Microsoft security and compliance centre
The Microsoft 365 security center, Microsoft 365 compliance center, and Exchange admin center are all designed with accessibility and usability in mind and include existing features as well as new, enhanced experiences for unified security, compliance, and mail flow management across Microsoft 365 services. The Office 365 Security & Compliance Center will be gradually replaced by these other centers (protection.office.com). Admins in your company may now switch on automatic redirection in the security center or compliance center, so they are automatically diverted from features in the Office 365 Security & Compliance Center to the comparable function in the new centers.
Examine the Microsoft Compliance Manager card to find the Compliance Manager solution. Compliance Manager makes it easier to handle compliance. It generates a risk-based score that assesses your progress toward taking recommended measures that assist decrease data security and regulatory compliance concerns. It also has workflow features and built-in control mapping to help you complete improvement tasks quickly.
A navigation pane on the left side of the screen, in addition to links in cards on the home page, offers you quick access to your alerts, reports, policies, compliance solutions, and more. Use the Customize navigation control on the navigation pane to add or delete options for a customized navigation pane. This brings up the Customize your navigation pane settings window, where you may choose which items display in the pane.
The horizontal scrollbar and the chopped-off column label are two examples of design flaws. However, the goal is clear: to give critical information while allowing the Admin to execute necessary actions straight from the card or a window that pops up from the right. This hasn’t been recognized in the portal’s preview version, which includes every card linked to other portals, the most notable of which are the Cloud App Security (CAS) and the SCC.
The SCC’s Labels, Label rules, and Sensitivity Info kinds subsections, as well as a new Label analytics subsection, make up the Classification section. As previously said, this is the most comprehensive component of the new Compliance centre, and you may anticipate parity with the SCC’s features. Here you may create, publish, and delete labels as well as label policies. My only criticism is the dubious color palette utilized in all of the pop-up panels.
Step by step process – How to use the common attachment filter Microsoft 365
Step by step breakdown:
- First, sign in to your Office 365 account.
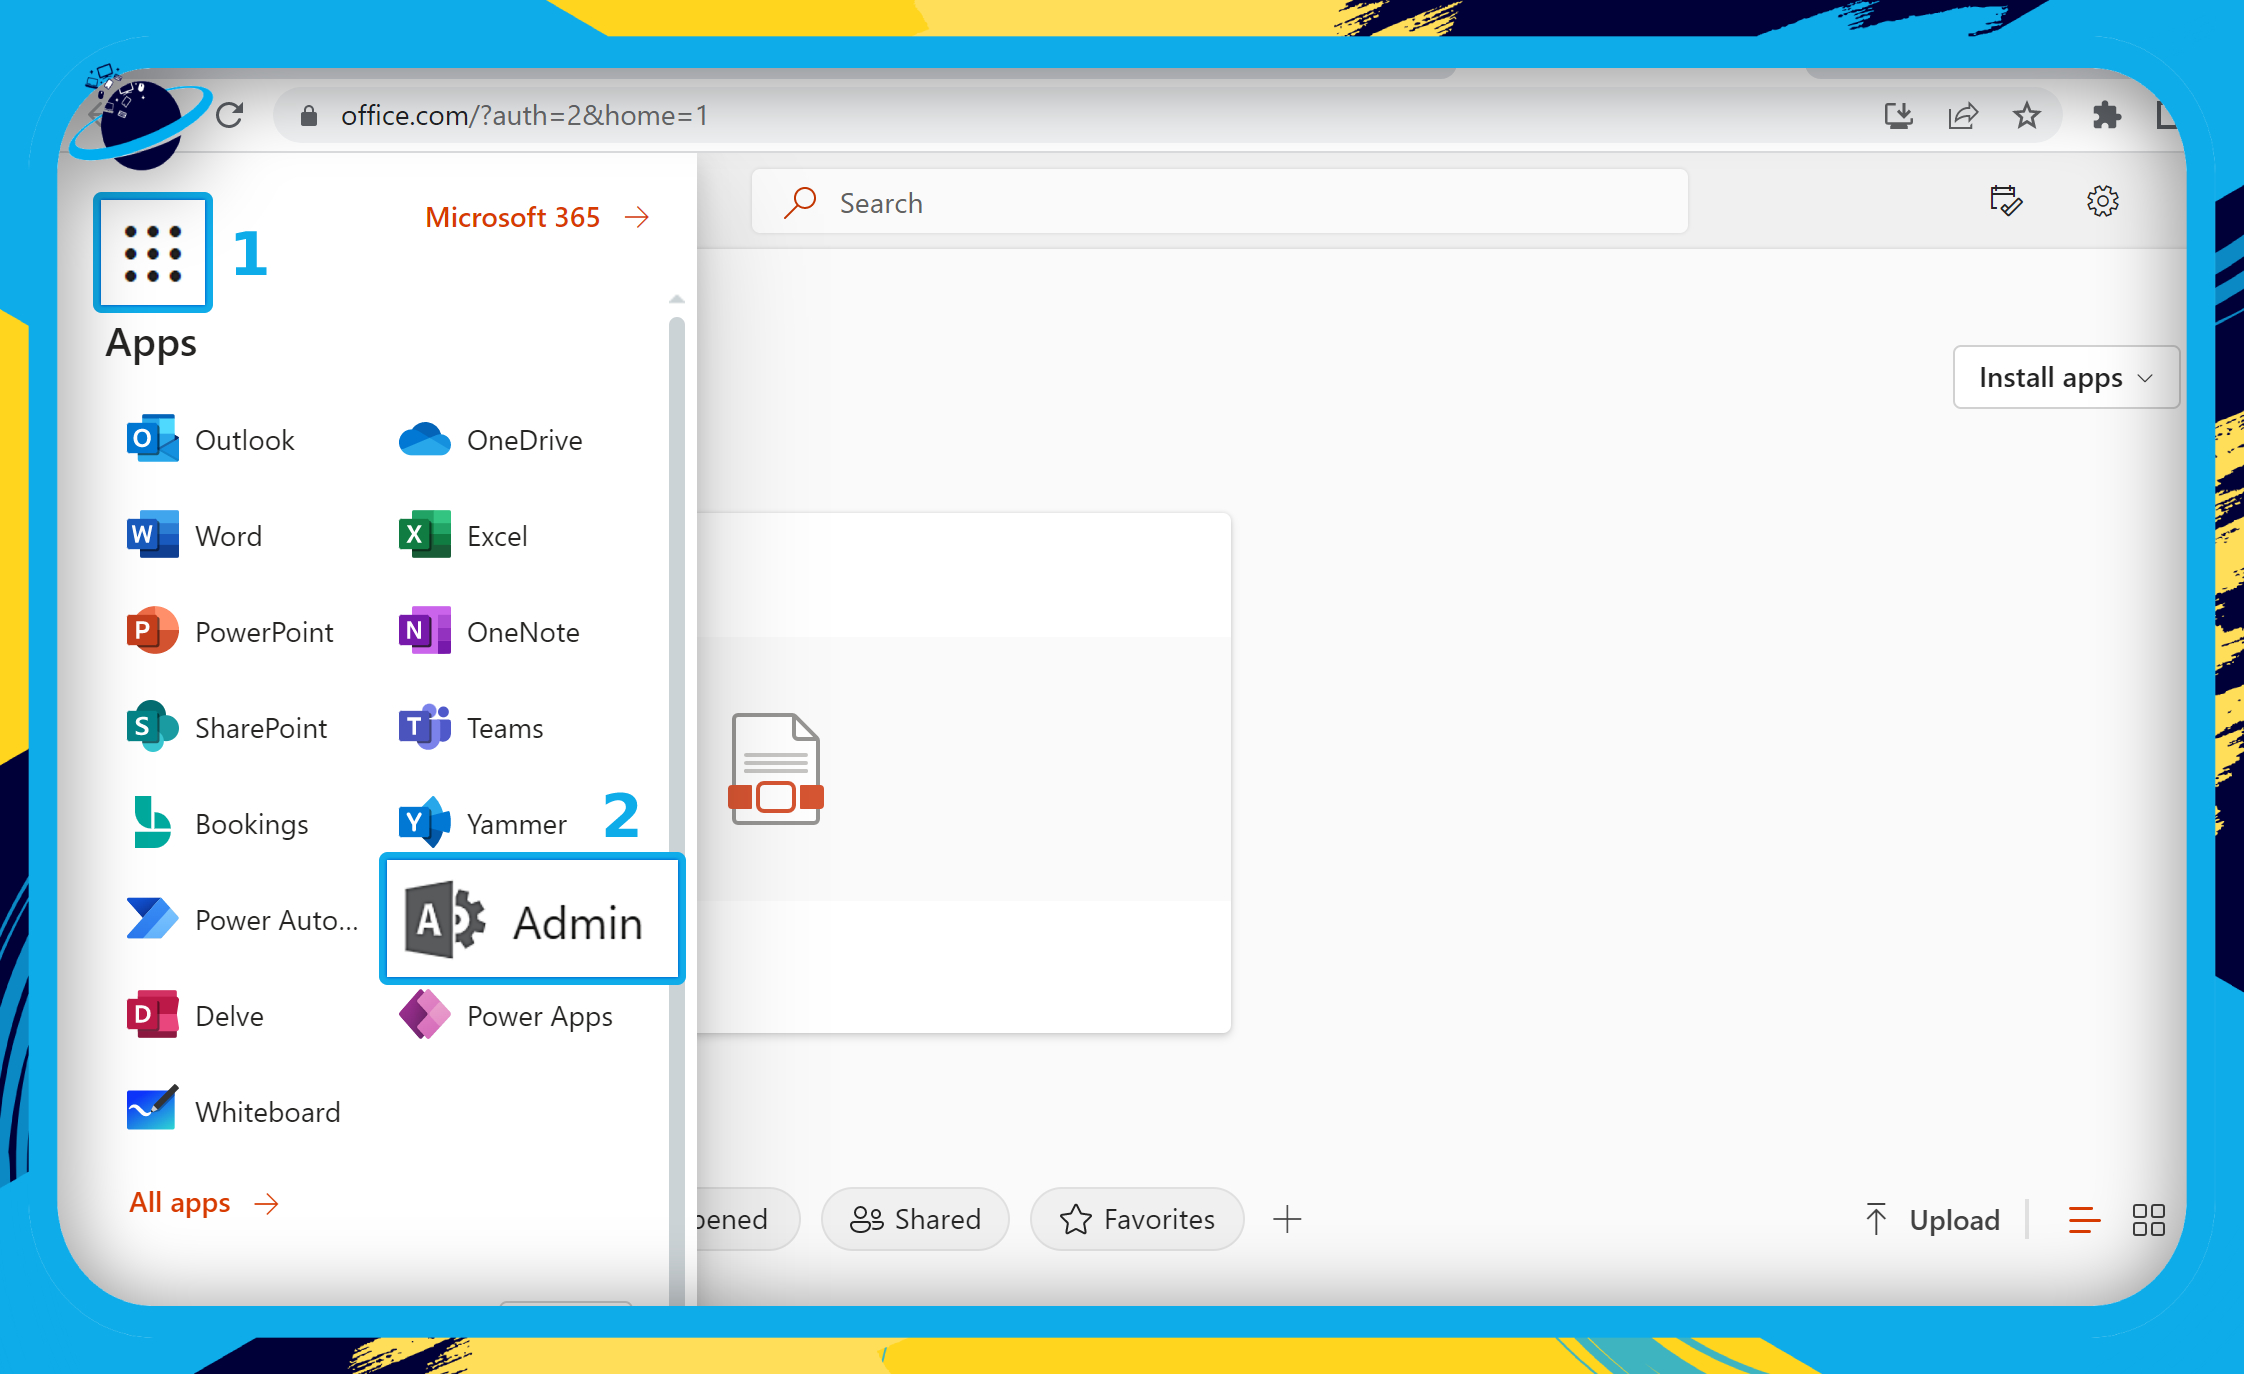
- Click the
 app launcher icon in the top left. (1)
 - Then select “Admin” from the apps list. (2)
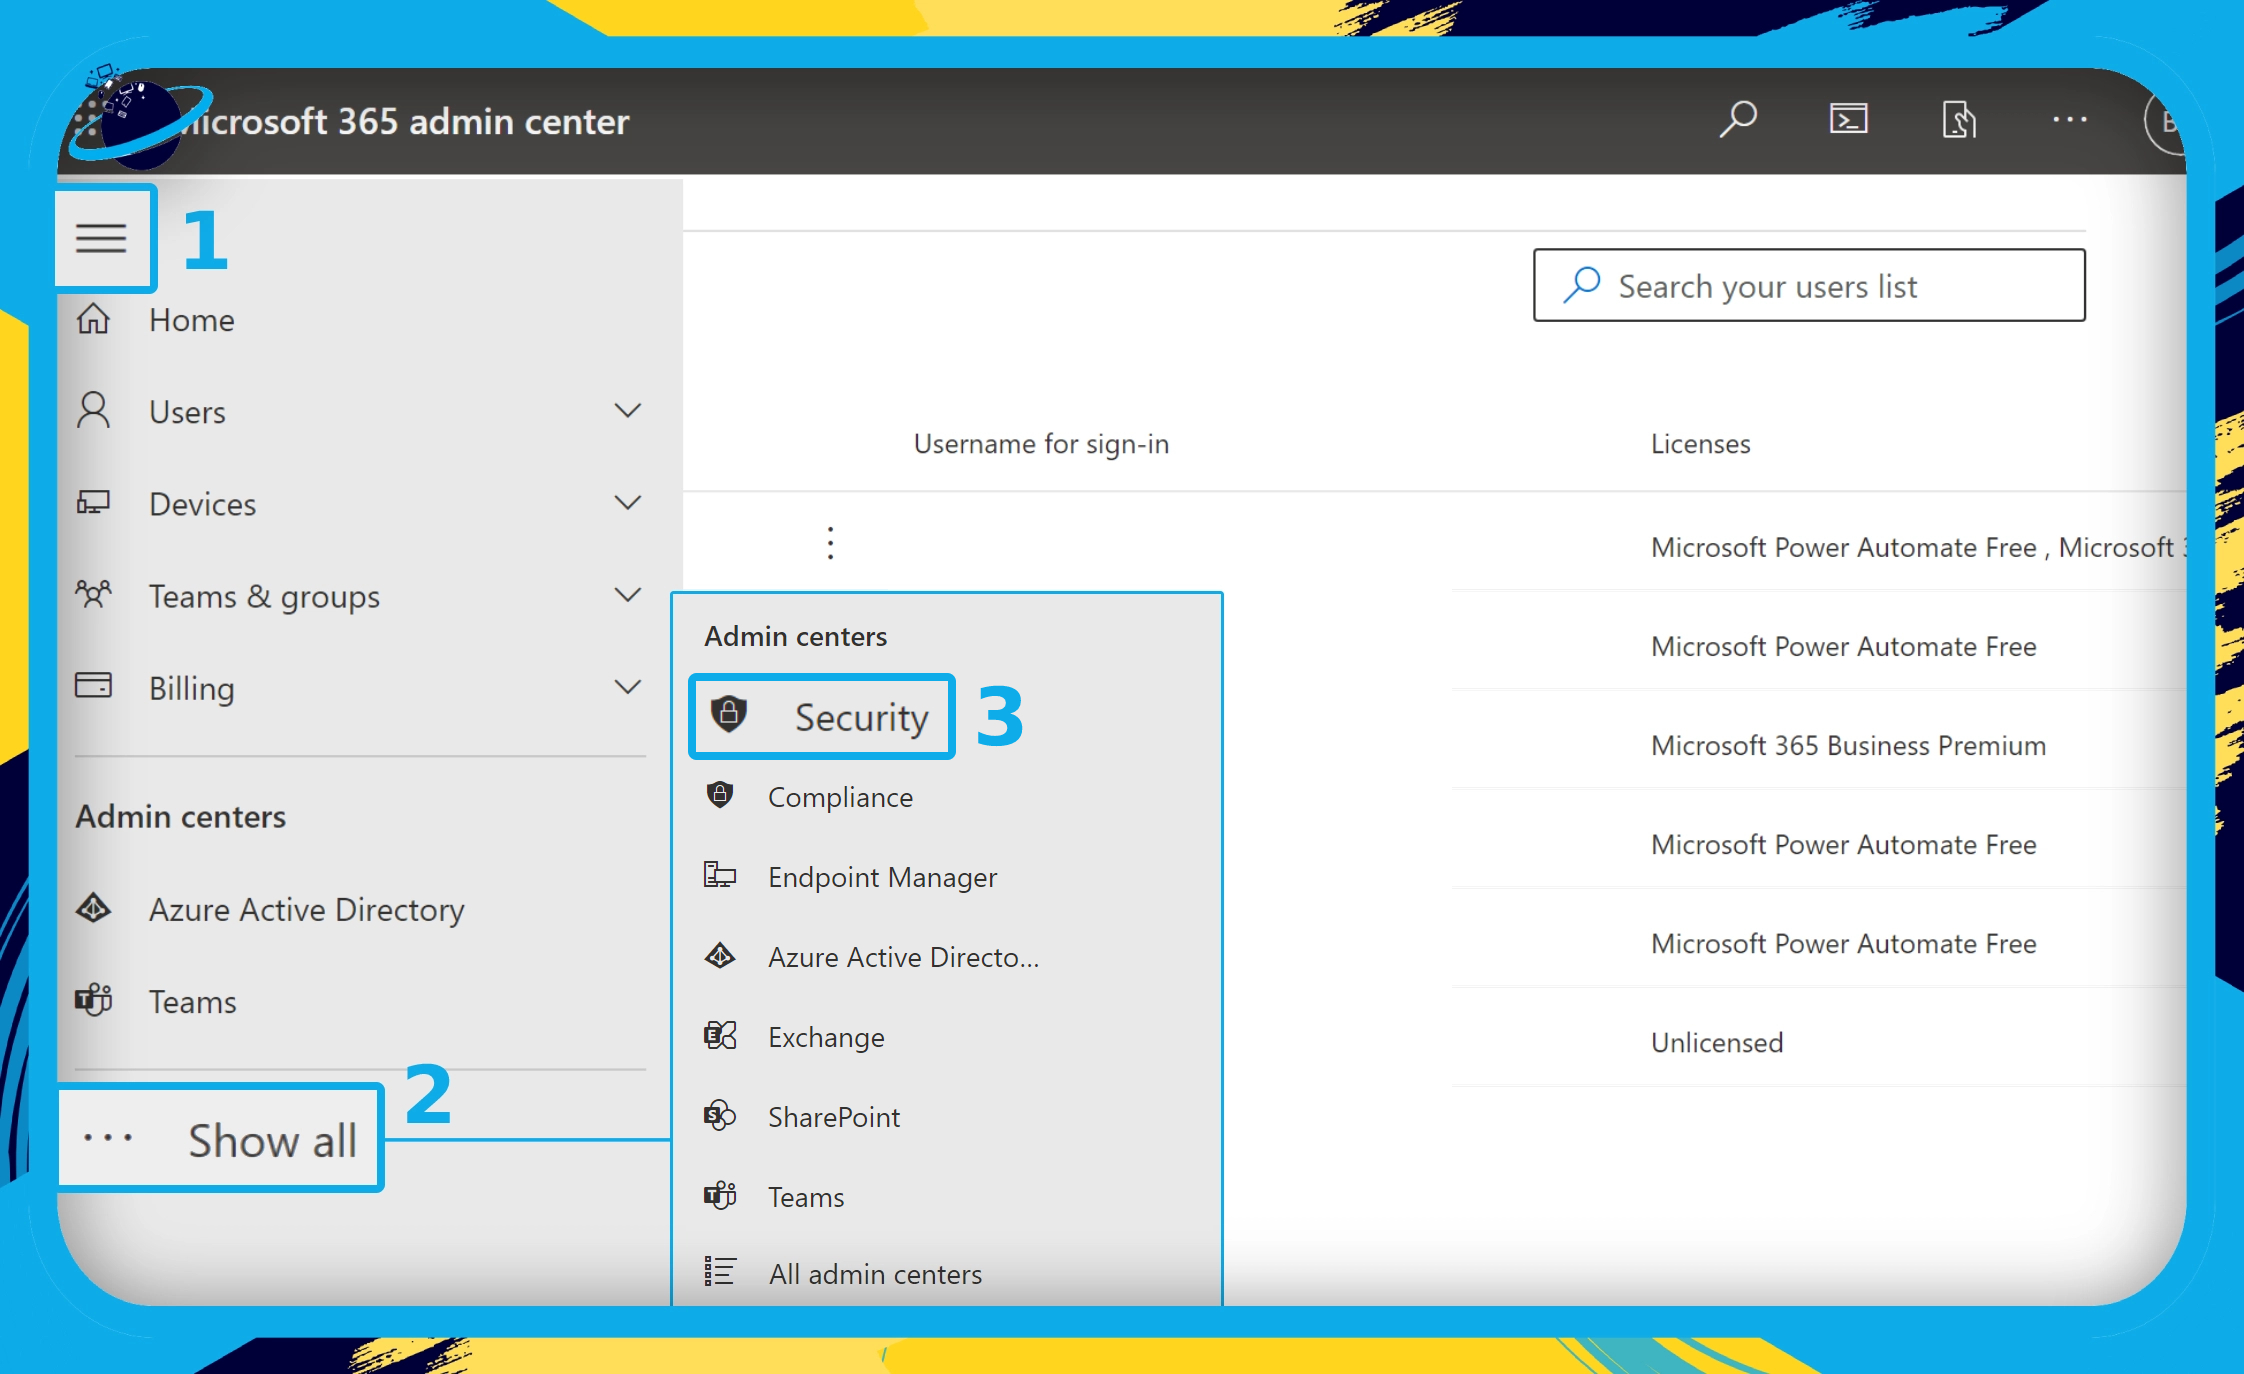
- Click the
 menu icon in the top left corner of the Admin center. (1)
 - Click “Show all” in the left menu to reveal more Admin centers. (2)
- Then select “Security.” (3)
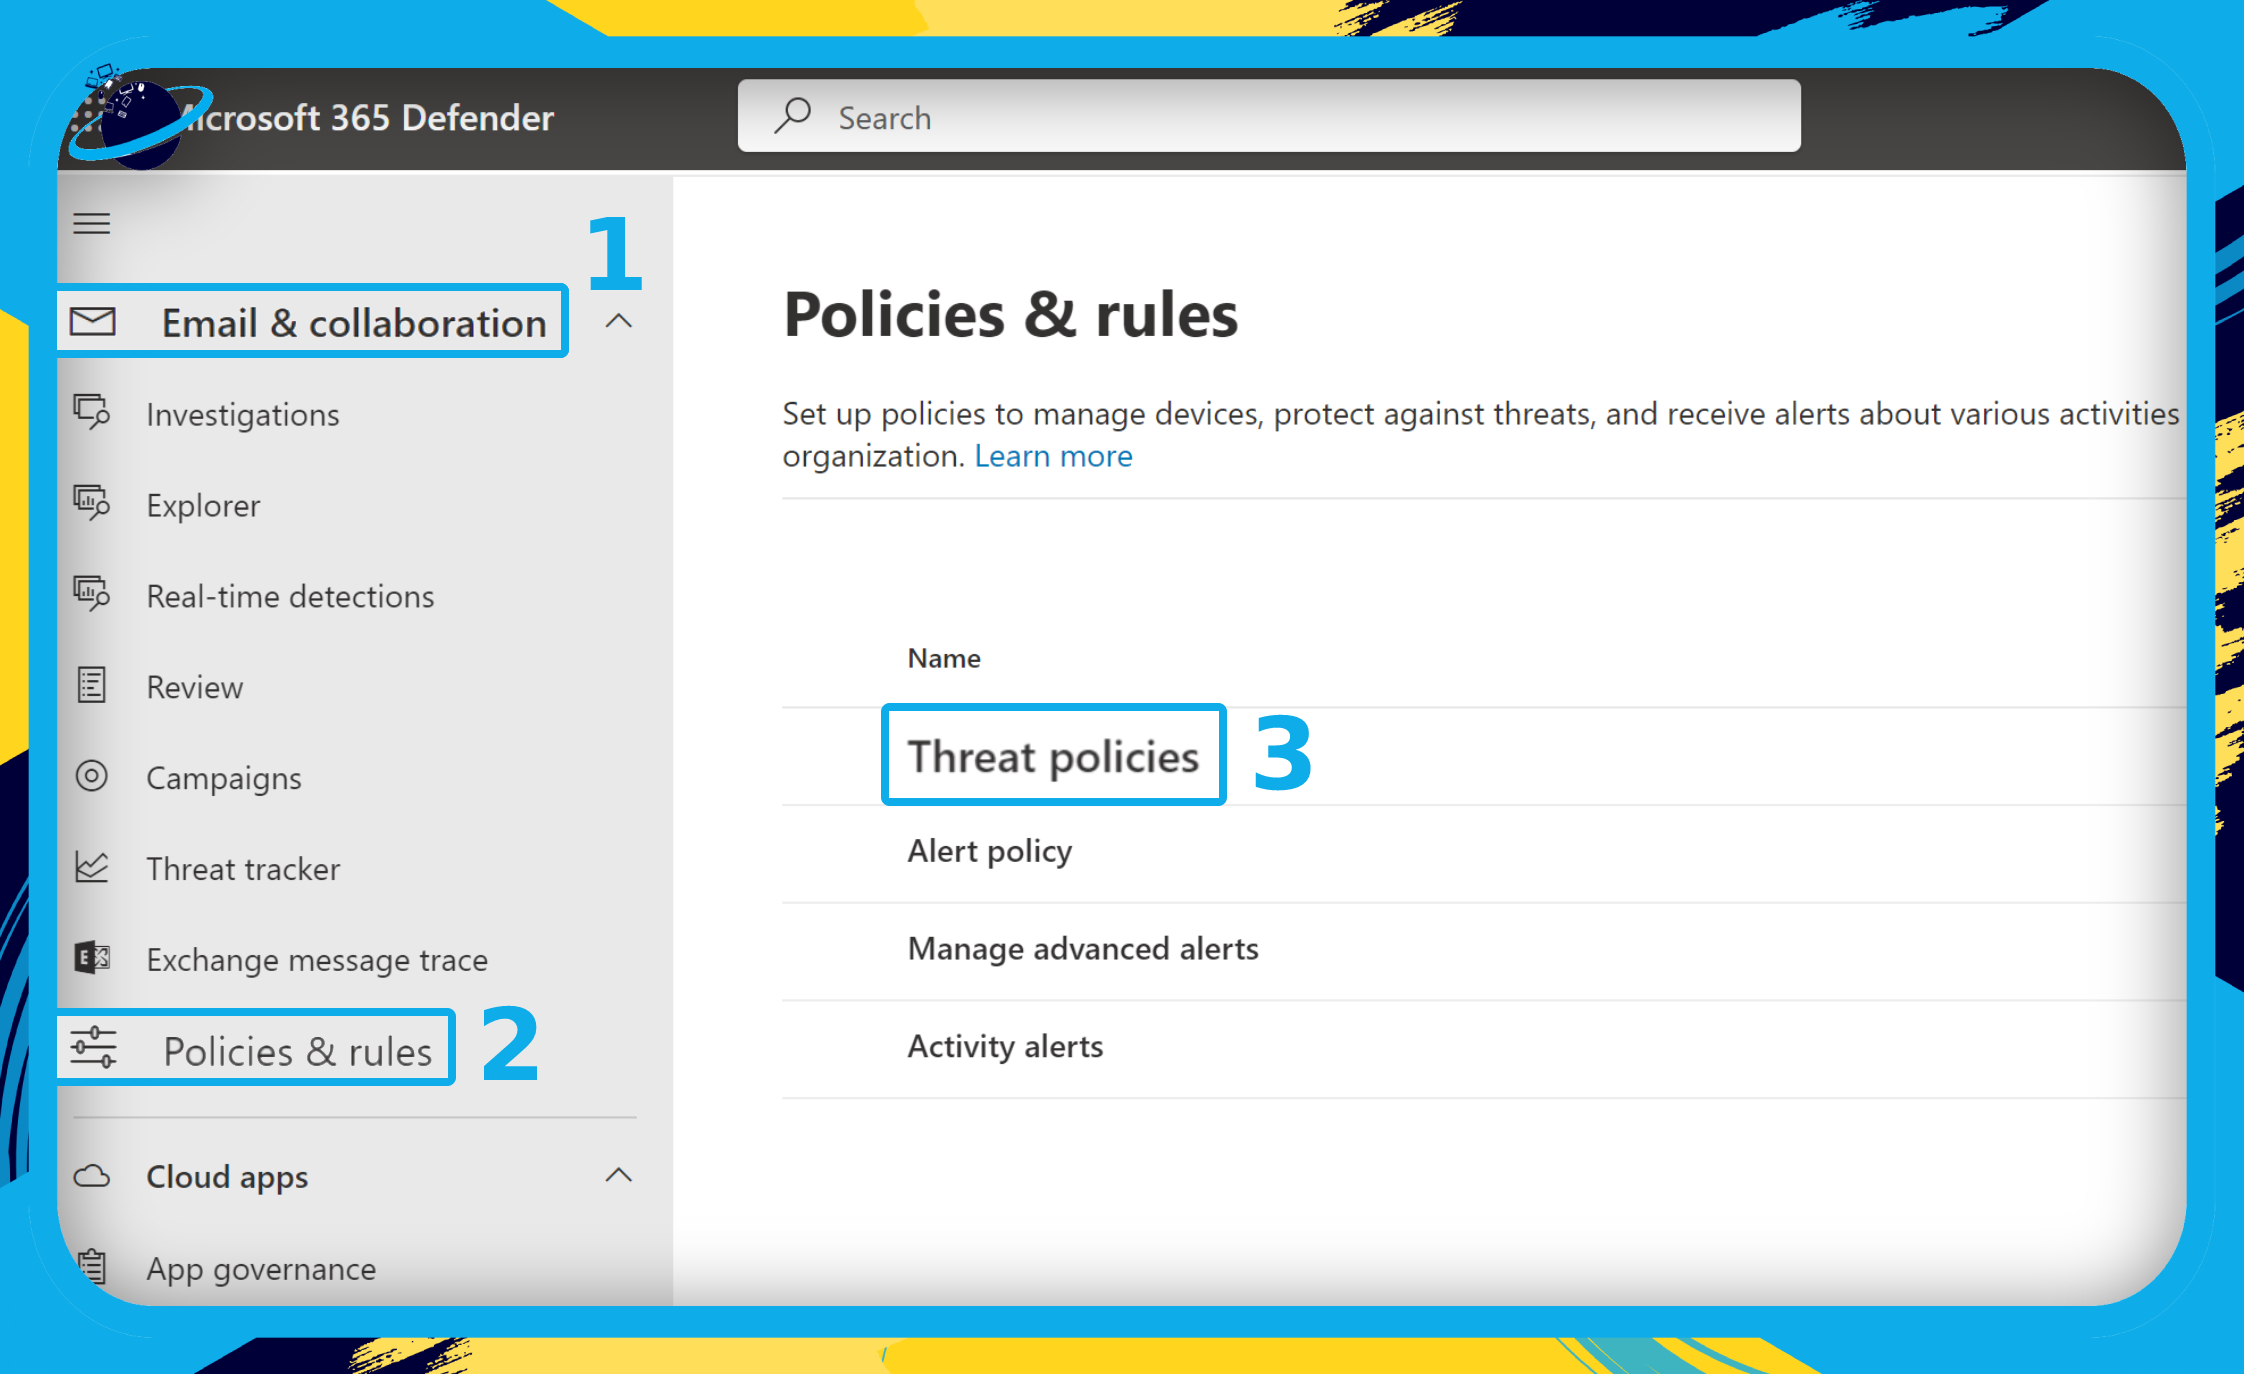
- Scroll down to “Email & collaboration” in the left menu. (1)
- Select “Policies & rules” in that section. (2)
- Then select “Threat policies.” (3)
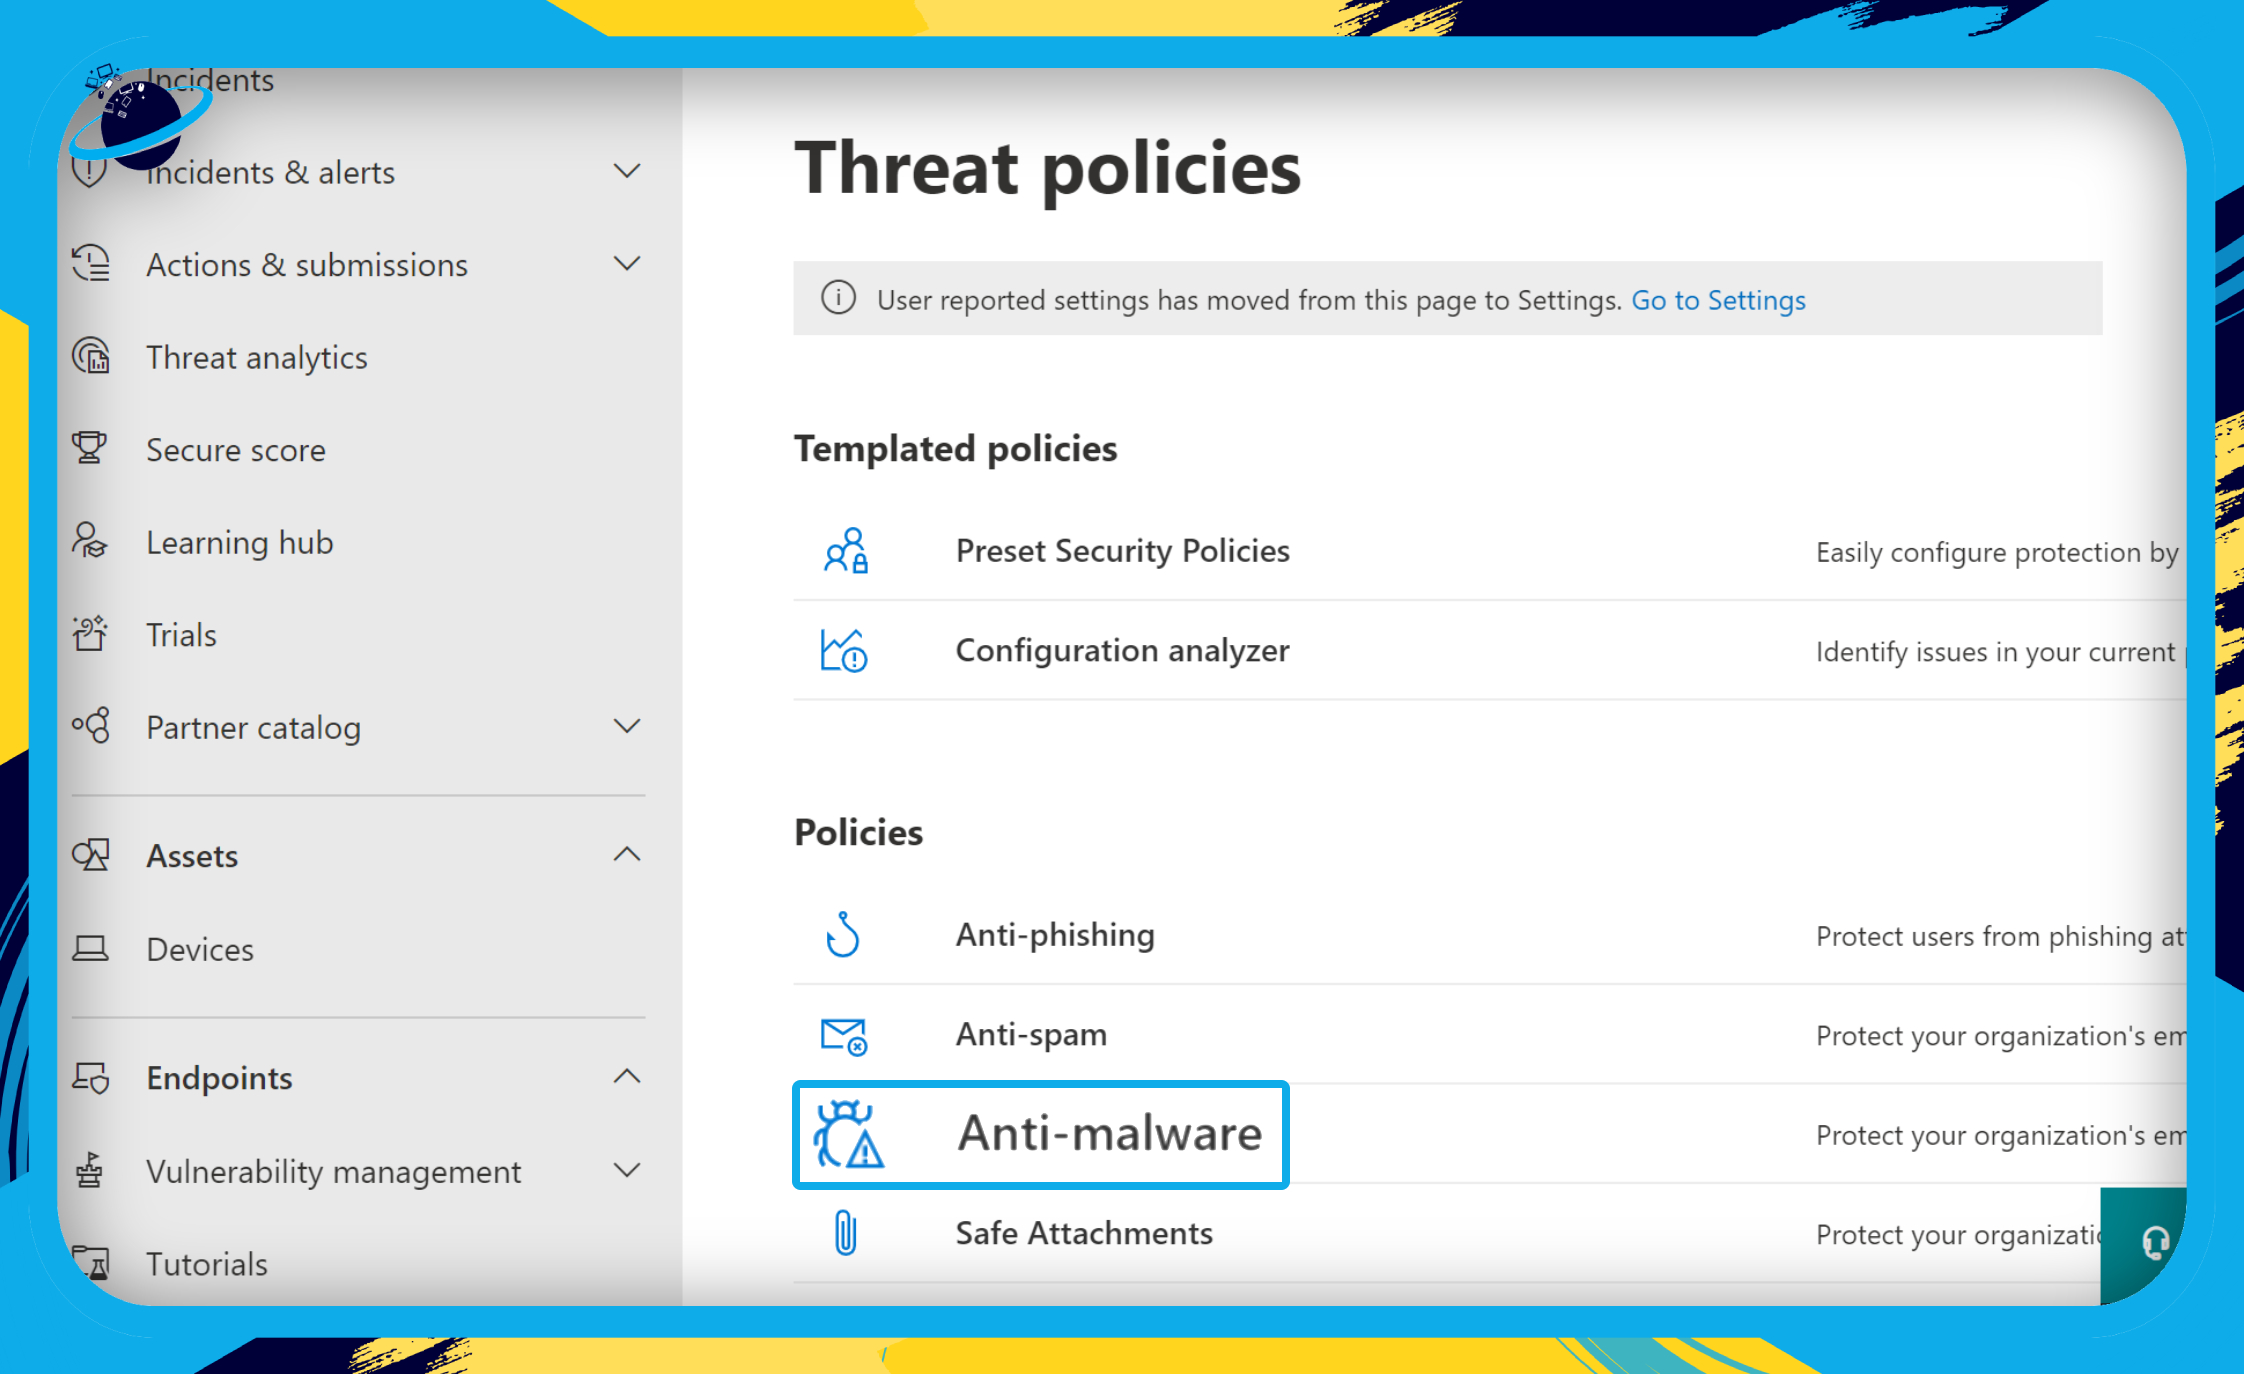
- Select “Anti-malware” under the “Policies” header.
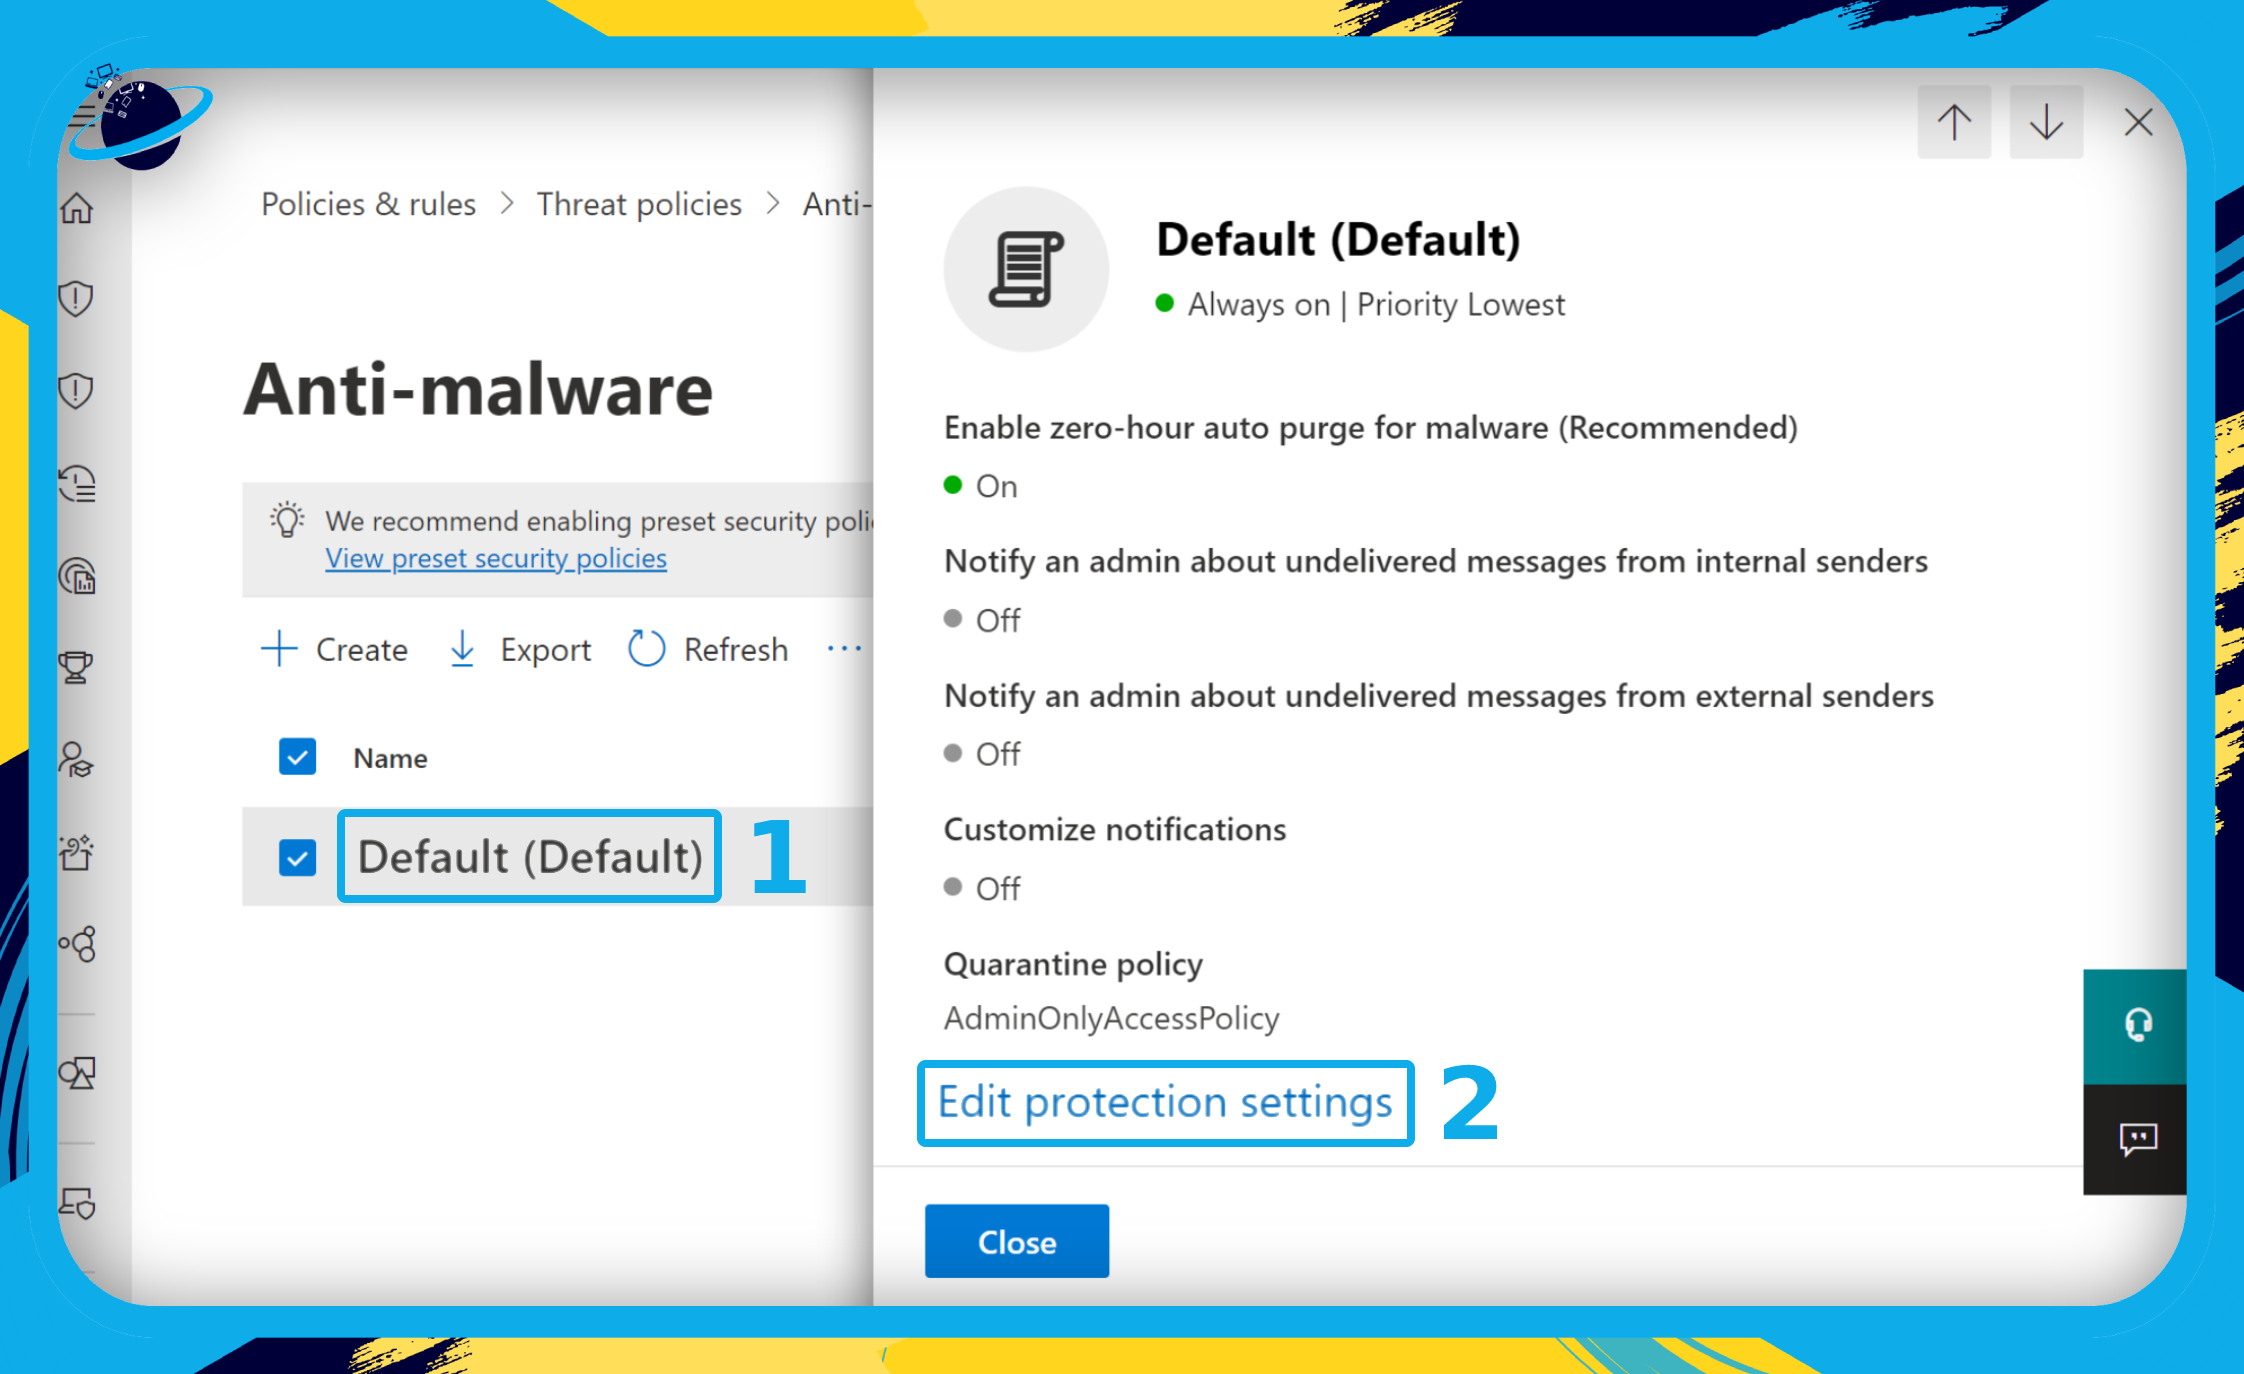
- Click on “Default.” (1)
- Then click “Edit protection settings” at the bottom of the flyout navigation pane. (2)
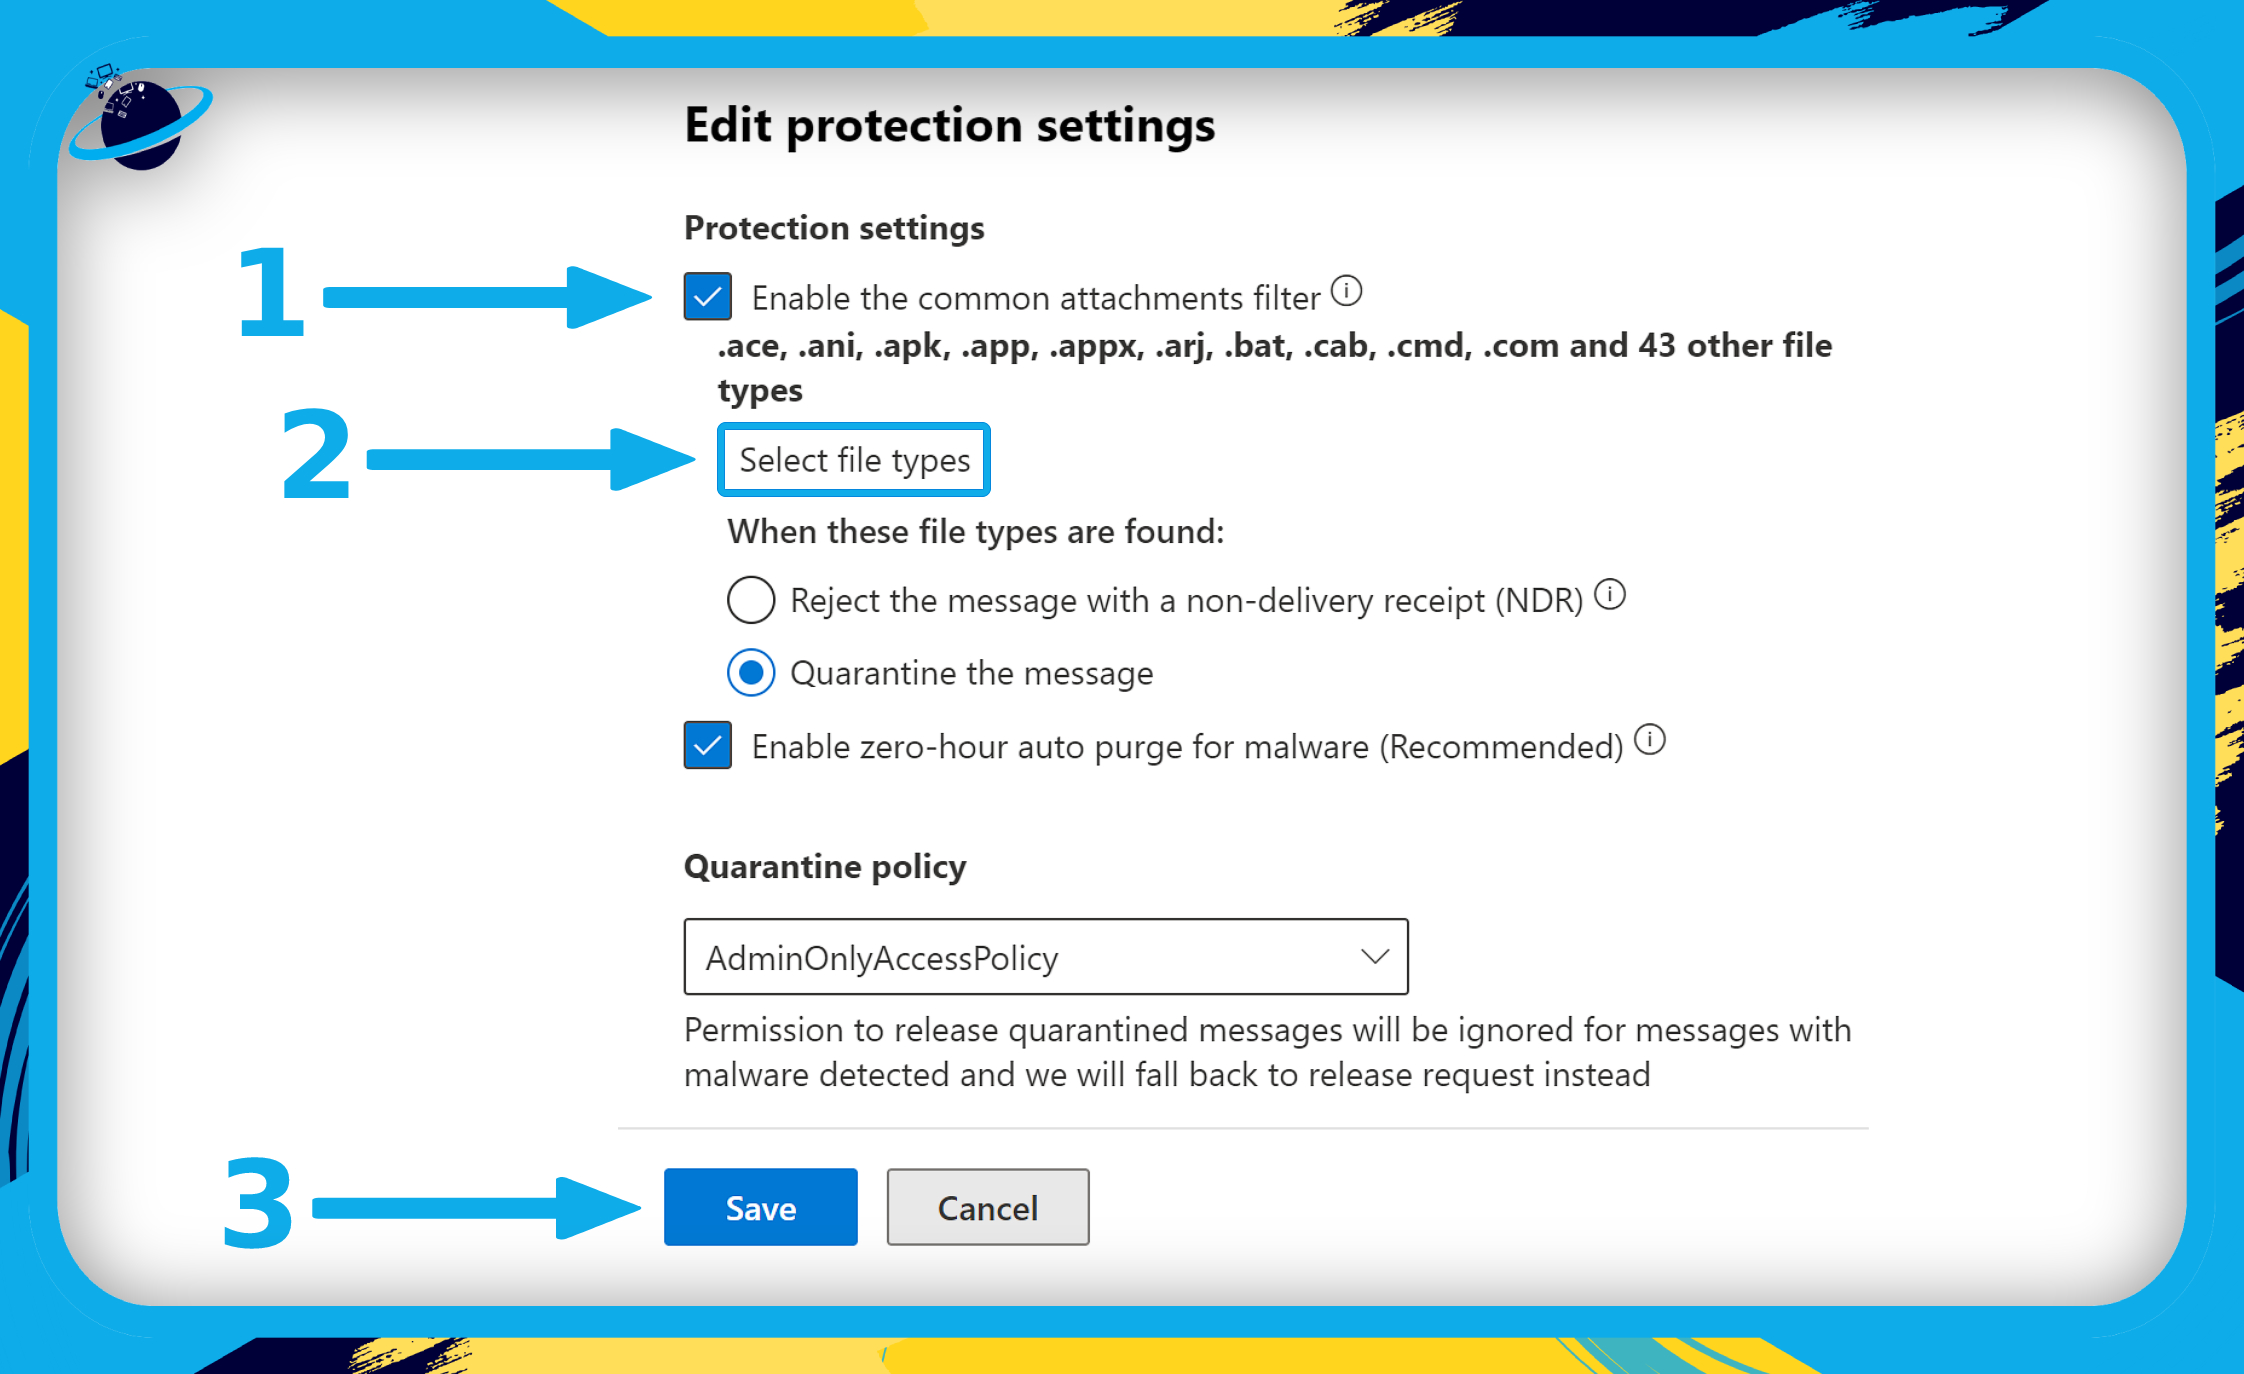
- Check the box next to “Enable the common attachments filter.” (1)
- Click “Select file types” if you want to add or remove certain file types from the filter. (2)
- Finally, click the “Save” button. (3)
That’s it for this Blog thank you for taking time out to read our content, please feel free to email our team about how it went if you followed the steps or if you need more help with the questions we answered in this Blog.