Using unauthenticated sharing (often referred to as Anyone links) is the easiest way to share files as people can open the link without authentication and are free to pass it on to others. This can be very convenient in a number of different situations, as long as the file being shared doesn’t contain any sensitive information, as not all content in an organization is appropriate for unauthenticated sharing.
Since files are often stored in sites, groups, and teams for long periods of time, there are often data retention policies that are often put in place. If such files are shared with unauthenticated people, unexpected access and changes to files may occur. To prevent this from happening, you can set an expiration date for Anyone links. This blog post covers the two options available to set an expiration date for ‘Anyone links’ as a way to safeguard and help protect your organisation’s content.
Setting expiry dates on SharePoint links
‘Anyone links’ across the organisation
- Go to Office.com and click on the app launcher
- Select the Admin icon
- Under admin centers, click ‘Show all’
- Select SharePoint
- From the panel, select ‘Policies’
- Then, select ‘Sharing’
- Under ‘Choose expiration and permission options for Anyone links’. Select the checkbox for ‘These links must expire within this many days’
- Enter your desired amount of days in the box.
- Click ‘Save’
‘Anyone links’ on a specific site
- Go to Office.com and click on the app launcher
- Select the Admin icon
- Under admin centers, click ‘Show all’
- Select SharePoint
- From the panel. Select sites
- Then, select ‘Active sites’
- Click on the site you want to change, then click ‘Sharing’
- Under ‘External sharing’ open up ‘Advanced settings for external sharing’
- Untick the option for ‘Same as organisation- level setting’
- Select ‘guest access expires automatically after this many days’
- Enter your desired amount of days in the box
- Click ‘Save’

Why setting expiry dates on SharePoint links is beneficial
There are often times within an organisation where files need to be shared with an external user. During these times, it is vital to ensure that the file you’re sharing is kept protected and safeguarded from others who are not permitted to see it or change it, particularly if the file holds sensitive information. The most effective way to do this on Sharepoint is to create an expiry date for the link when you share the file. By doing this, the external user can only access that file before the expiry date. Once the date has passed, the link will no longer work and they won’t be able to access the file. This ensures that the file isn’t stored on their computer or their email for any longer than necessary.
   |
Step by step process to set expiry dates on SharePoint links:
‘Anyone links’ across the organisation
- Go to Office.com and click on the app launcher

At the top left hand corner of the page, click on the icon to access App launcher.
- Select the ‘Admin’ icon

When the list of apps appears, click on the icon for ‘Admin’
- Under admin centers, click ‘Show all’
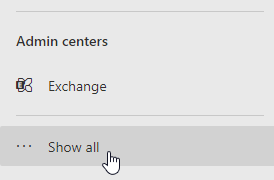
When the admin window opens, on the left hand side panel under ‘Admin centers’, click on the option for ‘Show all’
- Select SharePoint

When all the options under ‘Admin centers’ appear, select SharePoint.
- From the panel, select ‘Policies’

When the SharePoint admin page opens, select ‘Policies’ from the left hand side panel.
- Then, select ‘Sharing’

Under ‘Policies’, select ‘Sharing’ from the drop down list.
- Under ‘Choose expiration and permission options for Anyone links’. Select the checkbox for ‘These links must expire within this many days’

- Enter your desired amount of days in the box.
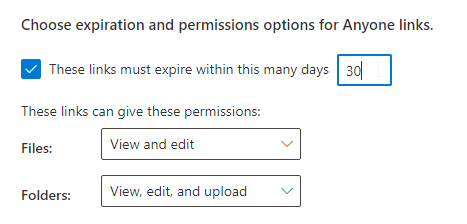
For the purpose of this tutorial, I have sent the link to expire in 30 days, you may choose more or less days depending on what is appropriate for you.
- Click ‘Save’

At the bottom of the page, click save to apply the changes to your sharing link.
‘Anyone links’ on a specific site
- Go to Office.com and click on the app launcher
At the top left hand corner of the page, click on the icon to access App launcher.
- Select the ‘Admin’ icon
When the list of apps appears, click on the icon for ‘Admin’
- Under admin centers, click ‘Show all’
When the admin window opens, on the left hand side panel under ‘Admin centers’, click on the option for ‘Show all’
- Select SharePoint
When all the options under ‘Admin centers’ appear, select SharePoint.
- From the panel. Select sites

Once the SharePoint admin page opens, select ‘Sites’ from the left hand side panel.
- Then, select ‘Active sites’

Under ‘Sites’, select ‘Active sites’ from the drop down list.
- Click on the site you want to change, then click ‘Sharing’

As an example, I will share the link to our ‘Blog Demo’ SharePoint site.
- Under ‘External sharing’ open up ‘Advanced settings for external sharing’
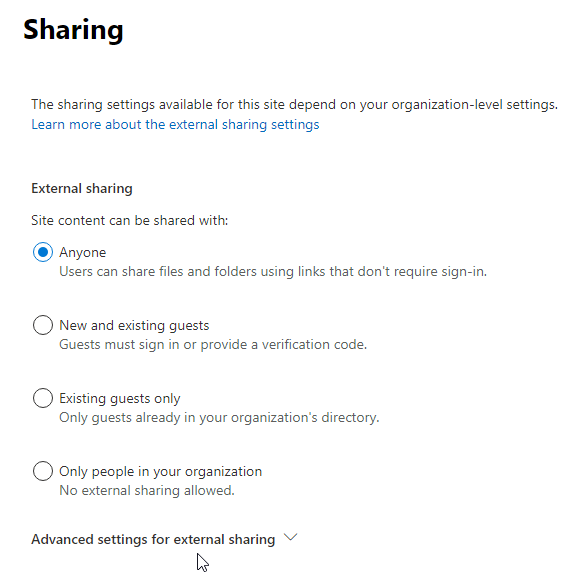
At the bottom of the section, there is an option for ‘Advanced settings for external sharing’. Click on the small arrow next to it to access the options.
- Untick the option for ‘Same as organisation- level setting’

The option for ‘Same as organisation- level setting’ will most likely be selected depending on your organisation’s default settings. Ensure that you deselect this option.
- Select ‘guest access expires automatically after this many days’

- Enter your desired amount of days in the box

For the purpose of this tutorial, I have sent the link to expire in 30 days, you may choose more or less days depending on what is appropriate for you.
- Click ‘Save’

At the bottom of the page, click save to apply the changes to your sharing link.