Stuck trying (and failing) to add attachments in Outlook? This blog has got you covered. An attachment can be any form of file attached to your email; as such, images, audio and documents would all be considered attachments. Similarly, OneDrive files also fall under this categorisation. Here we will discuss potential reasons you may be unable to add attachments, as well as (if applicable) the solutions.
| Cause | Solutions |
| Replying to messages with attachments (this will not copy the attachments over) | Forward the message to the sender, as opposed to replying |
| Attempting to add an attachment to calendars you do not control | Request access |
| Breaching email size limit for Outlook (29MB) | Compress attachments |
| Attachment is a OneDrive file larger than 2GB | Compress and re-upload the attachment |
As the potential causes of your predicament vary, we’ll be going over each solution step-by-step with images. If you’re not confident proceeding alone, feel free to follow along. Below is a list of each solution we’ve covered, in case you’re looking for something specific.
Quick links
Forwarding messages to sender in Outlook
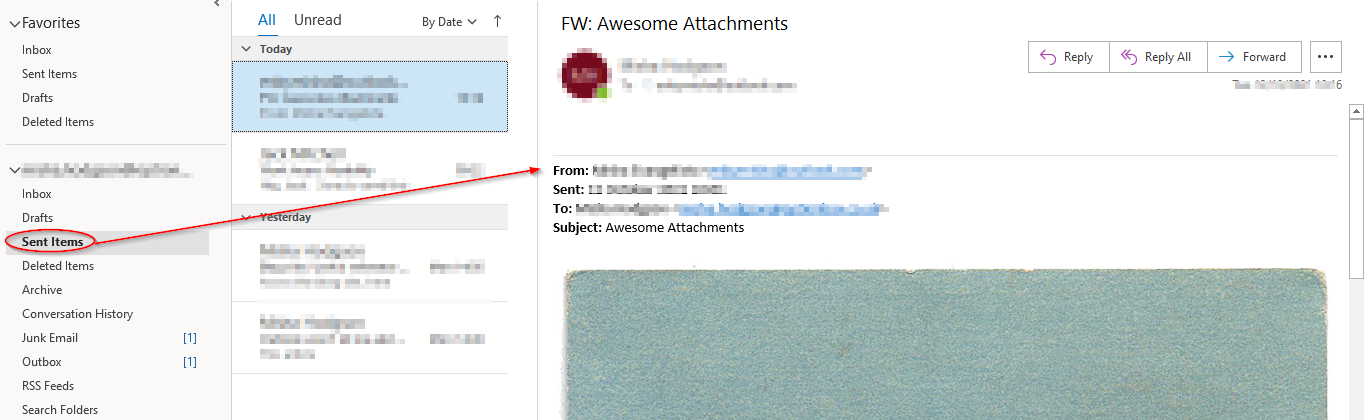
Step 1 – Open the email you intend to forward
- From here you may locate the “forward” button to the right of the email author’s name and address.

Step 2 – Select “Forward” and fill required fields
- You may notice it’s also possible to edit the forwarded email to add a reply, additional attachments, or remove everything.
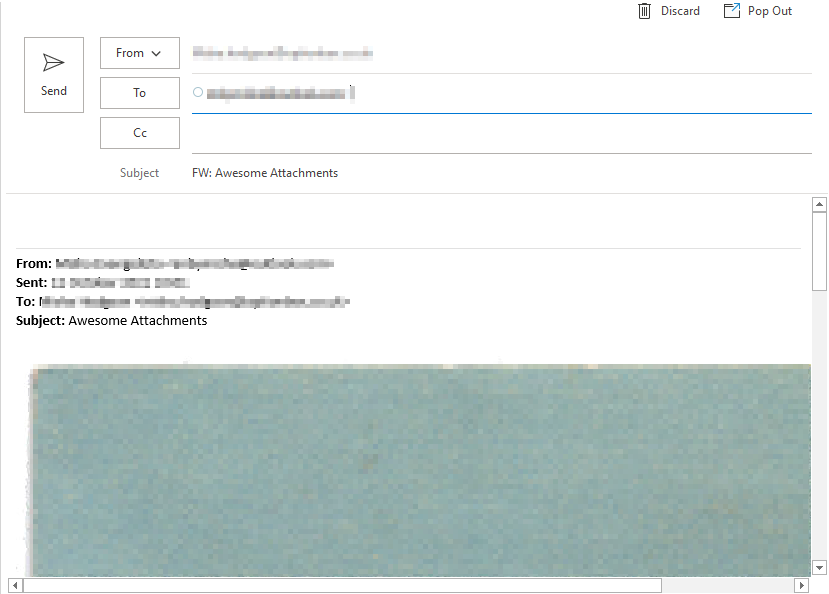
Step 3 – Click Send
- To ensure everything worked correctly: it’s advised you search your “Sent Items” folder to view the email yourself, or double check with it’s recipients.

Compressing attachments
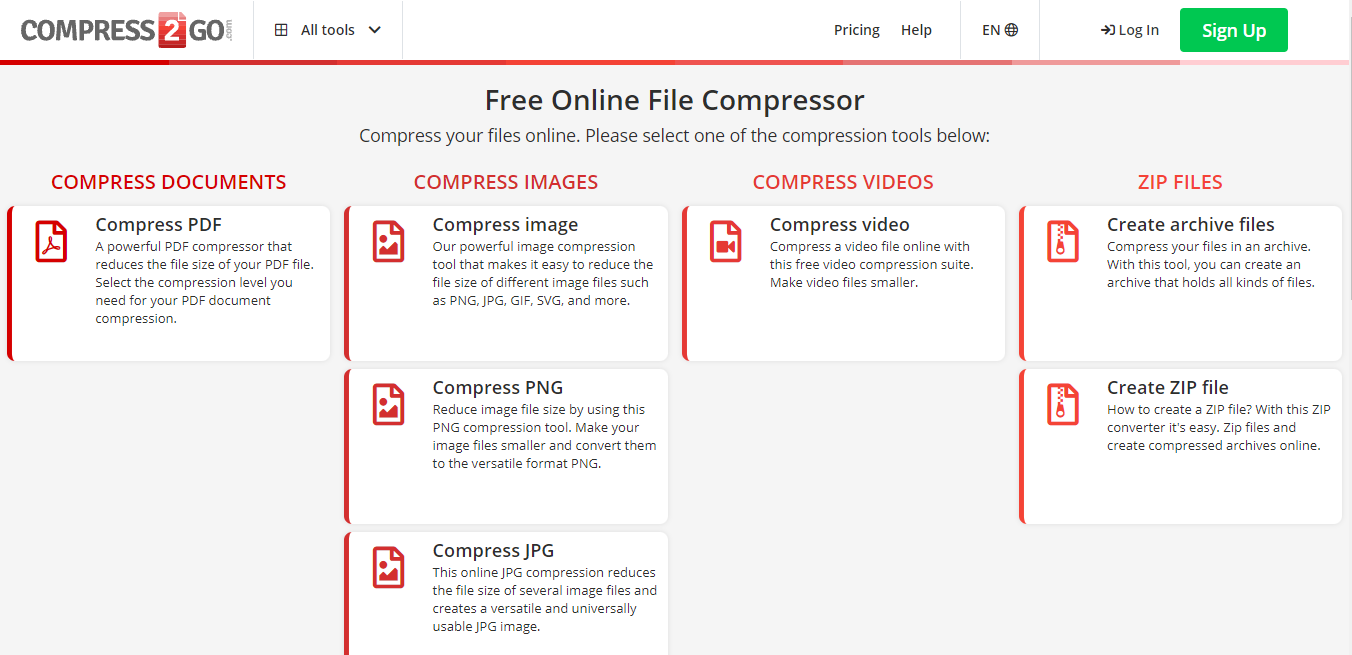
Step 1 – Visit Compress2Go within your browser
- Compress2Go offers a free online file compression service. As of the time of this post’s publication, the service supports compression for PDFs, Images (such as PNG, JPG, SVG and GIF) and videos.
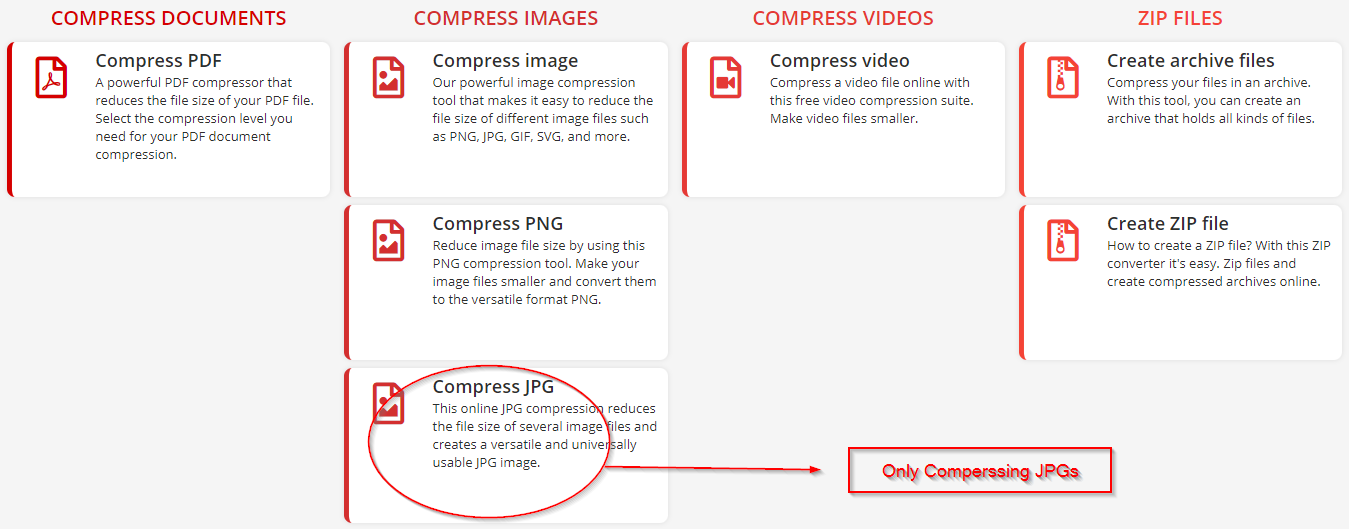
Step 2 – Select the option most appropriate for you
- If you plan to compress a series of JPGs, “CompressJPG” is likely your best option, similarly, “Compress PNG” is a good option for exclusively compressing PNGs. However, if you would like to compress a different form of image, or multiple image types, the “Compress image” option would be required. You may also select “Compress PDF” to compress a PDF, or “Compress video” to compress MP4s, MOVs, AVsI and WEBMs.
- In this example, we’ll be compressing a single JPG.
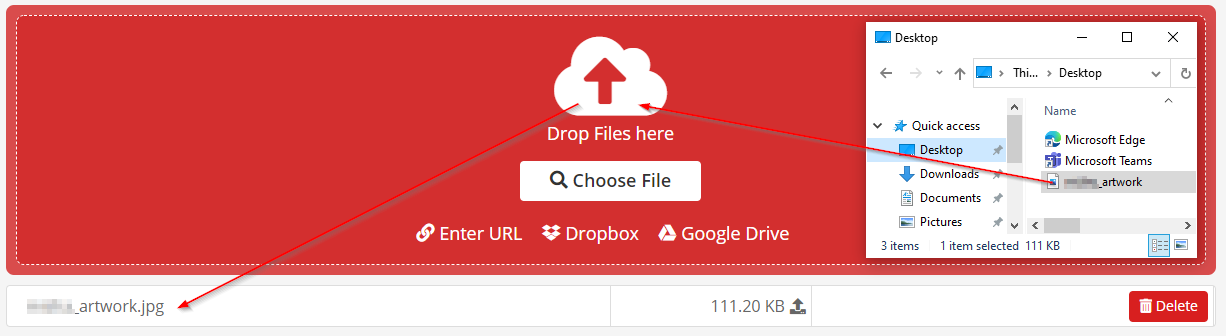
Step 3 – Drag and drop files to upload
- Use WIN+E on Windows to open up the File Explorer, then navigate to your file. I’ve gone to the Desktop, as my file is located there. After finding your file, click and hold on it- moving your cursor towards the drop zone. Upon release, your file will begin uploading. Once the upload is complete, scroll down to proceed with the next step.
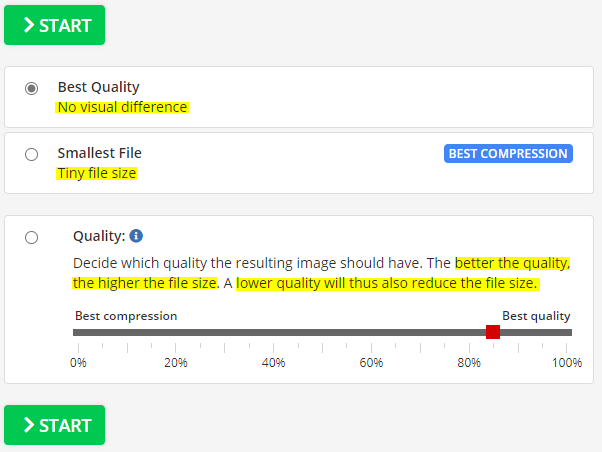
Step 4 – Determine appropriate quality
- If you’re transferring a document where visual quality is important, you may not want significant compression. This is a result of the artifacting caused by compression. As in this example, we’re sending artwork. Quality is important, so we will avoid the greater compression option. After you are satisfied with your choice, click “START” to proceed.
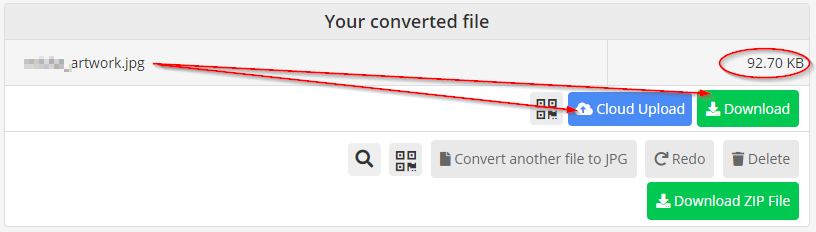
Step 5 – Download your compressed file
- After the compression process has completed, you will be met with a completion screen. This will display the new file size as well as 3 different download options. In this example, we’ll be using the standard download option. However, if you’re short on storage, we recommend the cloud upload option. Additionally, if you have a large number of files to download individually we recommend the zip file download.
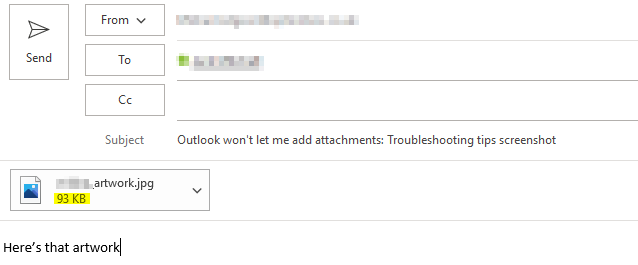
Step 6 – Try adding your attachment
- In the below example, we’ll be adding our attachment to an email via Outlook. Be sure to add the newly compressed version versus the larger original attachment.
Uploading attachments to OneDrive
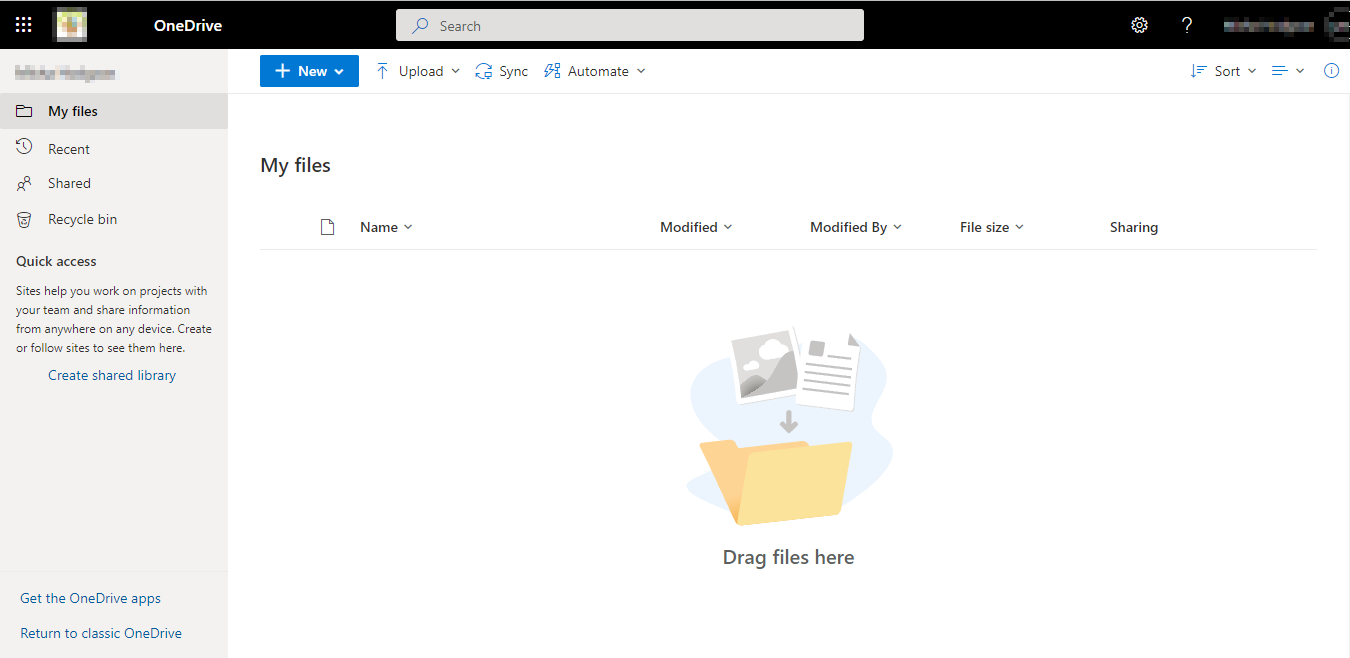
Step 1 – Visit OneDrive in your browser
- OneDrive links may be attached within Outlook without affecting message sizes. This increases the attachment file size limit to 2GB. An additional bonus is that these files will be accessible via the link anywhere- so long as you’re online.
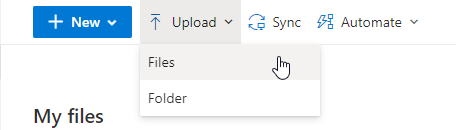
Step 2 – Select upload
- From the taskbar, select “Upload.”
- If you wish to upload a folder of files, select “Folder.”
- Else select “File.” Using the file explorer select each file/folder you wish to upload. Click “open.” to proceed to uploading them.
- Be aware this could take some time, depending on the number of files/folders being uploaded, your upload rate, your download rate and the file/folder size.

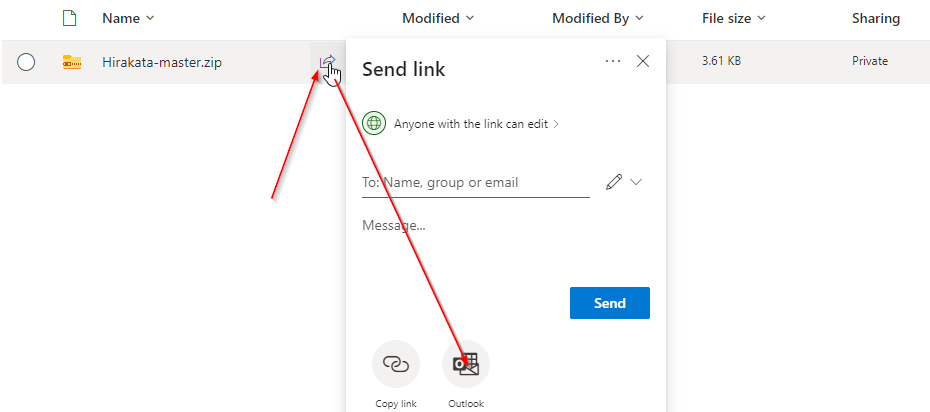
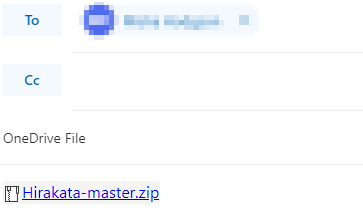
Step 3 – Share to Outlook
- Click the share icon located by your file/folder’s name, followed by the “Outlook” option on the created pop-out. This will create a message composition prompt in Outlook for you to send your share link to.
Thanks for reading! We hope you found our blog post useful. If the resolutions we’ve walked through here don’t work for you, please leave a comment below and we’d be happy to help!
Our related articles:
- How to change “from” address in Outlook – Tired of switching between accounts to send emails? Or perhaps you’re just curious. In this blog post we’ll be discussing how to access the “from” field in Outlook, why it’s useful and how to use it.
- How to prepend the email subject based on email sensitivity: Outlook – Uncertain what to do about email subjects? In this blog post we’ll be discussing exactly how you can prepend a subject, depending on an email’s sensitivity.
- How to pin an email to the top in Outlook – If you find yourself handling emails often, you’ve likely managed to misplace something important once or twice. In this blog post we’ll be going over how you can pin your most precious emails to the top of your inbox.
- How to fix Outlook web access error 503 – Communication is important. As such, communication issues are even more important. So we made this blog post to tackle one. Have a read to find out how you can resolve HTTP 503 errors, the cause of said error and a better understanding of what web servers are and how they relate to your issue.