Many users have pondered if auto-replies in Outlook can be set to only external users. Many individuals have a selection of shared mailboxes where automatic replies as acknowledgements to other users can be set up easily. However, there may be instances where users do not wish to send automatic replies to internal users of the company but only to external members of a company. While Outlook does offer users the option to turn it on auto-replies for external members, however, according to some users, this is not possible because there is not an option to disable the auto-reply feature for internal members. The only option is to both able and disables auto-reply for external members only. However, there are some unconventional workarounds Microsoft Outlook offers to allow for this scenario where auto-replies are set to external members only, Such as creating a new rule to allow for external auto-replies only.
Step by step process: How to send automatic replies to external only Office 365?
- First, sign into Office 365 using your sign in details.
- Navigate to “Outlook” using the “app launcher”.
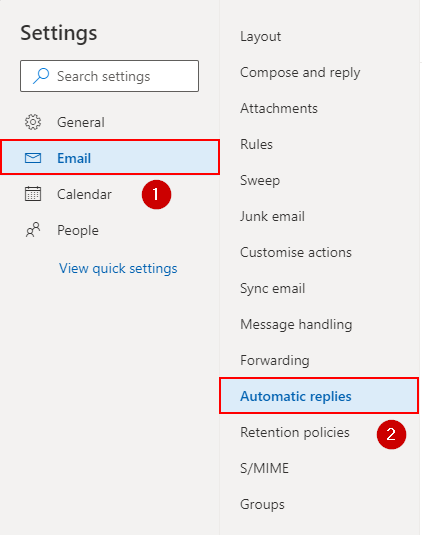
- In Outlook go to “Settings”.
- Click on “View all Outlook Settings”.
- In “Settings” go to “Email” > “Automatic Replies”
- Turn on auto replies.
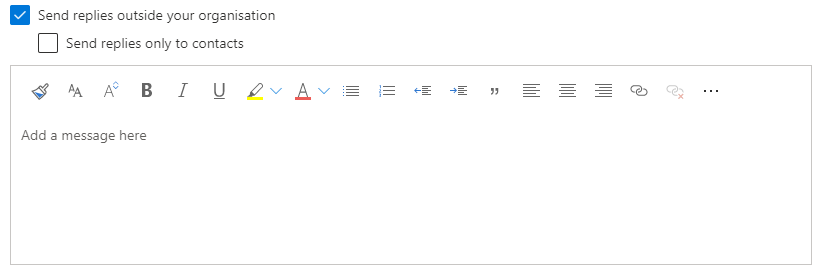
- Check the bot that says “send replies outside your organisation”.
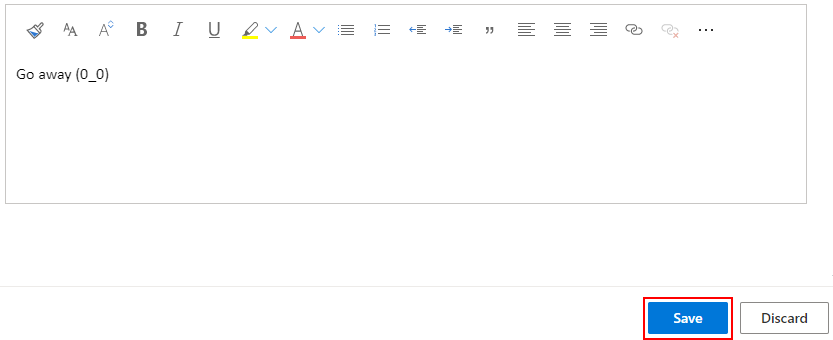
- Press “Save”.
- Now go back to the Office 365 Dashboard and use the app launcher to find “Admin.”
- Under “Admin Centers” click on “Exchange”.
- Under “Mail Flow” click on “Rules”.
- Click the “+” to create a new rule for Outlook Mail.
- Type out the details in the screenshot below,(type it out the way it’s shown as each phrase used is altered as a code).
- Click on “Finish” when you are finished typing out the rule.
While not the most convenient method in terms of functionality, it’s the most effective way to attain the results required to ensure only external members receive auto-replies. To make the “Have server reply using a specified message” action function for external senders, you may need to make small adjustments on your Exchange server.
The Out of Office Auto-Reply feature in Outlook / Exchange allows you to send automated responses to either internal and external senders inside My Organization or both internal and external senders outside My Organization. It is not possible to send auto-replies exclusively to external senders. As a result, the approach described above was employed.
Users of Outlook for Windows who have Office 365 Business or Exchange accounts should follow this instruction. Only Office 365 Business and Exchange users have access to Outlook’s out-of-office messaging functionality. If you use Outlook with Office 365 Home, Outlook.com, Hotmail, or Gmail, you may find an out-of-office “hack” on Microsoft’s Office support site, which is a bit of a pain but gets the job done.
  | |
 Compatible with Windows, Mac OS, and Android. Compatible with Windows, Mac OS, and Android. | FROM $6.00 user/month |

Why send auto replies to external members only:
With its astonishingly vast degree of productivity, Microsoft 365 (formerly known as Office 365), aims to break down the traditional business email platforms that inhibit content sharing and collaboration. The collaboration capabilities of SharePoint Online and OneDrive for Business allow users to collaborate with a wide range of colleagues from both inside and outside their organization. However, while it offers a better range of tools for users, it still lacks a few features that may prevent users from taking full advantage of the Office Outlook suite. Outlook, while it offers the option to send to external members or not, the same preferences cannot be applied to the internal members, at least not natively.
One main reason users may not want to have internal members receive auto-replies, only for external members, is to reduce the amount of unnecessary mail-based content taking up storage space, especially if there is media-based content within the email. External members may require a more concise set of instructions or information booklets that internal members may not want so having the auto-replies feature enabled to only send to external members will most certainly reduce the number of unwanted emails being sent.
Another reason is to reduce the amount of spam-based content being sent to users who do not require it. For example, auto-replies can be used to send updated pricing lists for clients from time to time and internal members may not require its usage as they may already have a copy on demand in for example SharePoint. So natively allowing for auto-replies being sent to external members will also send it to internal members which can potentially create a lot of unnecessary spam-like content.
   |
In depth step by step process: How to send automatic replies to external only Office 365?
Step by step breakdown:
- Sign into Office 365.
- Use the app launcher to navigate to “Outlook”.
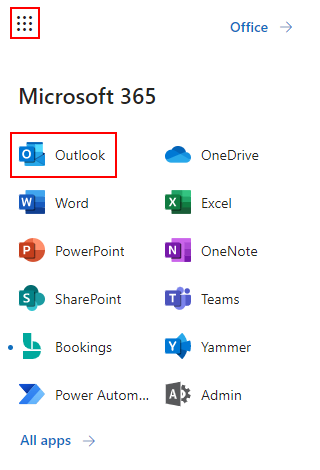
The app launcher is illustrated by nine dots on the top left side of the display. You need to click on this to access the Admin portal.
- Click on “Settings”.

Settings are illustrated by a gear icon click on it for the next step.
- Now click on “View all Outlook Settings”
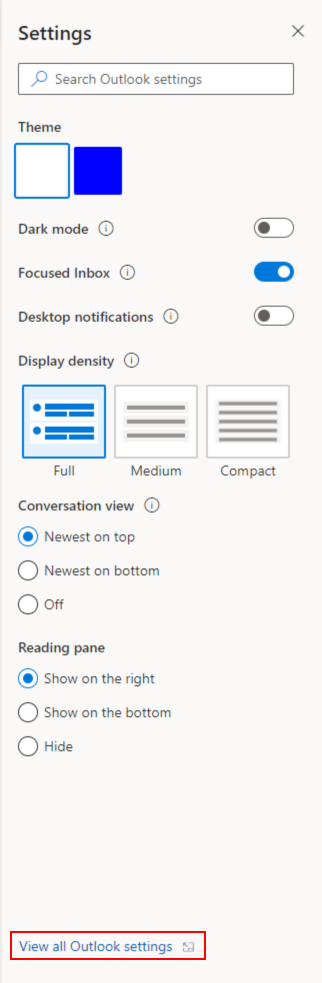
This is where most of the Outlook settings reside and here you will be able to see will be able to edit notifications.
- In “Settings” go to “Email” > “Automatic Replies”
- Turn on auto replies.
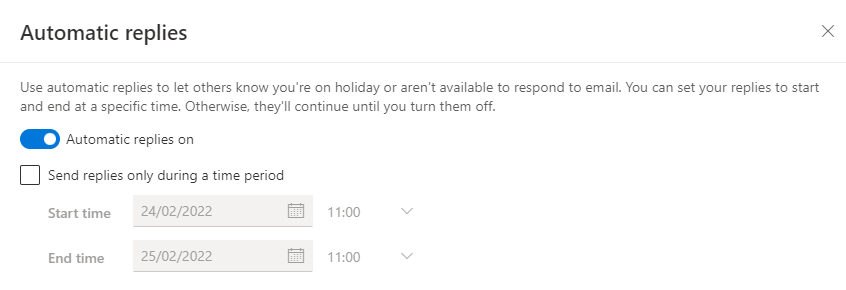
If the auto-reply feature is turned off you can turn it on by clicking the button.
- Check the box that says “send replies outside your organisation”.
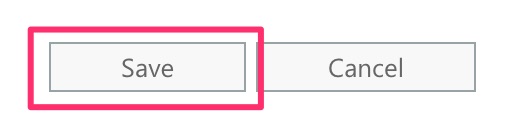
- Press “Save”.
- Now go back to the Office 365 dashboard.
Use your account details or if you have a current Skype account with the Office account in question, you can use this.
- Use the application launcher to navigate towards “Admin”.
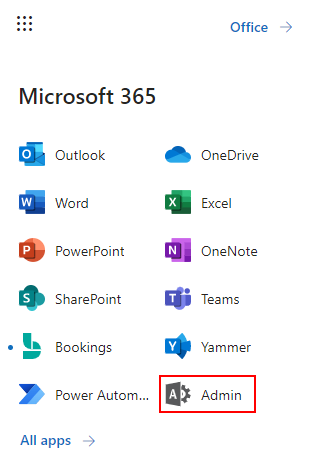
The launcher is illustrated by nine dots in the right corner, click on it and find “Admin” as shown above.
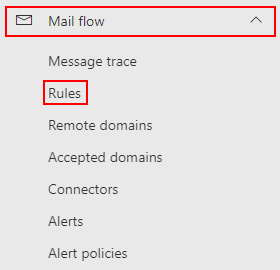
- In the Admin dashboard, under “Admin centers”, click on “Exchange”(you may need to click “Show all” to access).

- Then click on “Rules” under “Mail Flow” in the Exchange admin center.
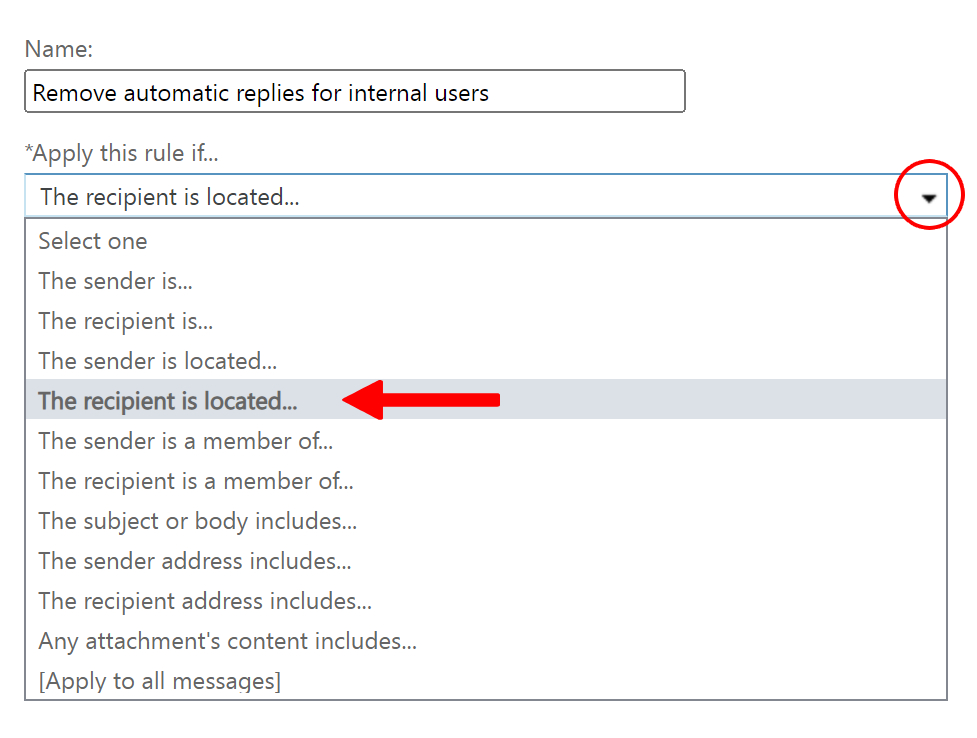
- Click the “+” to create a new rule for Outlook Mail.

- Select “The recipient is located…” from the “Apply this rule if…” menu.
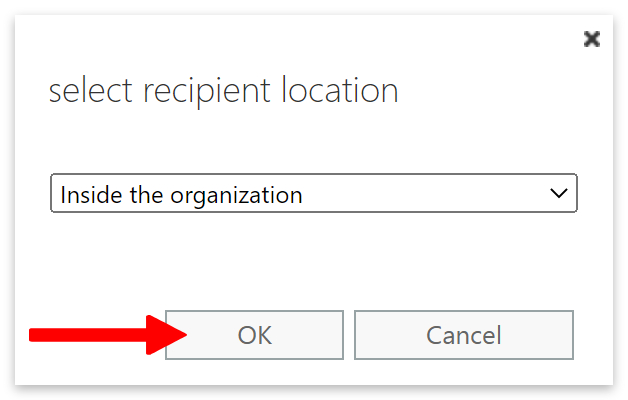
- Select “Inside the organization” and click the “OK” button.
- Then select “Delete the message without notifying anyone” from the “Do the following…” menu.

- Finally, click on “Save”.
That’s it for this Blog — thank you for taking time out to read our content. Please feel free to email our team about how it went if you followed the steps or if you need more help with the questions we answered in this Blog.