Within Microsoft SharePoint, the user has varying levels of access depending on their permissions. By this, I mean that the workplace you are part of in SharePoint will allow you certain tiers of accessibility, depending on your position within that company. One of these levels is known as ‘limited access’.
Limited access, as defined by Microsoft themselves, is something that “enables a user or group to browse a site page or library to access a specific content item when they do not have permissions to open or edit any other items in the site or library”.
The definition goes on to explain that limited access is “automatically assigned by SharePoint”, and that you as the user “cannot assign Limited Access permissions directly to a user or group yourself”. SharePoint automatically designates limited access to where it is required, meaning that at this moment limited access is not something that a user can alter.
Whilst this may prove understandably frustrating to some, there are still some means by which a user can alter levels of permission within Microsoft SharePoint. It is these means that we will run through in this blog, as something of a compensation for not being able to truly edit the limited access of SharePoint.
In order to edit the permissions within Microsoft SharePoint, you must do so by accessing the ‘Site Permissions’ subsection of options within the application, which itself can be found under the wider bracket of settings titled, ‘More Settings’.
As is the case with every blog piece that we post, do not worry if the above paragraph in itself is not enough detail for you to work with. Not only will we include a step-by-step guide of the process, but following that will be a more detailed, more thorough walkthrough of the method.
Step by step: How to edit permissions within Microsoft SharePoint and use “limited access”
- Open Microsoft SharePoint, either manually or via the application launcher.
- From here, click the settings cog towards the top right corner of your screen.
- With this new menu opened, click ‘More Settings’.
- This will bring you to a wide array of settings. Look for the heading titled ‘Users and Permissions’.
- Under this heading should be a setting named ‘Site Permissions’.
- Click ‘Site Permissions’ to navigate to a new menu.
- Here, look towards the upper side of your screen. Click the option labelled, ‘Grant Permissions’.
- On the menu that should have popped up for you, enter the names/email addresses of the people you want to grant permissions to.
- Click ‘Share’ at the bottom of this menu to finalise your changes.
Now, as was aforementioned, do not worry if even the steps above do not provide you with enough detail. We will now go into the more analytic breakdown of the method, with accompanying screenshots to best help you as you go.
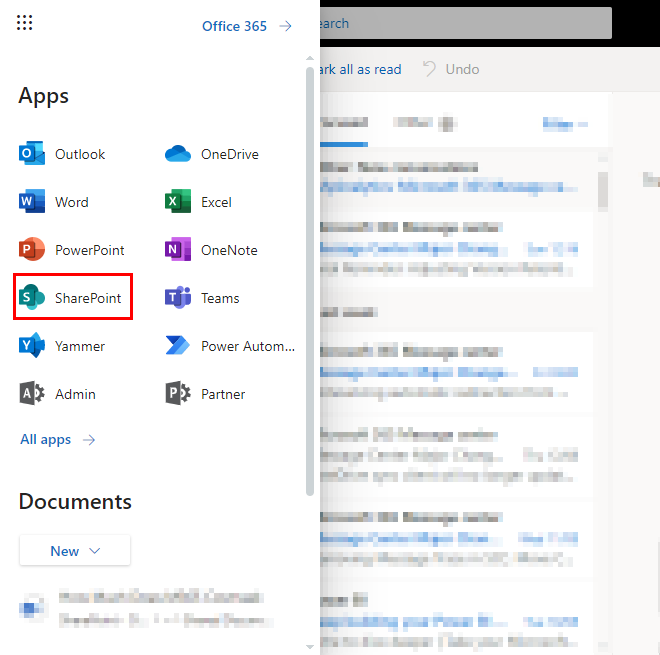
So, your first step, as highlighted in the above bullet pointed list, will be to open Microsoft SharePoint. Now, whilst you can open this manually and may well know how, in case you are unsure, you can also access SharePoint through the Microsoft application launcher.
The launcher can be found on any Microsoft application, such as Outlook, which may be the best way for some of you to access SharePoint. Simply open your application, click the launcher in the top left corner of your screen, and then open Microsoft SharePoint.
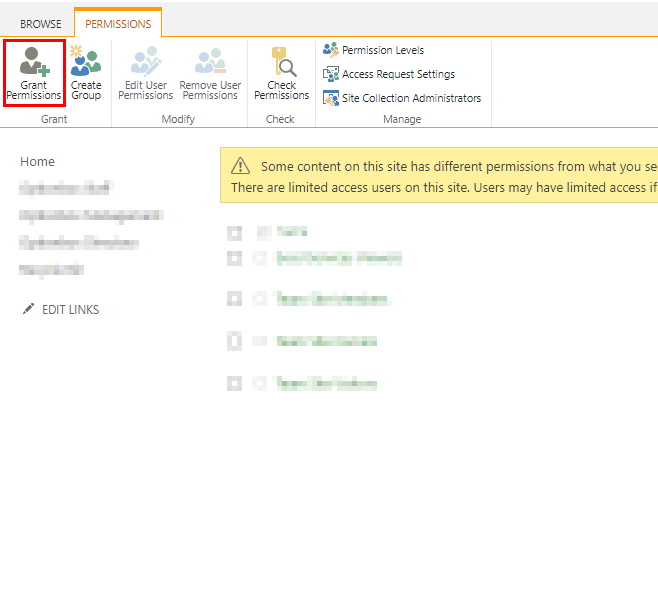
After opening SharePoint, you will understandably be met with the SharePoint menu, from which you can access a variety of tabs and sites. Of all options presented to you, you will actually want to look towards the top of your screen and click the settings cog, which has been emboldened in the screenshot below.
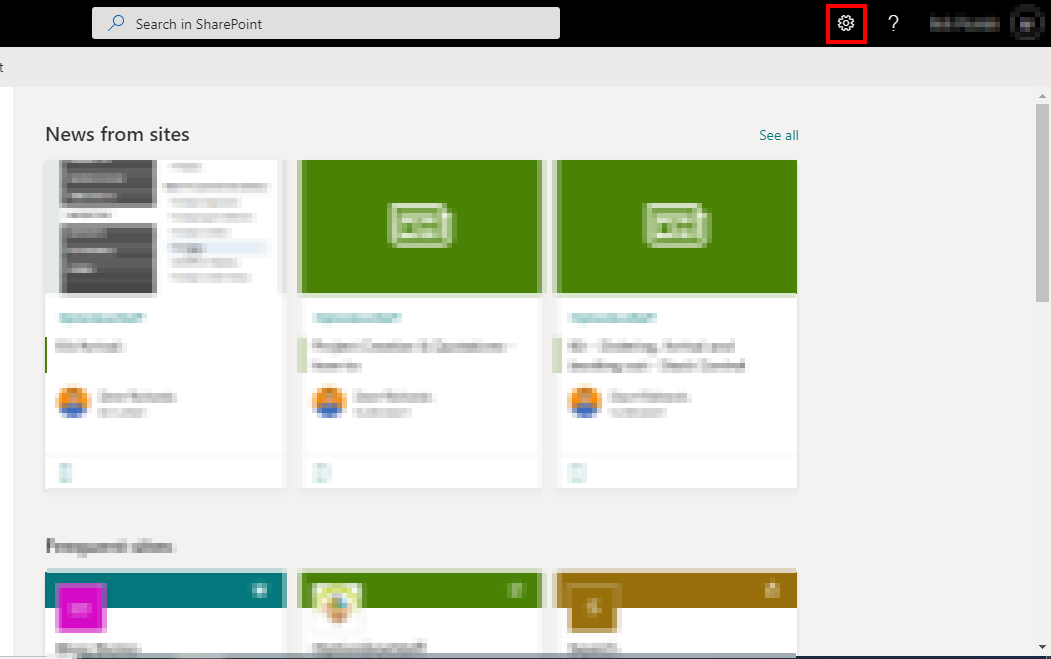
Clicking the settings cog will offer you a list of options to choose from. Of everything offered to you, you will want to click the option titled ‘Site Settings’.
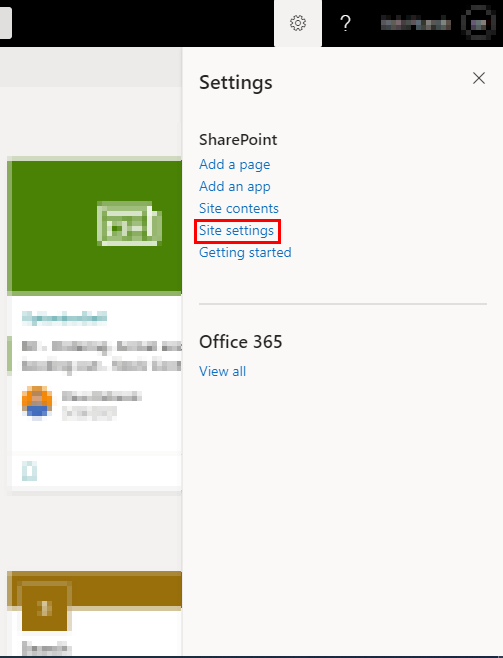
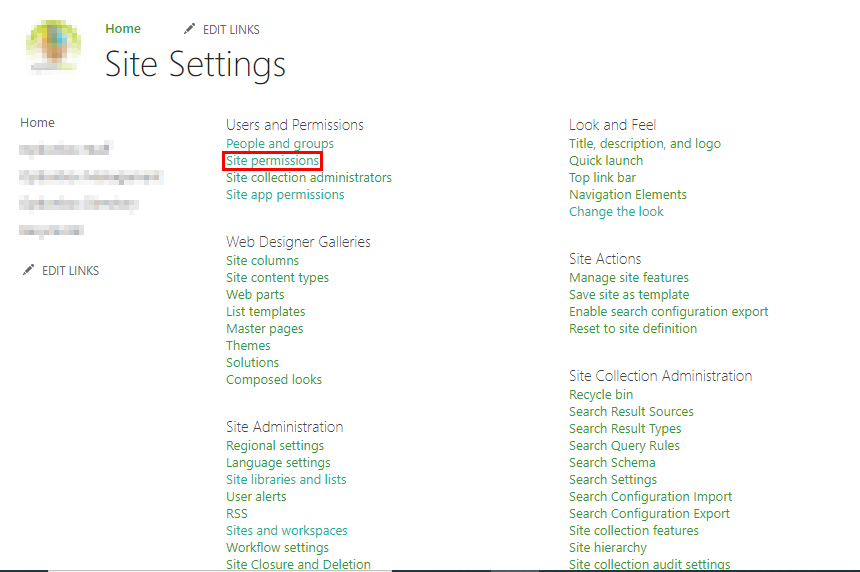
After clicking ‘Site settings’, you will be brought to the site settings menu, offering you multiple options. Under the first subheading, labelled ‘Users and Permissions’, is where you will want to look in order to further navigate through this process.
Underneath that heading will be a subsection titled ‘Site Permissions’. It should be the second option in descending order. Click that.
After opening the ‘site permissions’ topic of settings, you should now look to find the option titled ‘Grant Permissions’. Not formatted in a list, ‘Grant Permissions’ is instead found at the top of your monitor within a box. It is this box you will want to click.
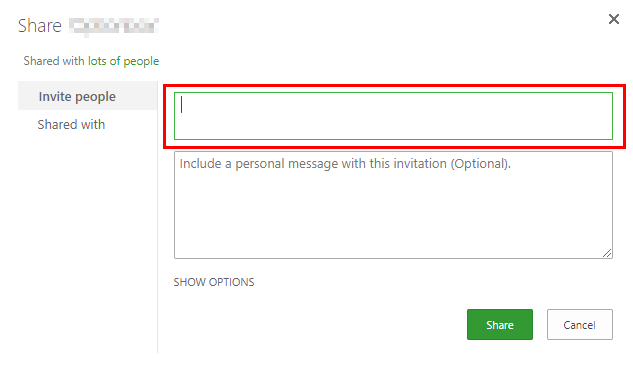
Clicking the ‘Grant Permissions’ box will open a small menu for you to work with. It is here that you will be able to grant certain users a new level of permission, and it is thankfully a very simple process. In a fairly straightforward step, you should now look to enter the name or email address of the user you wish to give permissions in the text box offered to you.
In order to ensure complete clarity within the walkthrough, the box has been highlighted in the below screenshot.
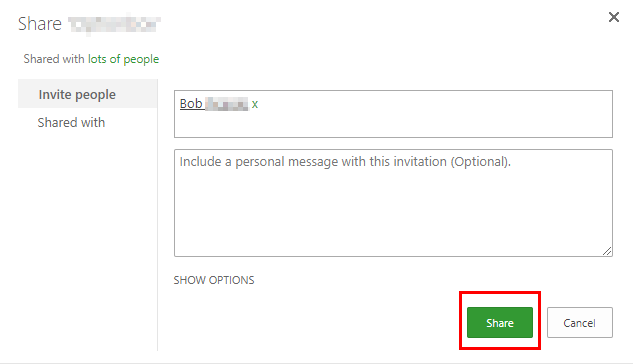
Once you have entered the name(s) you wish to grant permissions to, then simply click the ‘Share’ button at the bottom of the menu, the one highlighted in green and, just in case you need it, the one emboldened by the red rectangle in the image here:
After doing this, you will have successfully granted permissions to a new user!
Now, whilst it is unfortunate that there is no real way to edit limited access, this blog has explained to you what it is, whilst also showing you an avenue you can look to pursue, should you want to, that can offer users of your choice a higher level of permissions within your Microsoft SharePoint.
Thank you for taking the time to read this blog, I hope you found it as helpful as you had wanted it to be! As is the case with every piece we write, if you encounter any issues throughout the walkthrough, or simply wish to share some thoughts on it, then please do not hesitate to get in touch with a member of our team.