SharePoint offers its users an active and well-established platform to both share and manages files on. Users who share files can share either with members of the organization or members external to an organization. However, issues in relation to the sync features on SharePoint and other correlating office programs may impact the user’s ability to proceed without inconvenience. Sometimes these sync issues are generally quite easy to resolve, howe4ver other times they can be a nightmare to resolve, a tedious and sometimes impossible process to fix some of these issues. The sync issue we will resolve today is the “Sync now” not working, which relates to the uses not being able to sync data using the native clickable button. In this blog, we will be looking at solutions to help users resolve SharePoint “sync now” button not working and find possible solutions to help prevent the error from occurring again. We will also address some of the issues that can cause the SharePoint “sync now” button not to work so users are more aware of what they are dealing with and what approaches they need to take to resolve the SharePoint “sync now” button not working. Follow the step-by-step process below to see how you can resolve SharePoint “sync now” button not working.
Step by step process – SharePoint “sync now” button not working
- First, click on the OneDrive icon.
- Then click on “Help & Settings”.
- Now click on “Settings”.
- Now click on “Accounts”.
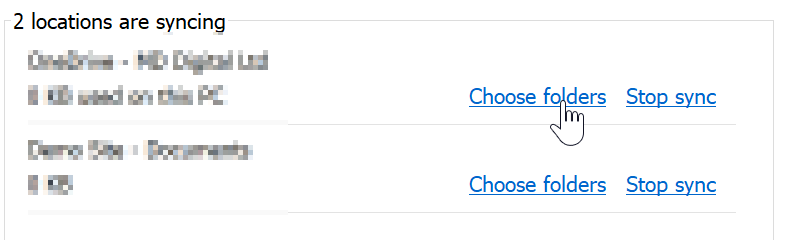
- In the “Location is Syncing” category find the OneDrive account.
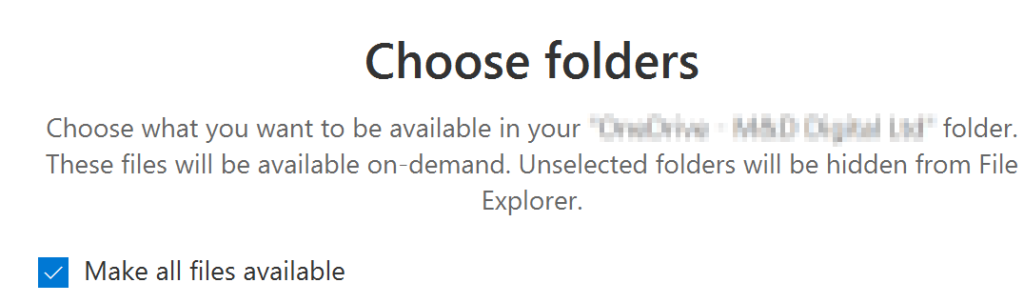
- Now click on “choose folder”.
- Ensure the “Make all files available” tab is selected.
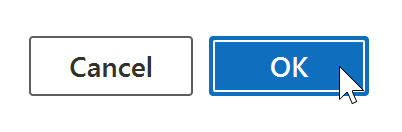
- Finally, click on “OK”.
That’s it, those are the steps required to reboot the sync feature and ensure that the sync client is running normally, you may need to activate more than one folder if the client isn’t syncing a document or folder assisted with your account. Since all that information is connected it’s essential that they are available on the desktop drive for sync purposes. Usually, folders of different allies may not function correctly, so unselecting them may help resolve the sync issue.
To set up the sync for that library for the first time, click the Sync button directly in the library. It can also accomplish your goal of adding directories from that library. However, we strongly advise you to pick directories for sync using the technique described above. Clicking the Sync button may create an unexpected problem (for example, OneDrive won’t start, and you won’t be able to access the previously synchronized folder).

More general tips to troubleshoot the issue – SharePoint “sync now” button not working
- Updating OneDrive to the most recent version.
- Because OneDrive files on-demand allows you to view all files without downloading them all and filling up your device’s storage, you should only sync what you need.
- Make sure you’re not synchronizing too many files at once. If OneDrive is stalled for an extended period of time or shows the Processing status as 0KB or xMB, you may have a large number of items on the disc or numerous files waiting to be uploaded, which will slow down the sync process. Instead of utilizing the website’s Upload button, add the files to the OneDrive desktop program.
- Mark files offline on all mobile devices so you may read them at any time, even if you’re not connected to the internet (they’ll be read-only).
- Check and compare the OneDrive storage capacity you have to the available computer disc space to stay within the storage limit. If they’re both restricted, you’ll need to relocate or remove some files or cut the amount down. You may also purchase additional storage or select which folders to sync with your PC.
- You may also pause and resume synchronizing.
Create a new profile – to resolve the Sharepoint sync issue
- Create a new profile, then move your documents, bookmarks, music, and other items over. Sign in to that account on the web, and the synchronization procedure should begin as if you were doing it for the first time.
- You then clicked Sync, which brought up the next pop-up, and everything began to sync. You may now repeat the process for all SharePoint sites, and the sites should begin and end the synchronization.
Check to see whether the problem is related to a certain folder.
When the dark blue cloud symbol (OneDrive) in your system tray displays a red X, you’ll know the sync is broken. You can verify the sync problems by right-clicking on this icon, which displays a list of any files or folders that aren’t syncing correctly. Here’s how to see if it’s a particular folder.
- By selecting upload in the library, you may add a new file to the OneDrive for Business library.
- Right-click OneDrive for Business and select Sync Now from the context menu.
- Move your cursor over the OneDrive for Business symbol on your computer’s taskbar. Is there a text that says something like OneDrive for Business – Syncing files, xx remained OR OneDrive for Business – processing changes?
- Go to a genuine SharePoint document library, such as one on a team site.
- To see if OneDrive can sync a regular SharePoint document library, click Sync.
- Allow another individual to share a folder in your OneDrive for Business library with you, then sync that library to see what happens.
In-depth – Step by step process – SharePoint “sync now” button not working
Step by step breakdown:
- First, click on the OneDrive icon.

Normally the OneDrive Icon will be located in the taskbar on both Mac and windows. Here on this example for Mac the OneDrive Icon was located in the top corner as opposed to the bottom for Windows computer.
- Then click on “Help & Settings”.
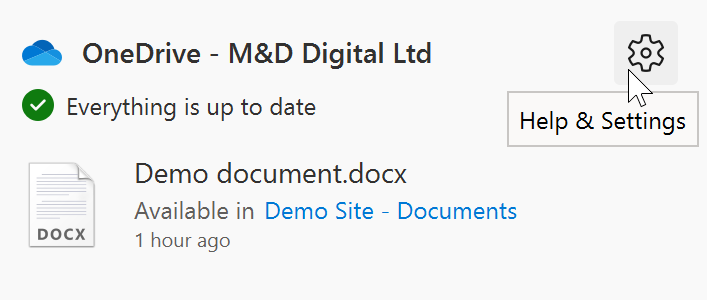
The help and settings panel will house all the essential tools to manage your OneDrive for PC application. This includes the sync panel which is what we require here.
- Now click on “Settings”.
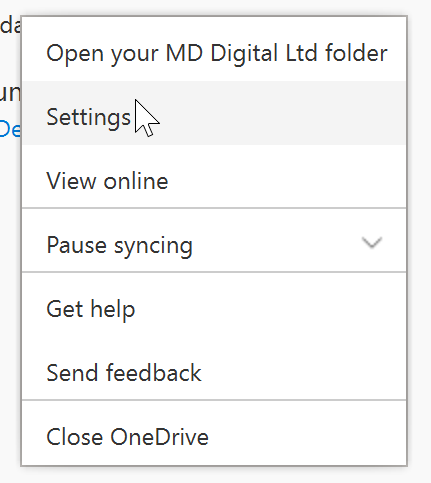
Preferences are located within the OneDrive setting folder.
- Now click on “Accounts”.
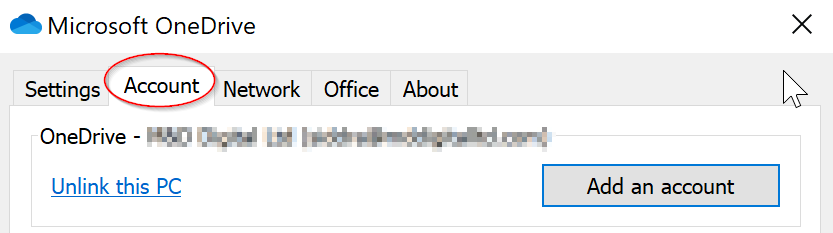
Here you can manage your accounts including account settings and whether you want to sync with the current computer or not and here we need to see if the computer is actually being synced with the OneDrive account in question or not. It will also give you a breakdown of how much storage has been used for folders and files.
- In the “Location is Syncing” category find the OneDrive account.
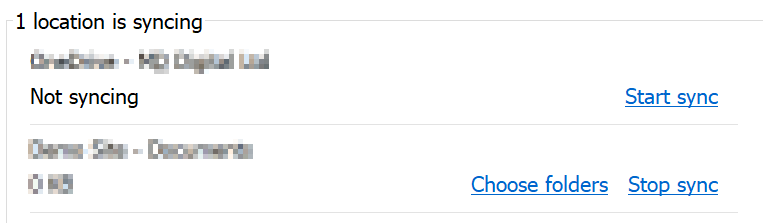
If you see the above in the selection panel, your dive will be syncing with the associated OneDrive account.
- Now click on “choose folder”.
- Ensure the “Make all files available” tab is selected.
- Finally, click on “OK”.
That’s it for this Blog thank you for taking time out to read our content, please feel free to email our team about how it went if you followed the steps or if you need more help with the questions we answered in this Blog.