Large Word documents can be exceptionally difficult to navigate, so adding a table of contents can make a massive difference. No matter the size of your document, adding a table of contents makes your document look super professional and simple to use. In this blog post, I’ll demonstrate numerous ways that you can create a table of contents in Word.
Here’s a step-by-step guide to creating a table of contents in Word (Desktop version):
- Open the Word document you want to add a table of contents to
- Click References on the ribbon
- Click Table of Contents
- Select Automatic Table 1 or Automatic Table 2
Here’s a step-by-step guide to creating a table of contents in Word Online:
- Open the Word document you want to add a table of contents to
- Click References on the ribbon
- Click Table of Contents
- Click Insert Table of Contents
We’ve also created a video to help with this process. You can watch it here:
Follow the process above and you should have a table of contents appear in your Word document. However, it does depend on how the document is structured — because automatic tables rely on the H1s, H2s, and H3s throughout your document as standard.
You can edit your table of contents in numerous ways — for example, changing how many levels are shown, changing tab leader style, and editing the format — which I’ll also demonstrate in this post.
First, here’s a step-by-step demonstration [with screenshots] showing how to create a table of contents quickly in a Microsoft Word document. Select the version of Word you’re using below for specific instructions to follow:
How To Create A Table Of Contents In Word (Desktop Version)
Creating a table of contents in Word is a super simple process, although you can customize your table of contents to your heart’s content.
The steps below take you through the process of creating a table of contents in Word:
- Open the Word document you want to add a table of contents to
- Click References on the ribbon
- Click Table of Contents
- Select Automatic Table 1 or Automatic Table 2
- Open the Word document you want to add a table of contents to
If you haven’t done it already, open up the Word document that you want to add a table of contents to.
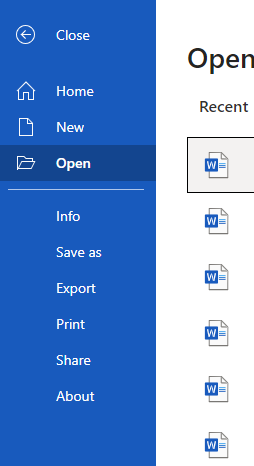
- Click References on the ribbon

The ability to create a table of contents is tucked away in References.
Once your document is open:
- Place your cursor where you want the table of contents to go
- Click References on the ribbon
- Click Table of Contents

- Select Automatic Table 1 or Automatic Table 2
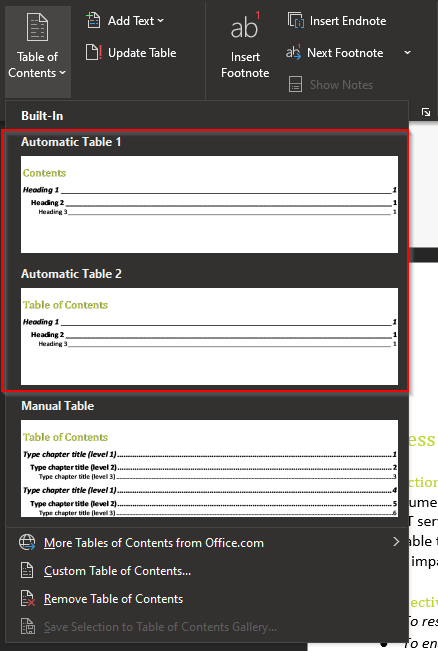
Select one of the two built-in options: Automatic Table 1 or Automatic Table 2. Your table of contents will then appear immediately in your document.
The screenshot below shows a basic table of contents created in the desktop version of Word with no customization.

Once you have the automatic table of contents created, you can quickly navigate your document. The headings in the table of contents are actual hyperlinks, so you can press CTRL and click on any of the headings to go to that section of your document.
Now we have a basic table of contents, but I have a problem with it — I have H4s throughout my document that I want on the table of contents, and I’m not a big fan of the format. Fortunately, you can customize all of that.
Next, I’ll walk you through customizing a table of contents.
Customizing a table of contents in Word
You can customize a table of contents within Word in numerous ways. Just a few basic customizations include:
- Changing tab leader
- Changing the format
- Showing more levels
To customize your table of contents in Word:
- Select the table
- Click Table of Contents on the ribbon
- Click Custom Table of Contents…
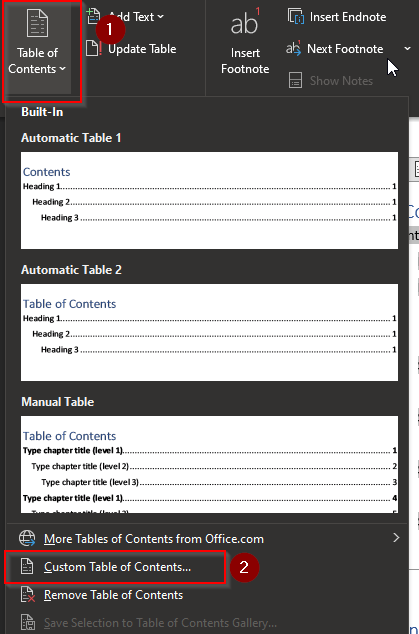
When you click Custom Table of Contents… it opens up an additional menu with tons of options for customizing your table. It should look a little like the menu below.
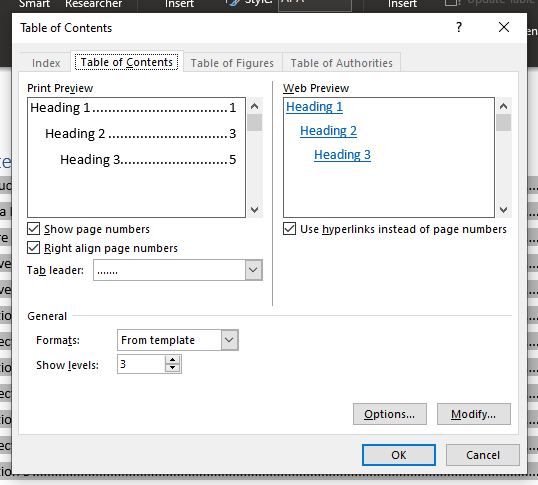
You can use Show levels to add more headings to the table of contents. So for example, if you type in 5, headings 1 – 5 will all be reflected on the table of contents.
You can use Tab leader to choose the types of dots or dashes that you want between the name of the headings and the page number — or you can remove page numbers altogether if you feel they’re not needed.
You can use Formats to choose from several formats. The preview boxes will give you a good idea of what you’re table of contents is going to look like before you save any changes you make.
Once you’re happy with the preview, press OK to save your table of contents and see what it looks like in your document.
I customized my table of contents using a few of the basic settings available. The screenshot below is the result.
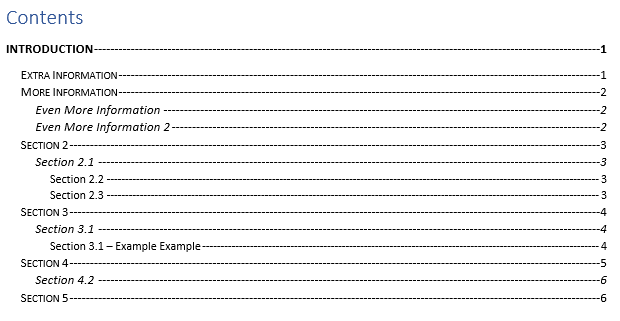
The steps that I took you through are just some of the basic ways that you can customize a table of contents. But as you can see, you can create a really professional-looking table of contents.
Next, I’ll demonstrate how you can create a table of contents in Word [Online version].

How To Create A Table Of Contents In Word (Online Version)
If you’re using Word for Web to create large documents, a table of contents can come in very handy. A table of contents can make navigating large documents much easier.
Here is a step-by-step process for creating a table of contents in Word [Online version].
- Open the Word document you want to add a table of contents to
- Click References on the ribbon
- Click Table of Contents
- Click Insert Table of Contents
- Open the Word document you want to add a table of contents to
Navigate to Word for the web and open up the document that you want to add a table of contents to.
If you aren’t already in Word for the web, you can access it using the following URLs:
- Office.com
- Microsoft.com
- Microsoft365.com
Once you use one of the URLs above, you just log in using your Microsoft 365 credentials. Select ‘Word’ from the app launcher, then you can open up the document you’re wanting to edit.
- Click References on the ribbon

- Click Table of Contents
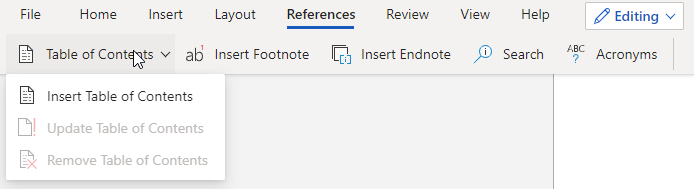
- Click Insert Table of Contents
Make sure to place your cursor where you want the table of contents inserting before you click Insert Table of Contents.
Once you click Insert Table of Contents, the table of contents will automatically appear in your document as shown in the screenshot below.
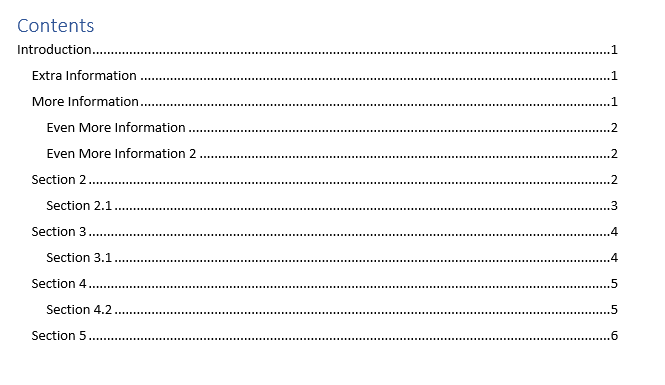
The only problem with Word for the web is that you cannot customize the table in the same you can in the desktop version of Word. However, you still have a fully-functioning table of contents that you can use to quickly and effectively navigate your document — as long as you get your heading structure correct.
Thanks for reading! Hopefully this blog post helps you quickly and easily add a table of contents into Word for the web and the desktop version of Word.