SharePoint offers a wide range of different tools to help users manage and share folders and files. With the ability to manage a personal database, you as company owners and directors can also create and manage groups and colleagues within SharePoint’s dedicated admin section. In this scenario, we will address how you can restrict permission for users who have contributed access in SharePoint. Contribute access refers to users who have access to edit documents within SharePoint, however you may only want them to contribute and edit those files and not proceed further and share those edited files across. You can use this post to help you address this situation and prevent users from sharing documents that they have edited. Follow the step-by-step process to see how you can Stop users sharing a site they have contributed access to: SharePoint.
Step by step process – Stop users sharing a site they have contribute access to: SharePoint
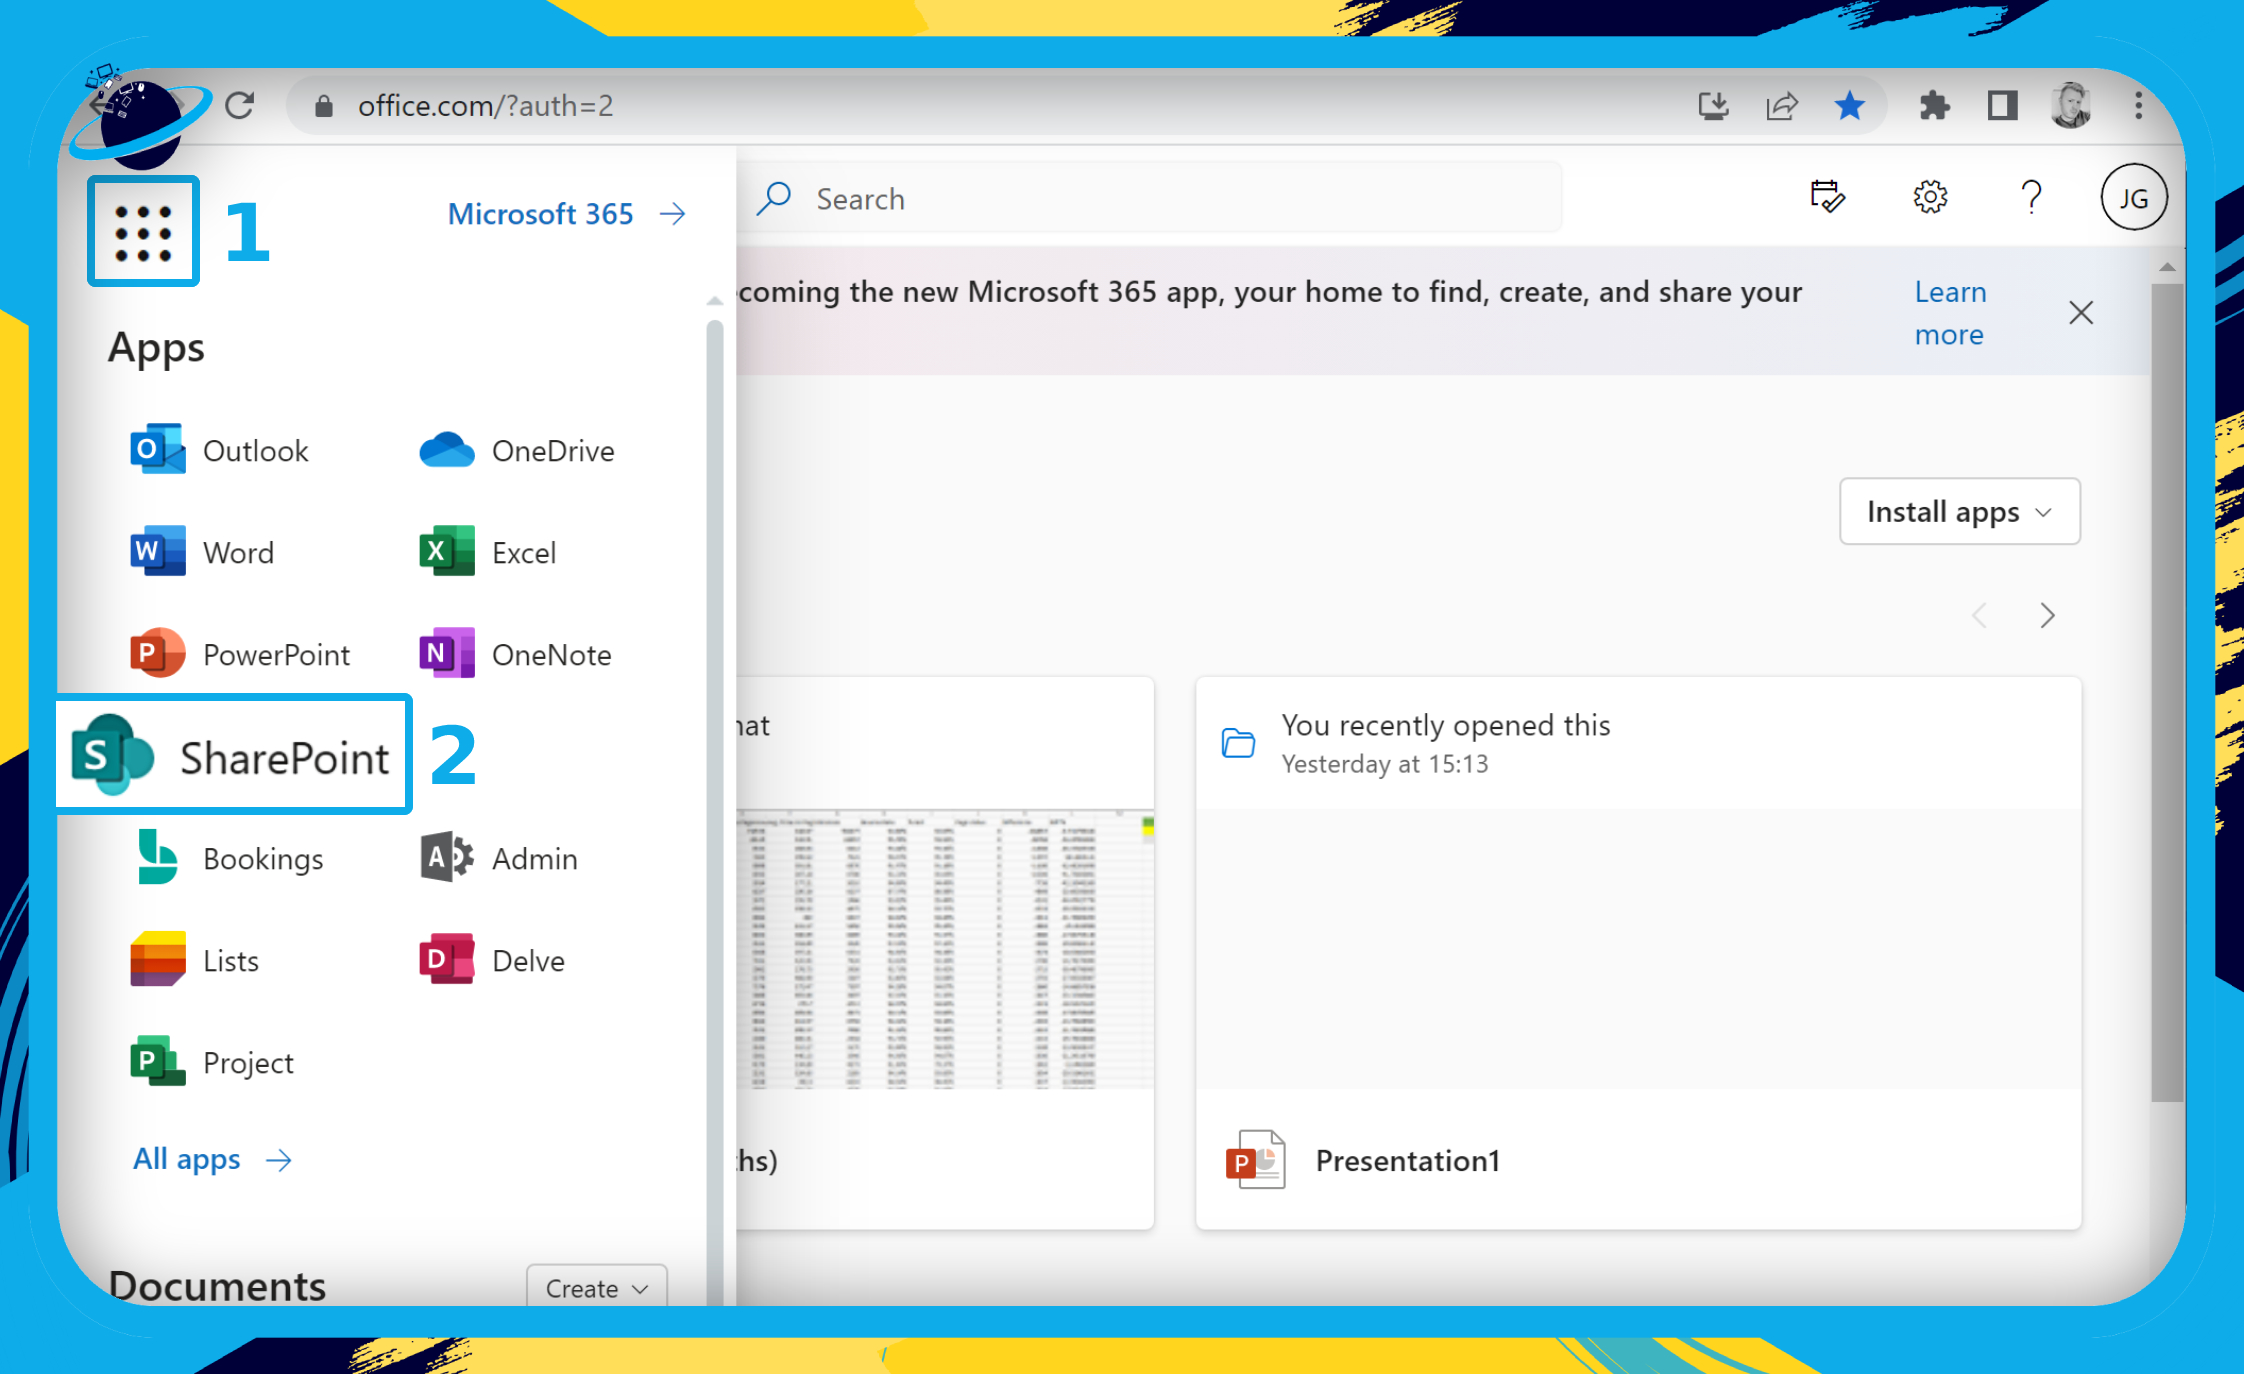
- First, sign into Office 365.
- Click the
 app launcher icon in the top left.
 - Then click “SharePoint” in the apps list.
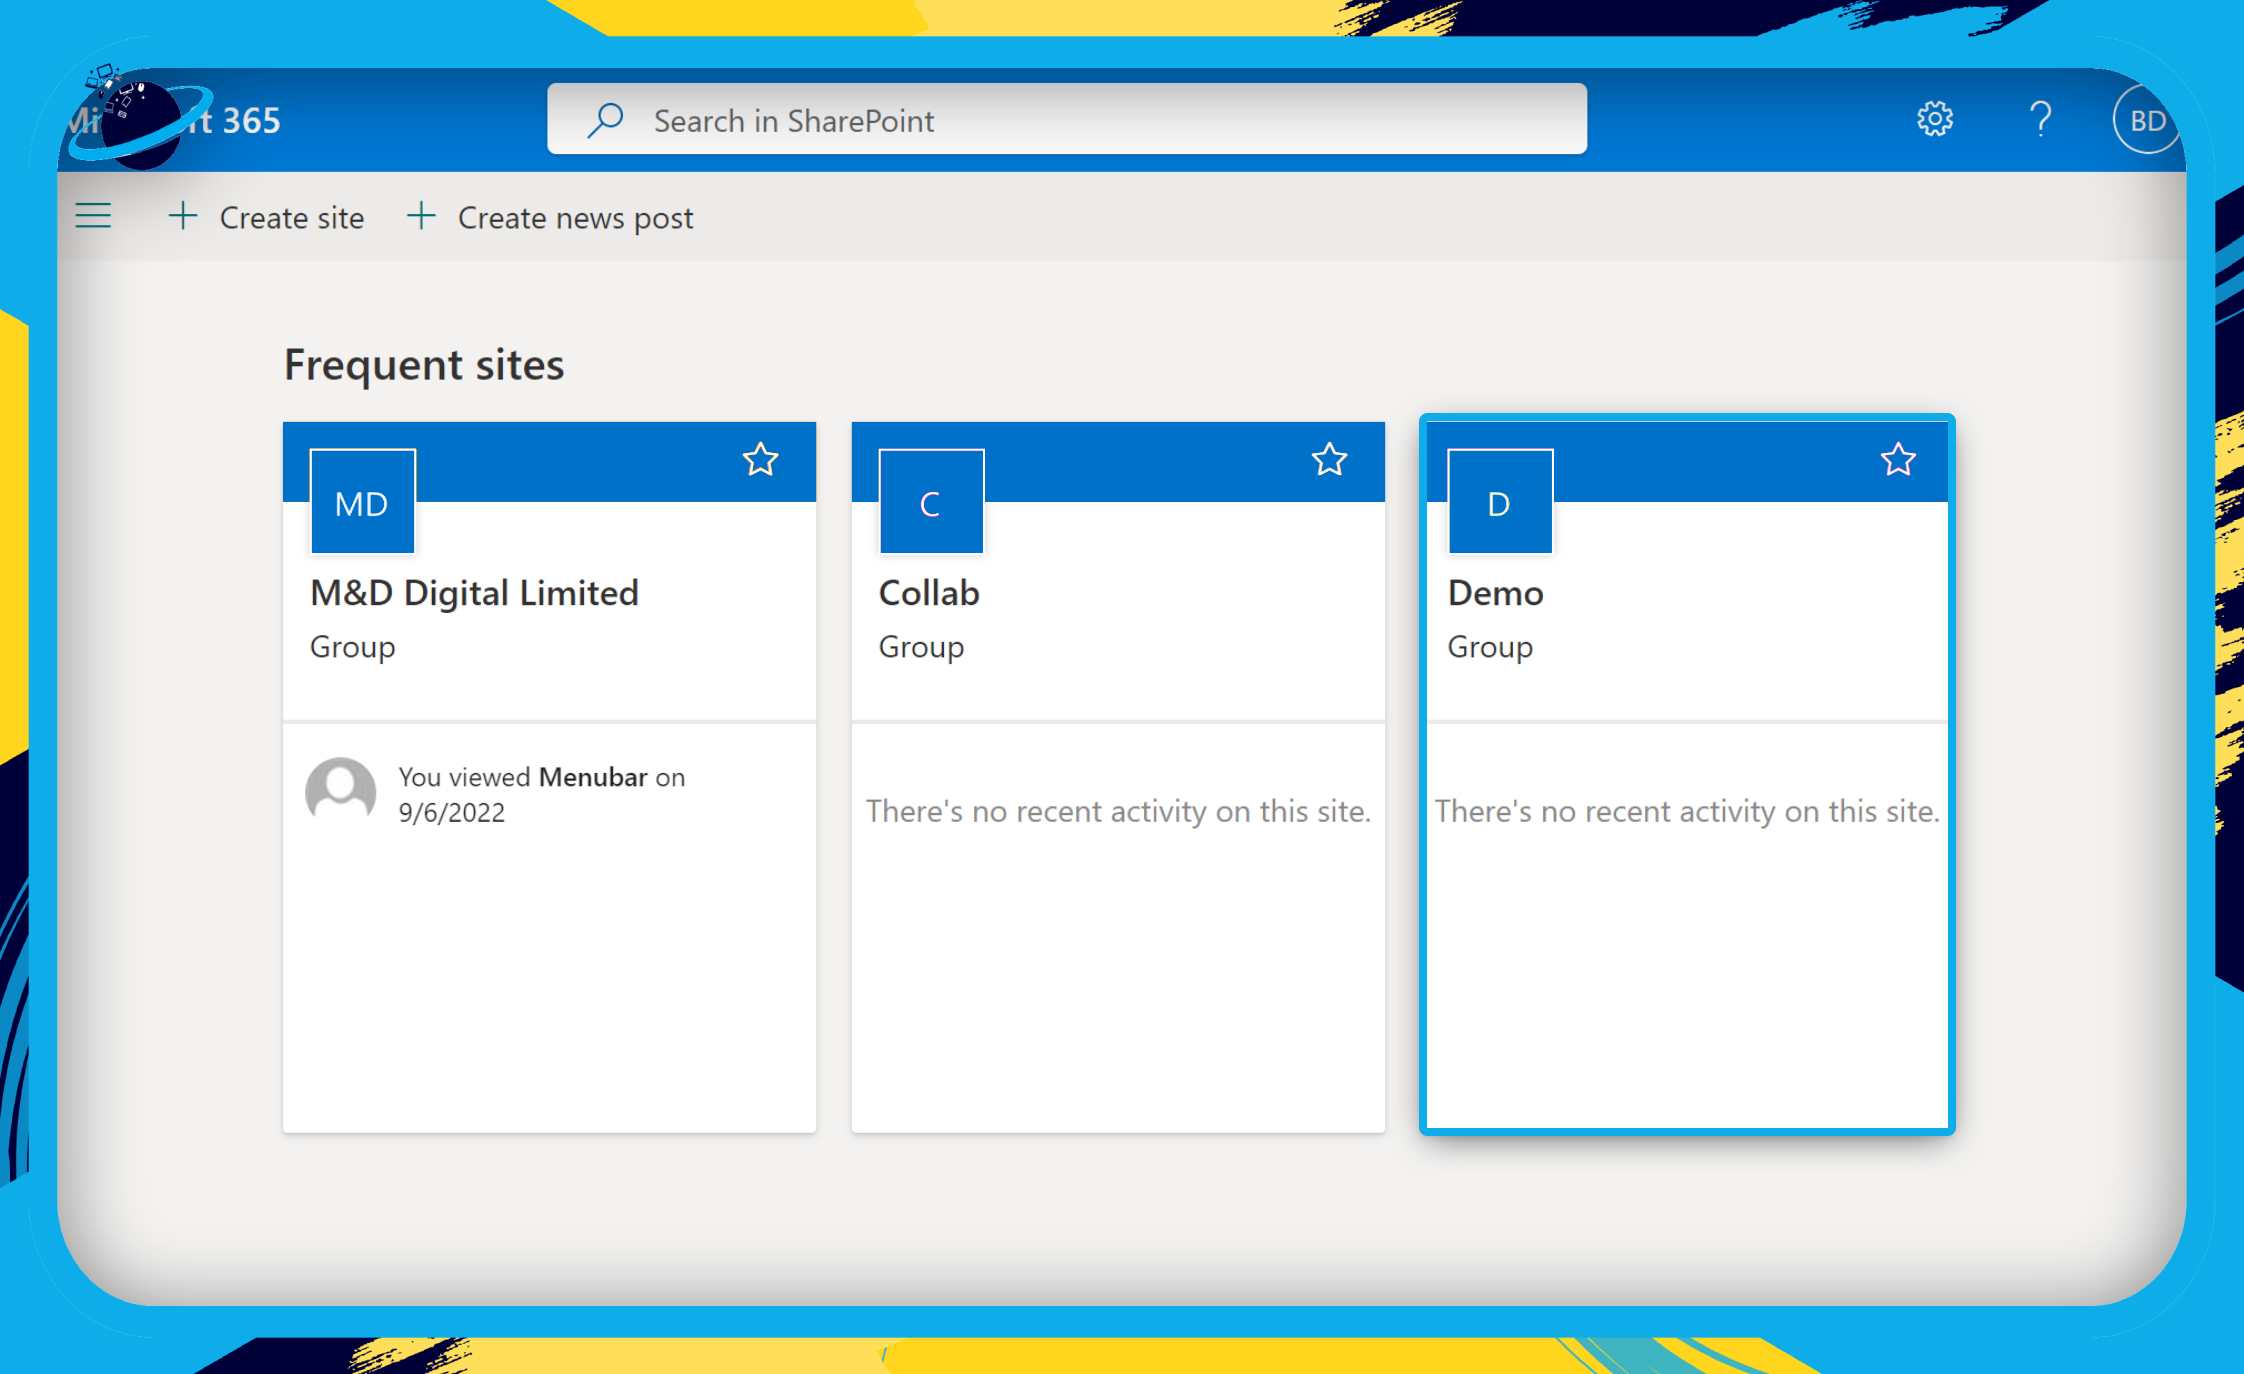
- Select the site in which your files are located.
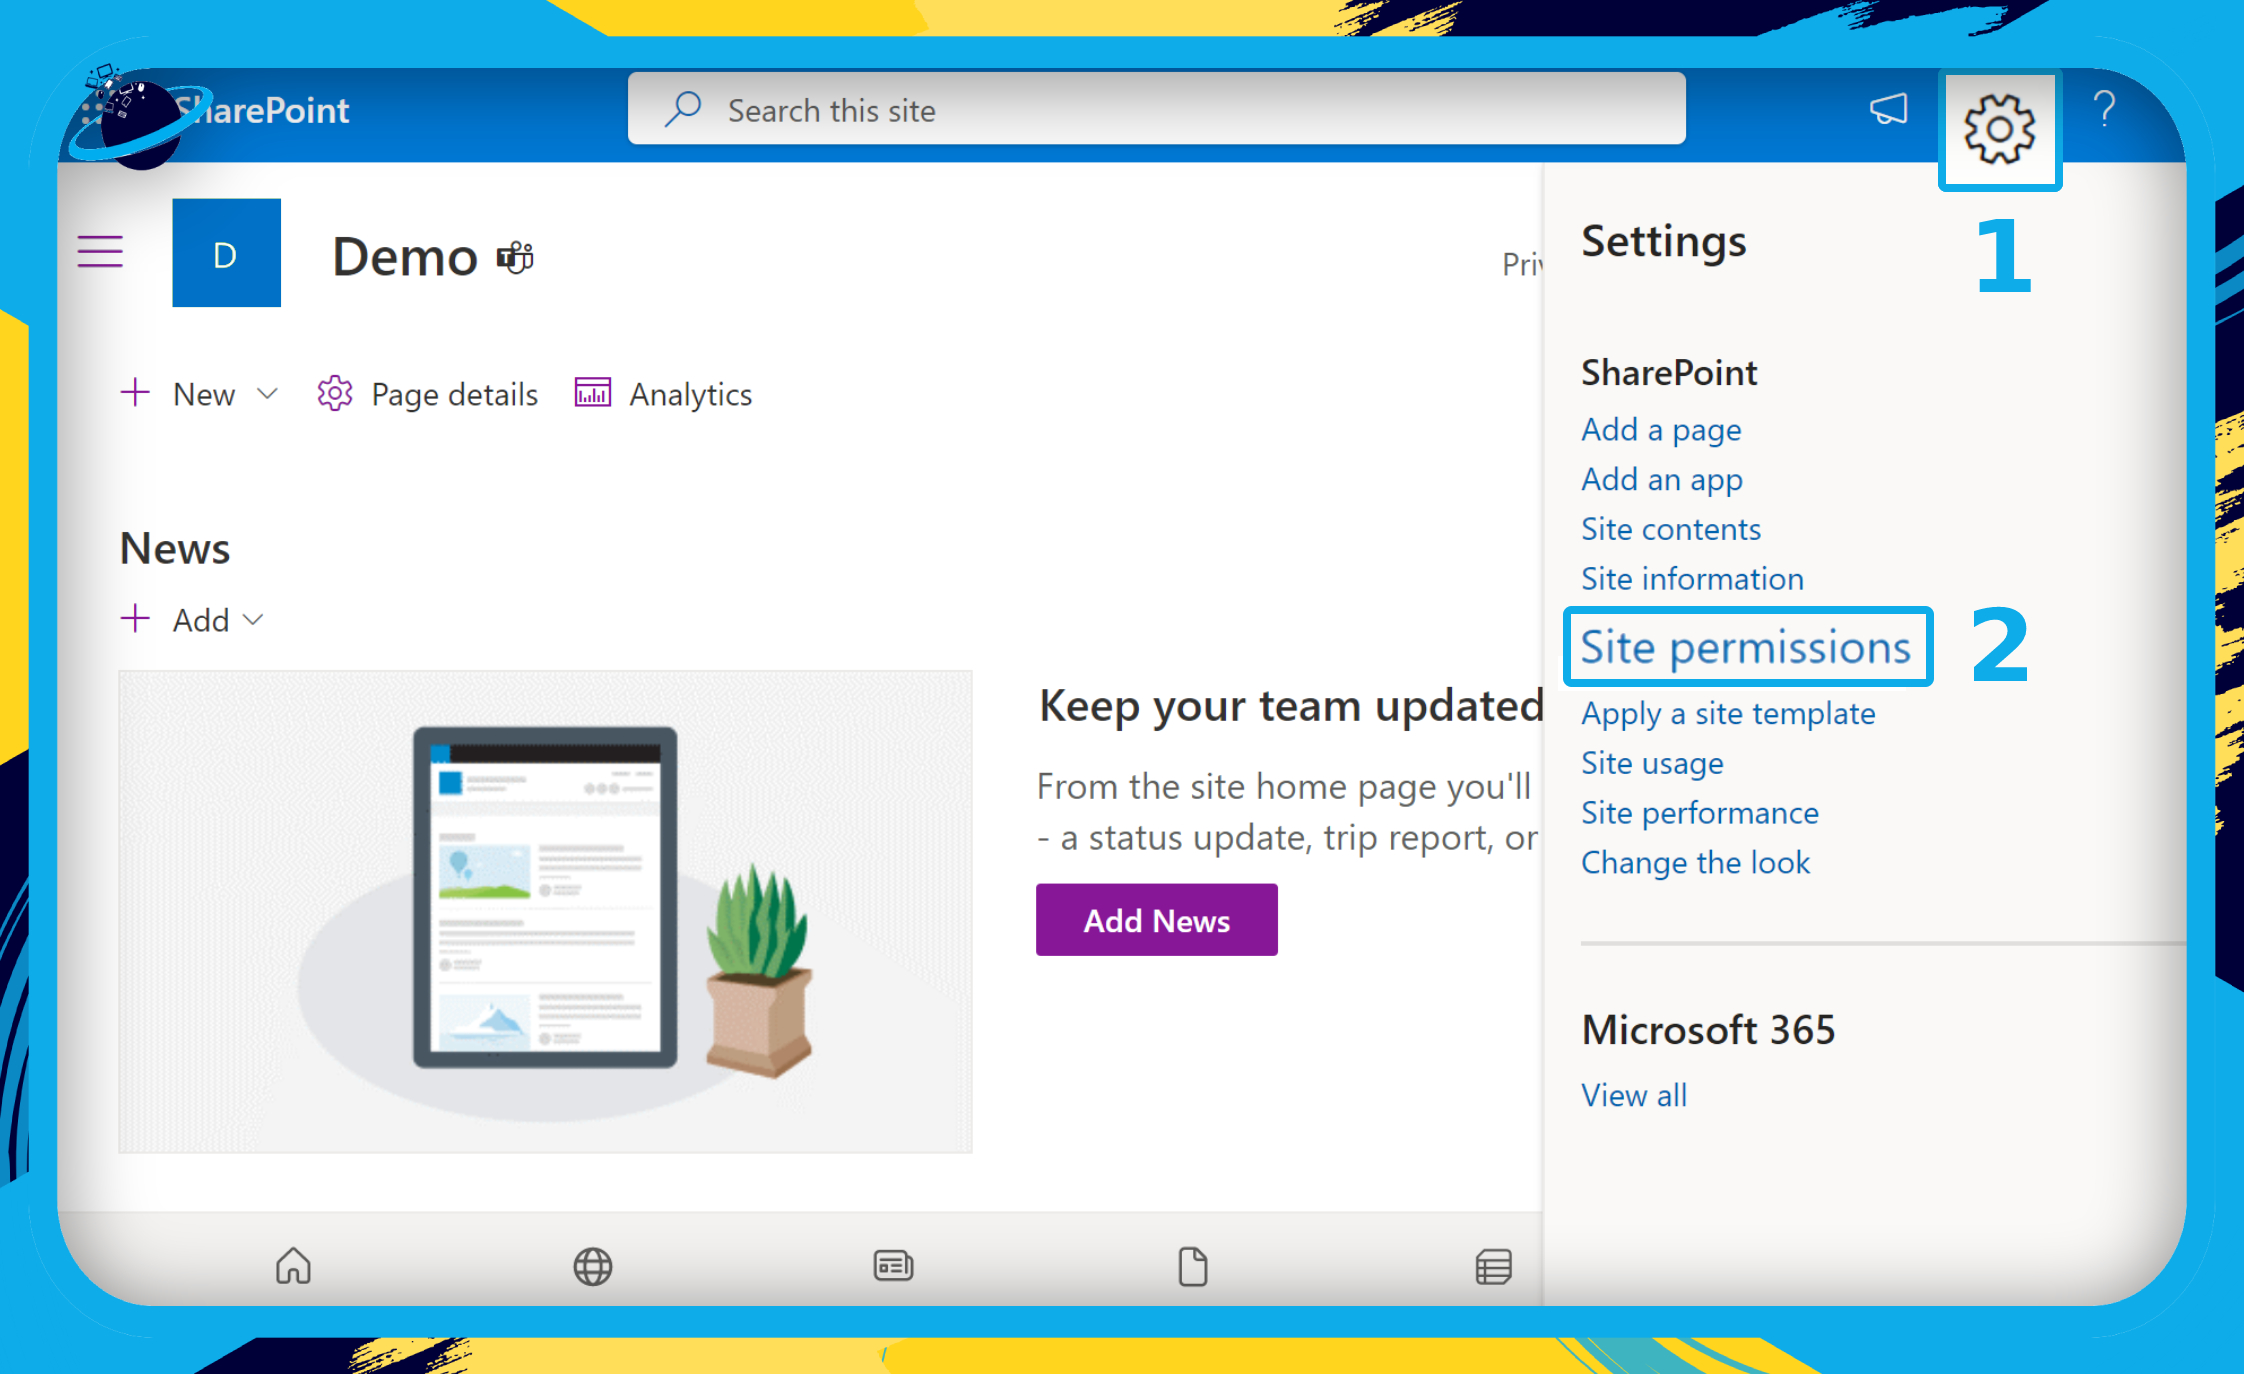
- Click the
 Settings icon in the top right.
 - Select “Site permissions” from the Settings menu.
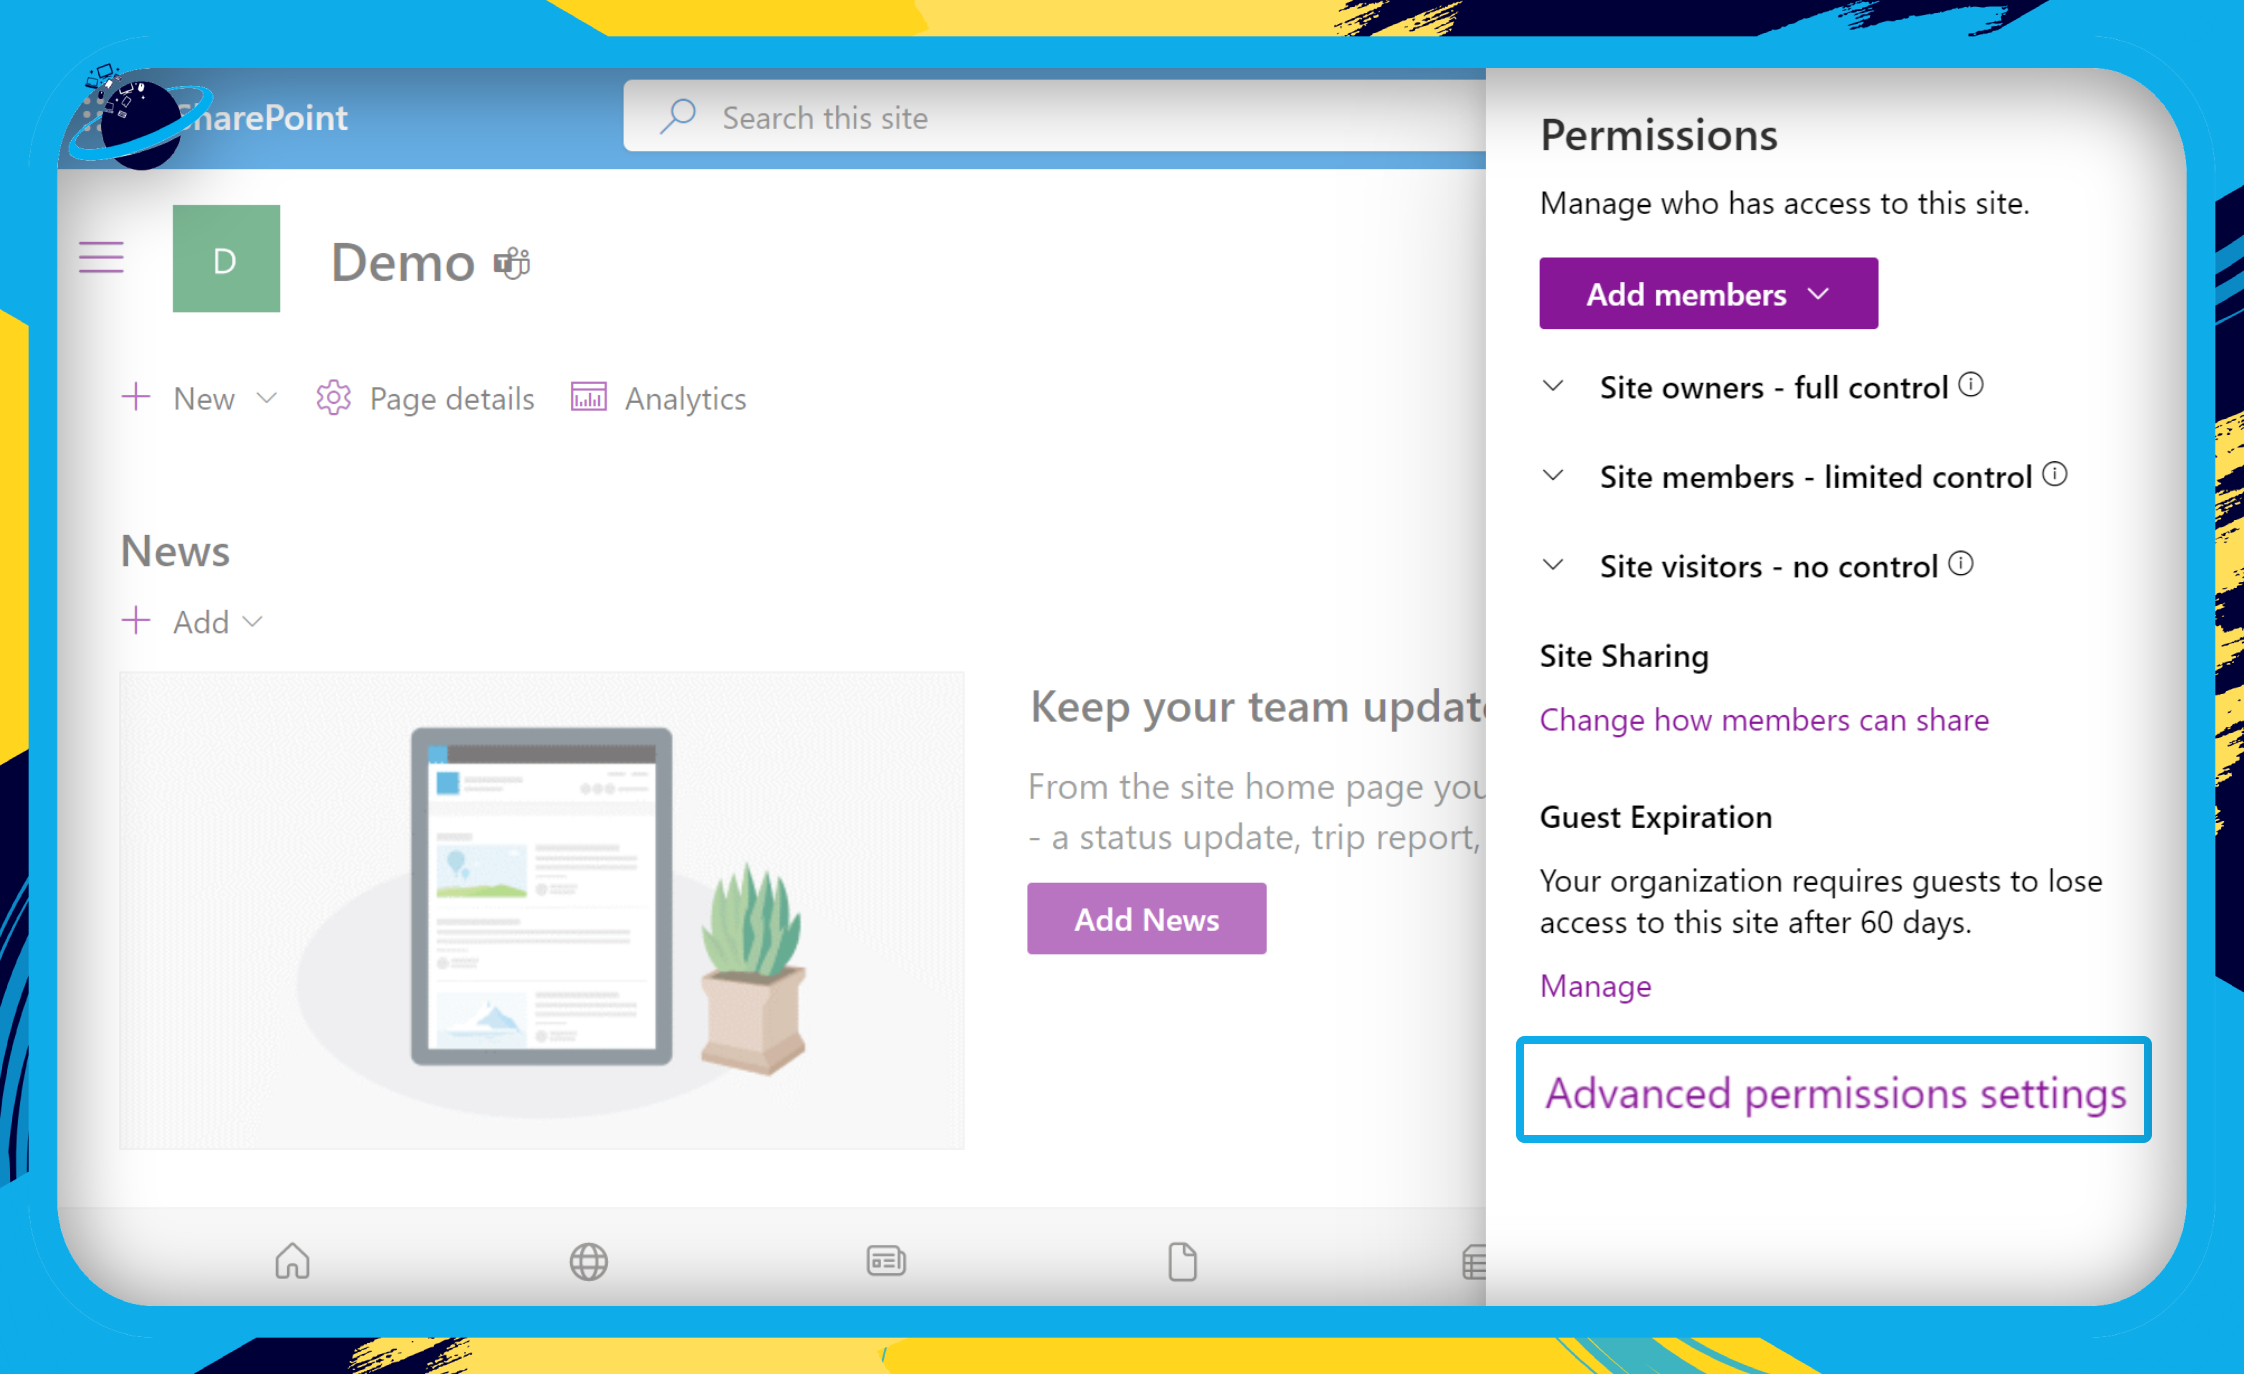
- Click “Advanced permission settings” at the bottom.
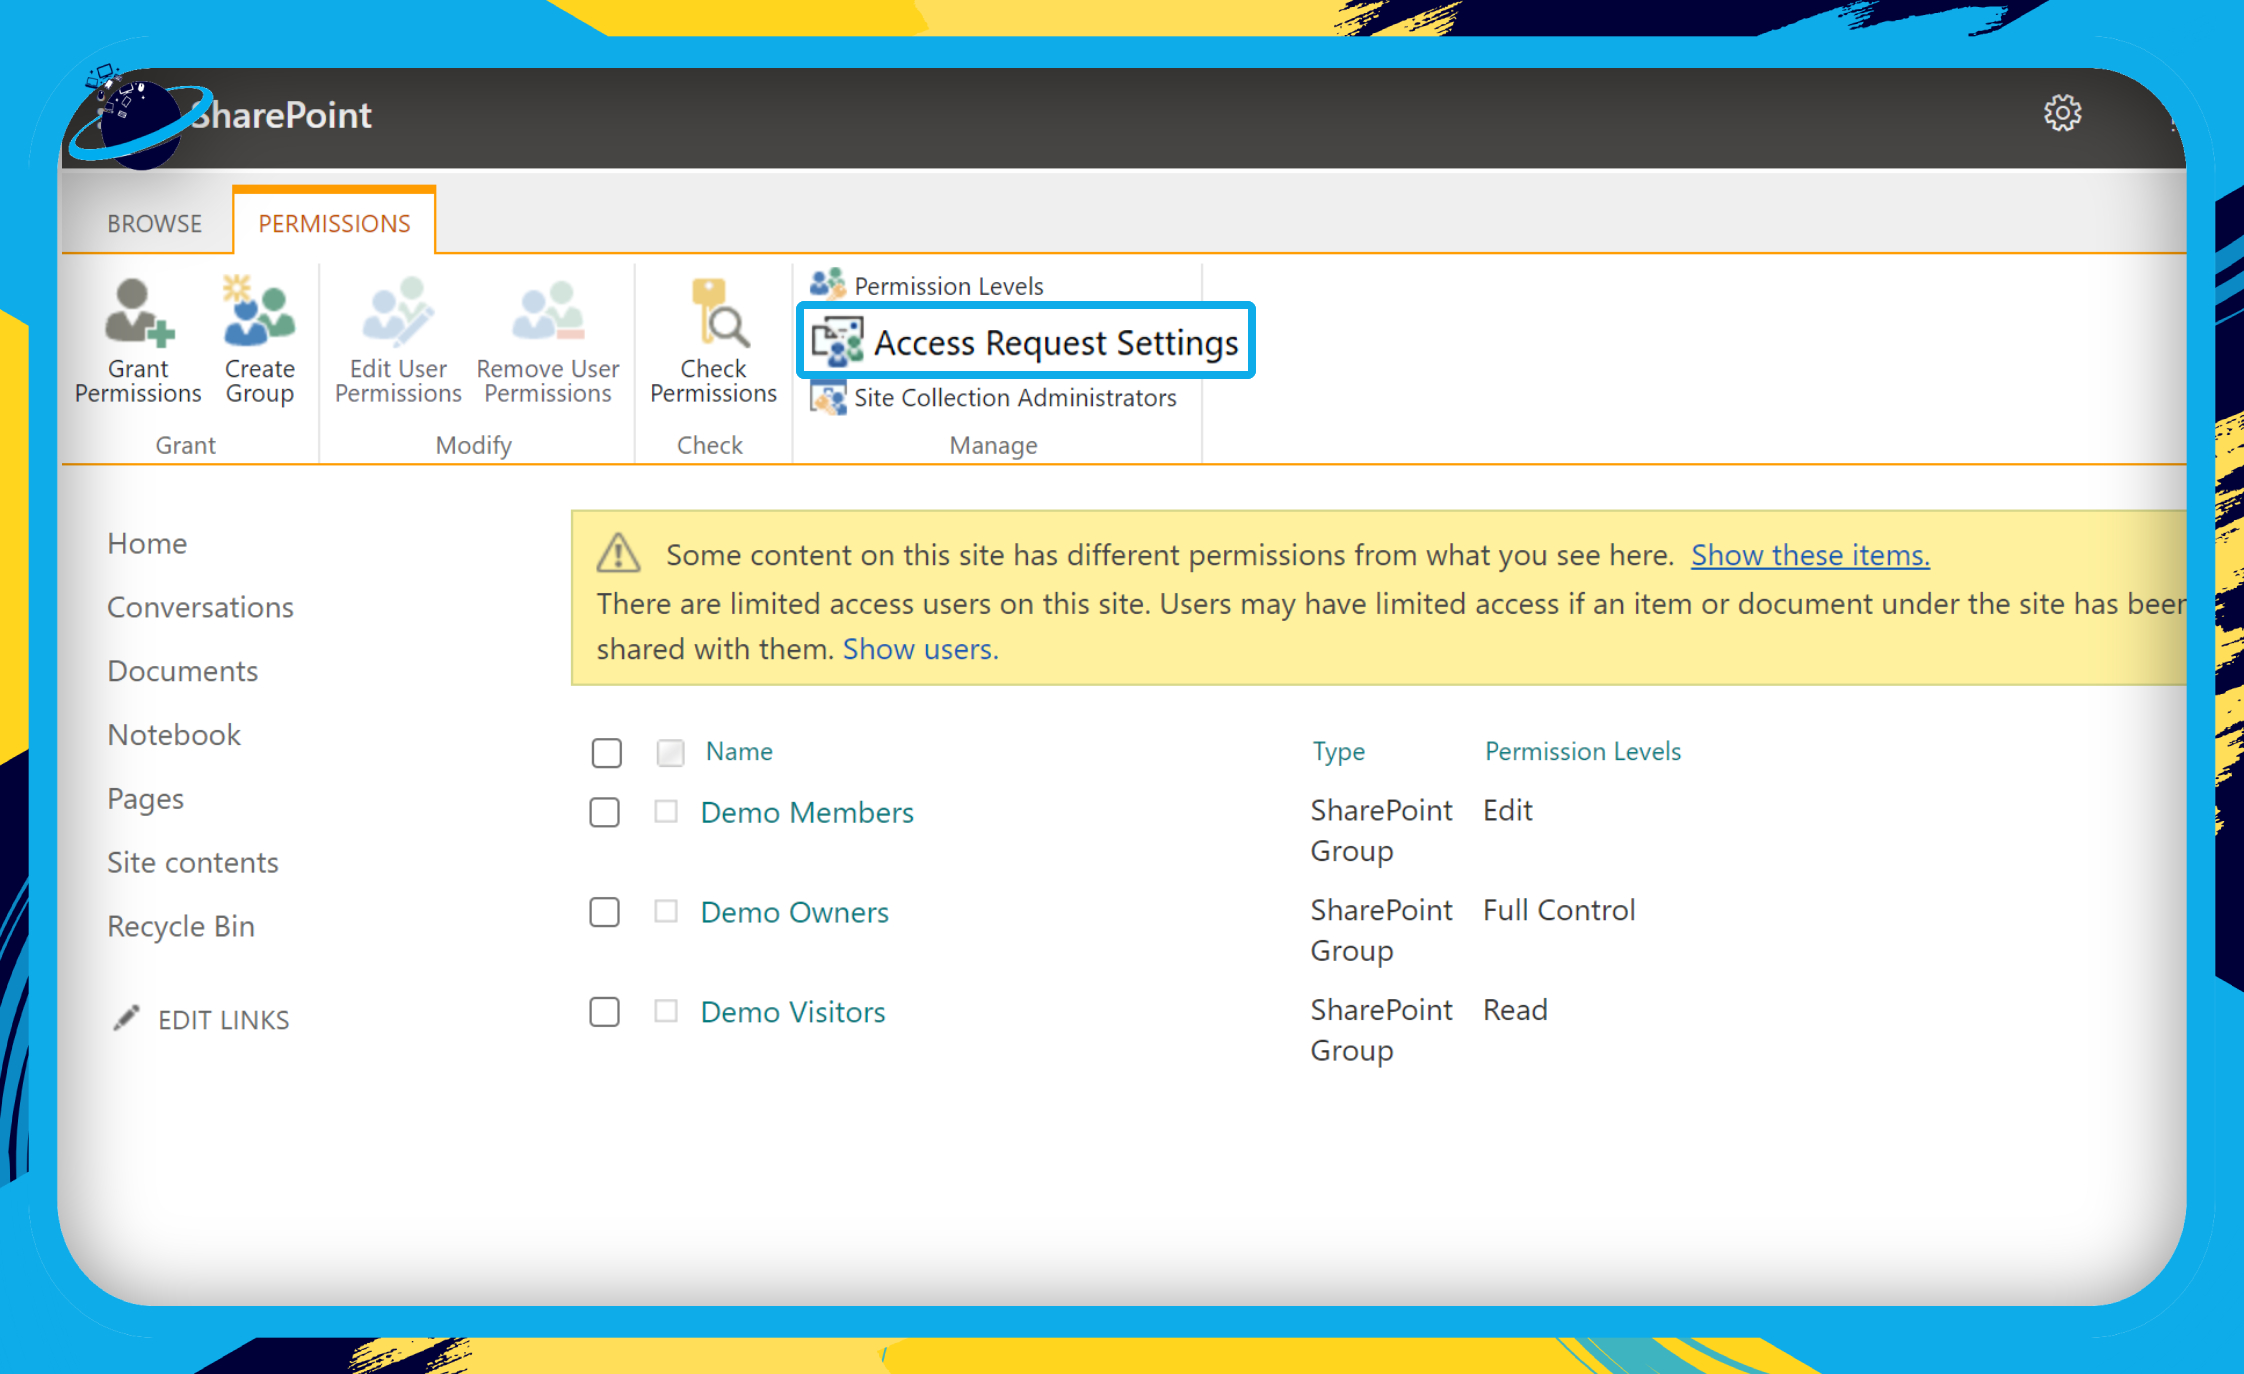
- Now click “Access Request Settings” in the ribbon at the top.
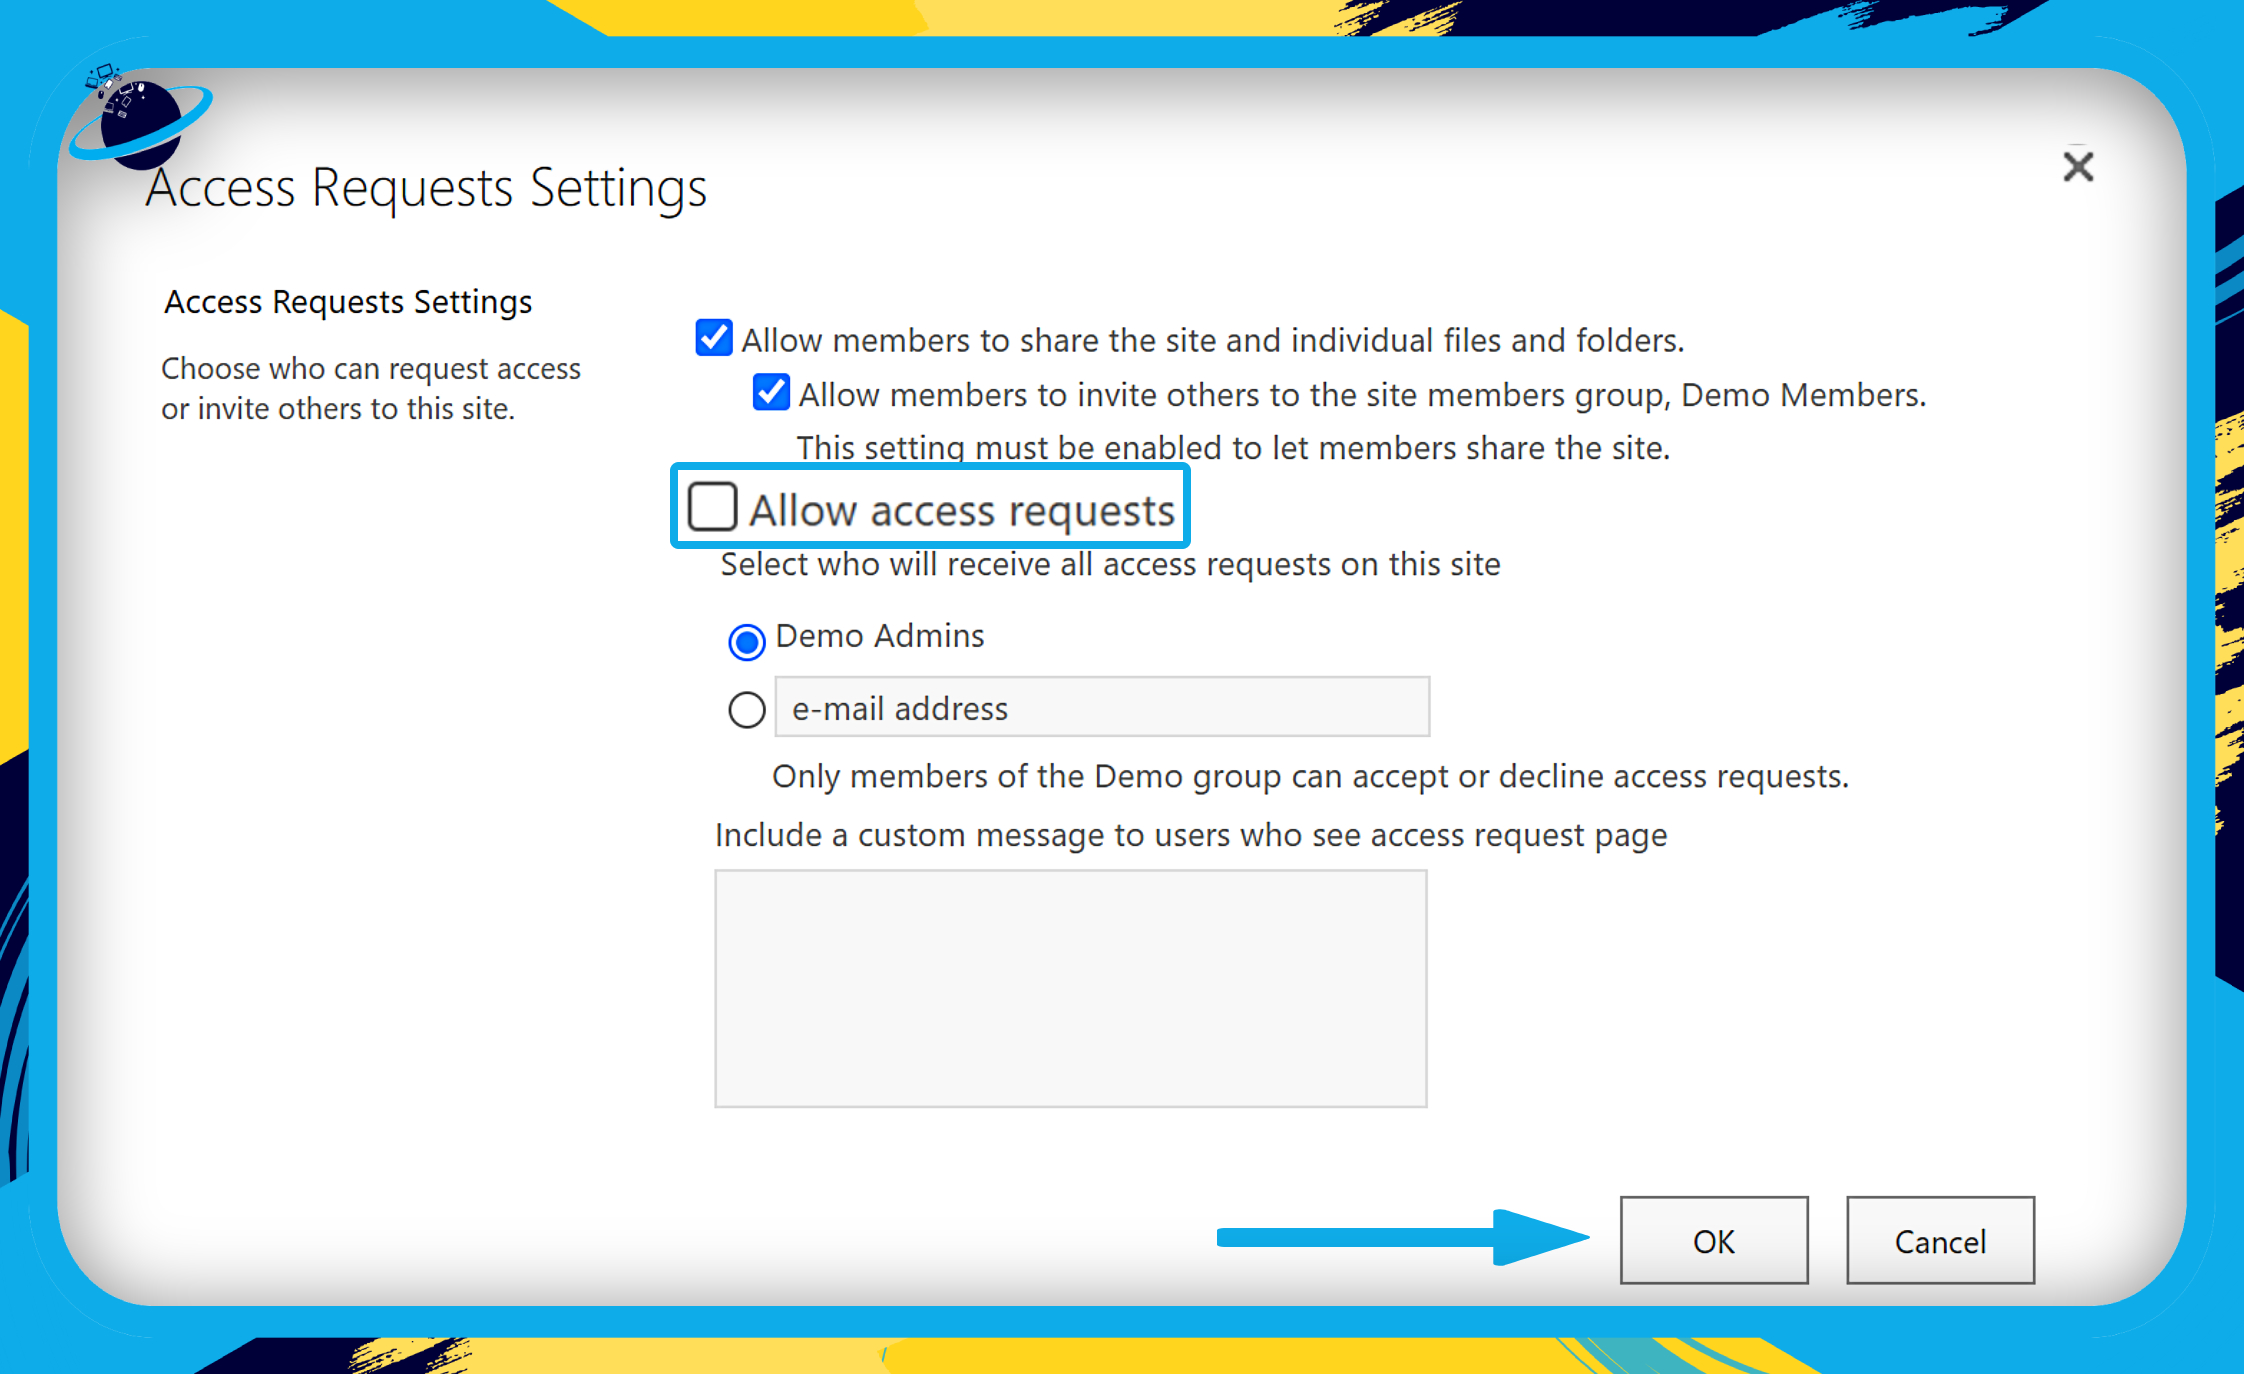
- Uncheck the box next to “Allow access requests.”
- Finally, click the “OK” button.
Following the steps above will allow you to effectively restrict share permission settings despite being an executive or contributing member of your organization. You can restrict as many users as necessary and prevent them from sharing the documents with other users. You can further restrict the settings and prevent them from editing documents that have been edited, once an edit is complete you can come back to this section and edit the settings again to restrict editing.
Only if the user already has access to that site collection will the direct link function (or has permissions on the item or list level). Everyone else will be sent to a page that says “access denied.” Even if sharing is disabled, the Share button will remain visible. When users click on the button, they may be presented with an error message or only the other users on the site collection.

Domain-based restrictions on external sharing to stop users sharing a site they have contribute access to in Sharepoint
If you want to limit sharing with specific partners or ban sharing with people at specific companies, this is a good option. All SharePoint sites and each user’s OneDrive are affected by the organization-level option on this page. To utilise this option, enter the domains (up to 3000) in the box using the domain.com format. After adding each domain, click Enter to list them all.
You can also use the Set-SPOTenant Microsoft PowerShell cmdlet with -SharingDomainRestrictionMode and either -SharingAllowedDomainList or -SharingBlockedDomainList to limit external sharing by domain. See Restricted domains sharing for information on limiting external sharing by domain at the site level.
SharePoint share restriction options – What to choose
You want to manage access further and apply some categorization on the share settings of users within your organization. You can use the guide below to help establish an optimal share preference and ensure that only users who have access to a share can share.
Anyone
Allow users to share files and folders by creating links that anybody with the link may view without having to authenticate. This option also allows users to share web pages with authenticated new and returning visitors. You may restrict the Anyone links by requiring them to expire within a certain number of days or allowing them to only provide View access if you pick this option.
New and existing guests
People who have received invites should be required to check-in using their work or school account (if their company utilizes Microsoft 365) or a Microsoft account, or submit a code to authenticate their identity. Users may issue invites to others who will be added to the directory once they sign in, and they can share with guests who are already in your organization’s directory.
Existing guests
Only guests who are already in your directory are allowed to share. These visitors may be in your directory because they accepted prior sharing invites or were manually added, such as through Azure B2B cooperation.
Sharing has many advantages and is a great new feature in SharePoint, but it also impacts system security in many ways. So be sure to correctly implement each sharing preference to prevent disappointment and or potential security breaches of both company and colleagues’ personal data.
In depth – Step by step process – Stop users sharing a site they have contribute access to: SharePoint
Step by step breakdown:
- First, sign into Office 365.
- Click the app launcher icon in the top left. (1)
- Then click “SharePoint” in the apps list. (2)
- Select the site in which your files are located.
- Click the Settings icon in the top right. (1)
- Select “Site permissions” from the Settings menu. (2)
- Click “Advanced permission settings” at the bottom.
- Now click “Access Request Settings” in the ribbon at the top.
- Uncheck the box next to “Allow access requests.”
- Finally, click the “OK” button.
That’s it for this Blog thank you for taking time out to read our content, please feel free to email our team about how it went if you followed the steps or if you need more help with the questions we answered in this Blog.