With online meetings becoming the new normal inside and outside the workplace, many users have experimented with the recent backdrops feature that Microsoft added to Teams. Initially, you could only choose from a dozen of Microsoft’s choices, but Microsoft has included an “Add New” capability, which means you can now choose which image best suits your style. However, some users want to know what size the custom background should be in Microsoft Teams. Here I will provide you with a guide and what size your custom background needs within the program. I will show you how to assign your custom background to Microsoft Teams when you have chosen it.
Microsoft Teams uses the standard aspect ratio for all its meeting screen sizes within the program. A standard aspect ratio for all displays currently being used is 1920*1080. Therefore the optimal size for a background in Microsoft Teams needs to be 1920*1080. Using these background sizes will ensure that there are no cutoffs or no protruding negative space, which could obscure vision. The 1920*1080 aspect ratio also falls to screen resizing or enlargement. If the display’s aspect ratio is slightly taller or wider, Microsoft Teams will automatically adjust by adding black bezels around the extended portions. If changes occur, the aspect ratio will also maintain the same width and height. You can use a custom background incorporating 1920*1080 size; you can find one using the guide illustrated here.
- Check your image’s dimensions before using it as a backdrop in Teams.
- What can you do to assign a custom background to your Team’s meeting?
You can progress through each blog section individually to better understand what size and aspect ratio your background needs to be to properly fit in the Microsoft Teams UI. I have provided a guide on checking to ensure your images have the correct sizing according to what is required. Once you have correctly sized your image, I will then show you a guide on how you can add the image to Microsoft Teams as a custom background.
How to check the dimensions of your image before you use it as a backdrop in Teams
You must understand how to check your images to ensure they are the correct size. If the images are too small or too large, they will not properly fit in the Microsoft Teams UI for the meeting. I provided a guide on how you can check your images to make sure they have the correct size. Read through for a better understanding of ensuring your images have the correct size to fit on the Microsoft Teams UI.
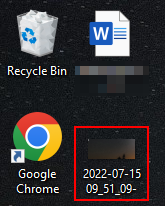
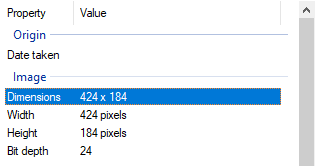
- Firstly, locate your image on your desktop.
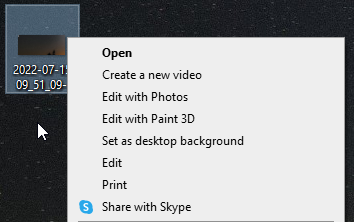
- From there, you need to right-click on the image.
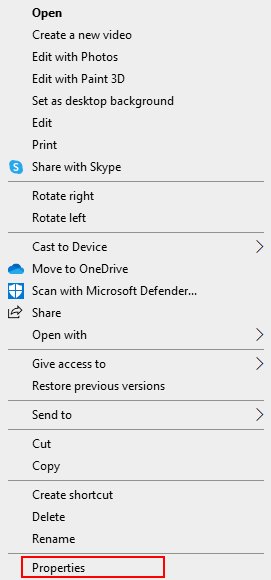
- Now click on the option for “Properties.”
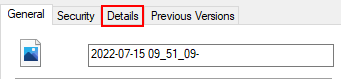
- From there, click on “Details.”
- Under “Image,” check the dimensions.
Image dimensions need to be 1920*1080. If the dimensions are vastly off, then the image will not work on Microsoft Teams, and you will have an obscure image. If the image is too small, it will appear blurry when you apply it to your Microsoft Teams custom backdrop. Microsoft Teams will aim to adjust the image; however, it may appear blurry and slightly warped. Therefore you need to ensure the custom aspect ratio is replaced by the standard 1920*1080 one. If the image is too large, it may compress; however, the compression may cause the image to be cut off from the edges and not show the full picture. If the image is either too large or too small, you will need to either try and rescale it using a tool such as Photoshop, or you will need to replace the image if the image is too small. This slight adjustment will ensure that the image looks professional and properly scaled with the correct amount of detail shown.
An in-depth guide on how to check the dimensions of your image before you use it as a backdrop in Teams
Sometimes the UI of a program or the process may be quite difficult to understand; you may not be able to understand the process or understand individual steps within the process. Therefore we have included an in-depth guide that will allow you to go through the process without any issues. You can use screenshots to help navigate through the UI to better understand what to do to complete the process. You can also use some of our in-depth analysis to assist in the process of allowing you to complete the image size checks.
- Firstly, locate your image on your desktop.
- From there, you need to right-click on the image.
- Now click on the option for “Properties.”
- From there, click on “Details.”
- Under “Image,” check the dimensions.
You must ensure the image size is 1920*1080 to properly fit in the Microsoft Teams meeting UI. If the image is too small, Microsoft Teams will automatically try and adjust the image to make sure it’s the 1920*1080 size; however, you need to make sure you are aware that the image will go blurry if the image scale is too much. If the images’ dimensions are incorrect, you can either find a new image or scale it down if it’s large. If the dimensions are often, you may encounter issues such as blurring, and the image may be cut off sometimes if it’s too large. Even if the image remains uncut, you may still have the image warp or squash to ensure it’s properly.

What can you do to assign a custom background to your Teams meeting
To assign a background on the Microsoft Teams UI is quite simple if the image is properly scaled. Now that you have properly scaled the image to the aspect ratio shown above, you can assign the background to Microsoft Teams. Simply follow the steps, and you will have your background assigned to a meeting in Microsoft Teams.
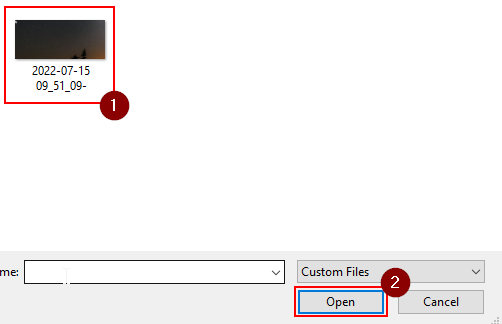
- Firstly, join a meeting.

- Now make sure your camera is on.
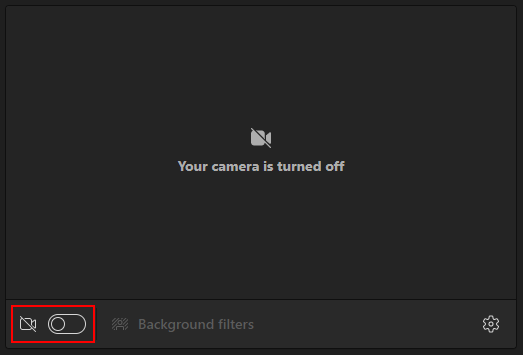
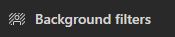
- Now click on “Background filters.”
- From there, select “Add new.”
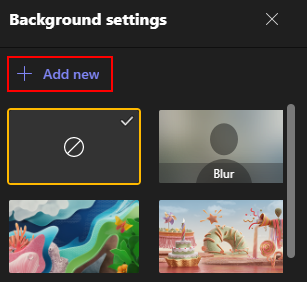
- Choose your scaled image and then click on “Open.”
The background will be assigned to Teams once the steps are complete. As you can see, the background is properly scaled to the Microsoft Teams meeting UI, which is 1920*1080. Microsoft Teams will often sometimes recommend choosing a square aspect ratio; however, this will automatically scale down the image or scale up the image depending on what is required. These are often the maximum and minimum sizes you can have in the UI. However, once the background is assigned, you have a nice clean background to use in meetings. The meeting background can be customized to anything that is required, for instance, a company banner, or it could be something personalized to your taste.
Conclusion
Thank you for reading our content on Microsoft Teams’ custom background dimensions. We have given you the information about what the custom background needs to be within the program. I’ve also given you a guide on how you can assign the background once you have properly scaled it. I’ve also given you the guide on how you can check to make sure the images are scaled correctly. If there are any issues you come across when following the blog, simply drop a comment below, and we will address the issues.