Within Microsoft SharePoint, you may sometimes encounter errors within the library of the application. One of these issues is that any changes you have made to your latest document may not show in the library, and chances are if you are struggling with this issue, then that is why you are reading this article today.
Thankfully, there are several avenues you can look to pursue when attempting to solve this issue. These include:
- Clearing your browser cache.
- Trying an alternative browser.
- Checking your permissions.
Now, do not worry if a simple list of potential solutions is not enough detail for you to work with. For each of the four listed above, we will first discuss the process in a step by step guide. If this also proves to be not enough assistance, then continue reading, as each process will be broken down further into a walkthrough, with accompanying screenshots to better the aid provided.
So, we will first discuss how to clear your browser cache, which may alleviate the issues you are having with your SharePoint library.
Step by step: Clearing browser cache to show latest documents in SharePoint library
- Open your browser of choice (This example will use Microsoft Edge).
- Look to click ‘Menu’, the icon of which is the three dots in the top right corner of your search bar.
- When this opens, click ‘Settings’.
- This will bring you to a new tab. From here, look to the left-sided listing menu.
- Click the subheading, ‘Privacy, search and settings’.
- Now, scroll down slightly, looking for the heading ‘Clear Browsing Data’.
- Click the blue box, titled ‘Choose what to clear’.
- Choose the time from which you want to delete your data.
- Make sure every box is ticked.
- Now, click ‘Clear Now’.
As was aforementioned, do not worry if the steps above alone are not enough for you to work with. We will now break the process down further.
Your first step, after opening your browser, will be to click the ‘Menu’ button in the right corner of your search bar. Again, this tutorial will be utilising the Microsoft Edge browser, so make sure to consider that if your default browser is something else.

After clicking this, a small, drop down menu should appear with numerous settings listed on it. Of everything offered to you, you should look towards the lower end of the list, where there will be an option titled ‘Settings’. Click on that. Should you need any further guidance, then there will yet again be a highlighted screenshot below.

Clicking ‘Settings’ should bring you to a new tab, a dashboard of multiple settings you can opt to edit. You should look towards the left hand side of your screen, where there will be several tabs to choose from. The second one down should be called ‘Privacy, search and services’. It is this you will want to click on.

Clicking this will bring you to a new menu. On this, you will want to scroll down very slightly until you come to the subheading labelled ‘Clear Browsing Data’. Under this will be a blue box titled ‘Choose what to clear’, and it is this that you will want to click.

Choosing to click this will open a small menu on your screen, detached from the tab you have been occupying up until this point. There will be four tick boxes, all of which should be ticked by default. Now, it is of your choosing as to which aspects of the cache you wish to delete, be that an option or a time range.
It seems worth saying, however, that clearing your entire cache will free up the most space, and therefore it would perhaps give this method the best chance of working.
Once you have decided the boundaries for the cache space you wish to delete, click ‘Clear Now’, the button at the bottom of the menu.

If this has served to resolve your SharePoint library issue, then great! If not, fear not and read on as we cover the next three potential solutions.
Now, trying an alternative browser to your default one is not really something that needs a tutorial. It is as simple as it seems, and is in no way a trick. Just load a new browser, and see if your SharePoint is working any better.
Moving down the options at the start of the article, the next one listed is to edit the permissions of your SharePoint. In order to do this, you must access ‘Site Permissions’ via ‘Site Settings’ on SharePoint. Again, there will be steps and a detailed breakdown to follow this paragraph.

Step by step: Edit SharePoint permissions to view latest documents in SharePoint library
- Log into Microsoft SharePoint.
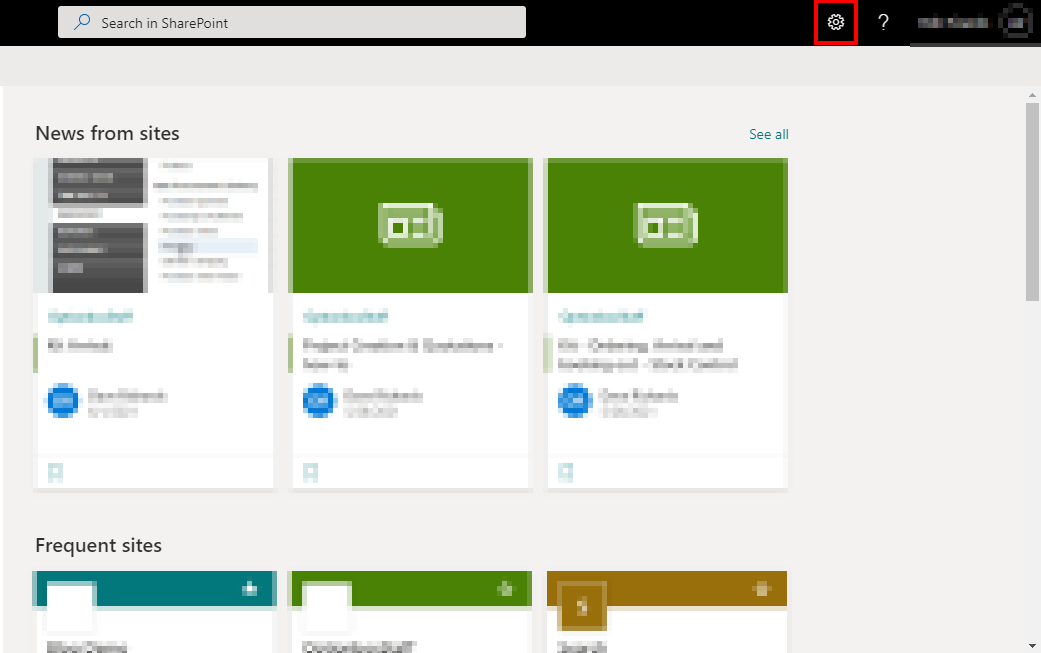
- Click the ‘Settings’ cog at the top of your screen.
- Click ‘Site Settings’.
- Navigate to ‘Site Permissions’.
- Here, click ‘Check Permissions’.
- Search for the user you wish to view permissions of (perhaps in this case, yourself).
- See if you have permissions to change documents.
Now, whilst this is not something you may be able to edit there and then, finding out if you have permissions to create, manage or edit subsites will offer you an insight as to why your new changes may not be saving.
So, first, login to Microsoft SharePoint. You can either do this manually, or via the application launcher in another Microsoft application, such as Outlook.

Opening SharePoint will, obviously, bring you to the SharePoint dashboard. From this screen, look towards the top of the screen and find the settings cog.
Clicking this will open a new menu on the right side of your screen. Look for the option titled ‘Site Settings’, and click that.

Clicking ‘Site Settings’ will bring you to a menu littered with numerous outlets of settings for you to browse. Under the first subheading, ‘Users and Permissions’, will be an option titled ‘Site Permissions’, which is the option you will want to click.

When you have opened the permissions, you should look to click ‘Check Permissions’, which has been highlighted below.

Here, enter your name into the search bar, and from there you will be able to see what permissions you have been allowed within SharePoint. If you see one that you feel is altering your ability to save the latest changes you have made within your SharePoint library, then it may be worth discussing.
Thank you for taking the time to read this blog, I hope it was as helpful as you wanted it to be! As is the case with every piece we post, if you run into any issues whilst following it, or simply wish to let us know your thoughts, then please do not hesitate to get in touch with a member of our team.