 Key Takeaways
 Pages in Microsoft Loop are used to build and organize project components. You can also share pages, allowing you to construct projects with your team in realtime, and across various Microsoft 365 applications. [More…]
 To add content to a page, you can select a template at the bottom, or create your own by typing a forward slash / and selecting a component from the list. [More…]
 To share a page, click the “Share” button at the top, or hover over the page you want to share in the left menu and click the
 ![]() three dots.
three dots.
You will have the option to copy the page link. But if you’d like to embed the page in another application, select the option to share as a ![]() “Loop component.” [More…]
“Loop component.” [More…]

Pages in Microsoft Loop are like the chapters of a book, where the book is the workspace and the components are the text on the pages. But if you want to know more about pages, and how to use them correctly, then please read on to learn everything you need to know about Microsoft Loop pages.
What are Microsoft Loop Pages?
Pages in Microsoft Loop are spaces to create your project’s components. Pages can host numerous components, and you can share the whole page or even specific components within them. You can also create subpages to help you organize your project.
We’ve also created a video to help show you what Microsoft Loop pages are:
 Overview: What are the three key parts of Microsoft Loop?
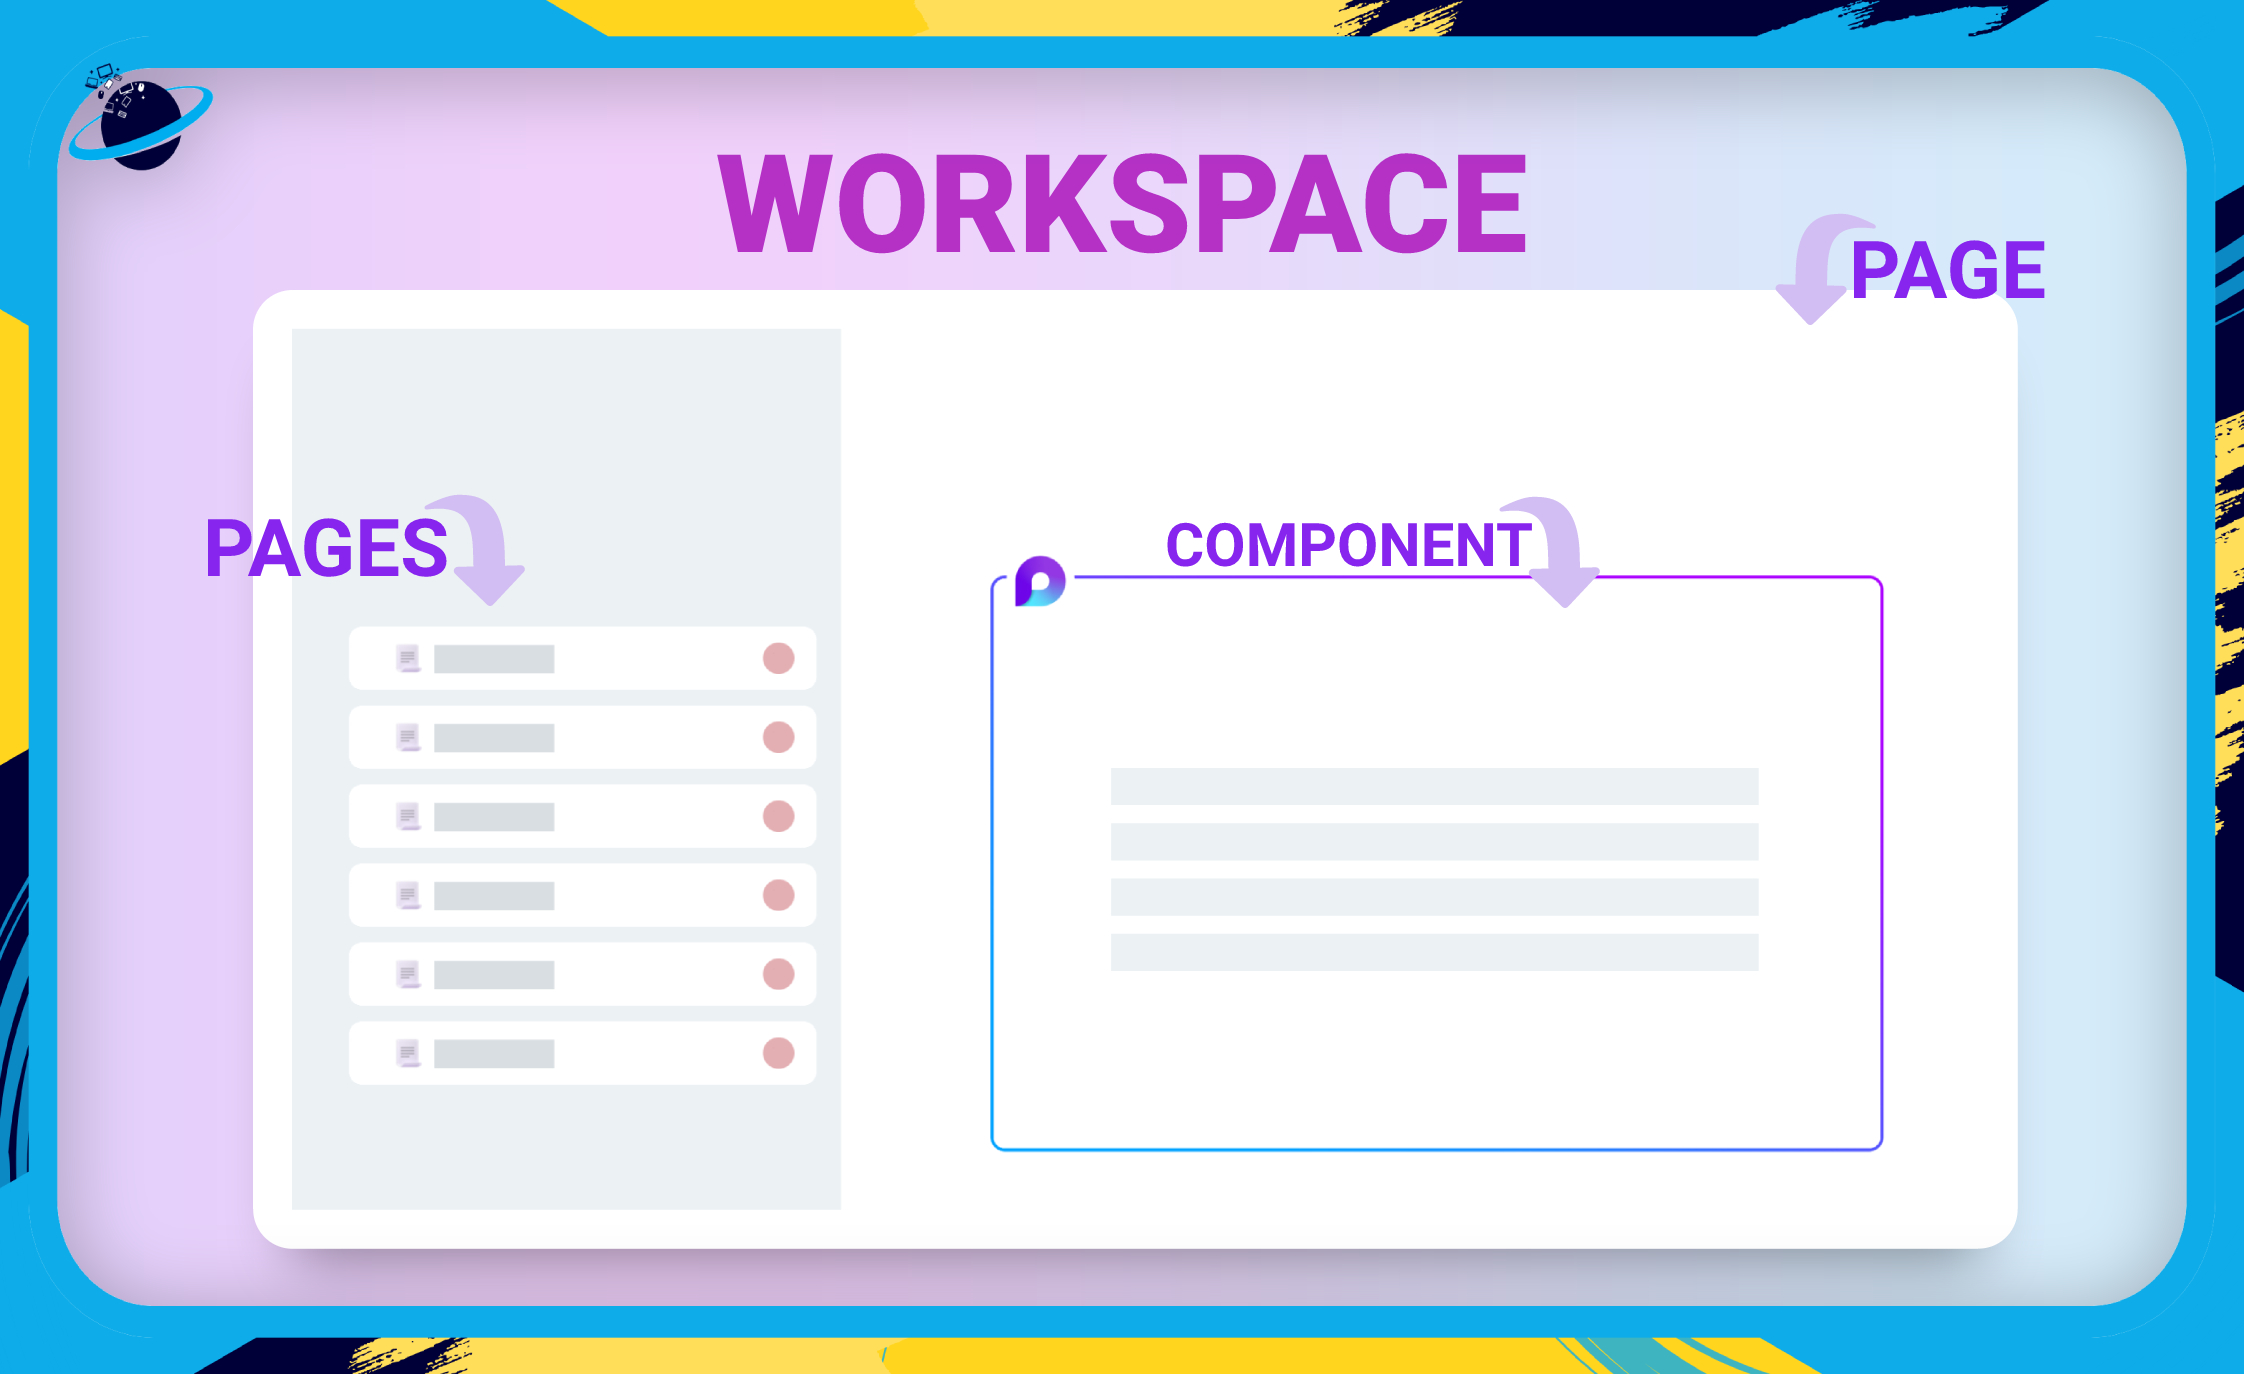
Microsoft Loop is a collaborative tool that enables teams to work on projects from various locations within their Microsoft 365 apps. Shared pages and components are synced in real-time across all instances, ensuring that updates are visible to all team members.
There are three key parts to Microsoft Loop:
- Workspaces.
- Pages.
- Components.
In this guide, we’ll be focusing on pages. We’ll discuss what they are, how to create and share them, and how to embed them in different locations.

 What are Microsoft Loop Pages?
Pages in Microsoft Loop are used to create and organize the components of your project. Pages can host single or numerous components, and you can share them, allowing you to build the project with your team members in realtime.
Components are building blocks, such as tables, headers, lists, and images. So if workspaces are books, pages would be the chapters, and components would be the text within those chapters.

How to create a page in Microsoft Loop
In this section, we’ll show you how to create a page, link, and subpage.
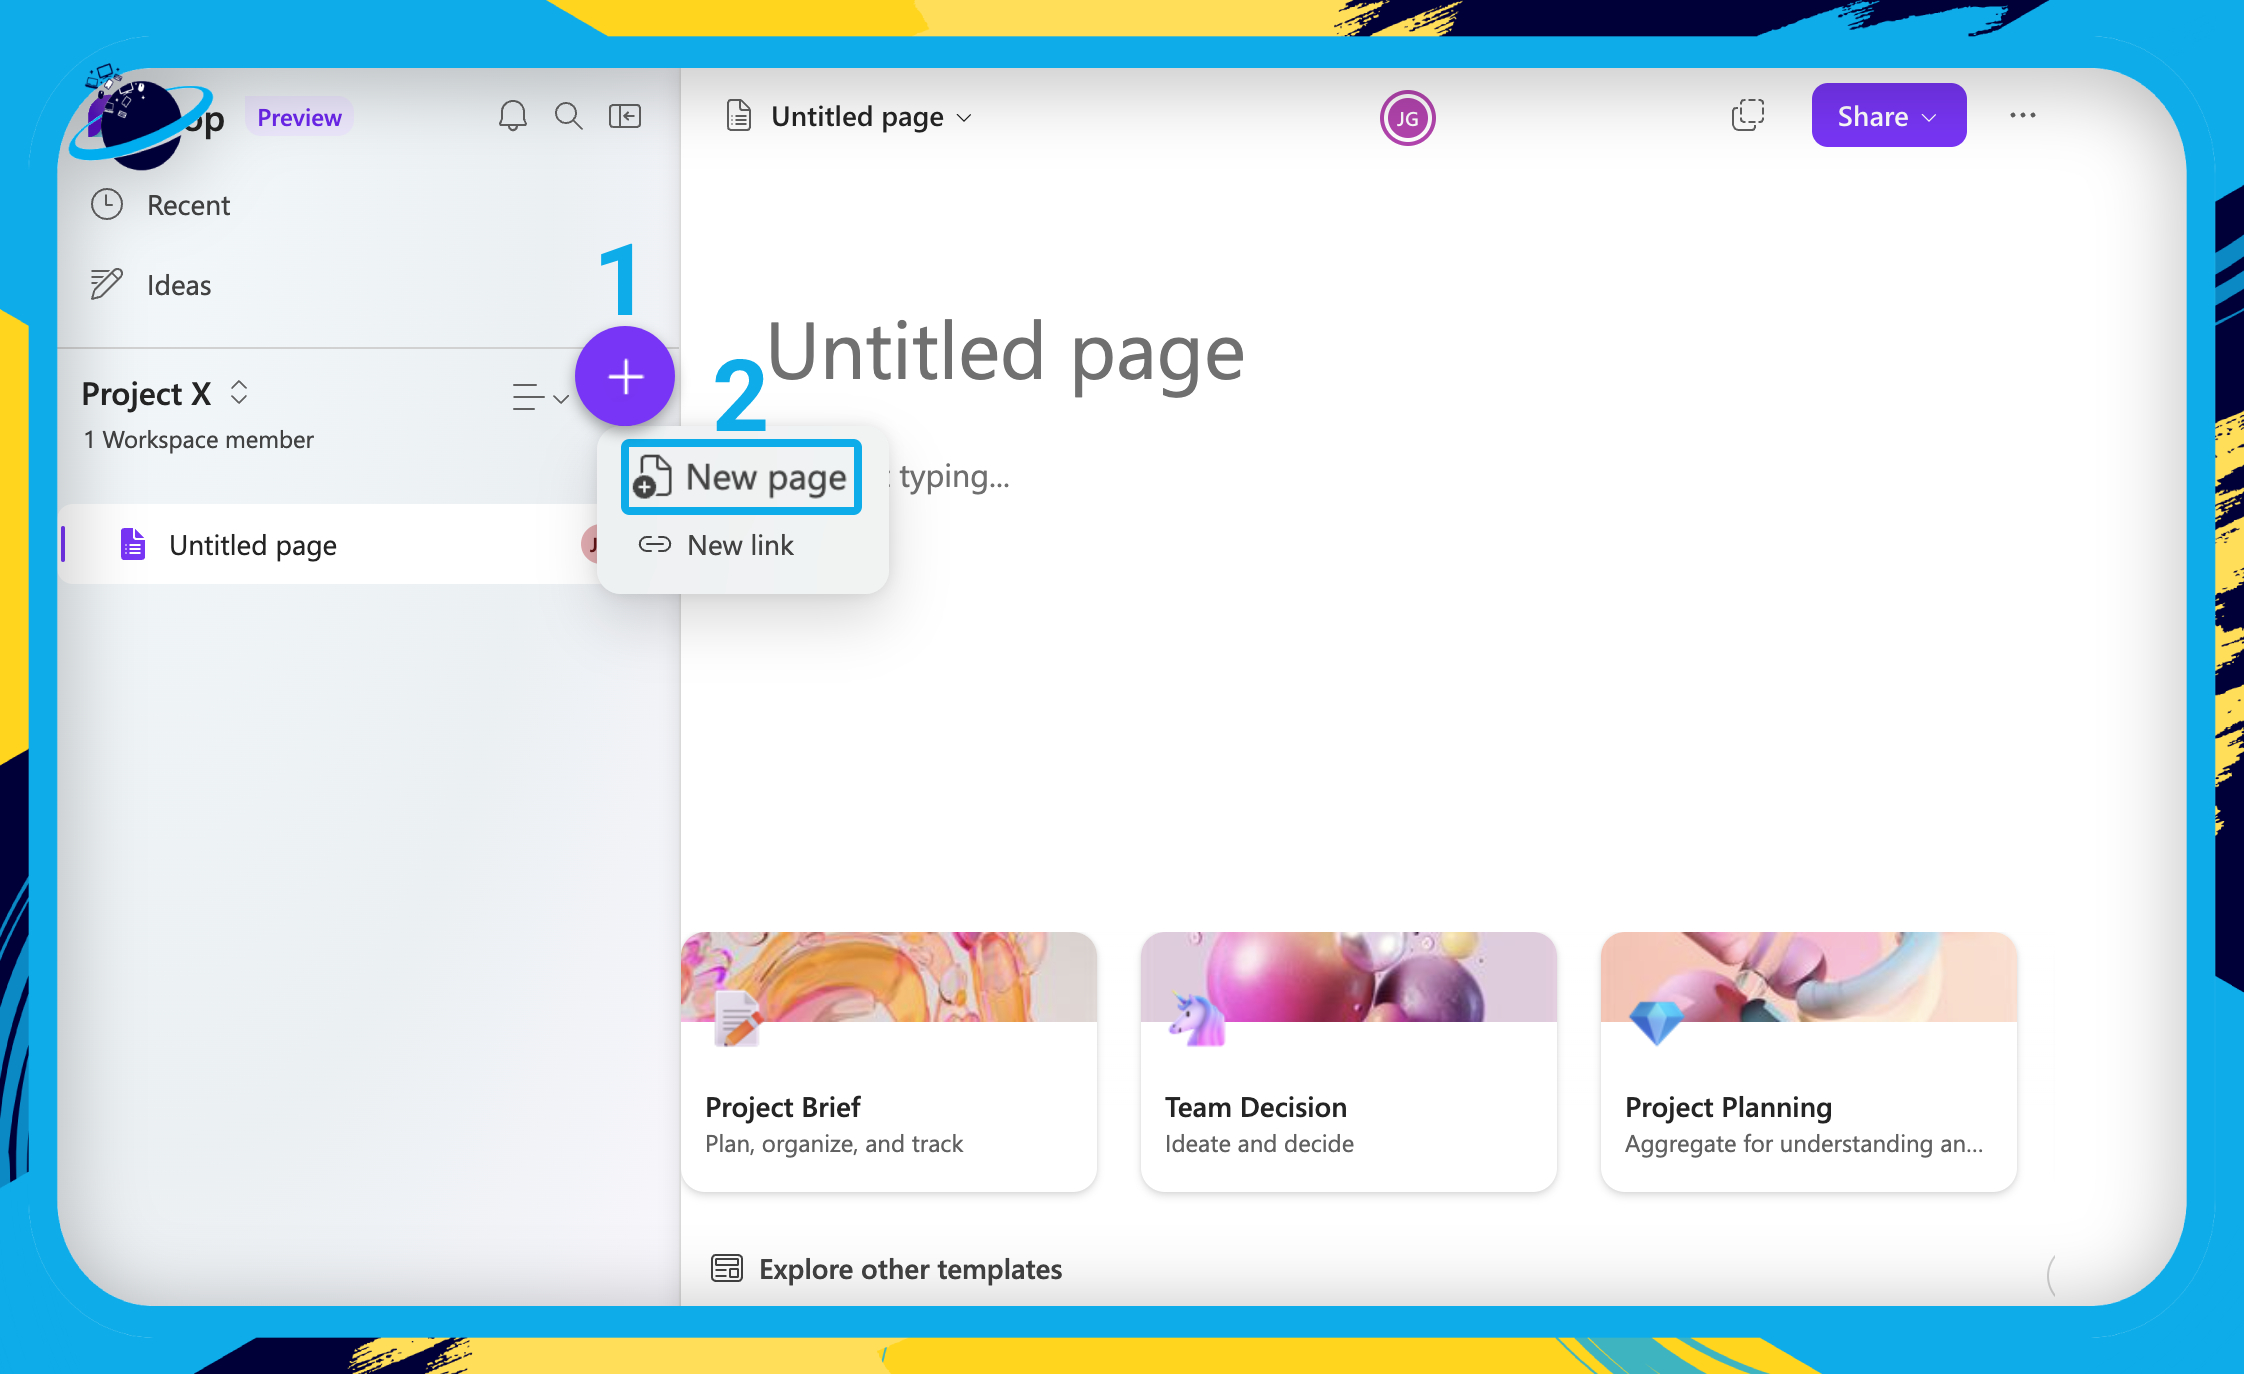
- Start by opening a workspace.
- There, click the
 circular plus icon. [1]
 - You should find two options:
- New page.
- New link.
- Select
 “New page.” [2]
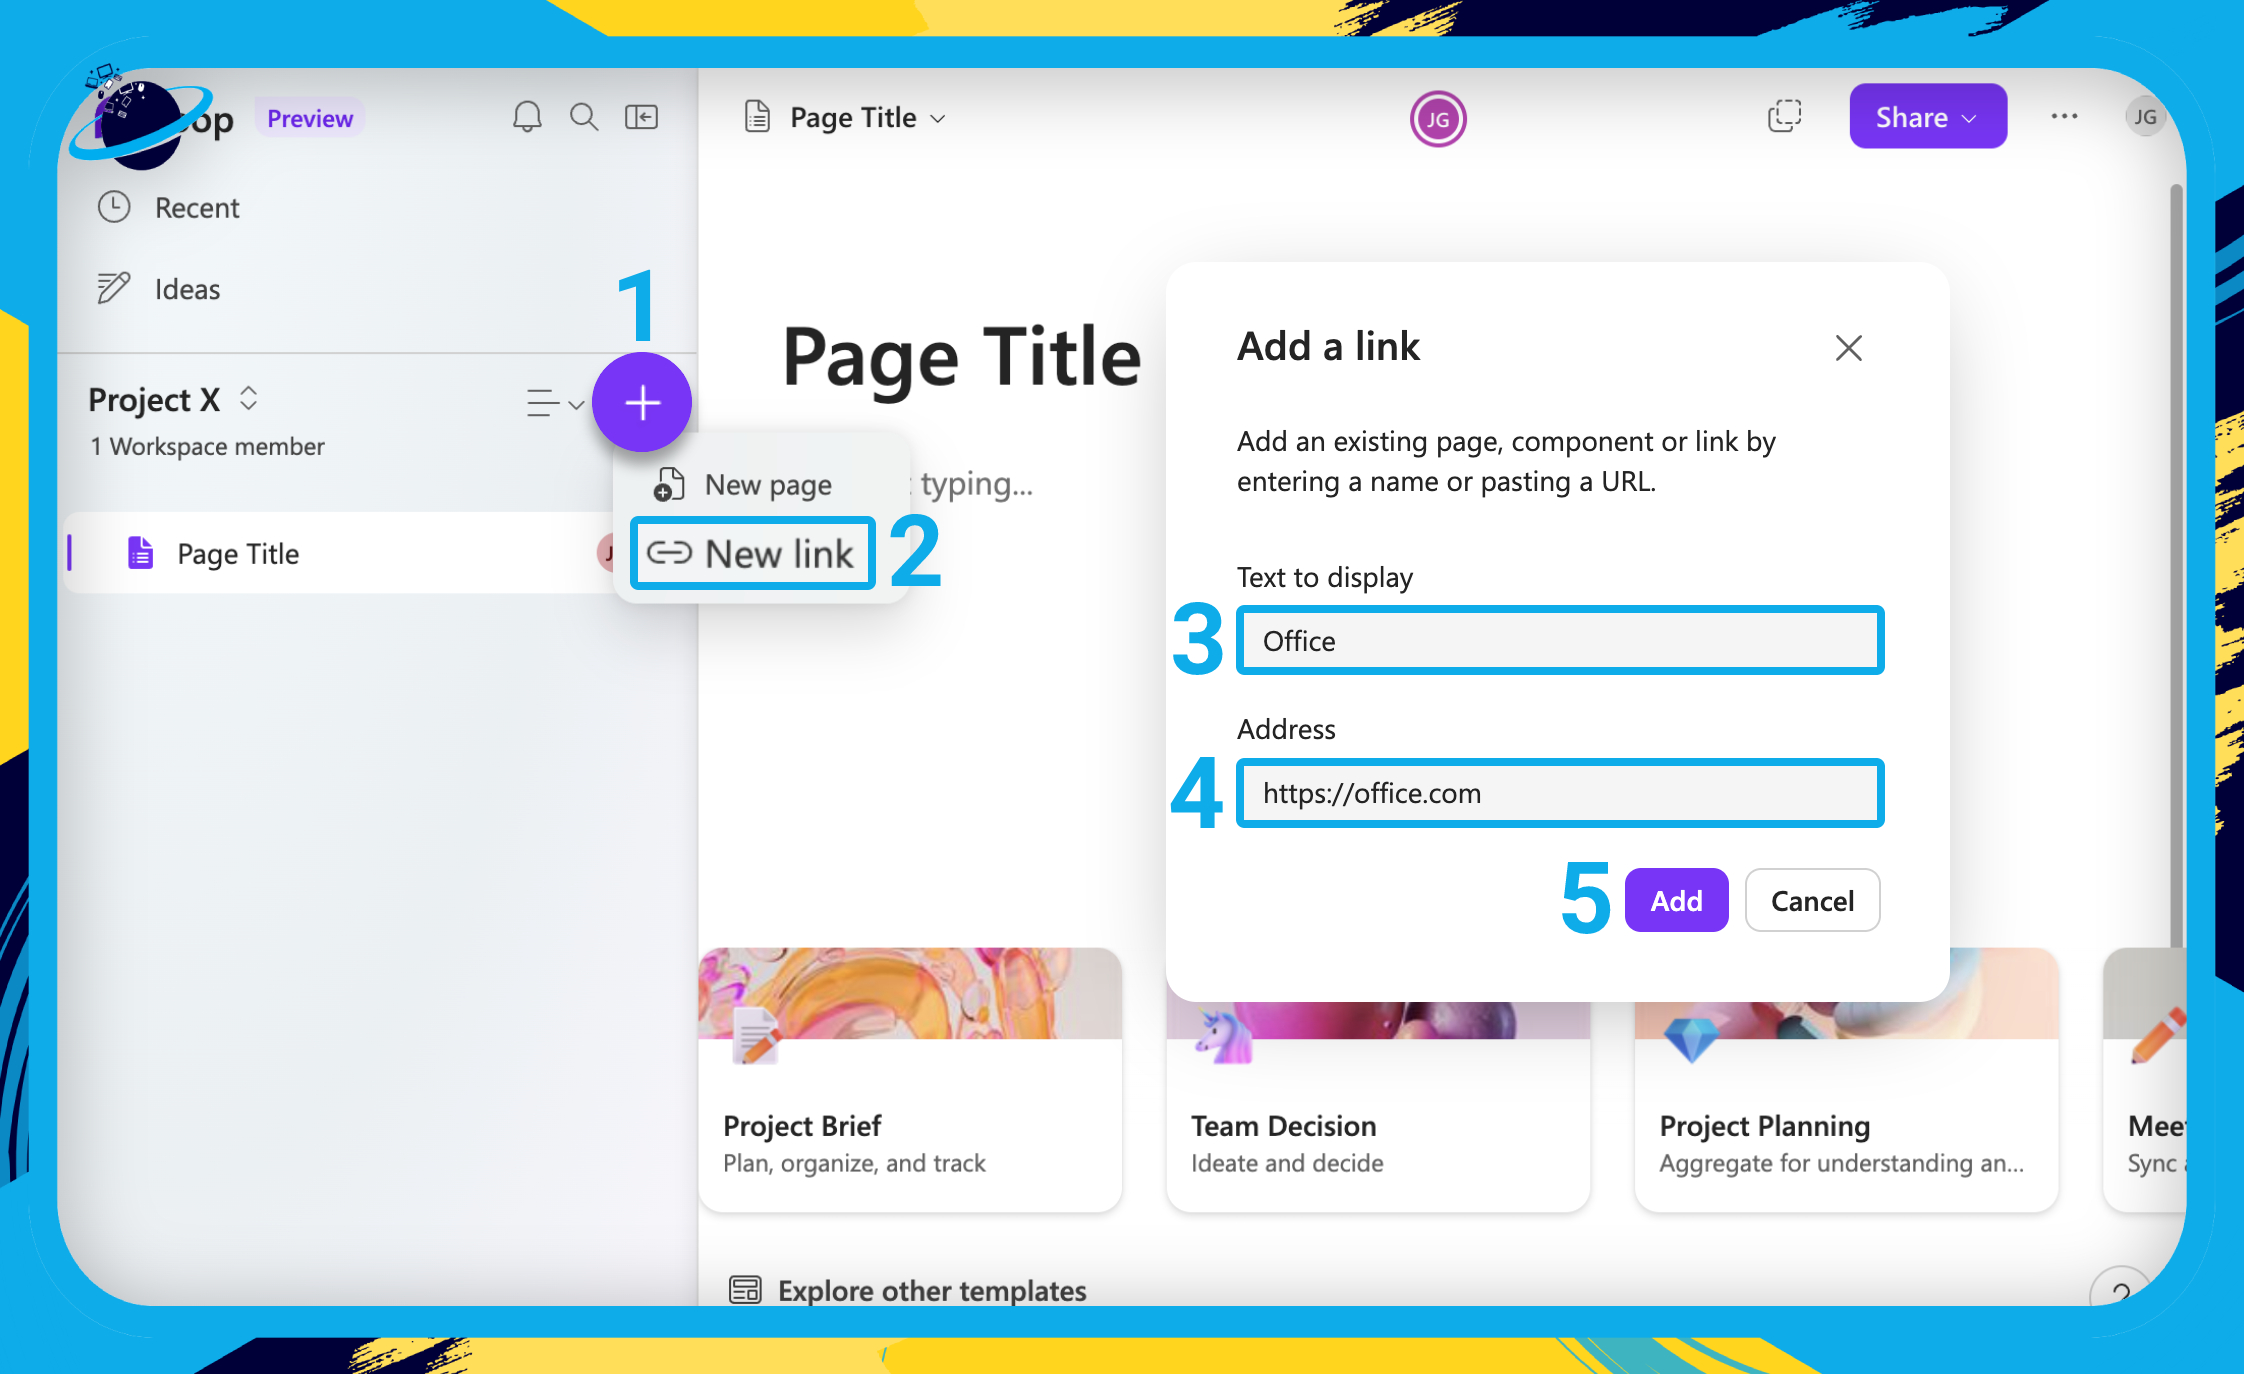
Links will appear on the left menu like pages, however, clicking them will either open a link in a new tab or download a document, depending on the type of link you add.
- To make a link, click the circular plus icon. [1]
- Then select
 “New link” from the dropdown. [2]
 - Add in the text, which will appear like a page title on the left menu. [3]
- Add the link address. [4]
- Then hit the “Add” button. [5]
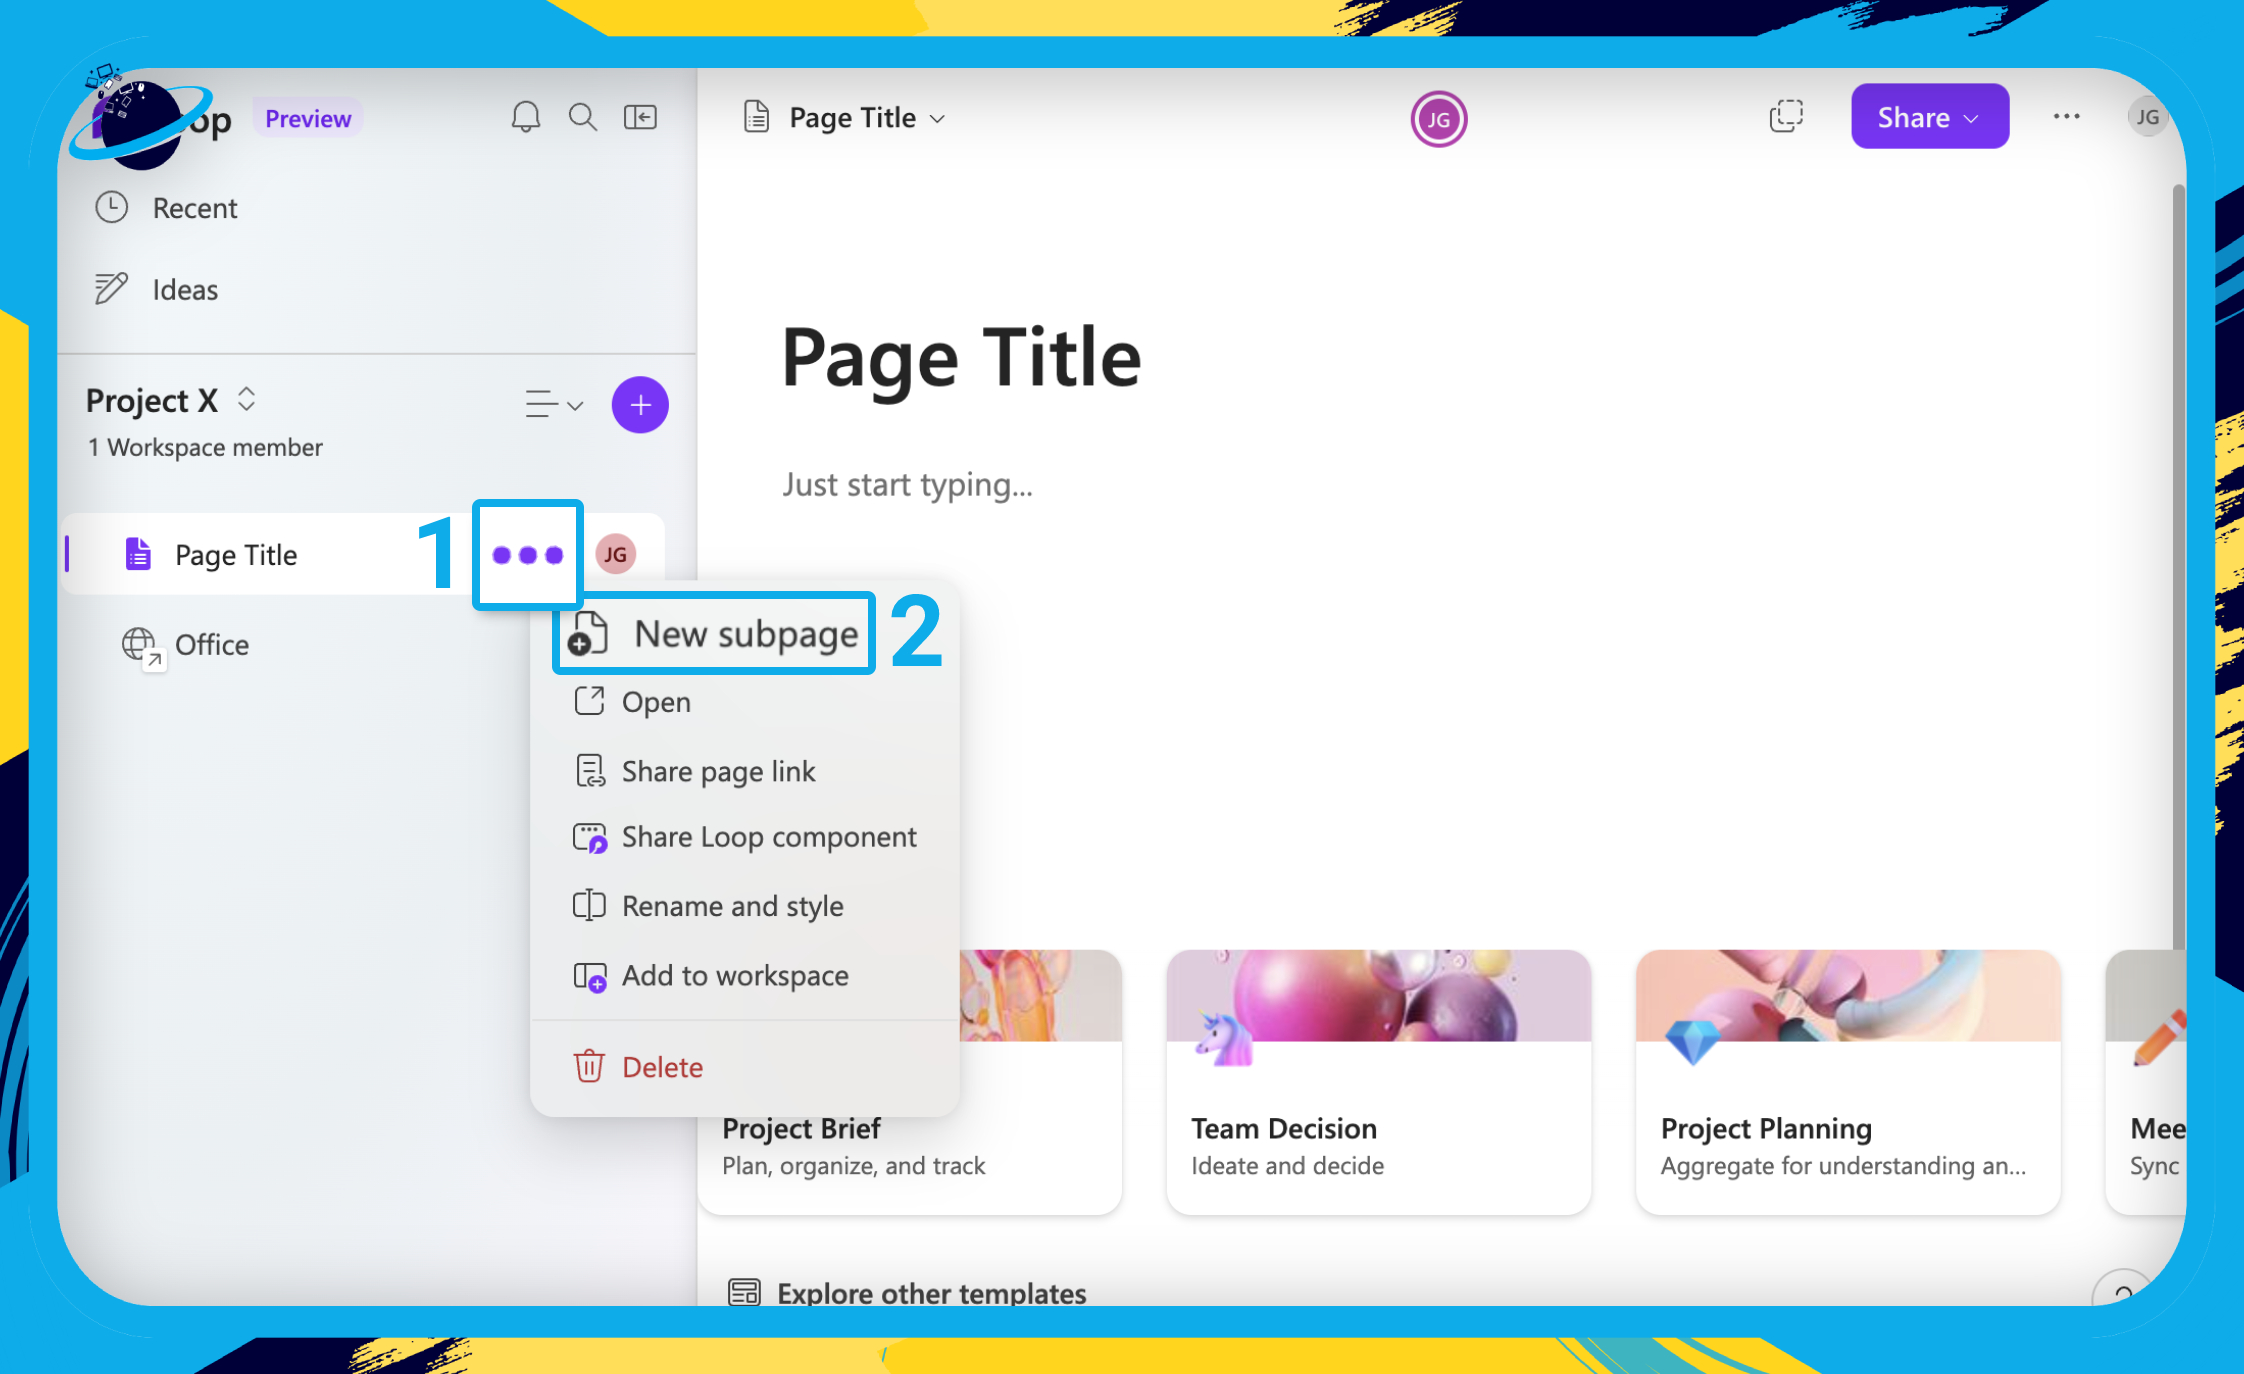
You can also create subpages for your links and regular pages. You can even have subpages within subpages, with a maximum of 4 sublayers.
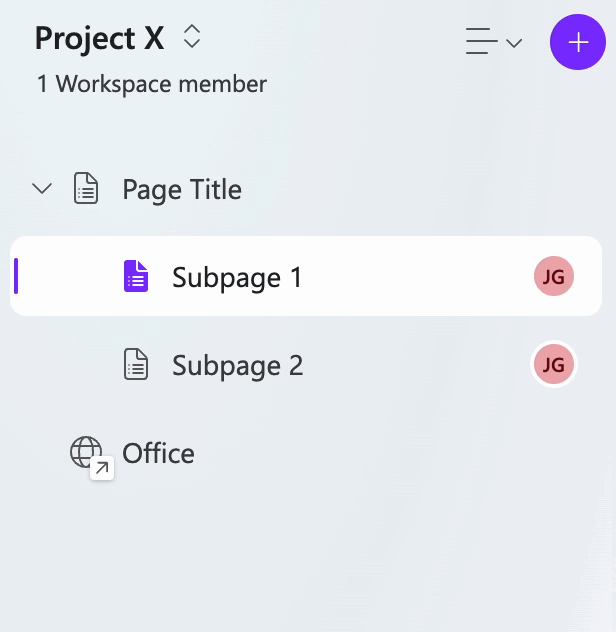
- To make a subpage, hover over your page or link on the left menu.
- Then click the
 three dots. [1]
 - Select “New Subpage” from the dropdown. [2]
If you want to reorder your pages and subpages, you can do that by dragging the pages up or down. You can also drag a page or subpage into another page.

How to modify a page in Microsoft Loop
In this section, we’ll show you how to modify a page, including renaming, deleting, and restoring old versions.
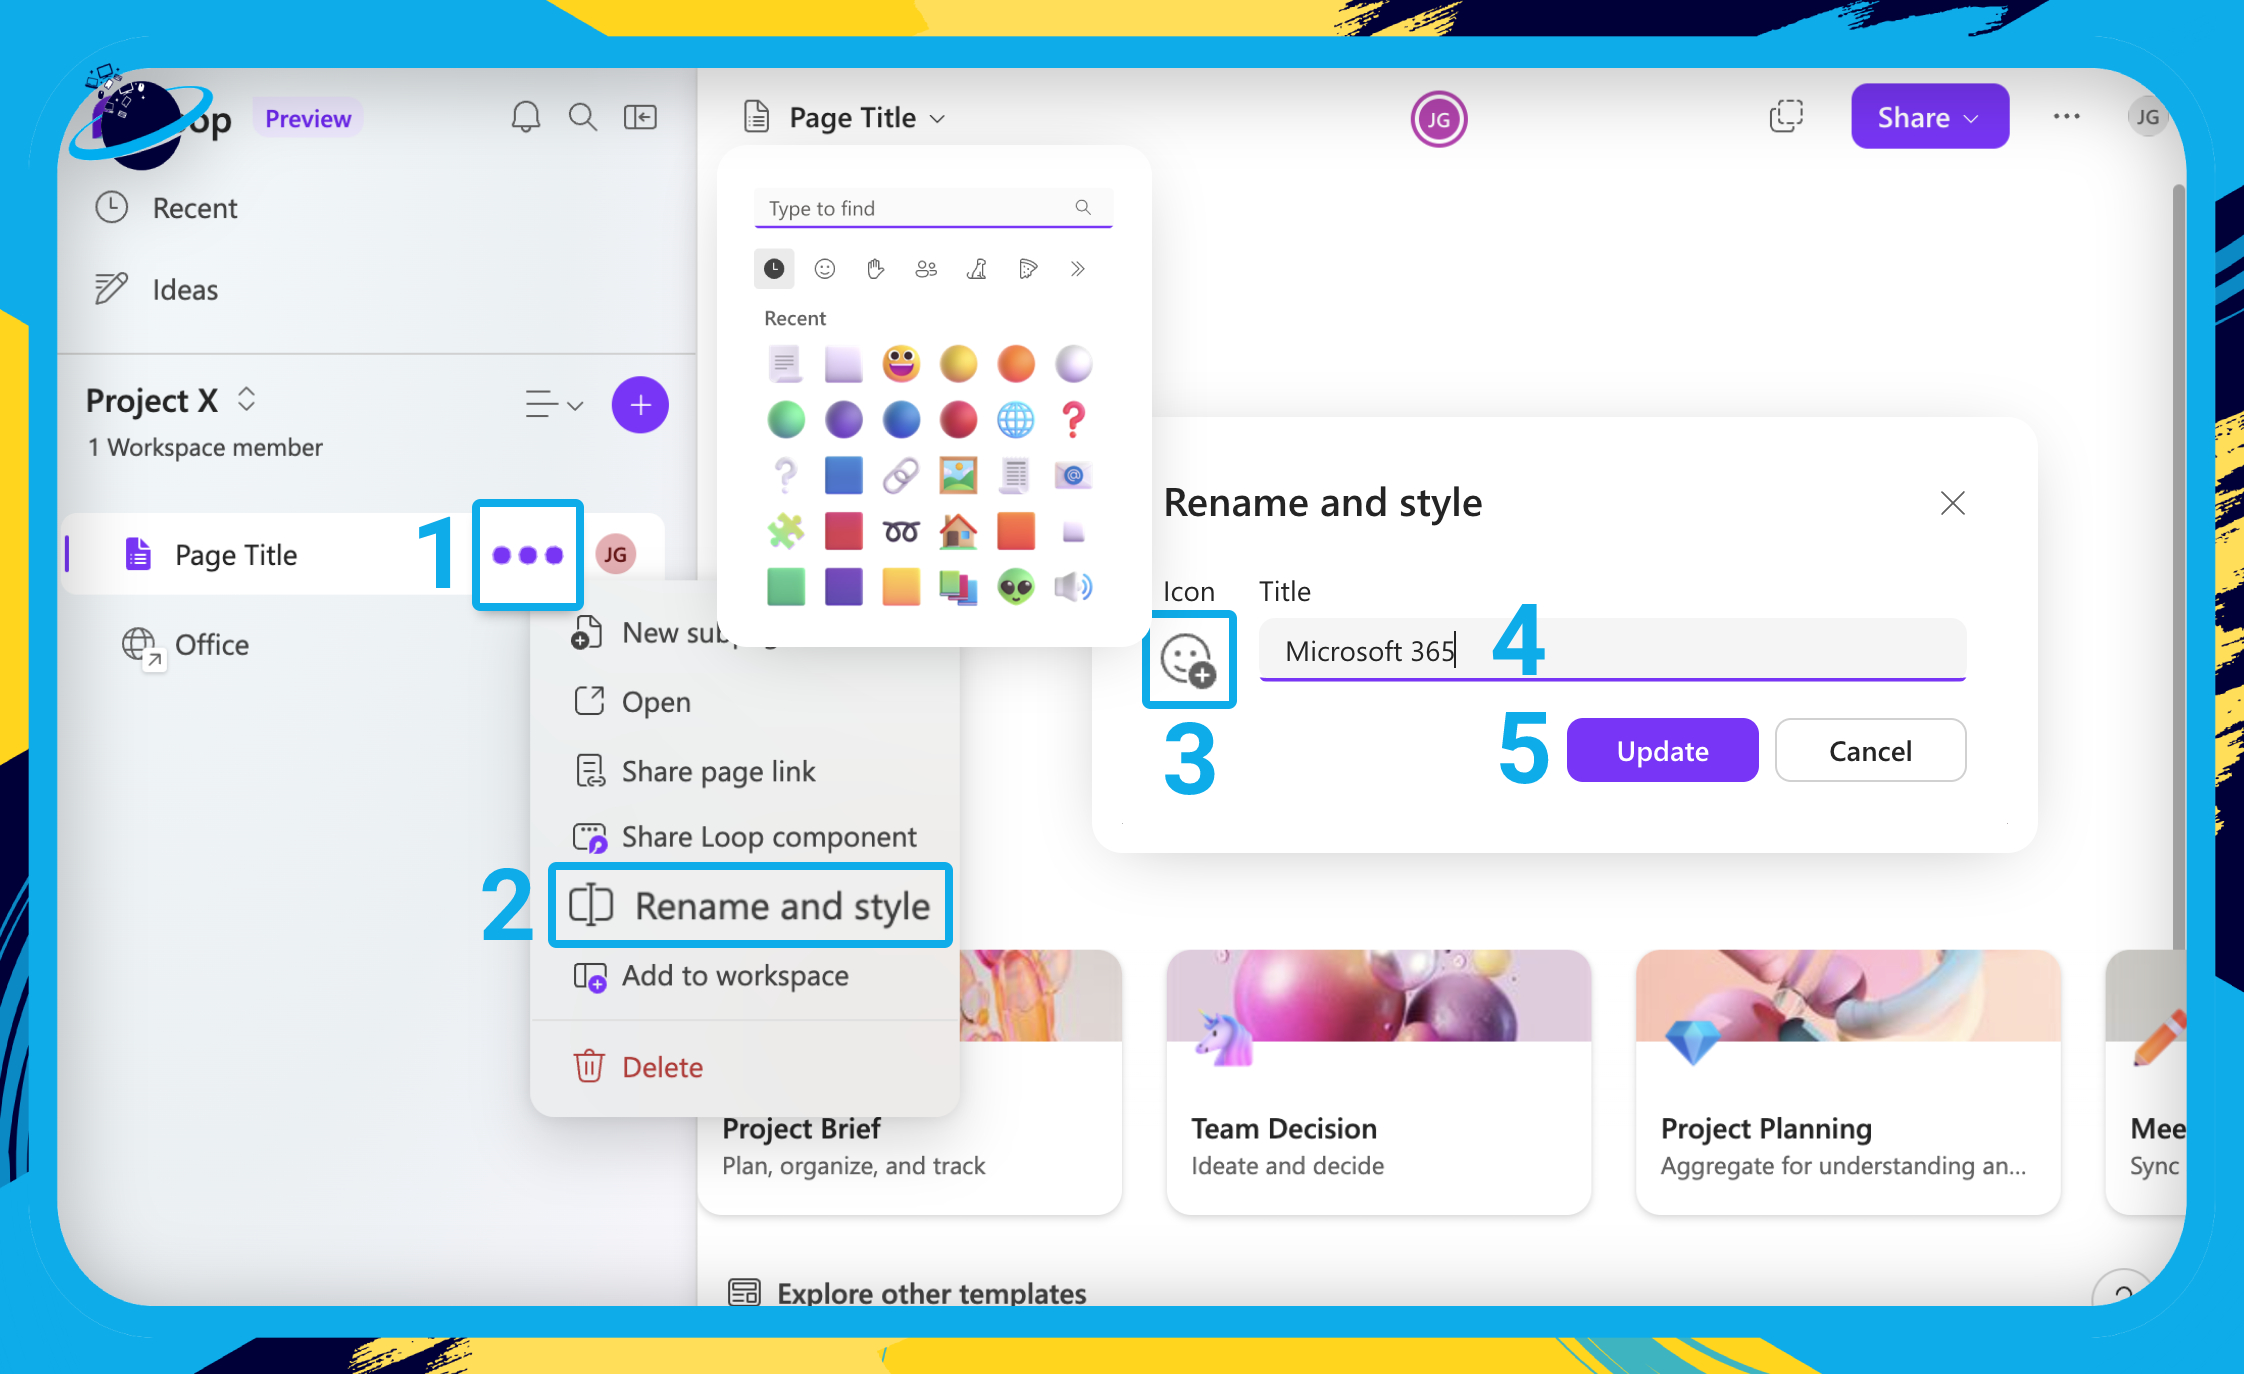
Rename and style the page:
- Hover over the page you want to rename and style.
- Click the three dots. [1]
- Select
 “Rename and style” from the dropdown. [2]
 - Click the
 emoji icon and select a new icon. [5]
 - Add a new title. [4]
- Hit the “Update” button. [5]
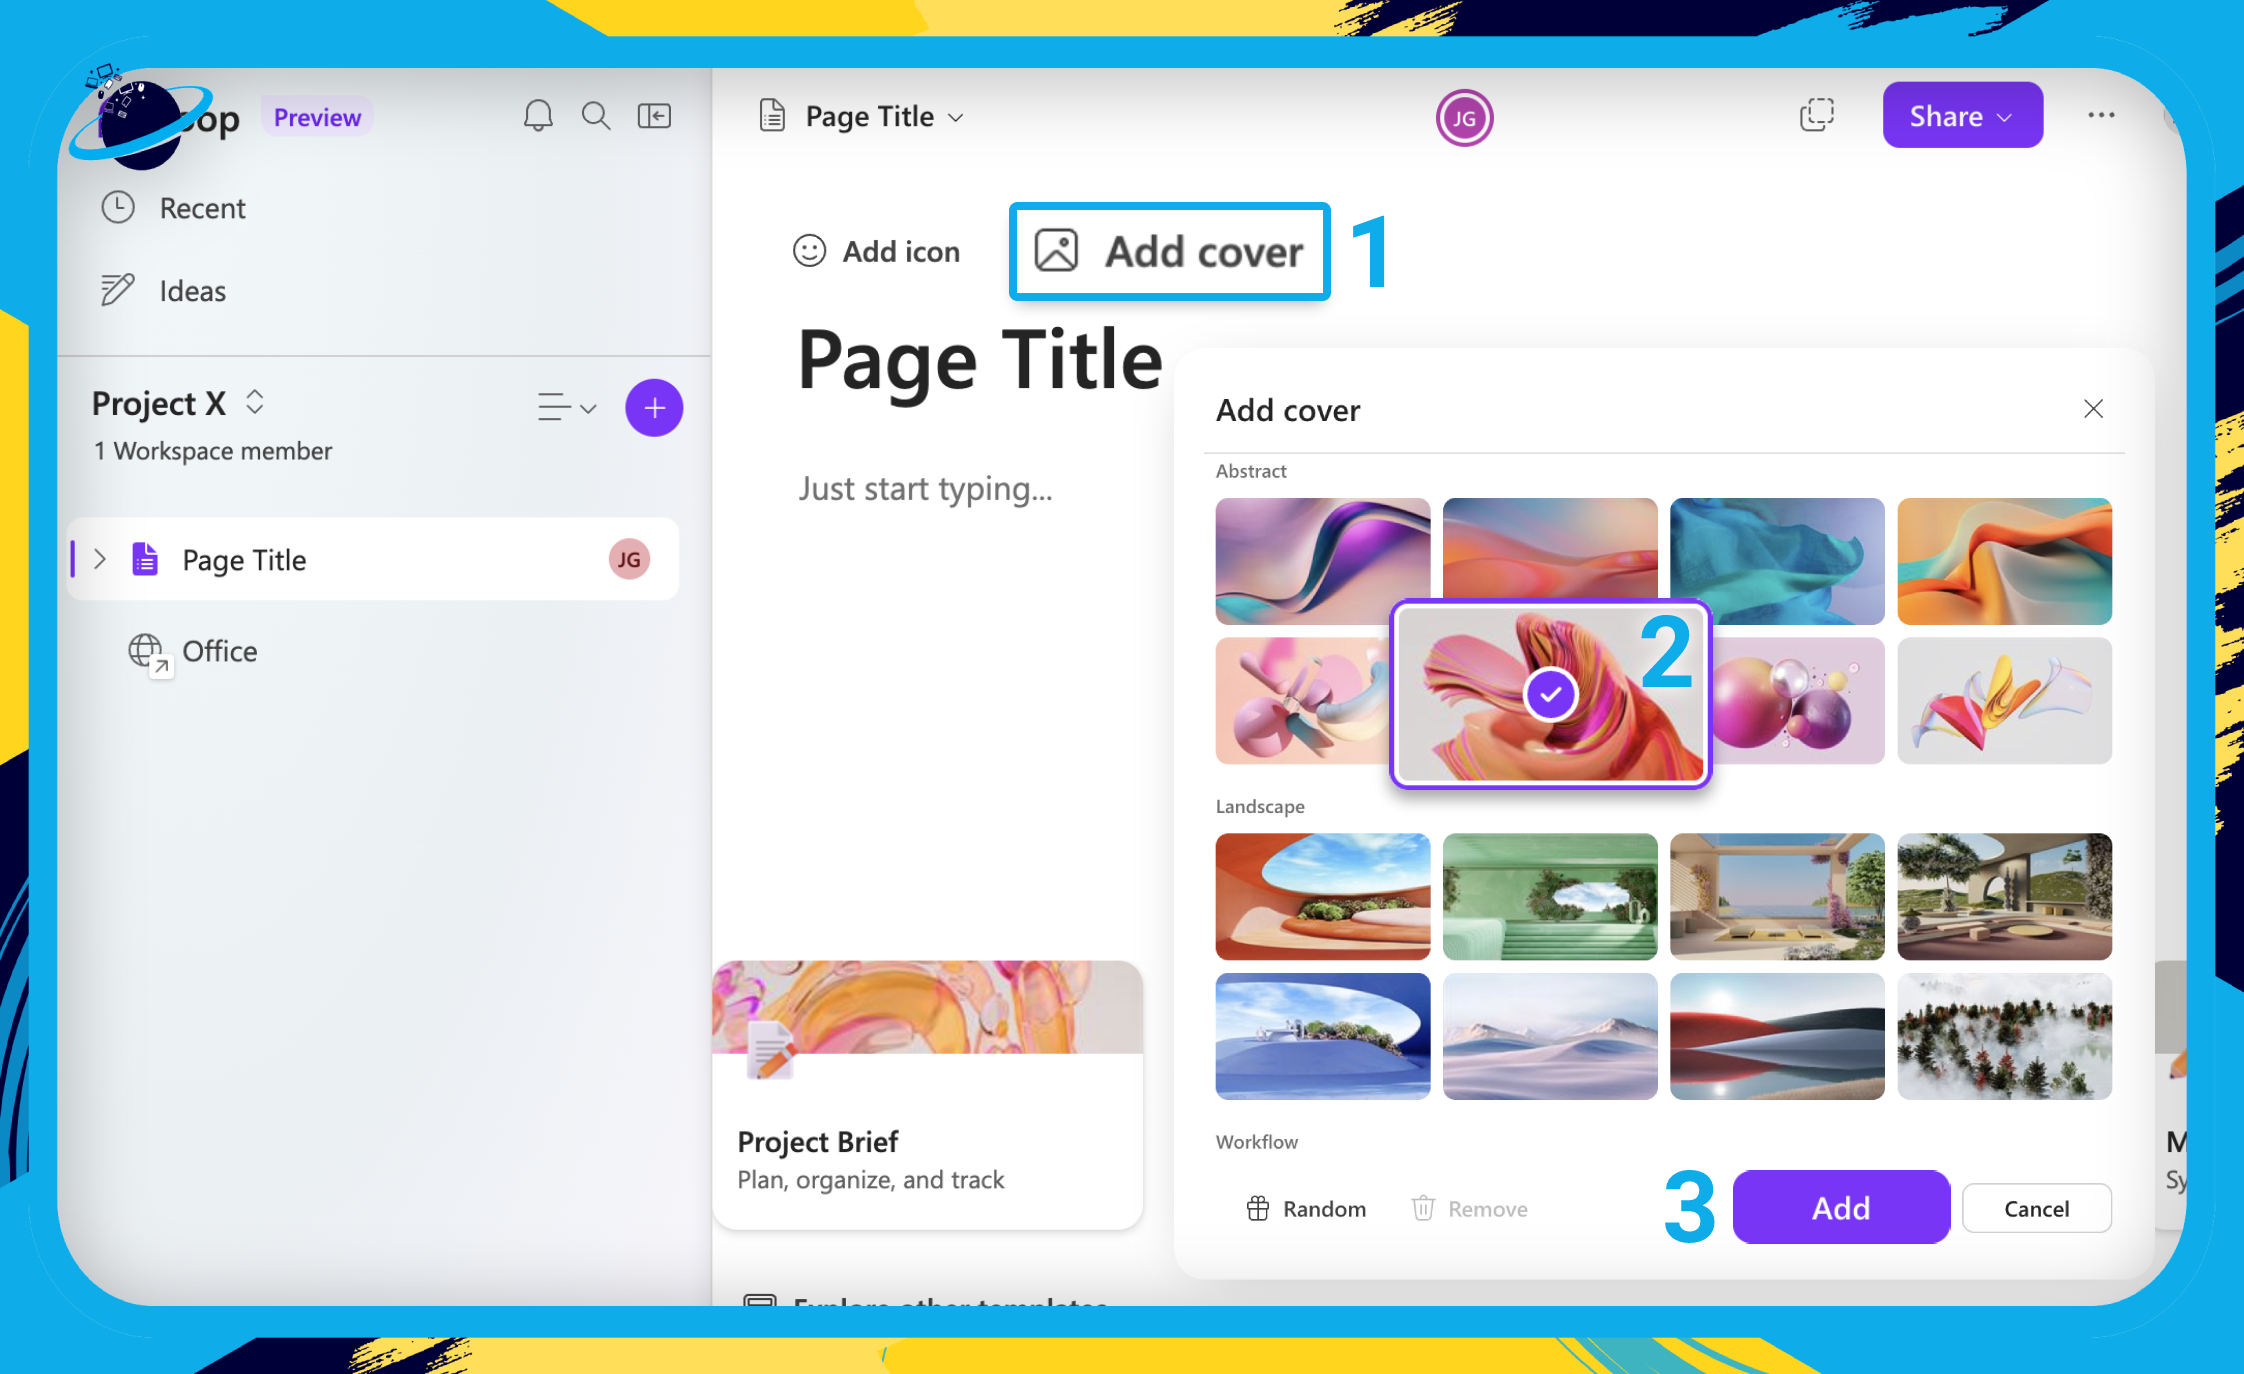
- To change the cover, you need to go into the page.
- There, hover above the page title and click the
 “Add cover” button. [1]
 - You can then select a cover from a list of presets. [2]
- Click “Add” to use the cover you selected. [3]
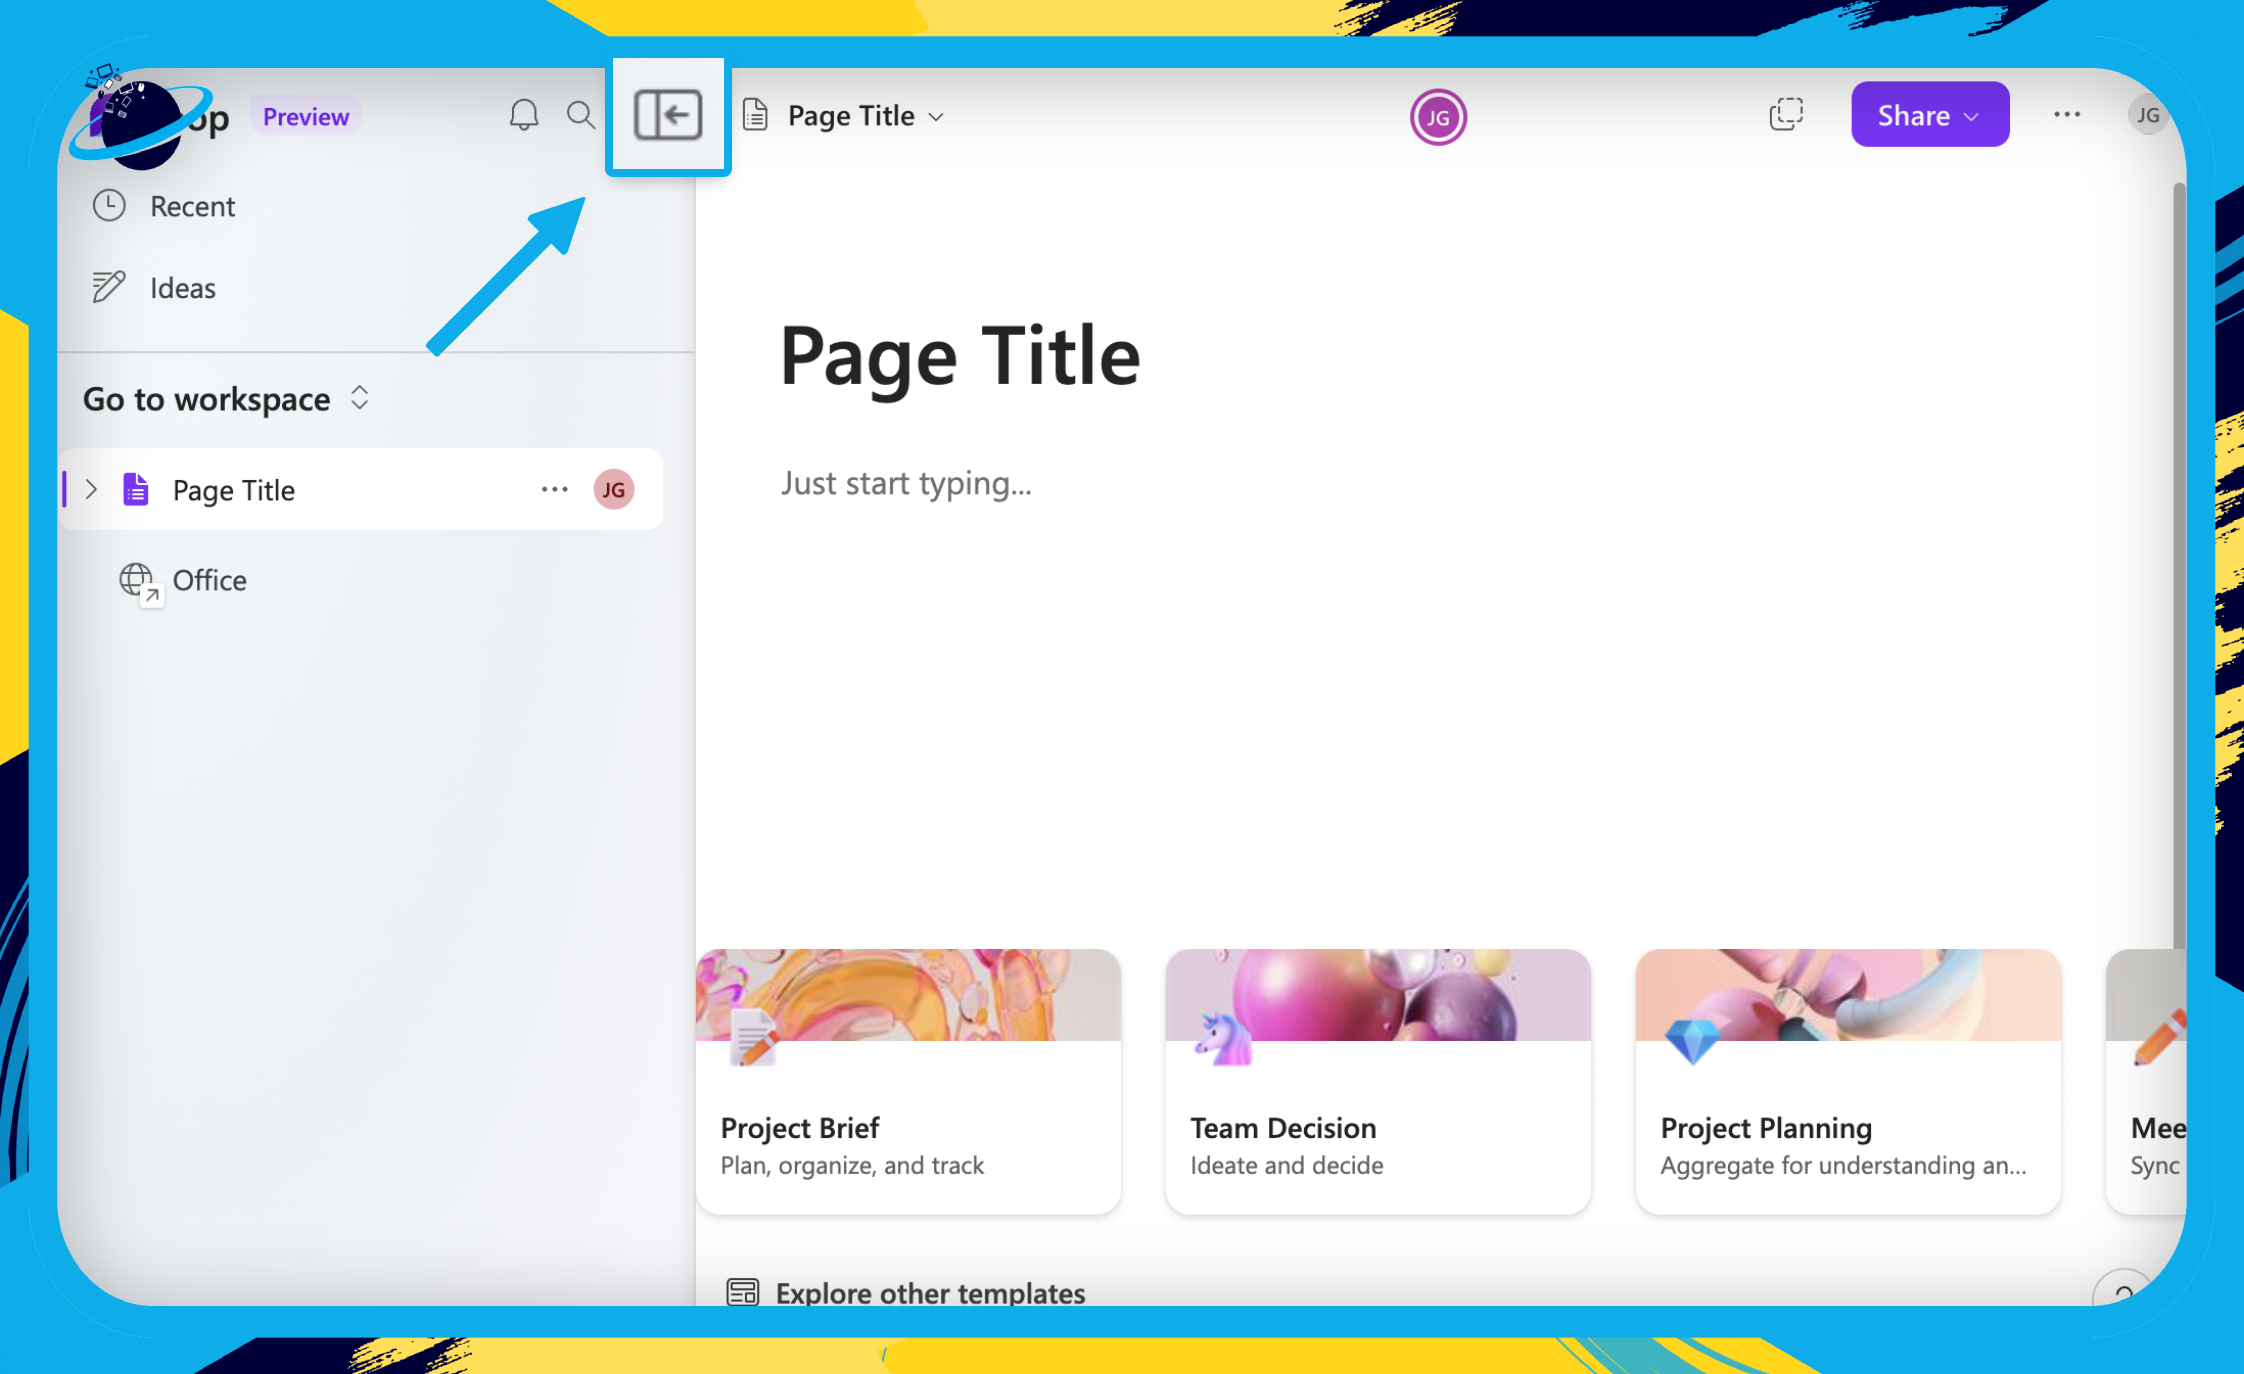
View the page in full-screen:
- To view the page in full-screen, click the
 “Close sidebar” icon in the top left.
 - Click the
 “Open sidebar” icon to return to the default view.
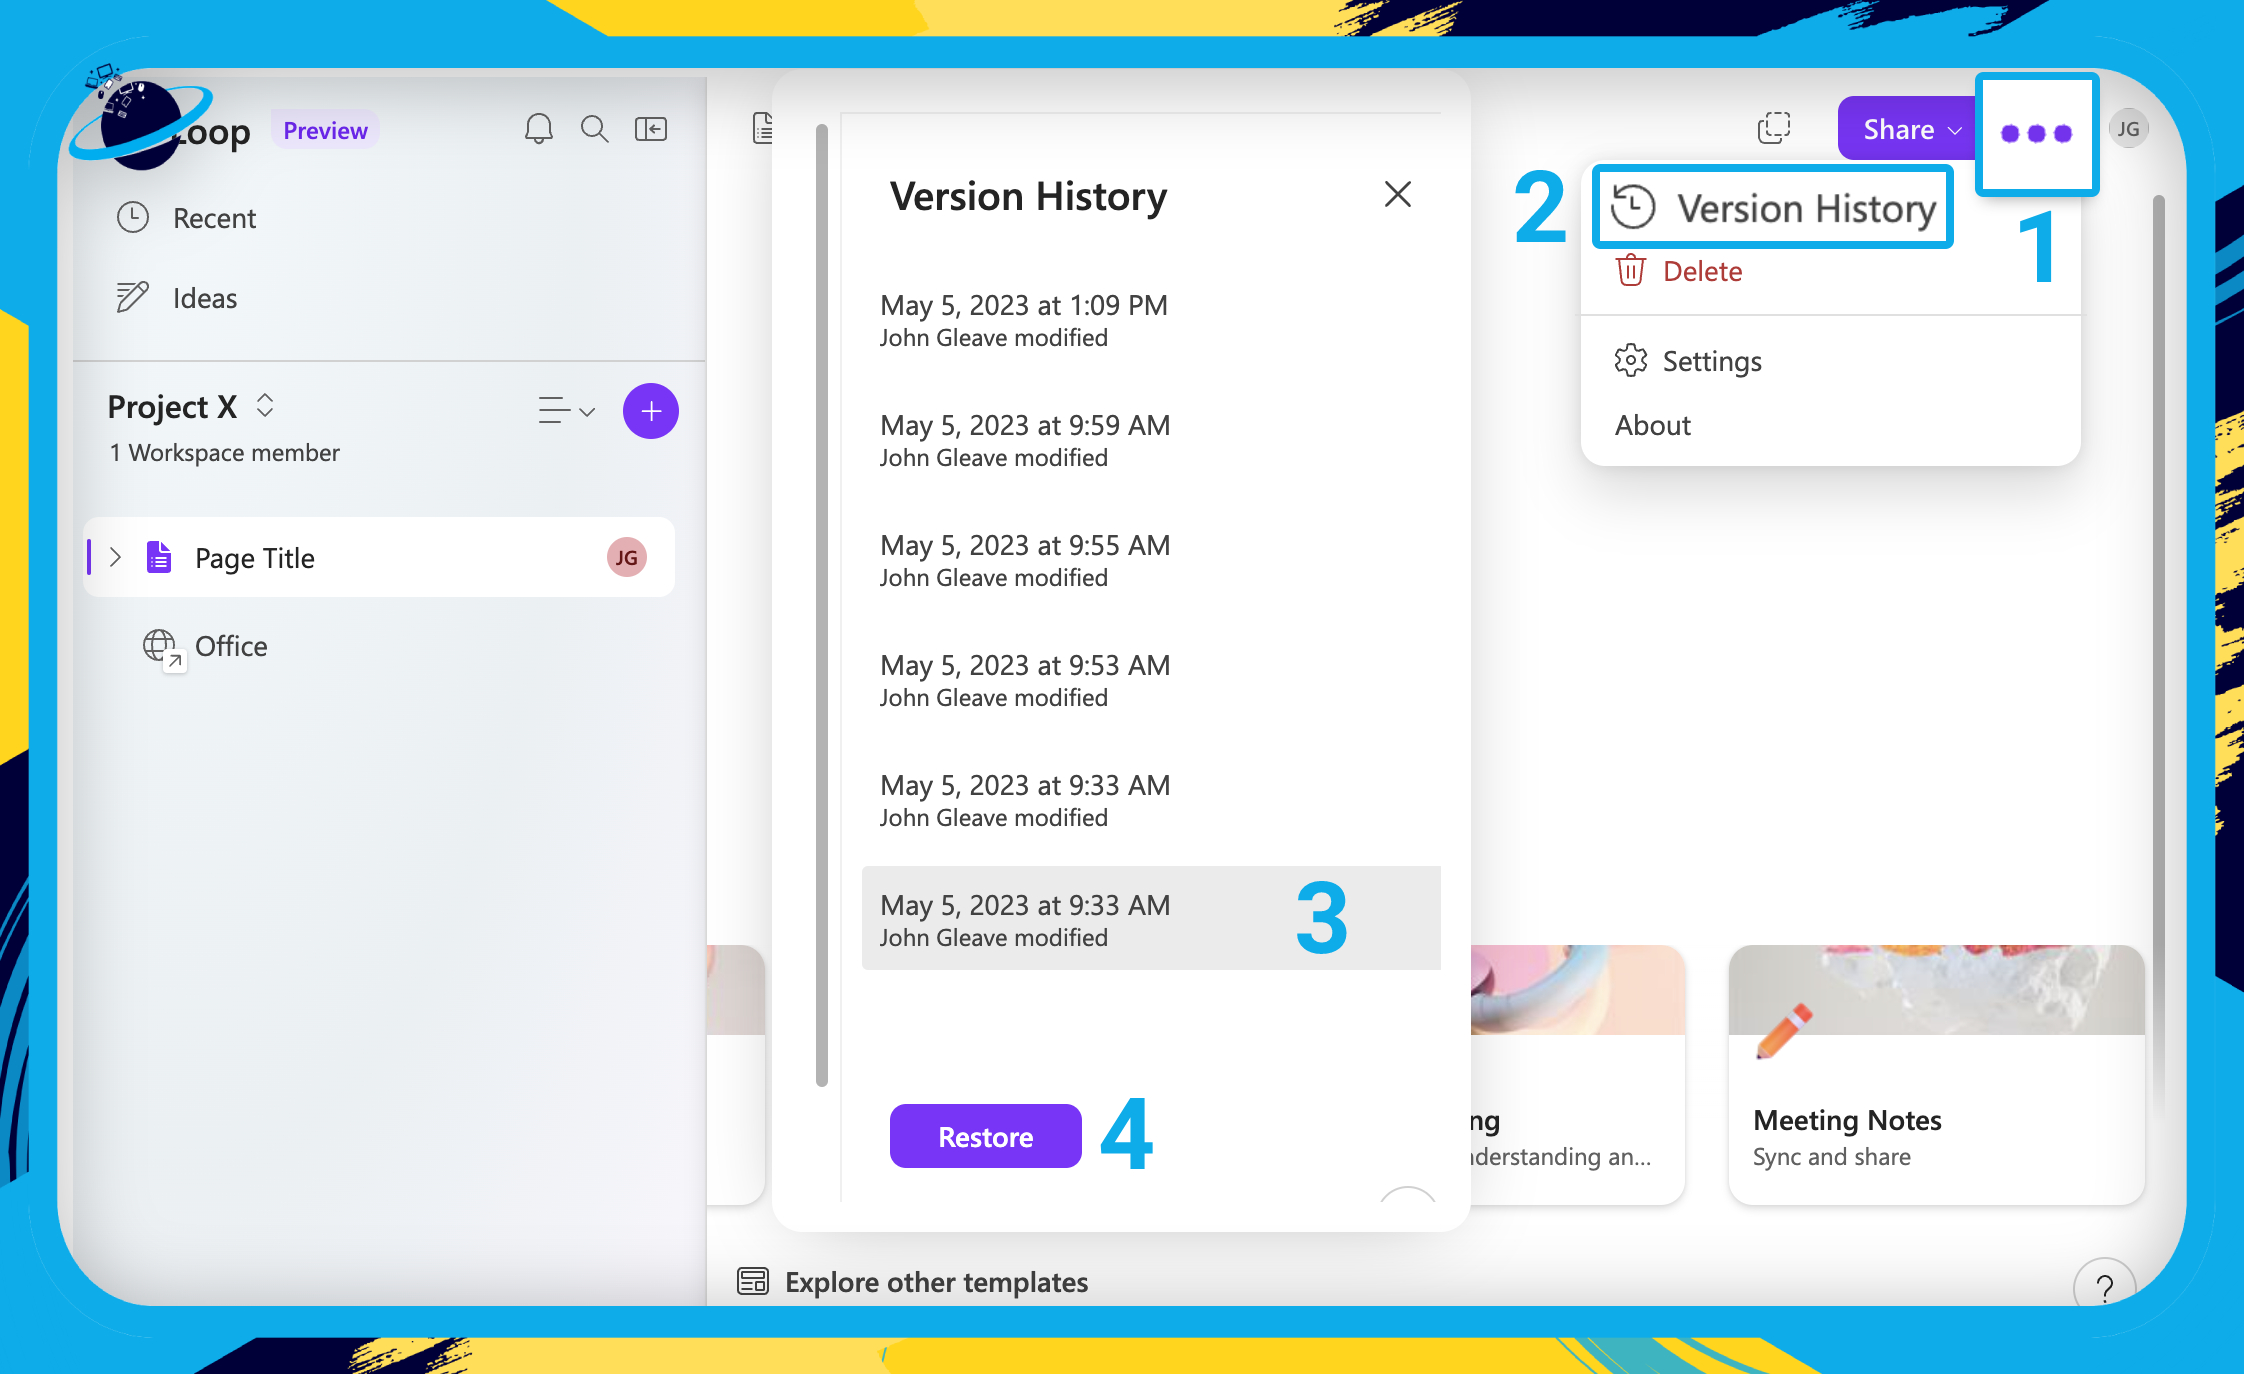
Restore old versions:
- Click the three dots in the top right. [1]
- Select “Version History” from the dropdown. [2]
- A list of previous versions will appear on the right.
- Select an older version that you want to restore. [3]
- Then click the “Restore” button. [4]
Add the page to a different workspace:
- Hover over the page you want to move and click the three dots. [1]
- Select
 “Add to workspace” from the dropdown. [2]
 - Then select a workspace to add your page to. [3]
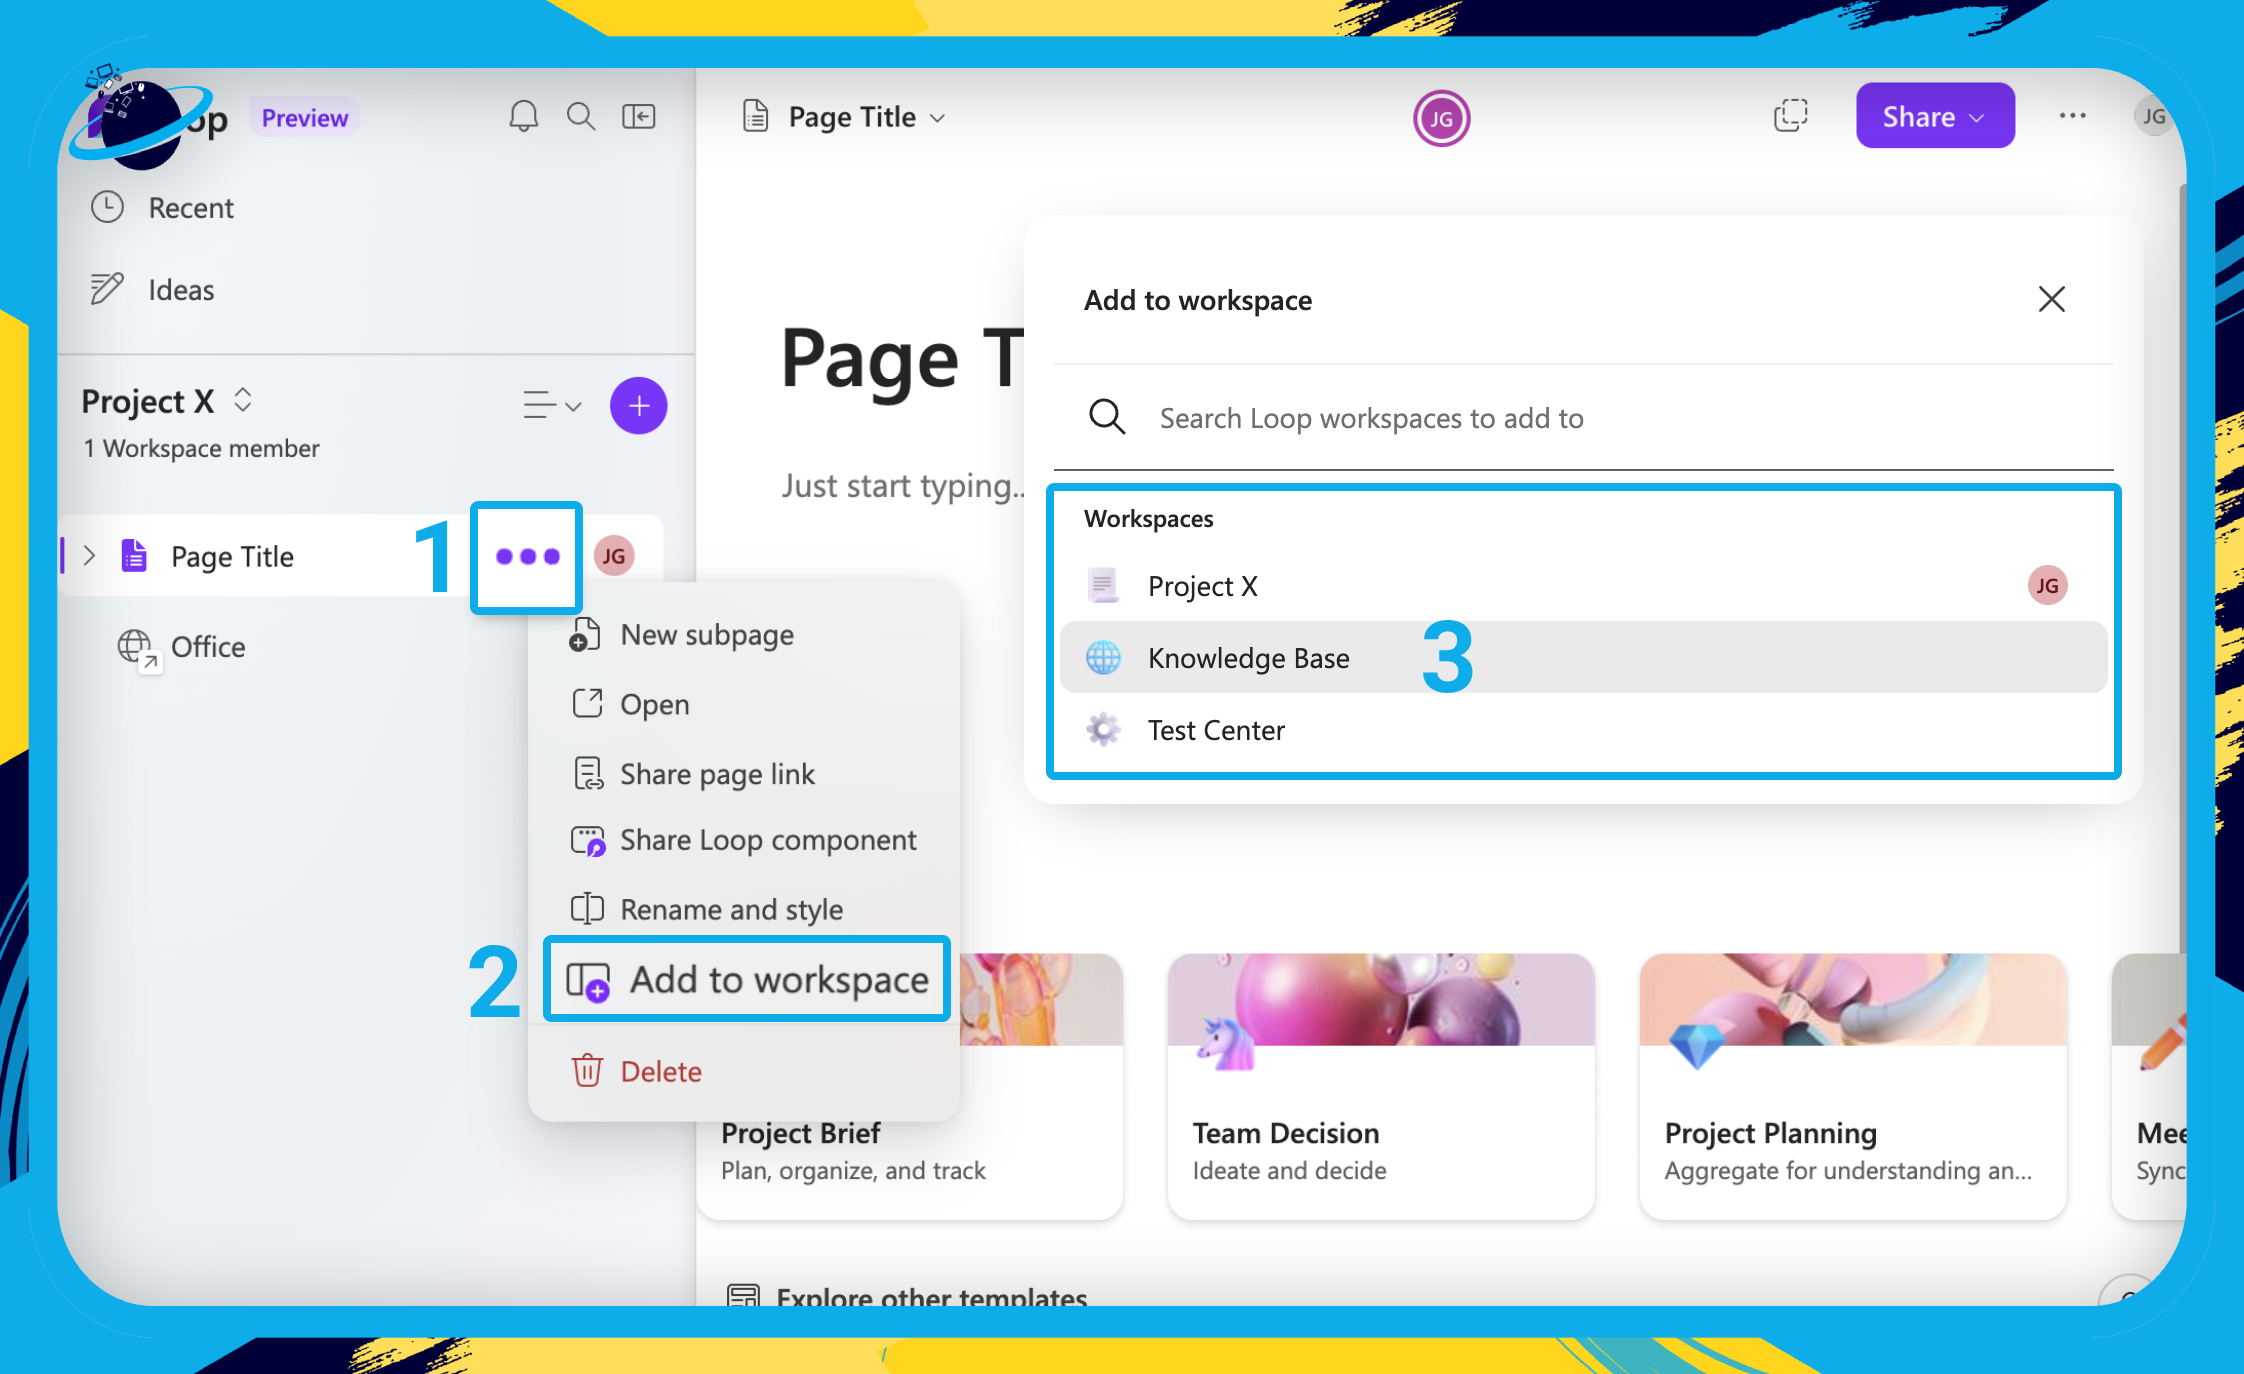
![]() Note: Adding a page to another workspace will not remove it from the previous workspace. Instead, it will create a duplicate page that will update synchronously with the other. If you delete the original page, the duplicate will no longer function.
Note: Adding a page to another workspace will not remove it from the previous workspace. Instead, it will create a duplicate page that will update synchronously with the other. If you delete the original page, the duplicate will no longer function.
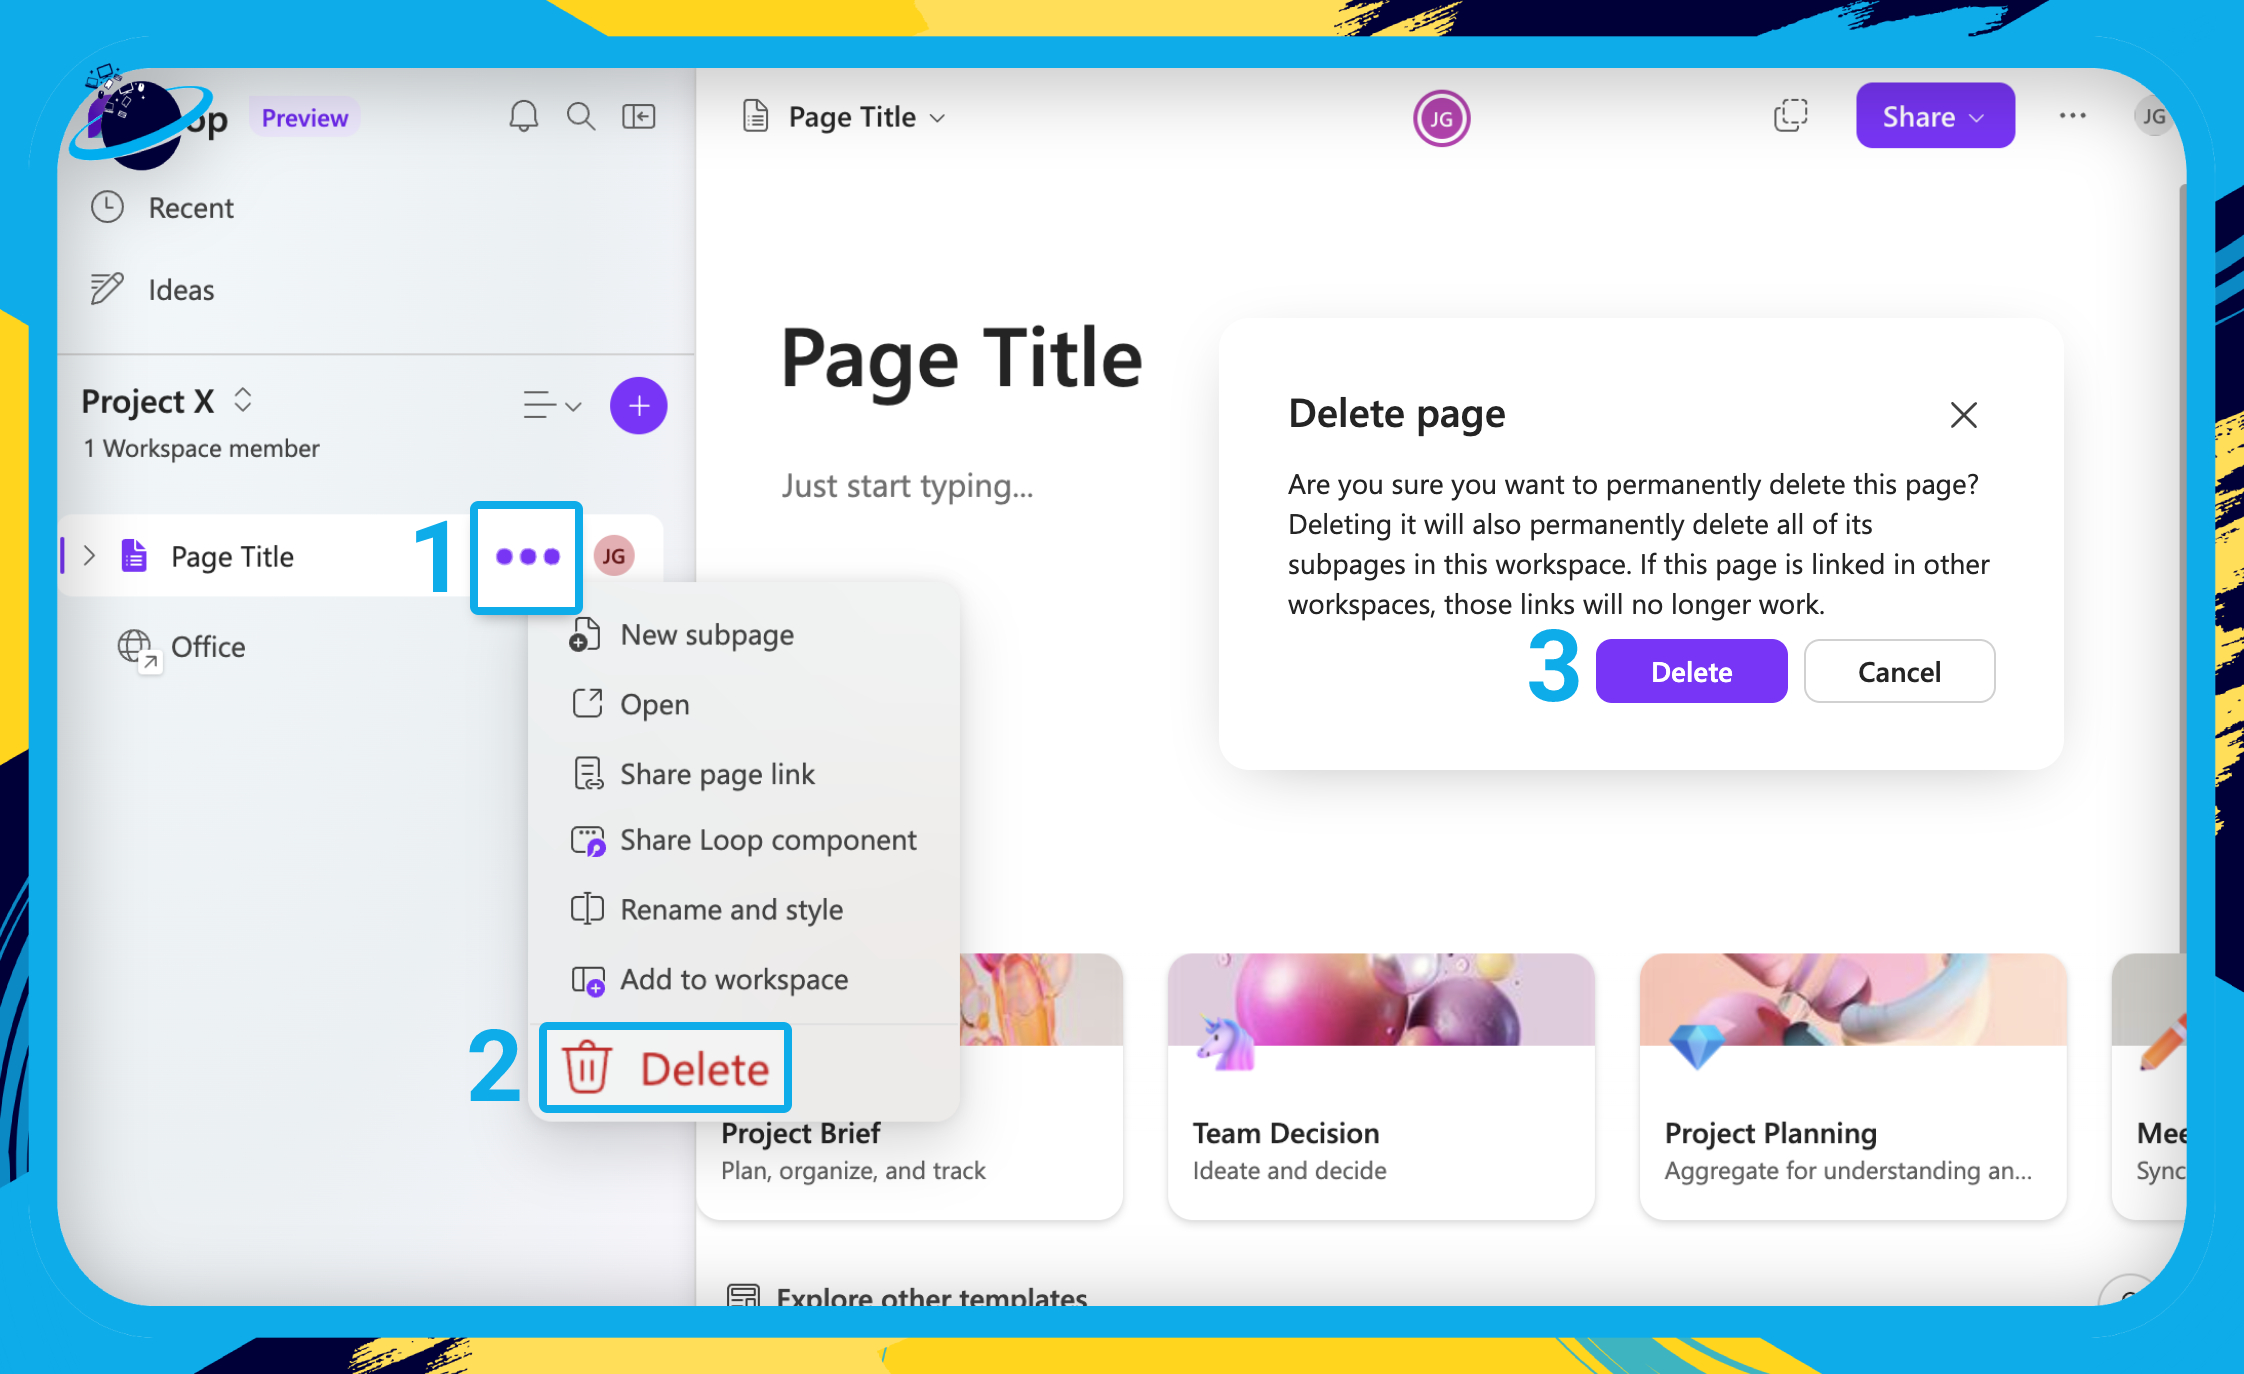
Delete the page:
- Hover over the page you want to delete and click the three dots. [1]
- Select
 “Delete” from the dropdown. [2]
 - Then click the “Delete” button to confirm. [3]
How to share a page in Microsoft Loop
In this section, we’ll show you how to share a page using a link or by embedding the page into another application.
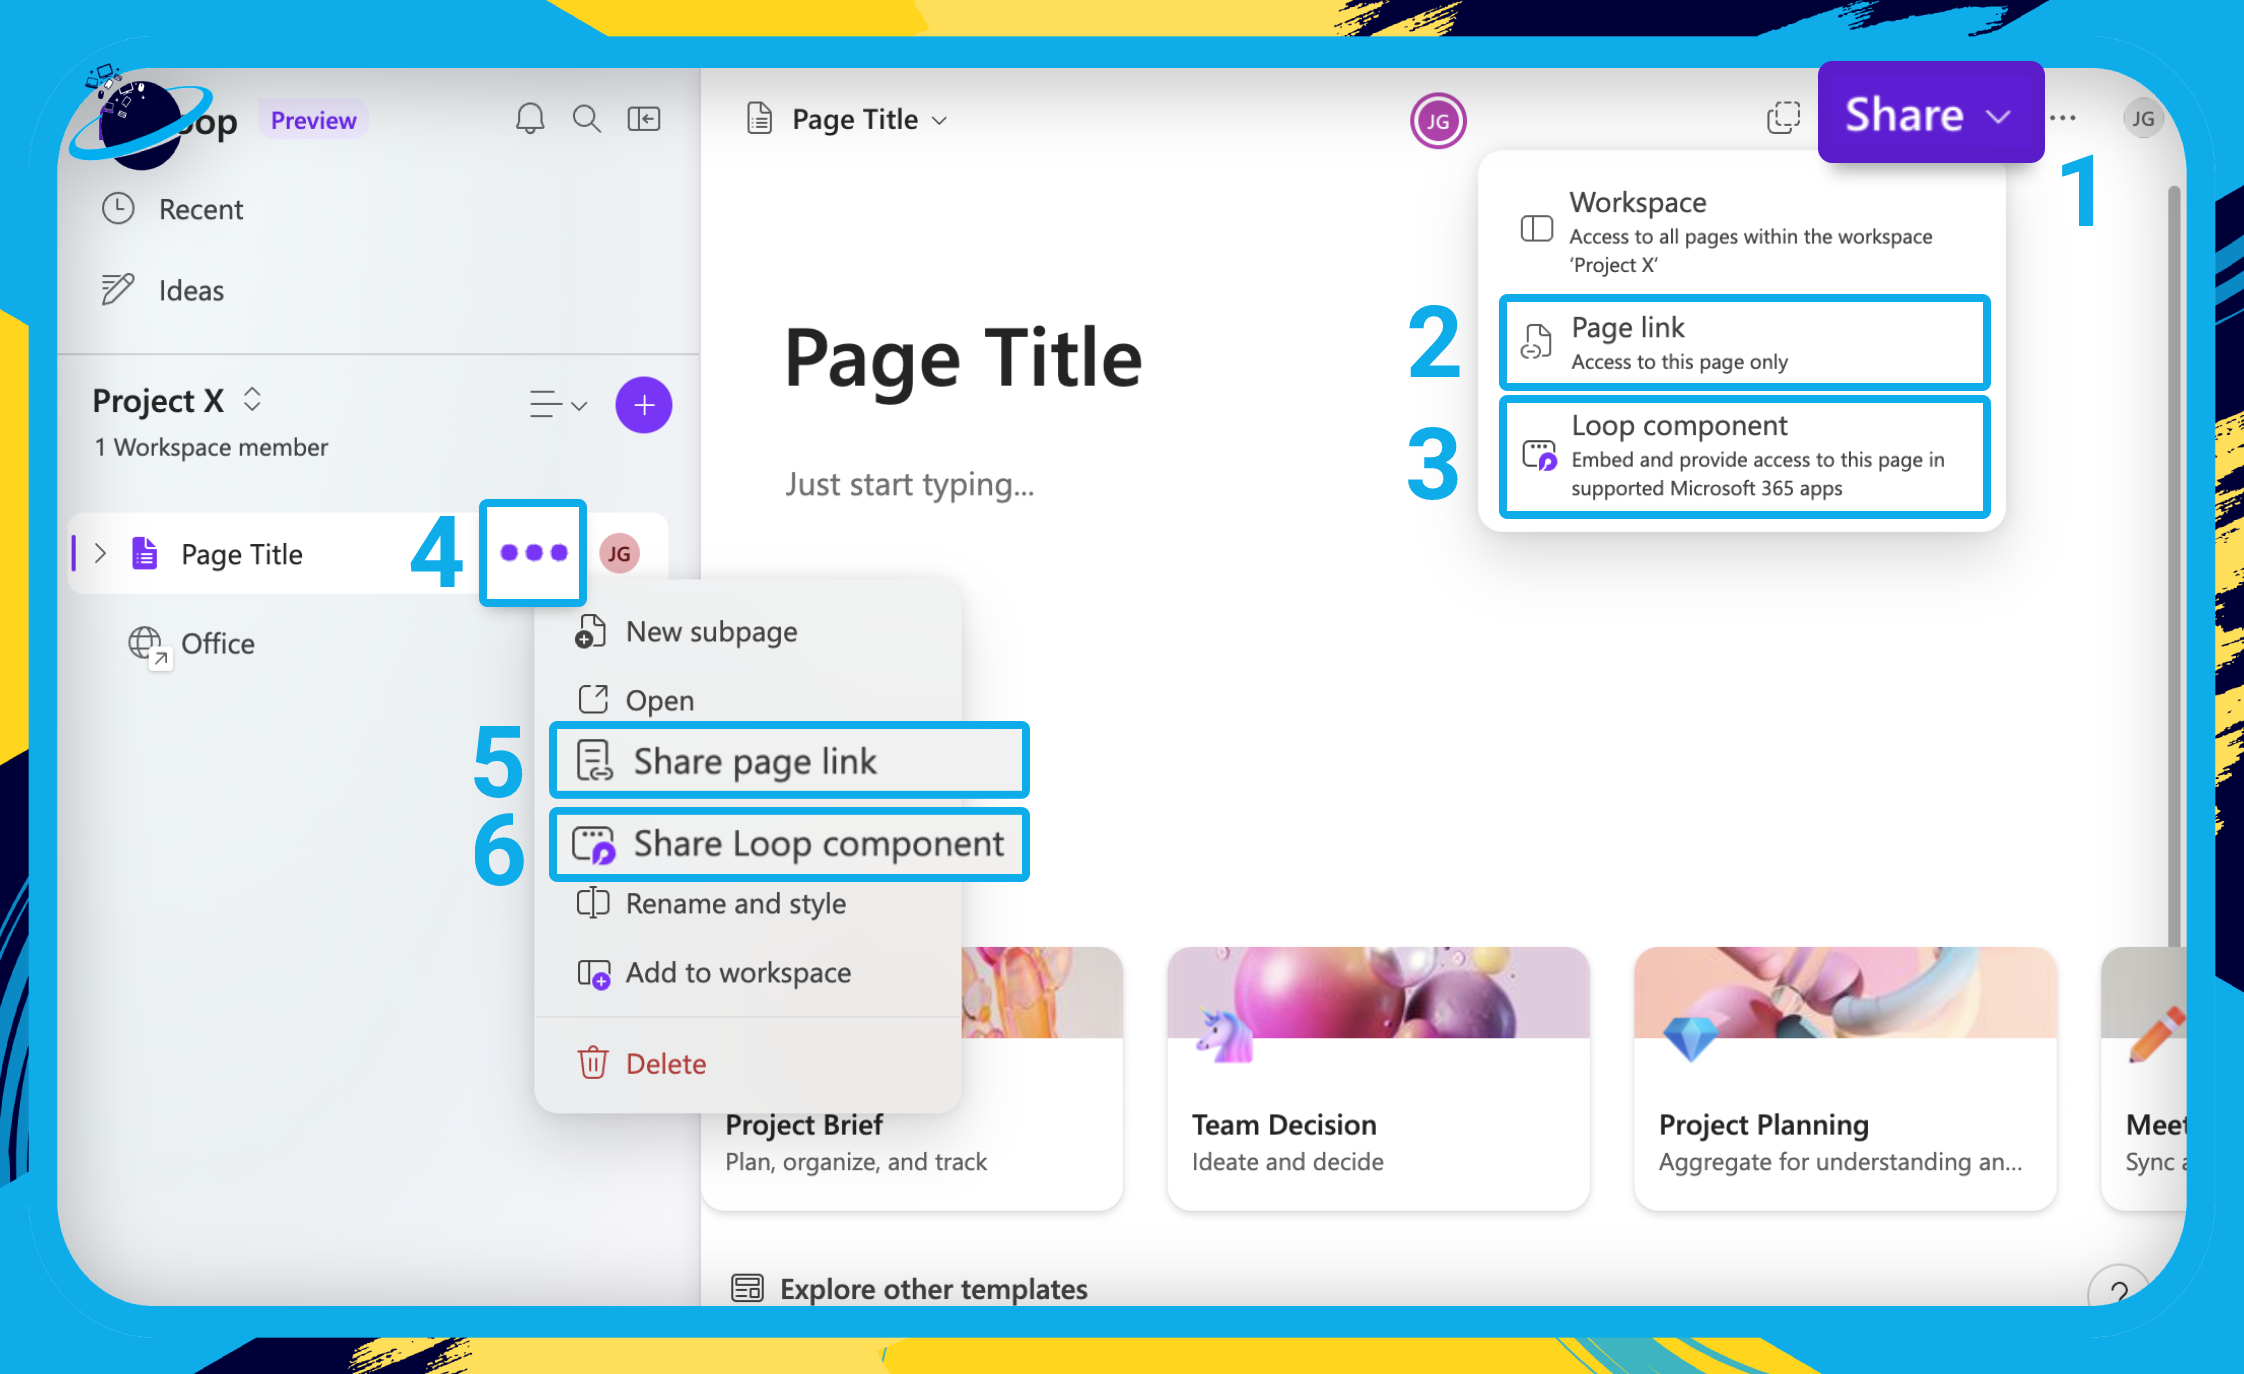
- To share the page, click the share button at the top. [1]
- To share the page link, select
 “Page link.” [2]
 - To embed the page in other applications, select
 “Loop component.” [3]
You can also share the page from the left menu.
- Hover over the page you want to share.
- Click the three dots. [4]
- To share the page link, select
 “Share page link.” [5]
 - To embed the page in other applications, select “Share Loop component.” [6]
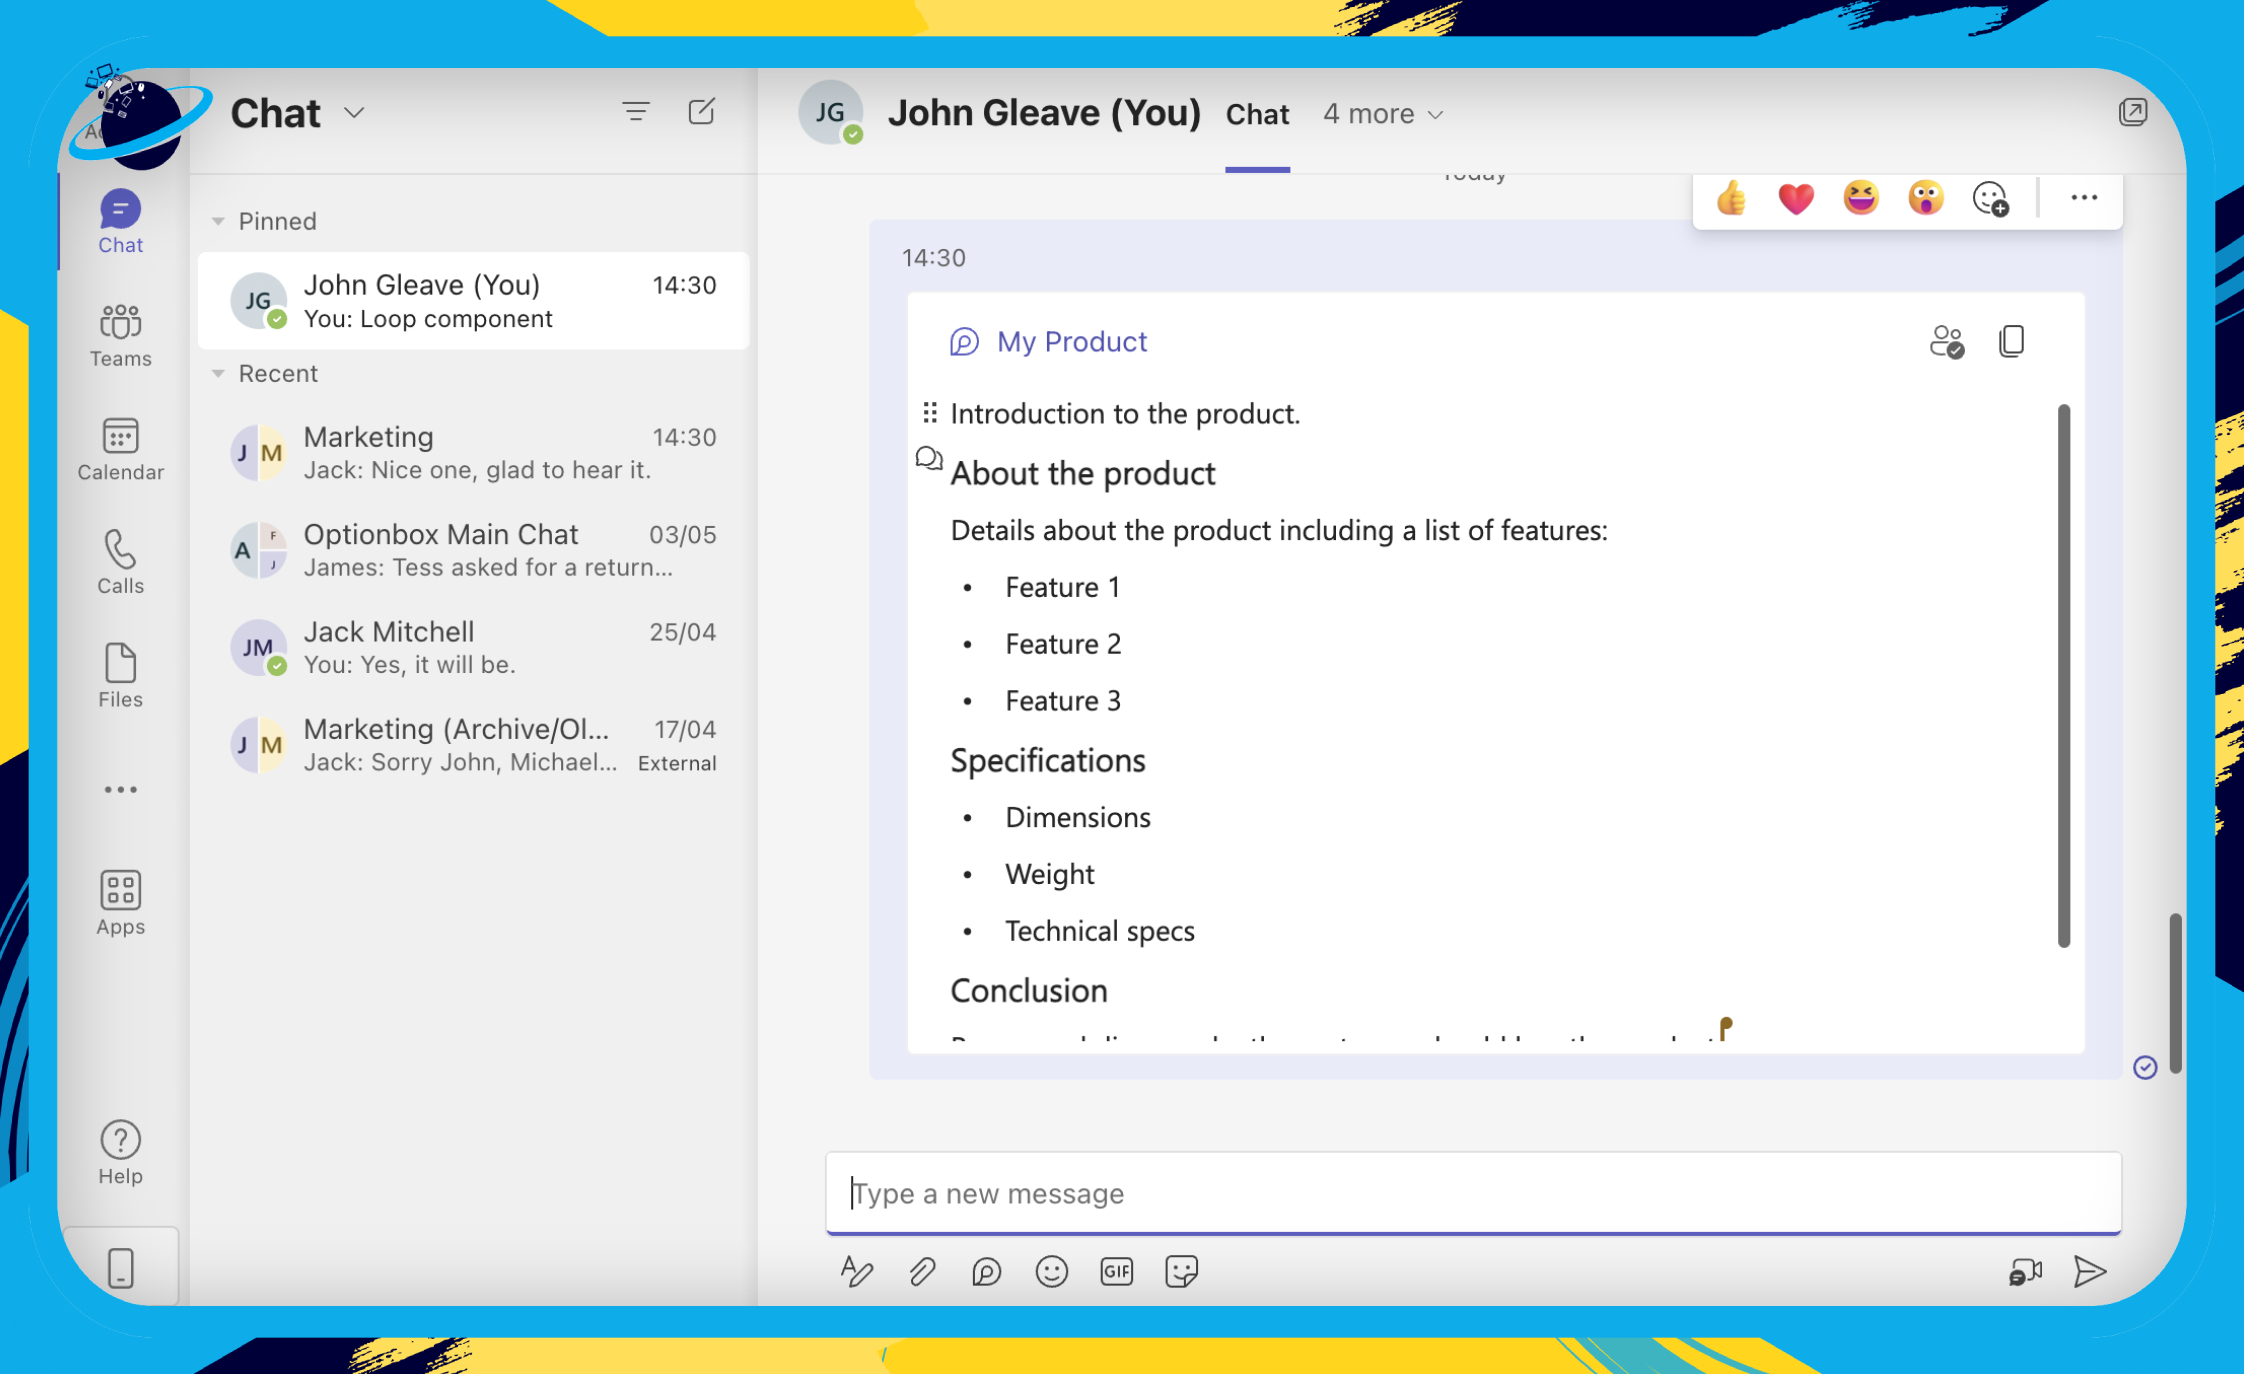
You can share the page link anywhere. However, the locations in which you can embed a page are currently limited to: A Teams chat, a new mail in Outlook, Whiteboard, and the web version of Word. Please note that this may change as Loop is still in development.
Here’s what it looks like when you post a page into a Teams chat:

How to add components to a page in Microsoft Loop
In this section, we’ll show you how to add content to a page, including templates and loop components.
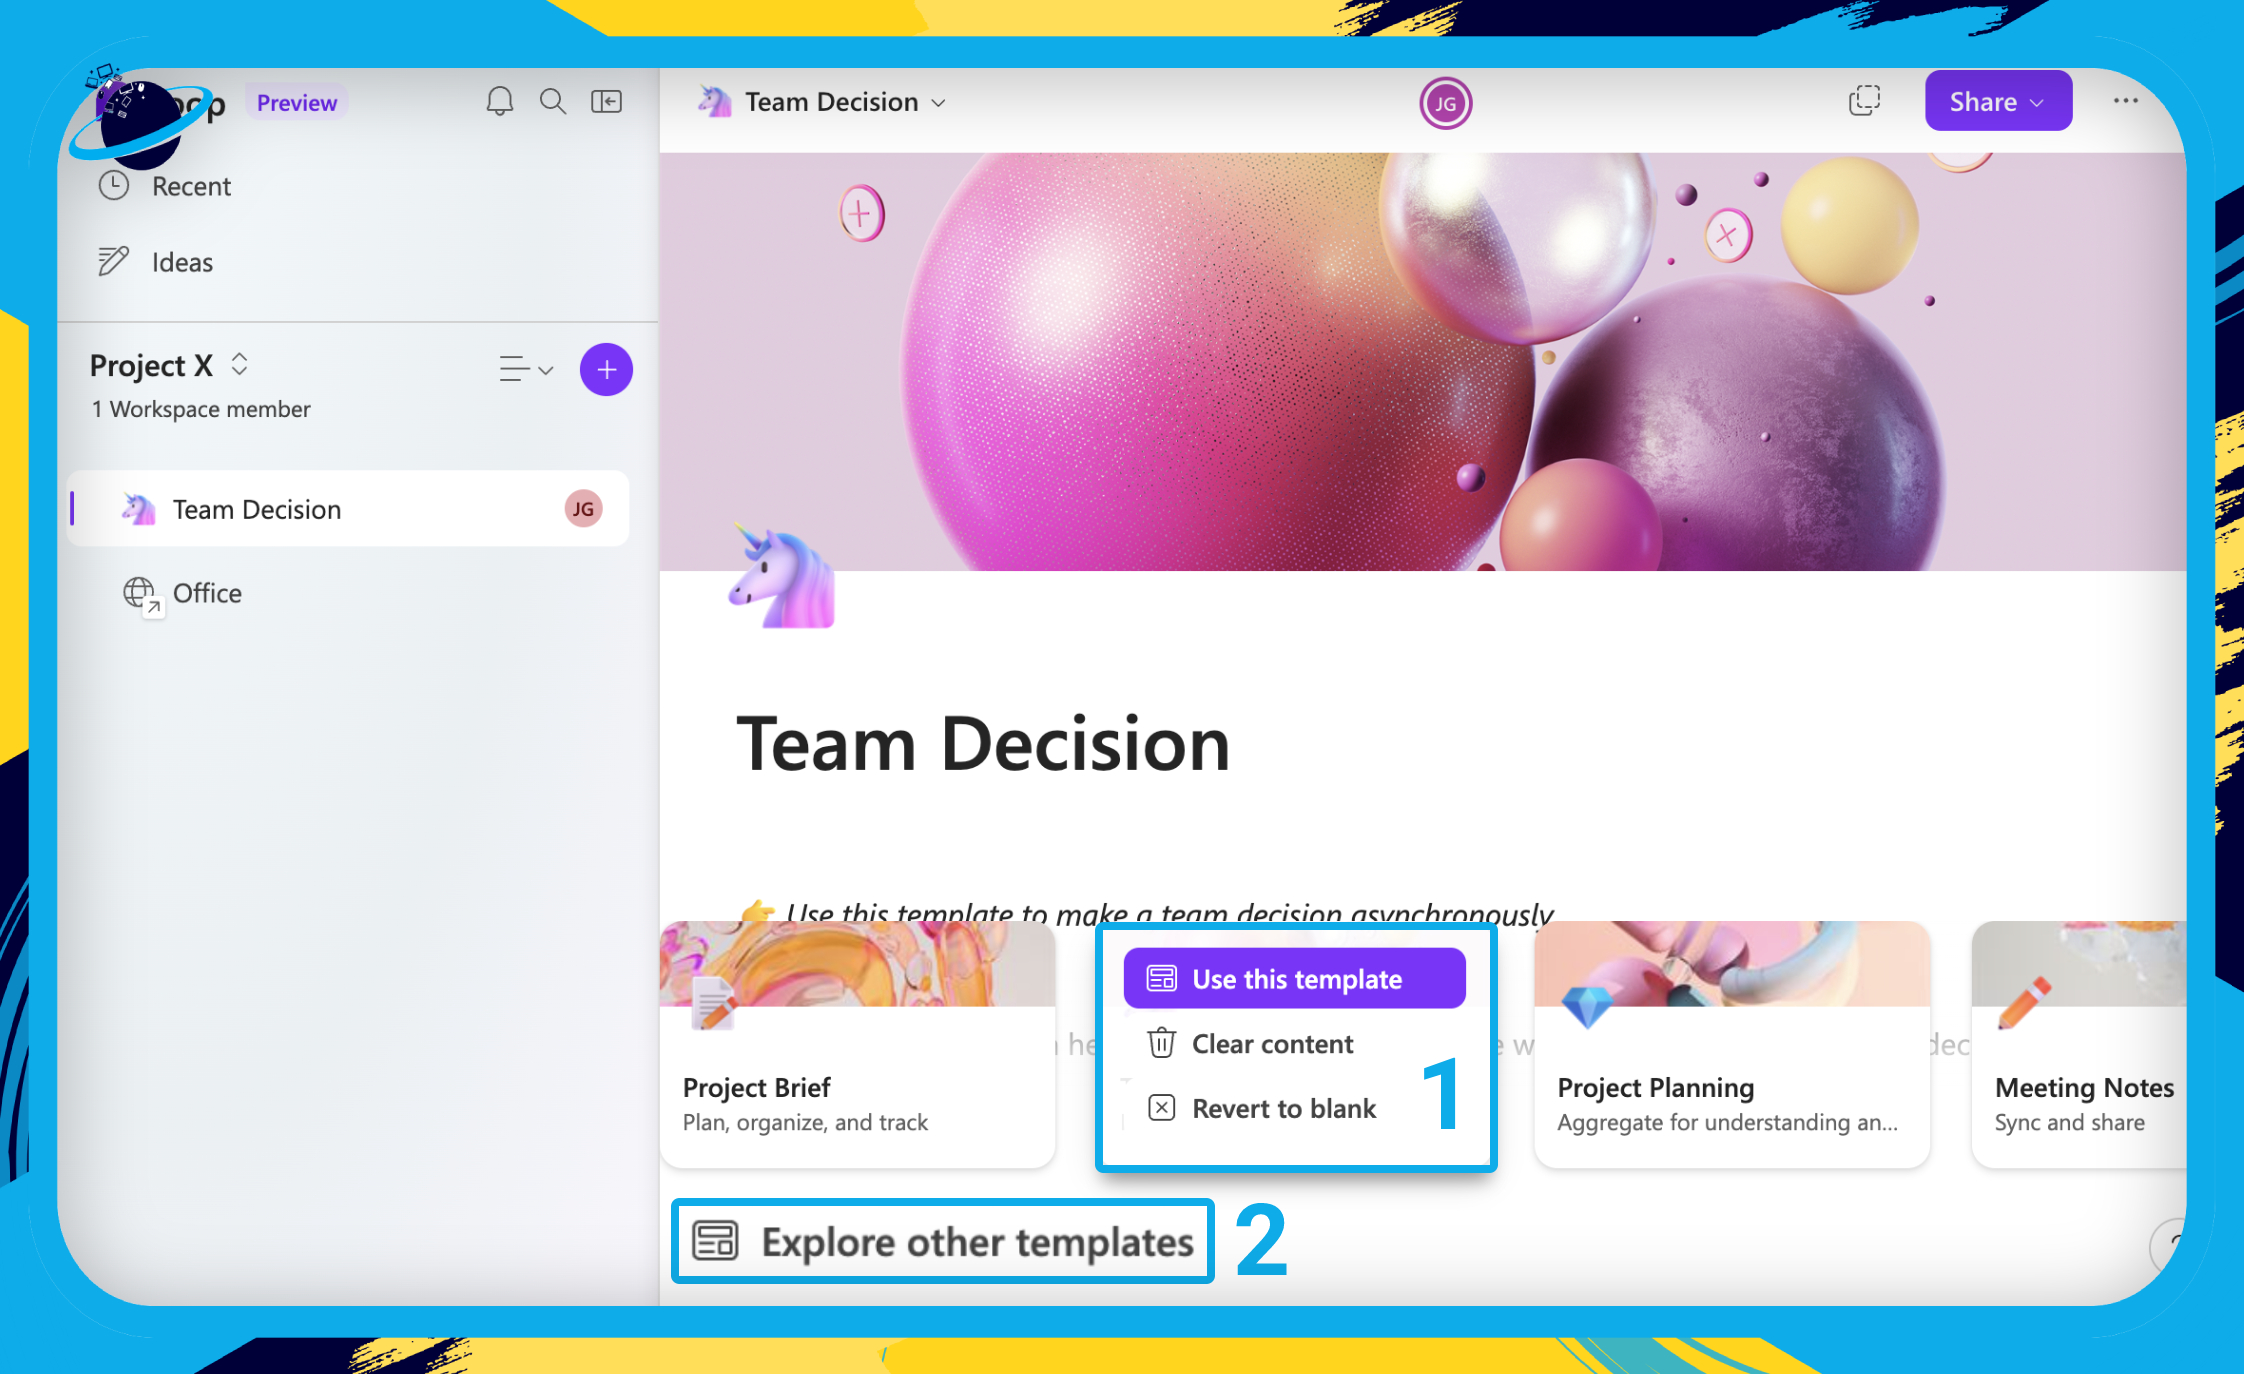
When you create a new page, you’ll have the option of choosing a template. There are currently ten templates to choose from. Here are the templates on offer:
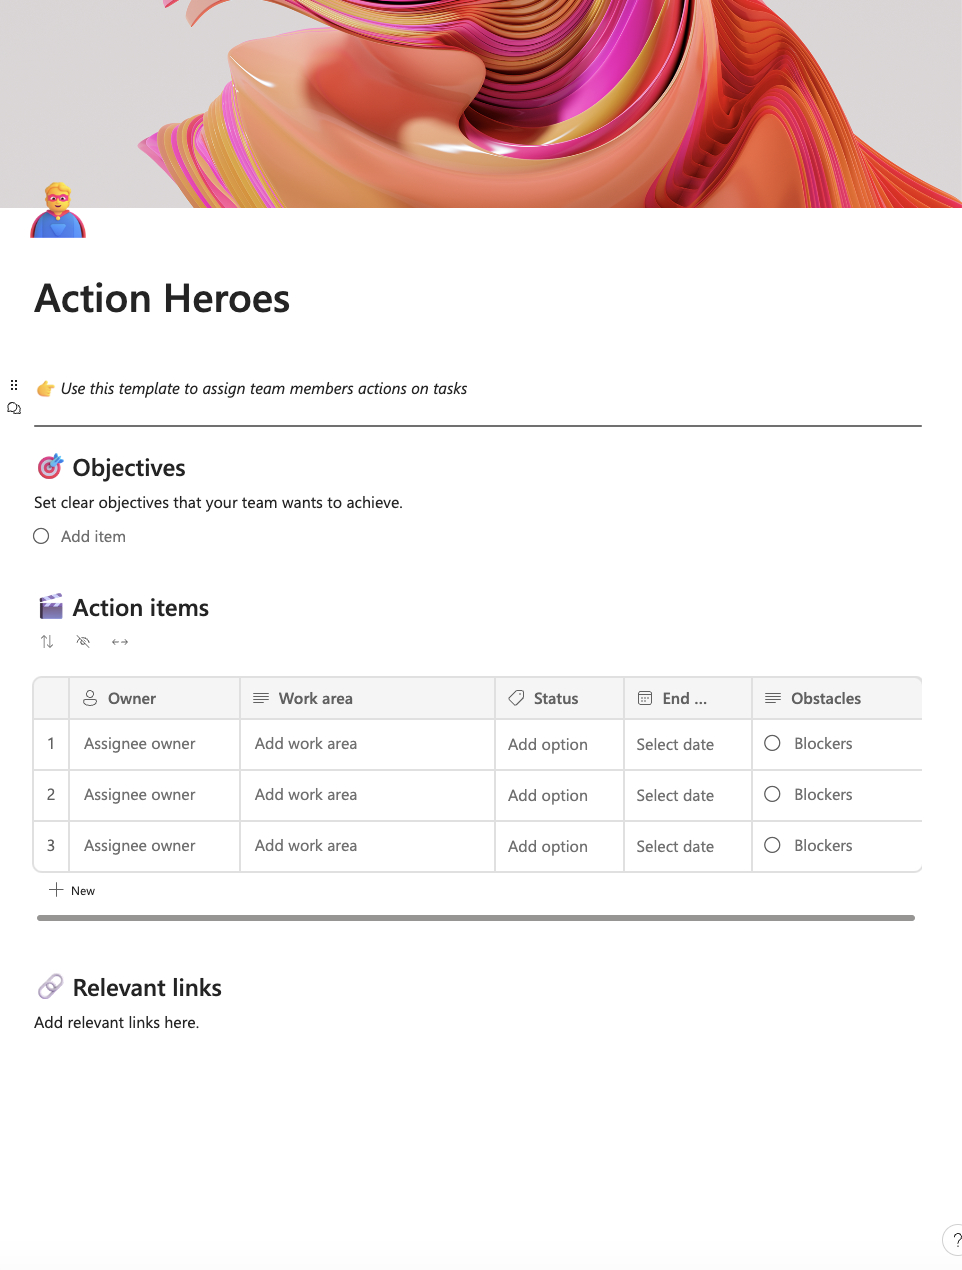

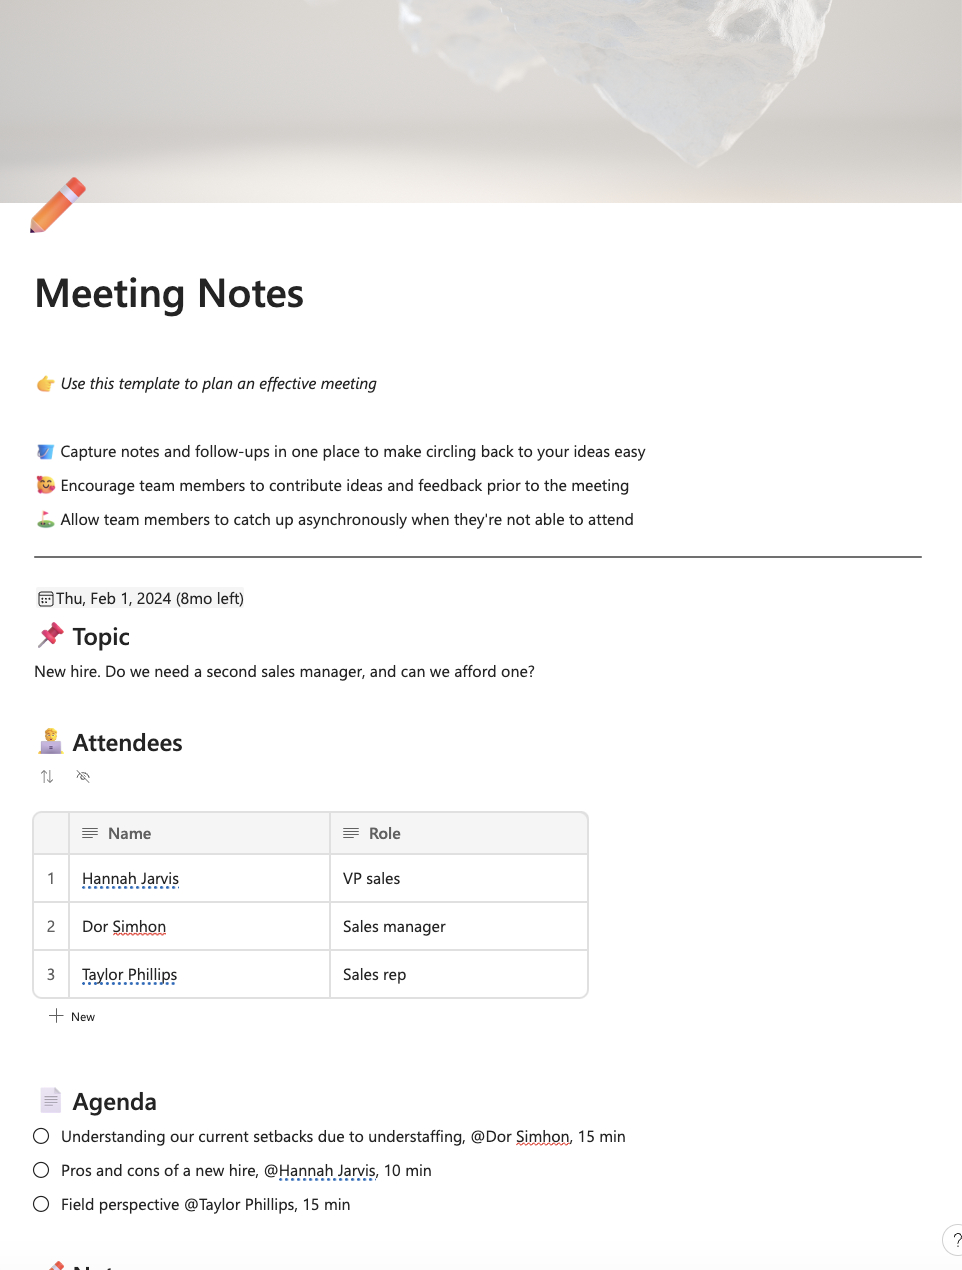
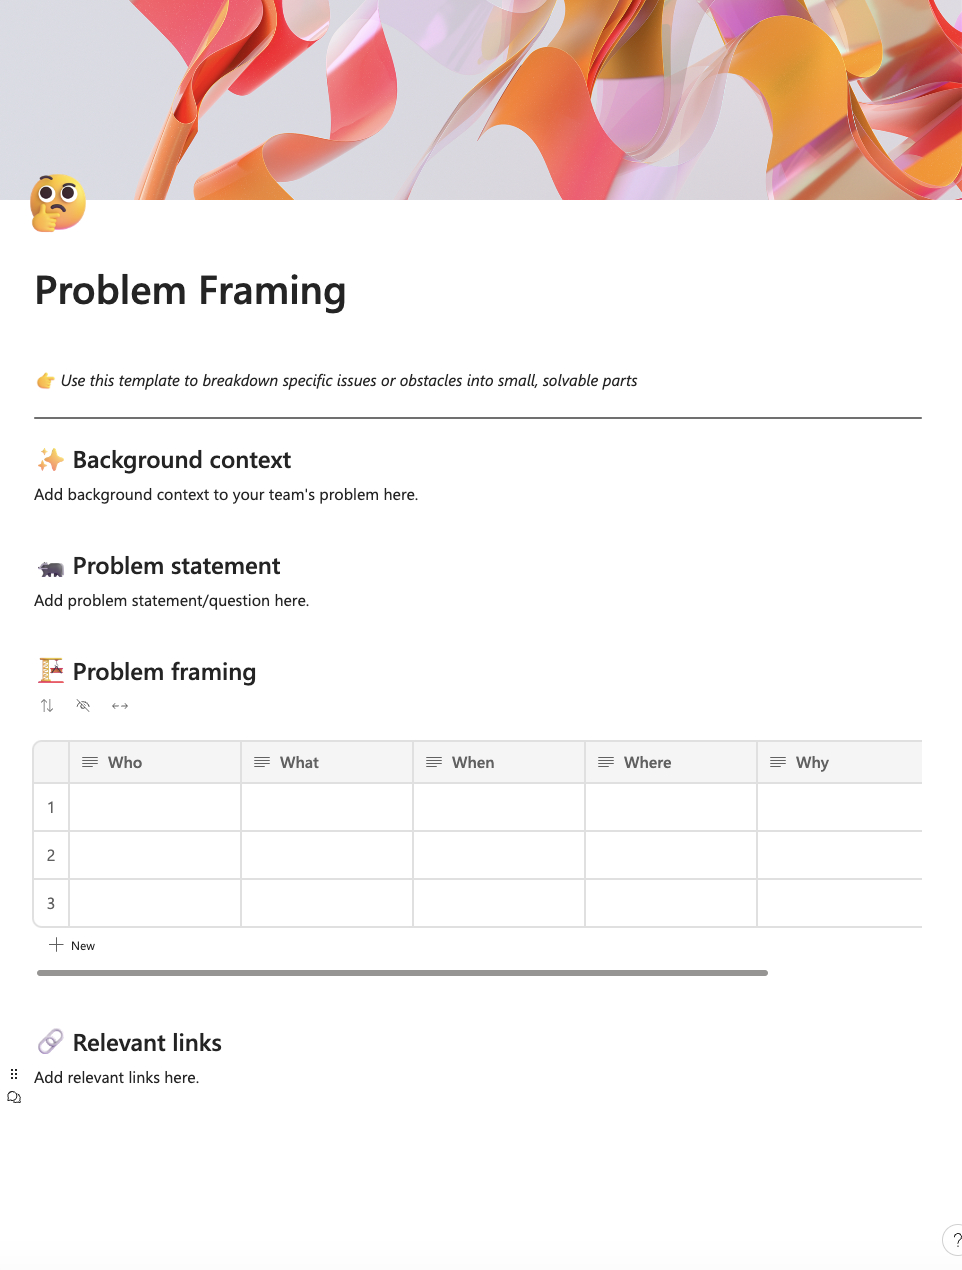
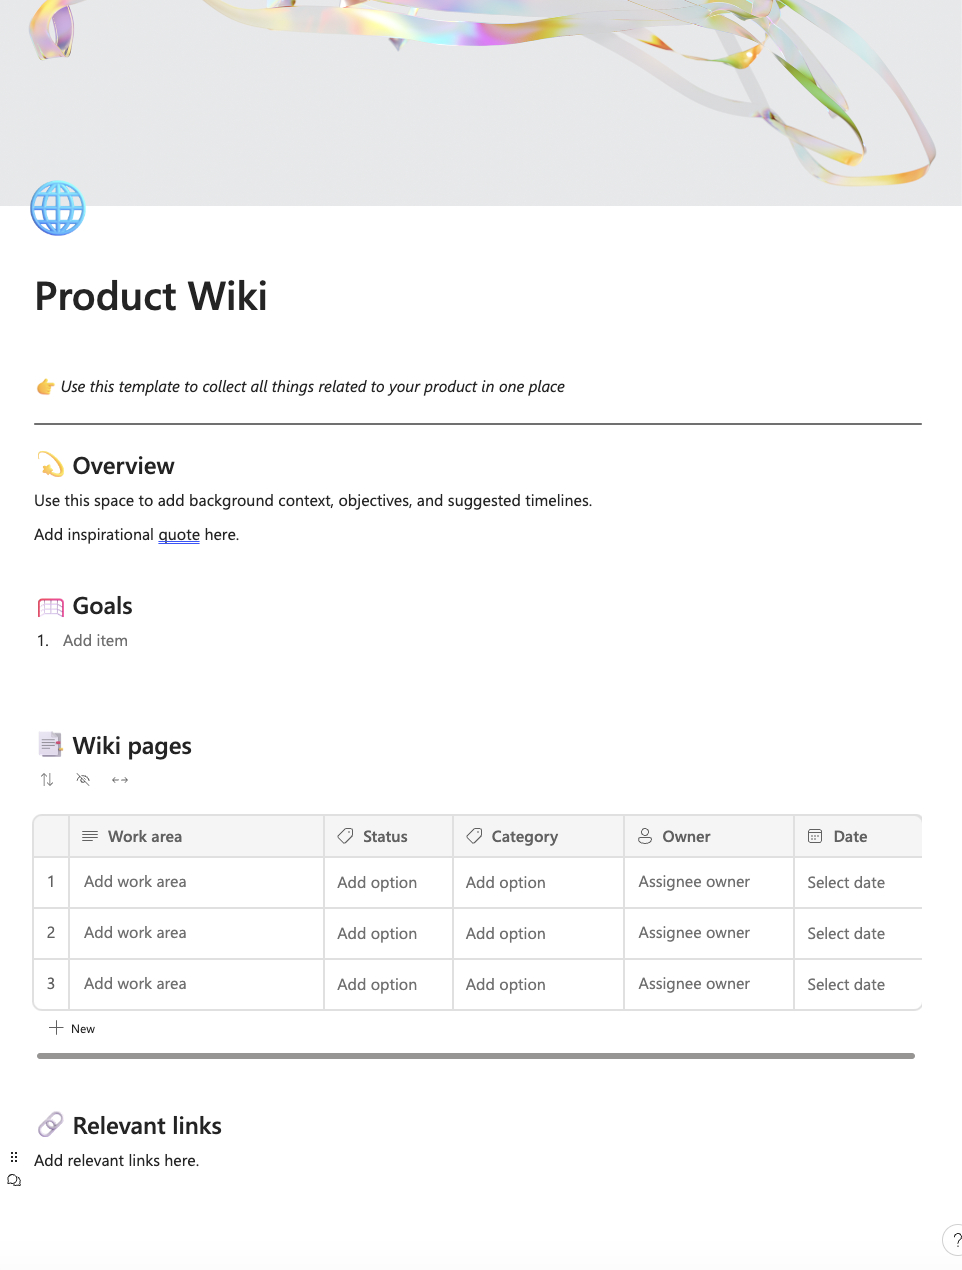
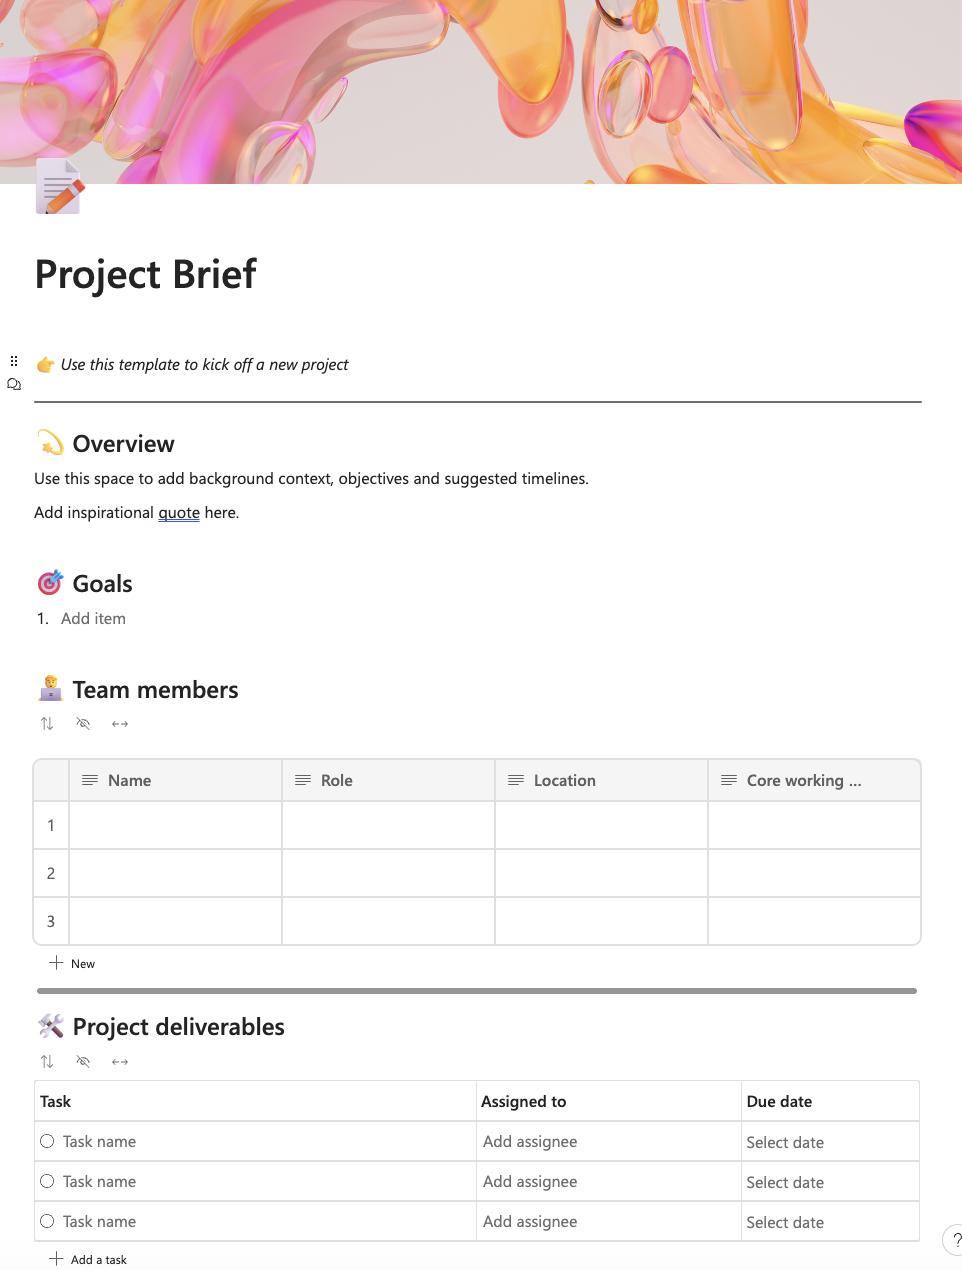
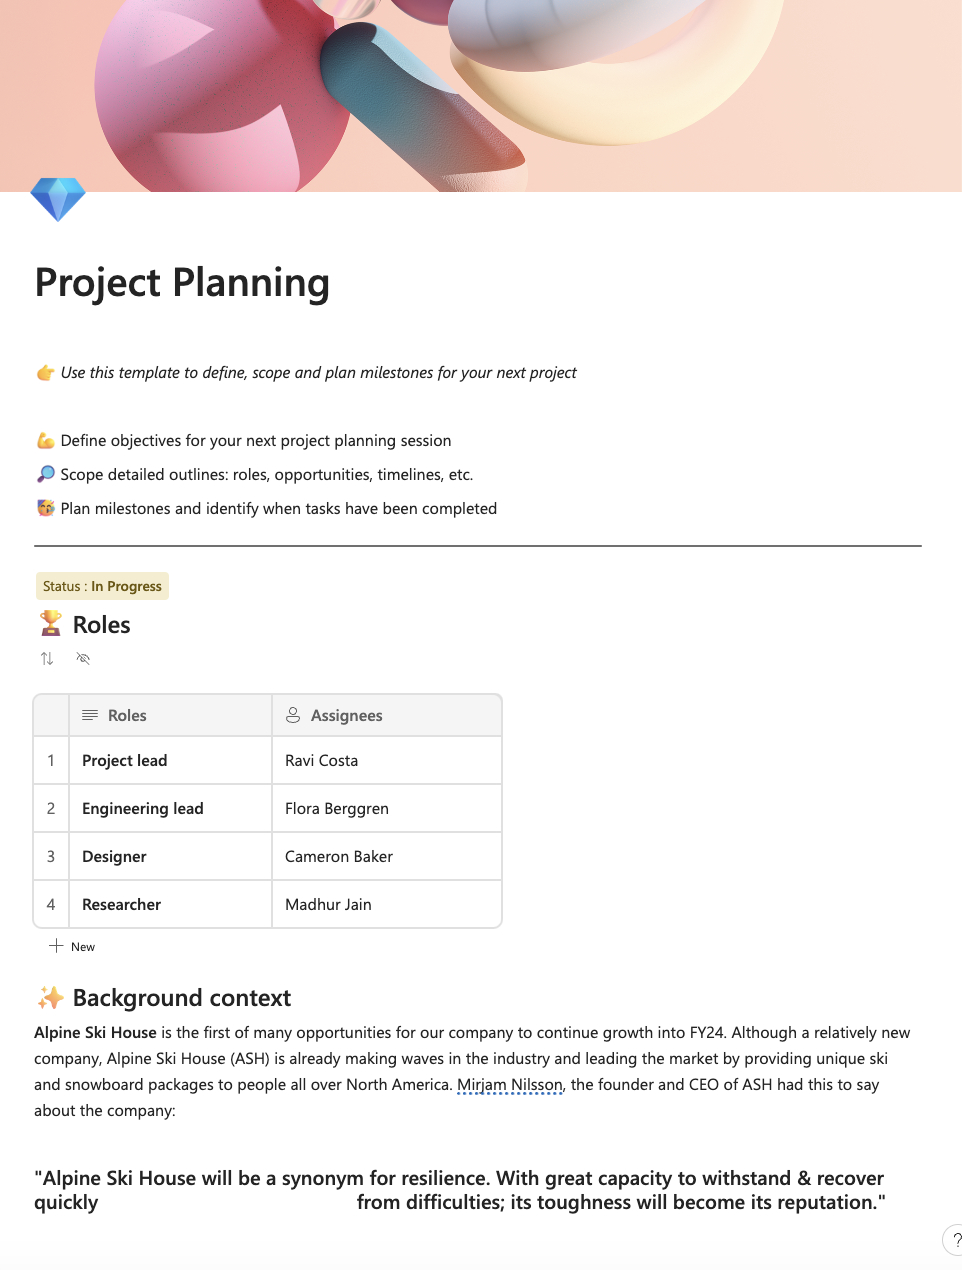
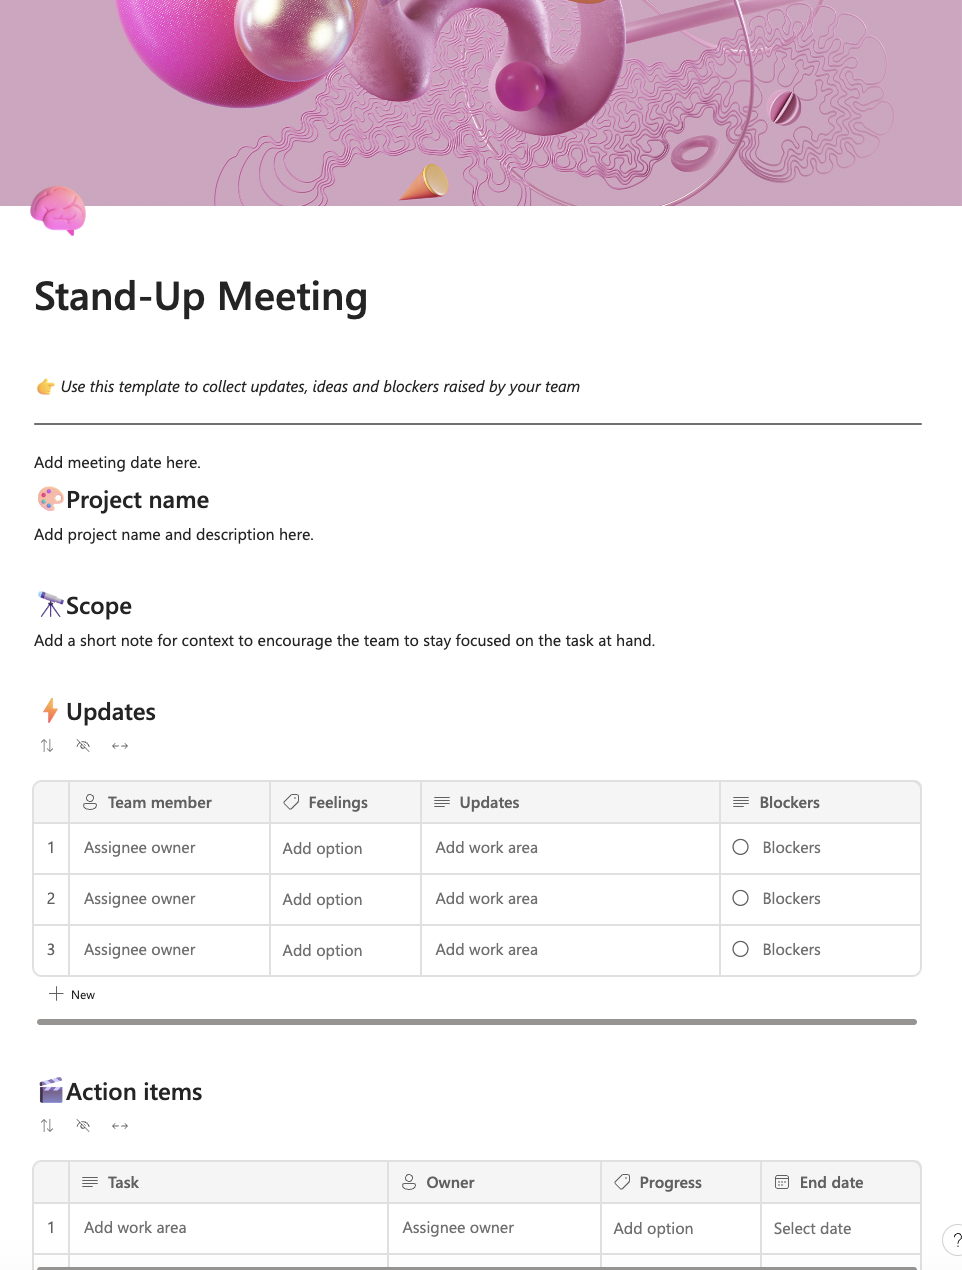
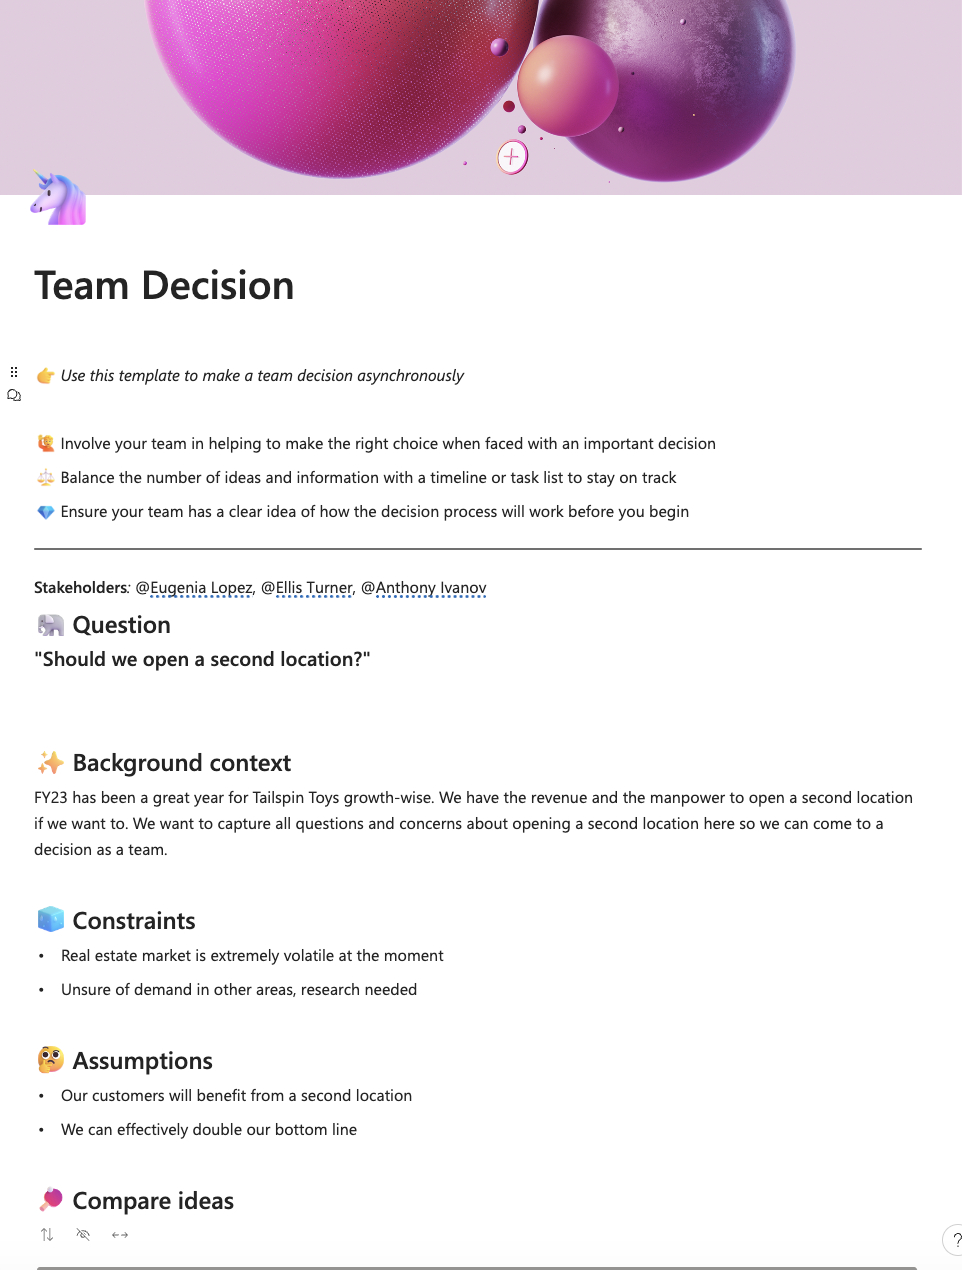
- To select a template, look for them at the bottom of the page.
- Click one that meets your requirements, then select
 “Use this template“. [1]
 - To view more templates, click “Explore other templates.” [2]
To start adding components to your page, type a forward slash / then select from a list of available components.
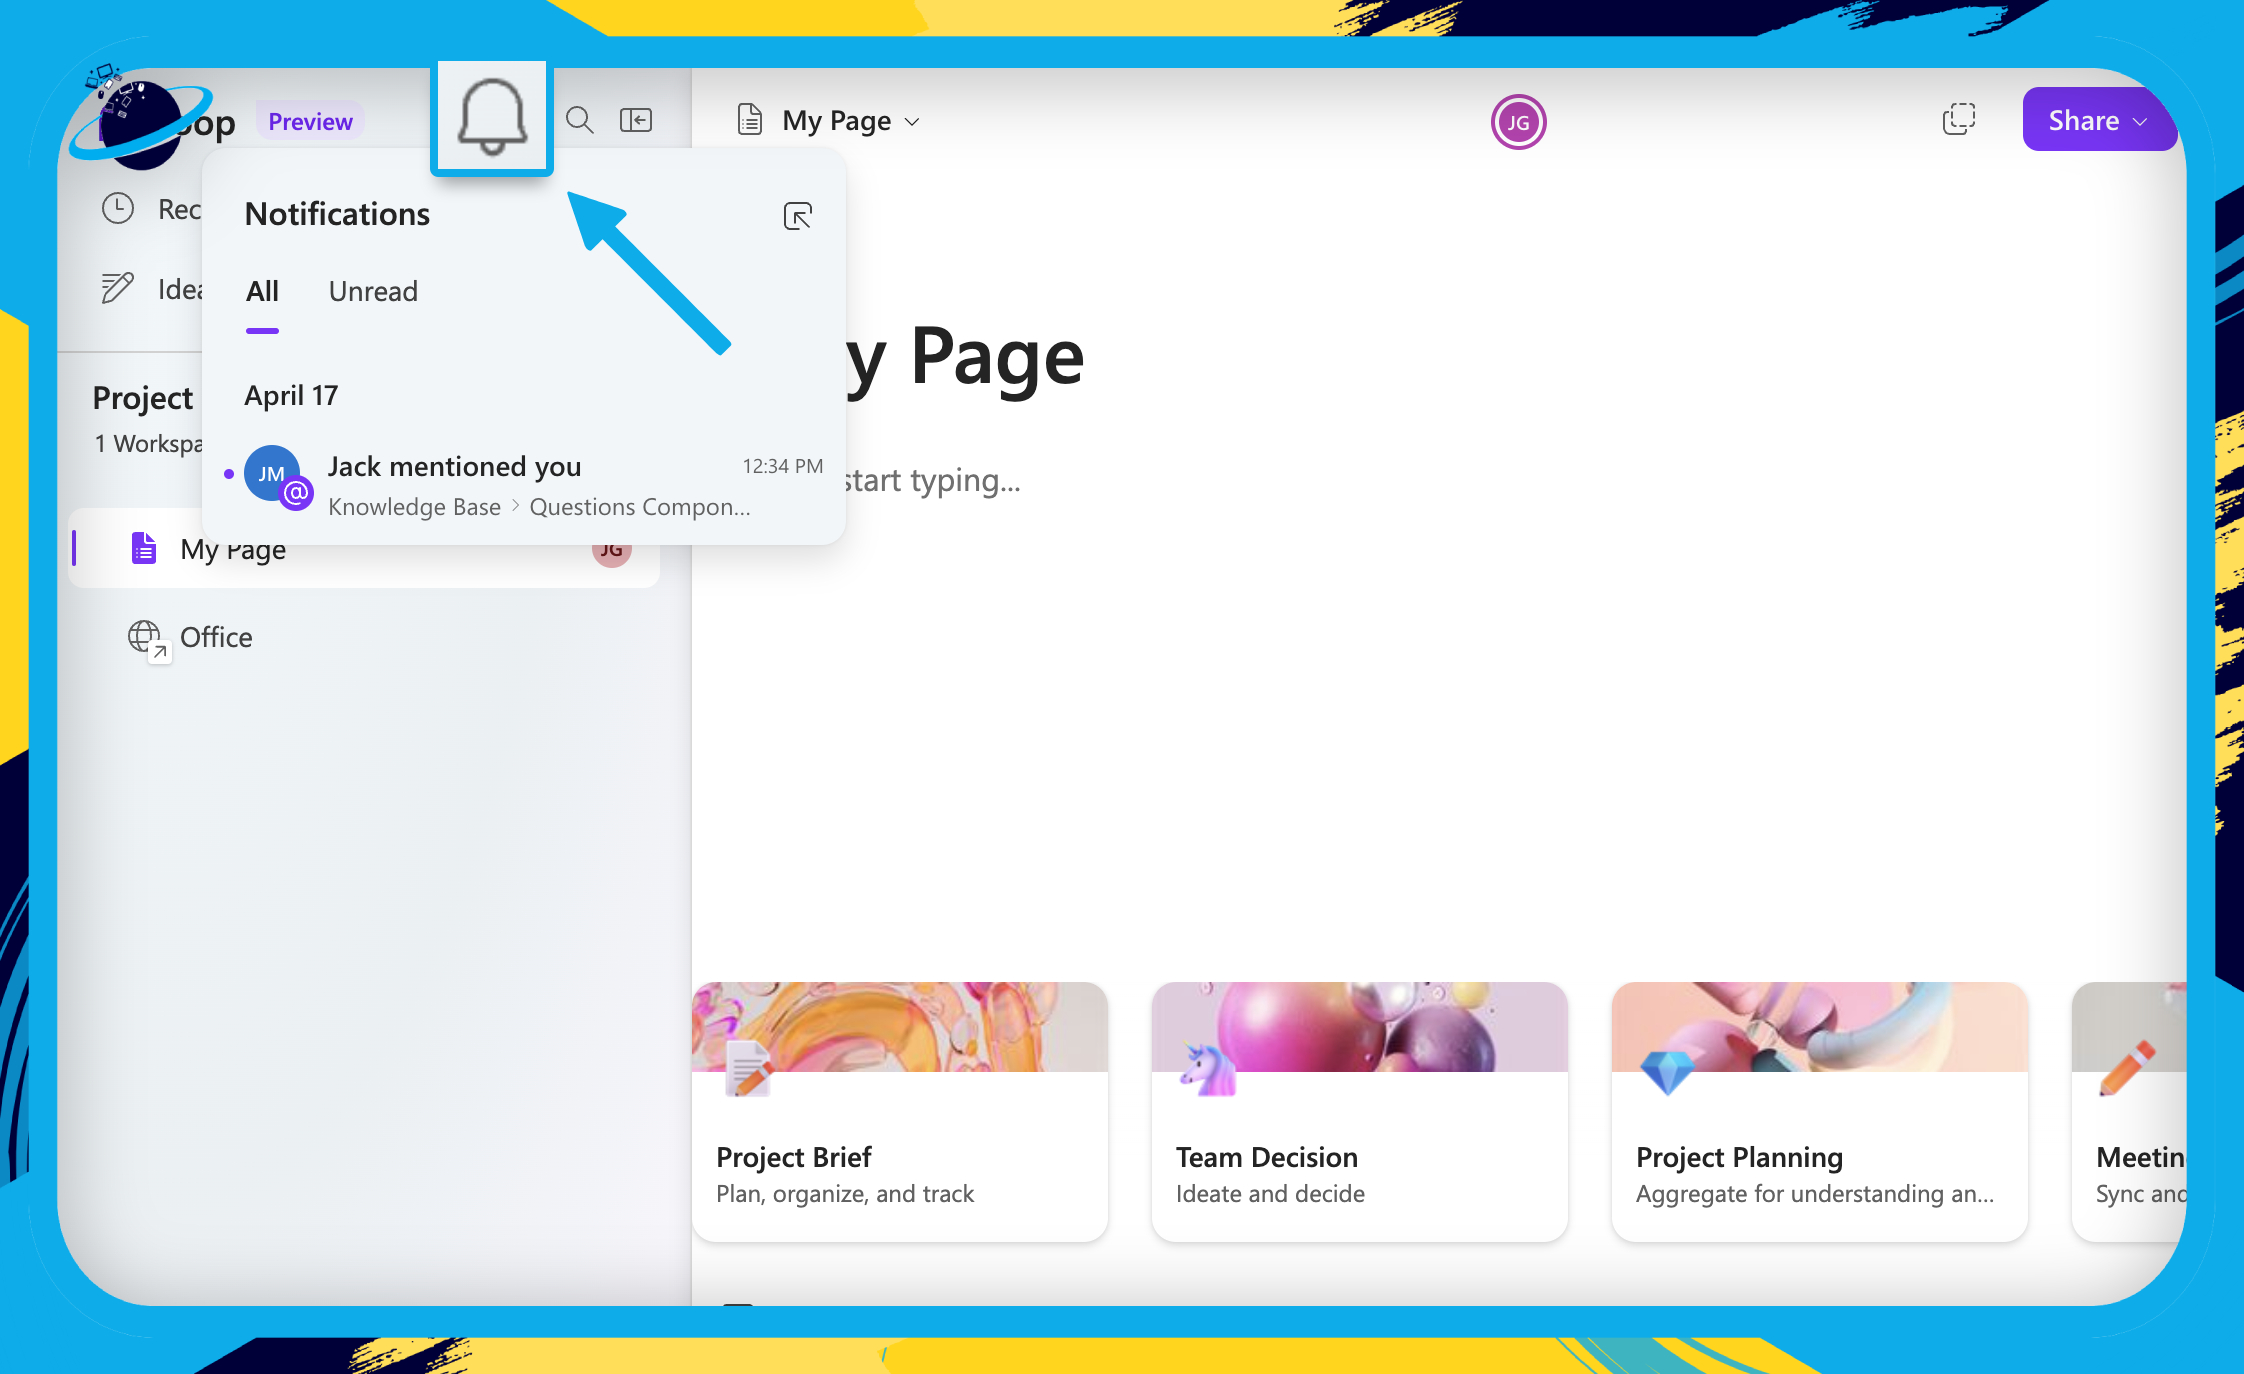
To mention people, type an @ symbol, then type their name. If the person you mention is a member of the workspace, or has access to the page, they will receive a notification.
Notifications will appear in your email inbox and in Loop. To view notifications in Loop, hit the ![]() bell icon at the top of the left menu.
bell icon at the top of the left menu.
![]() Note: To learn more about how to create components, please read our dedicated blog post:
Note: To learn more about how to create components, please read our dedicated blog post:![]() Microsoft Loop Components: A complete guide on how to use them
Microsoft Loop Components: A complete guide on how to use them
 Conclusion
Pages are used in Microsoft Loop to develop and organise project components. You can also share pages and embed them in different Microsoft 365 applications, allowing you to build projects in realtime from many locations.
To add content to a page, choose a template from the list at the bottom or make your own by entering a forward slash / and selecting a component from the list.
To share a page, hover over the page you wish to share and click the ![]() three dots, or click the “Share” button at the top.
three dots, or click the “Share” button at the top.
You can then choose to copy the page link. However, if you want to embed the page in another application, choose to share as a ![]() “Loop component.”
“Loop component.”
Thanks for reading!