A shared mailbox is a great way for users to contribute using the same mailbox for email-based messages — everyone can see a copy of a message that is sent to a shared mailbox. However, whether you send a message as another user or on their behalf, the message isn’t preserved in the shared mailbox’s Sent Items folder. Instead, it’s stored in your personal mailbox’s Sent Items folder. How can we fix this? Follow through for more information on how you can resolve this error.
Step by step process – how to fix messages sent from a shared mailbox not saved in that mailbox:
- First, sign in to your Office 365 account.
- Use the app launcher and navigate to admin.
- Click on “Show All” to reveal “Admin centers.”
- Here, click on “Exchange”.
- Now under recipients click on “Mailboxes”.
- Select the shared mailbox.
- Under “Sent items” click on “Edit”.
- Ensure both checkboxes under “Manage sent items” are ticked.
- Finally, click on “Save”.
If you have an on-premise Exchange solution, the process above will not work for you. Fortunately, we’ve explained a method that will work for you later in this blog post. Please click here to jump straight to it.
That’s it; once you’ve followed the steps, the issue will be resolved and any mail you send from that shared mailbox will stay within that shared mailbox. Please note that admin permissions are required to edit the mailbox, otherwise the changes will not save.
Potential cause of messages sent from a shared mailbox not being saved in the mailbox
Shared mailboxes in Office 365 don’t require a license and can’t be added to Outlook as a standalone mailbox. A shared mailbox does not allow you to sign in. Instead, you log in to your own inbox first, then open the shared mailbox. Outlook automatically sends answers from the sender’s account when you send or reply to a new message from the shared mailbox. As a result, messages are saved in the sender’s mailbox’s Sent Items folder.

Shared mailboxes more information
A shared mailbox is one that does not have its own login and password. As a result, users are unable to access them directly. Users must first be granted Send As or Full Access rights to a shared mailbox before they may access it. Users sign into their individual mailboxes after that, and then add the shared mailbox to their Outlook profile to access it. Shared mailboxes were just normal mailboxes to which an administrator may offer delegate access in Exchange 2003 and prior.
Creating a shared mailbox in a prior version of Exchange was a multi-step procedure that required the use of the Exchange Management Shell to perform some of the activities. However, now it can be achieved in as little as one.
Shared mailbox permissions
- Full Access: This permission allows a user to log into a shared mailbox and operate as the mailbox’s owner. A user may create calendar items, read, view, delete, and update email messages, and create tasks and calendar contacts while signed in. However, unless they also have Send As or Send on Behalf access, a user with Full Access can’t send email from the shared mailbox.
- Send As: When sending mail, the Send As permission allows a user to mimic the shared mailbox. If Kweku logs into the shared mailbox Marketing Department and sends an email, it will appear that the email was sent by Marketing Department.
- Send on behalf: The Send on Behalf ability allows a user to send email on behalf of a shared mailbox. If Saaj enters into Block 79’s shared mailbox and sends an email, the message seems to have been sent by “Saaj on behalf of Block 79.” To provide Send on Behalf rights, use the Set-Mailbox cmdlet with the “GrantSendonBehalf” option instead of the EAC.
Step by step process – How to save copies of sent items in shared mailboxes
- First sign in to your Office 365 account.
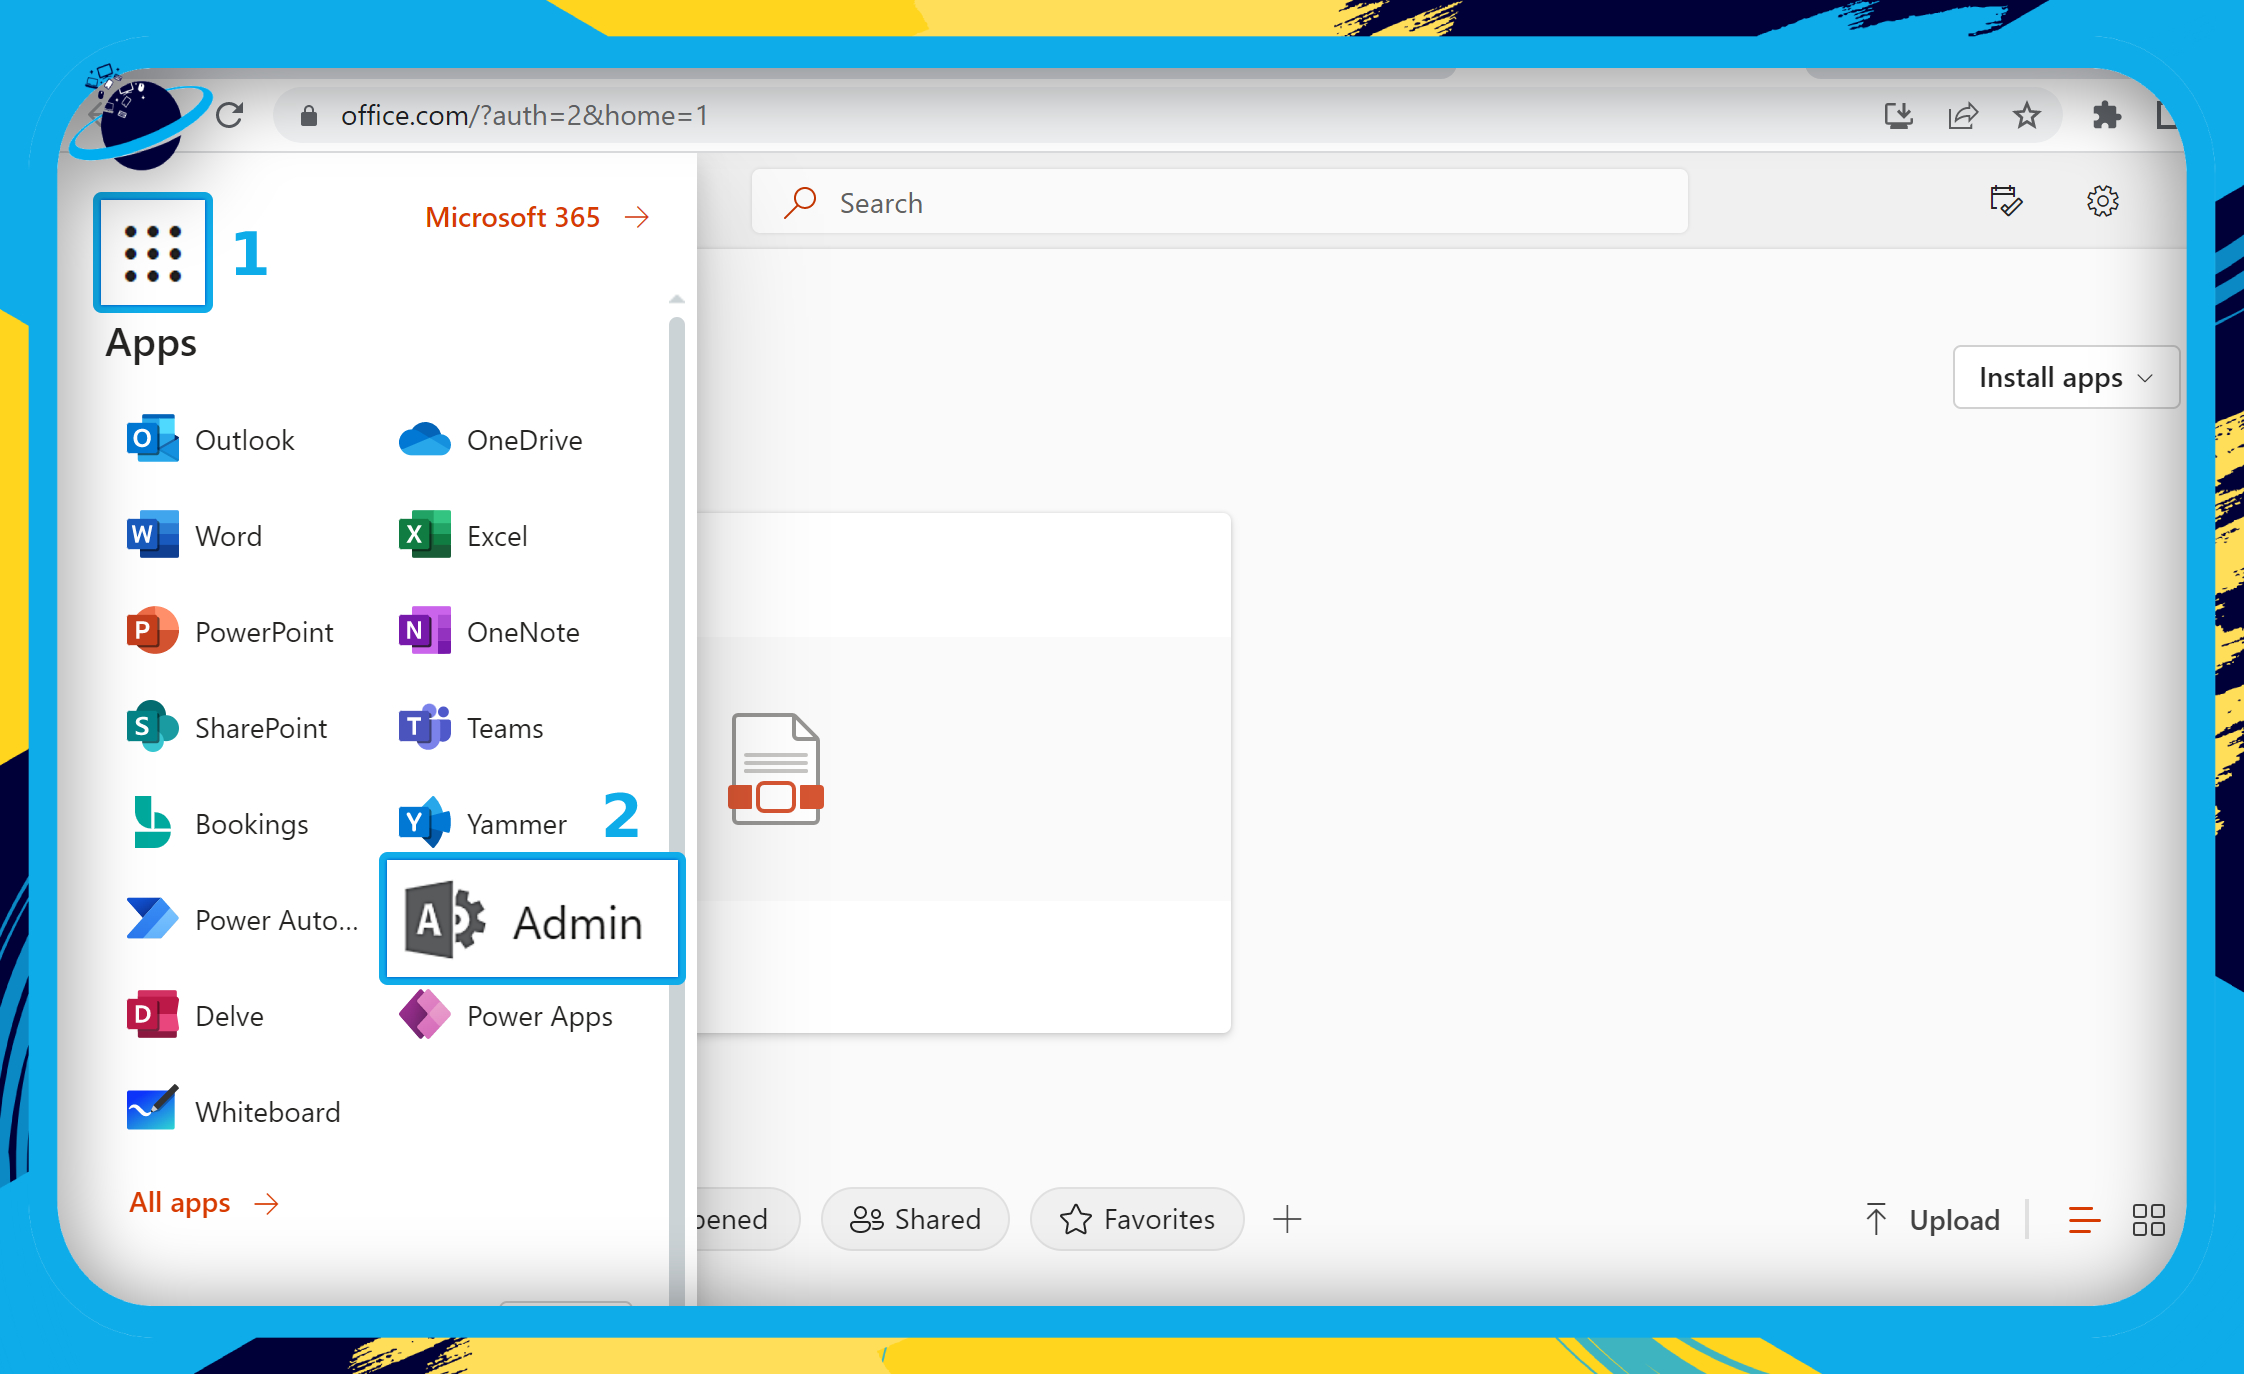
- Click on the
 app launcher icon in the top left. (1)
 - Then select “Admin” from the menu. (2)
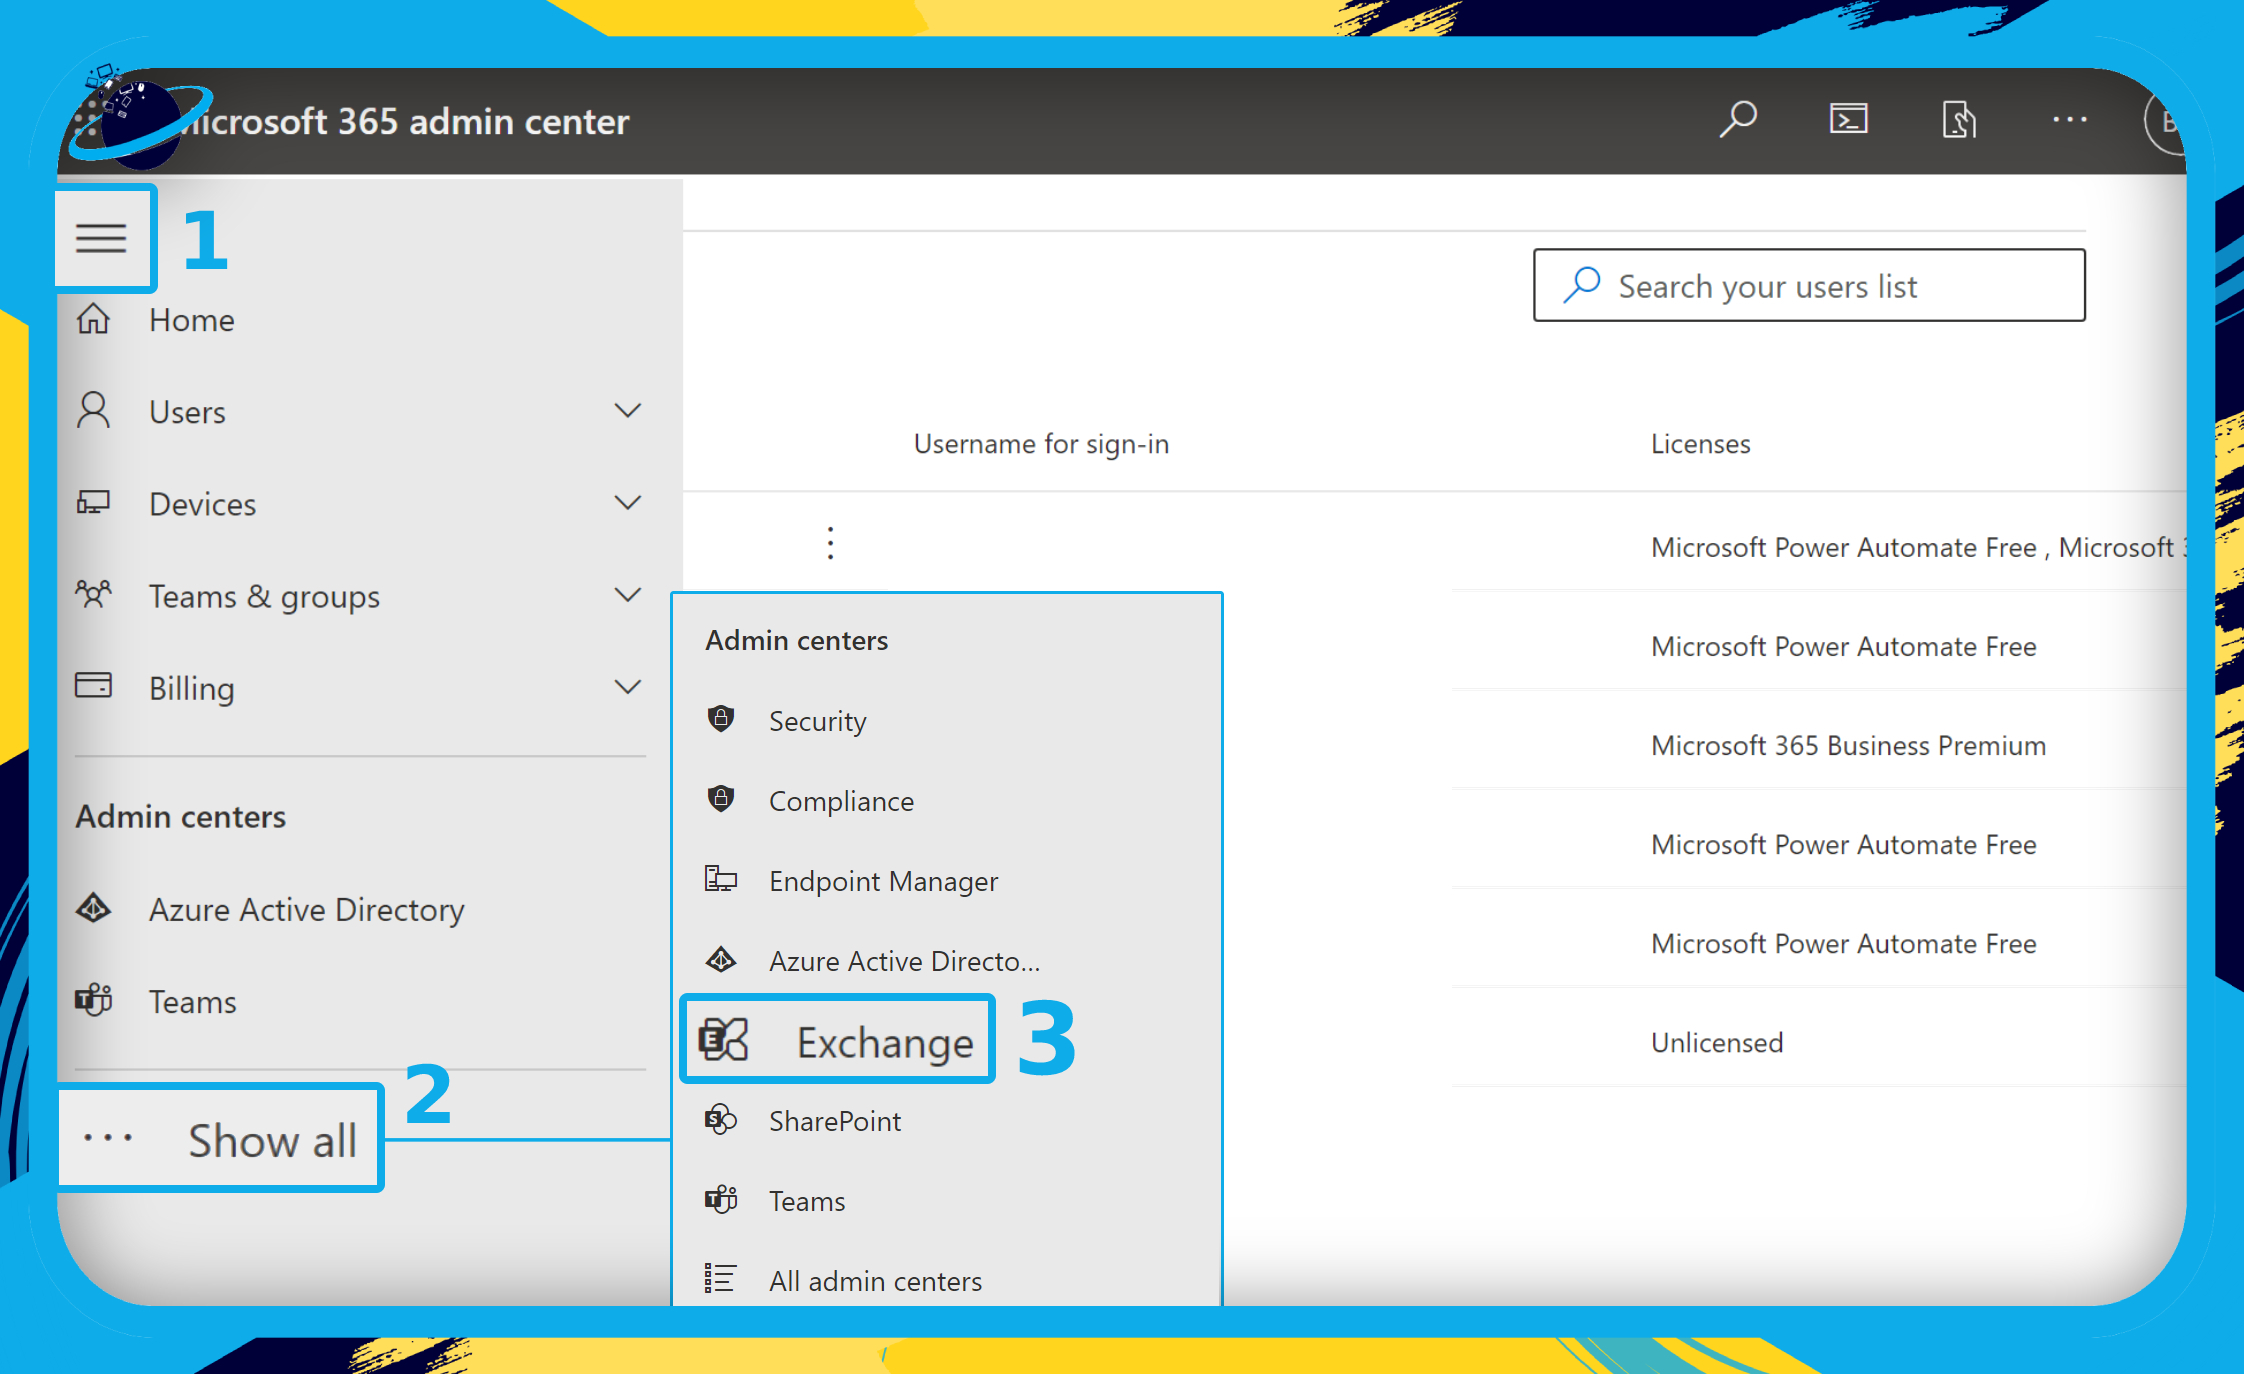
- Click the
 menu icon in the Admin center. (1)
 - Click “Show all” on the left menu to reveal all the Admin centers. (2)
- Select “Exchange” from the list of Admin centers. (3)
- Now under recipients click on “Mailboxes”.

- Select the shared mailbox.

- Under “Sent items” click on “Edit”.

- Ensure both checkboxes under “Manage sent items” are ticked.

- Finally, click on “Save”.

Step by step process – how to fix messages sent from a shared mailbox not saved in that mailbox
- Firstly, click on “Start”.

- After that type into the search bar “Run”.

- Now click on “OK”.

- Type “regedit”.

Many key operating system settings are stored in the Windows registry database. It comprises items such as what should happen when you double-click a specific file type or how large the taskbar should be, for example. When the driver is loaded, built-in and added hardware also saves information in the registry; this driver is called up every time the system is powered up. As a consequence, the graphics card understands what approximate resolution or color depth it should have on the screen. Finally, a number of third-party apps still use the Windows registry as a reminder to retain user preferences or enable automatic starting throughout the booting process.
- From there, find the following registry subkey and click it:
- HKEY_CURRENT_USER\Software\Microsoft\Office\x.0\Outlook\Preferences

- Select “New” from the “Edit” menu, and then “DWORD” Value.

By selecting a relevant search word, such as the name of the program or the manufacturer, and clicking “Find Next,” you may now conduct a focused search for certain database entries. You may also indicate whether Regedit should run a full scan or simply look for the requested phrase in keys, data, or values in the search settings. To do so, simply check or uncheck the corresponding box with your mouse. You may also use the Compare whole character sequence option to get a more accurate search result. This indicates that only those results are shown that have the same name as the search query.
- Press Enter after typing “DelegateSentItemsStyle”.

- Modify “DelegateSentItemsStyle” by right-clicking it.
- Type 1 in the Value data box, then click “OK”.

- Close the Registry Editor.
Conclusion
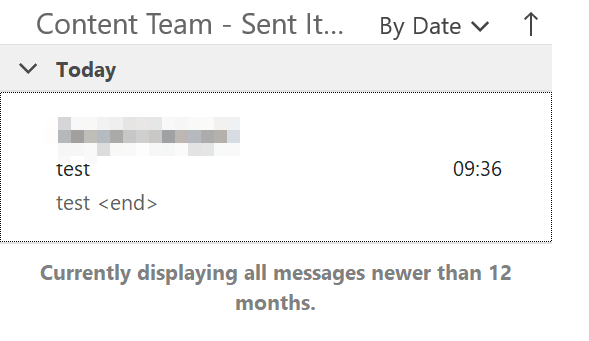
Once the steps above have been established, you will be able to see the sent mailbox items within the mailbox shared folder. As you can see in the test outcome the messages are now sent to that folder.
That’s it for this Blog thank you for taking time out to read our content, please feel free to email our team about how it went if you followed the steps or if you need more help with the questions we answered in this Blog.