Adding a digital signature to a document has grown commonplace as individuals try to use less paper overall. Document creation solutions like Microsoft Word are frequently utilized by many for reporting and other writing-related jobs. However, many users have asked how they may sign a Word document with Mac OS. This is because there is an active feature called “Signature Line” for the Windows version of Word. These users want to know if there is a Mac OS equivalent. Read the instructions below for more information on adding a signature to a Word document and a list of available options.
Using various techniques, you may add a signature to a Word document in Mac OS. The Shape tool in Word is the first approach you can take to include a signature in a document. Using shapes will allow you to create the signature box. Simply insert the shape and your request for a sign or the sign itself. Inserting a single box table is another way to include a sign. You can then remove the top, left, and right borders, leaving a signature line for users to sign. You can add a signature to a Word for Mac document using any available methods. As Word for Mac does not offer a direct feature for you to add a signature, you will need to use these workaround methods to add a signature into the program.
- How to change a standard shape in Word for Mac into a signature box?
- How can you add a single box table and convert it to a signature line?
- How to input a text box and turn it into a signature box?
Here are the three methods you may use in Word for Mac OS to create a signature box: first, you can add a standard shape and convert it to a signature box; second, you can add a single box table and convert it to a signature line. You should thoroughly consider each approach to better grasp how to add a signature on Word for Mac.
How to change a standard shape in Word for Mac into a signature box?
The first way to add a signature to a Word document on a Mac is to add a shape, which you can then convert into a sign box. This can be included near the end of your Word document and will enable you to allow users to sign the document. The best form for creating boxed signs is a square, which can easily be scaled to meet any desired dimension. See how to convert a regular shape in Word for Mac into a signature box by reading the instructions below.
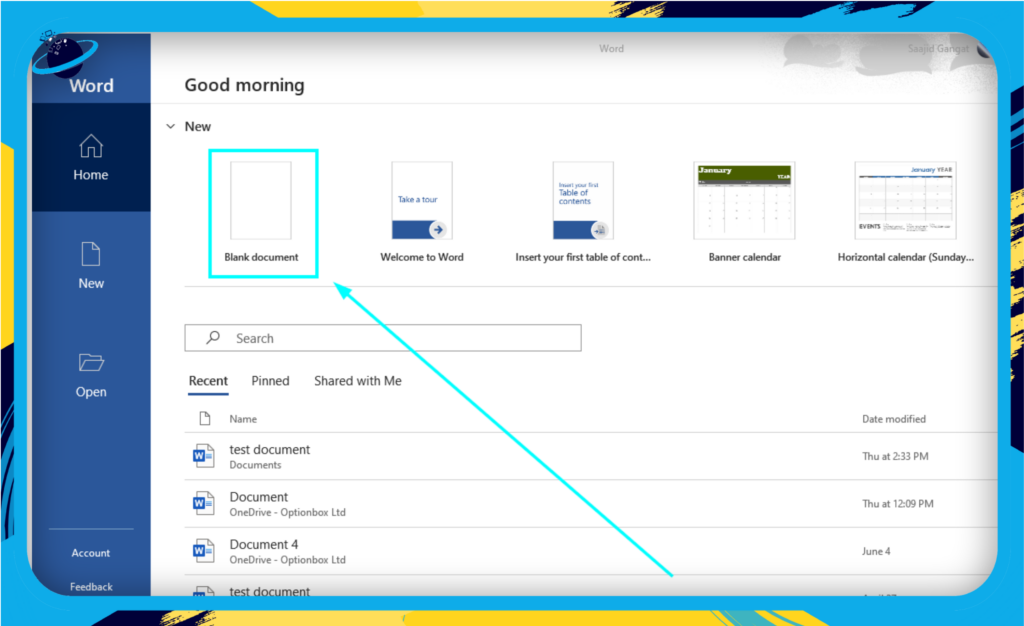
- Firstly open your Word document.
- Now click on “Insert.”
- From there, you need to click on “Shapes.”
- Choose the “Square” option.
- Draw the shape in the desired location.
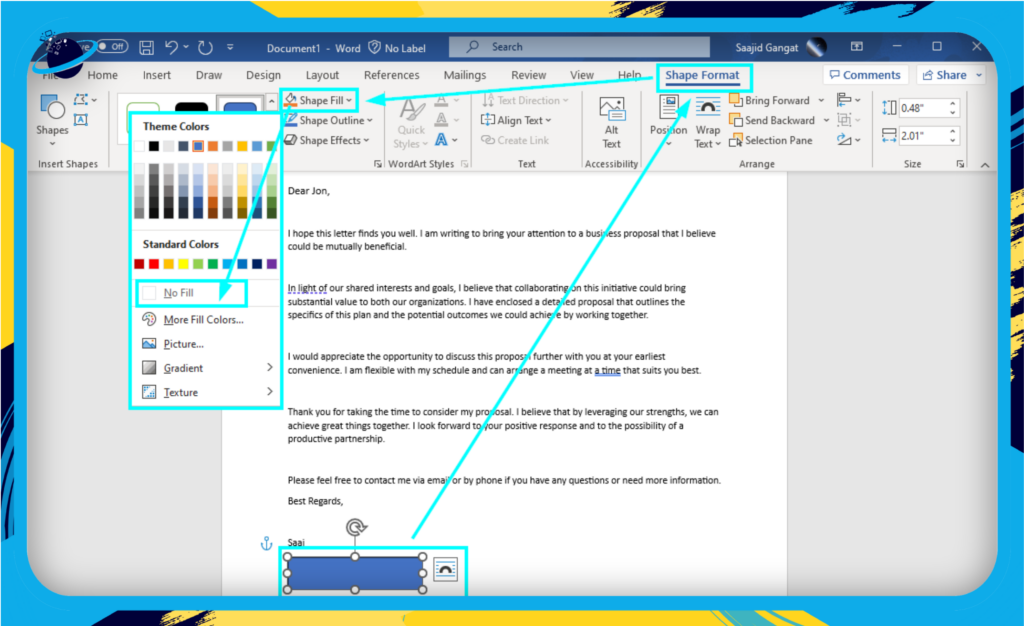
- Click on “Shape Format.”
- Now click on the dropdown next to “Shape Fill” and select “No Fill.”
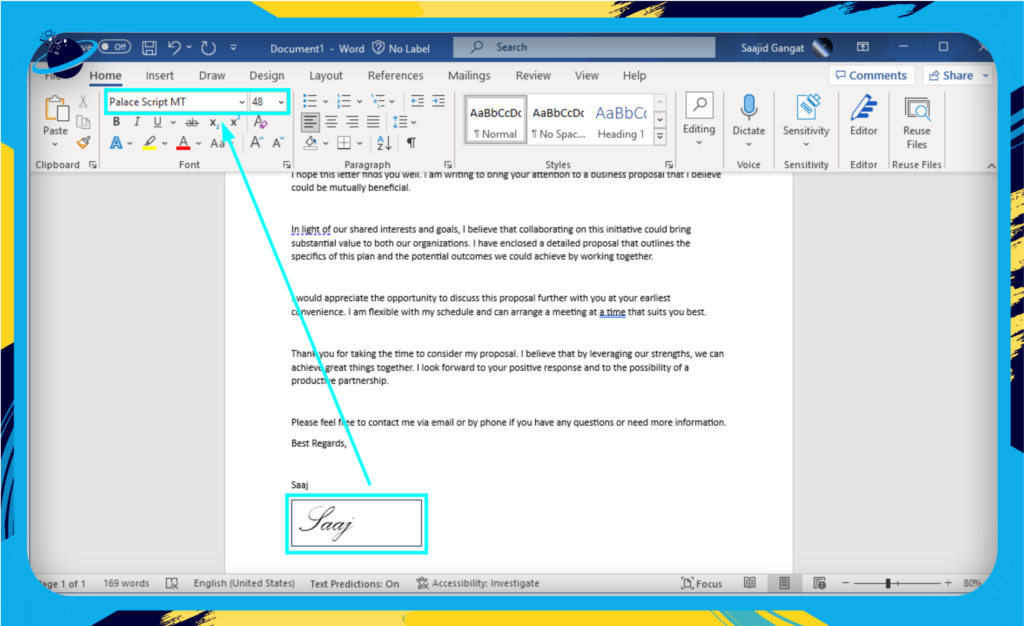
- Double-click on the shape, and you can add your signature using handwriting-style fonts.
Suppose the current document is a template, or you must transmit it to another user for their signature. In that case, you can insert text like “Sign here” because Word for Mac does not have a native mechanism to add a signature line or box to the platform; thus, you must use this method to add the signature box. Now that users have received the paper, they can sign it.
An in-depth guide on how to change a standard shape in Word for Mac into a signature box
If you need more help with the process, you can use the in-depth guide to help. The guide includes screenshots allowing you to go through the Microsoft Word UI without problems. You can also use the screenshots as a visual guide to understanding what needs to do to complete the process. You can also use some of our in-depth analysis to help users understand the steps that are quite difficult to understand properly.
- Firstly open your Word document.
- Now click on “Insert.”
- From there, you need to click on “Shapes.”
- Choose the “Square” option.
- Draw the shape in the desired location.

- Click on “Shape Format.”
- Now click on the dropdown next to “Shape Fill” and select “No Fill.”
- Double click on the shape, and you can add your signature using handwriting-style fonts.
You can either sign the document yourself or simply print it out with a plain box and then send it to your users. You can also add some additional text to let users who will sign digitally know where they need to add their signature. Once the process is complete, you will have successfully added a signature box in Word.

How can you add a single box table and convert it to a signature line?
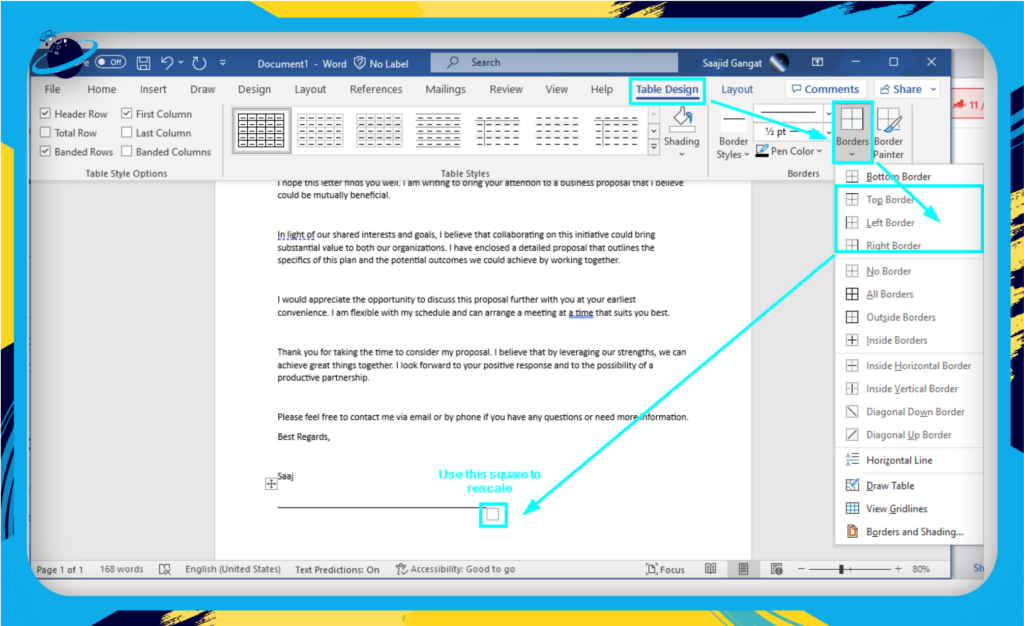
The next method represents the signature line used on Word for Windows. The process involves creating a 1×1 table and removing the sides and top, only leaving the bottom. This allows you to add a signature line that closely resembles what you would normally find in a normal digital sign document. You cannot add a simple line as you can’t type on it to generate your signature. The method here is easy to add a signature line, and you can rescale to the required dimensions.
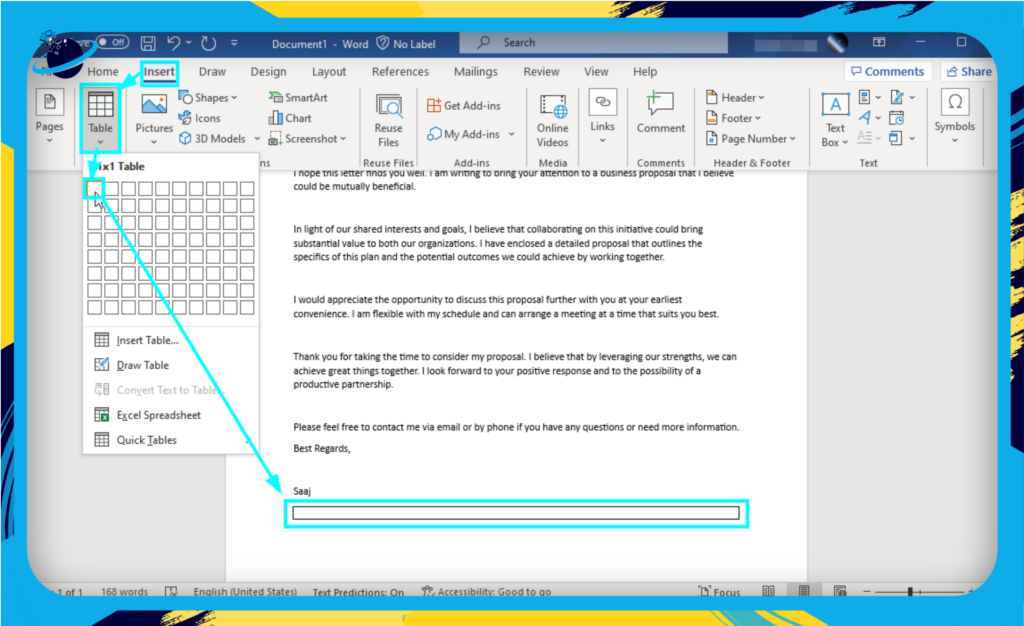
- First, click on “Insert.”
- Now click on “Table.”
- Select the “1×1” option.
- Click on “Table Design”
- Click on the dropdown for “Borders.”
- Uncheck the Top, left, and right borders.
- Rescale the signature line to your preferred dimensions.
You can add the signature on the line as it is right now, or you can add text such as “sign in,” which will allow users who require this document to know where they need to sign. The method shown here will add a line signature that shapes cannot achieve with the method shown at the top. Shapes cannot have individual stroke edges removed.

How to input a text box and turn it into a signature box?
Word provides a versatile way to include a signature box, particularly if you desire flexibility in placement within your document. The method involves adding a text box and transforming it into a signature box. The text box can be moved to any location in the Word document, and you can remove borders and add a line underneath to make it resemble a traditional signature box.
Follow the steps below:
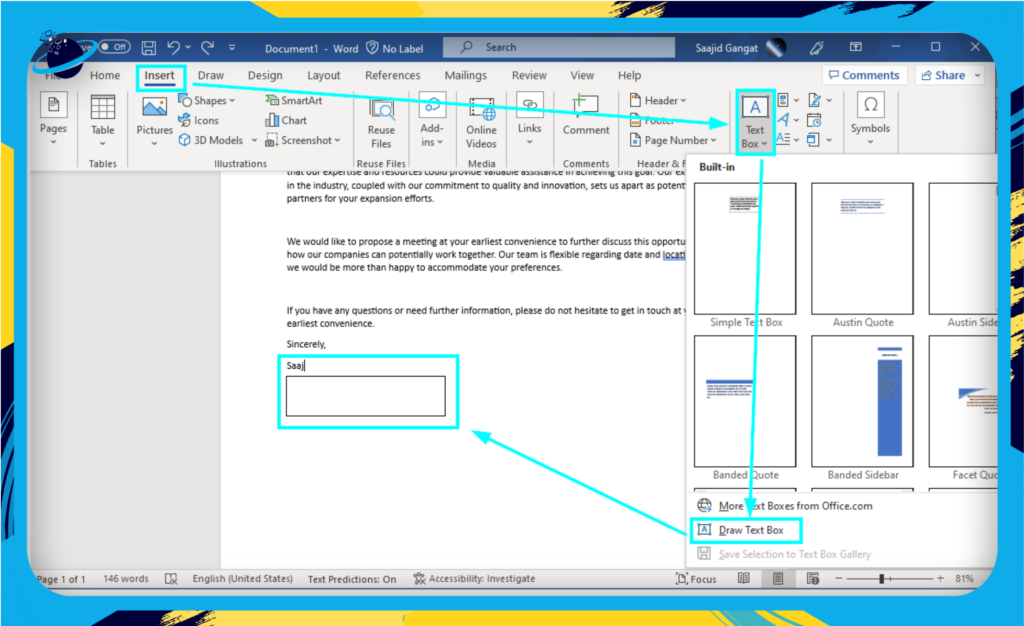
- Click on “Insert.”
- Now select “Text box.”
- From the dropdown, choose “Draw Text Box.”
- Draw your text box for the signature.
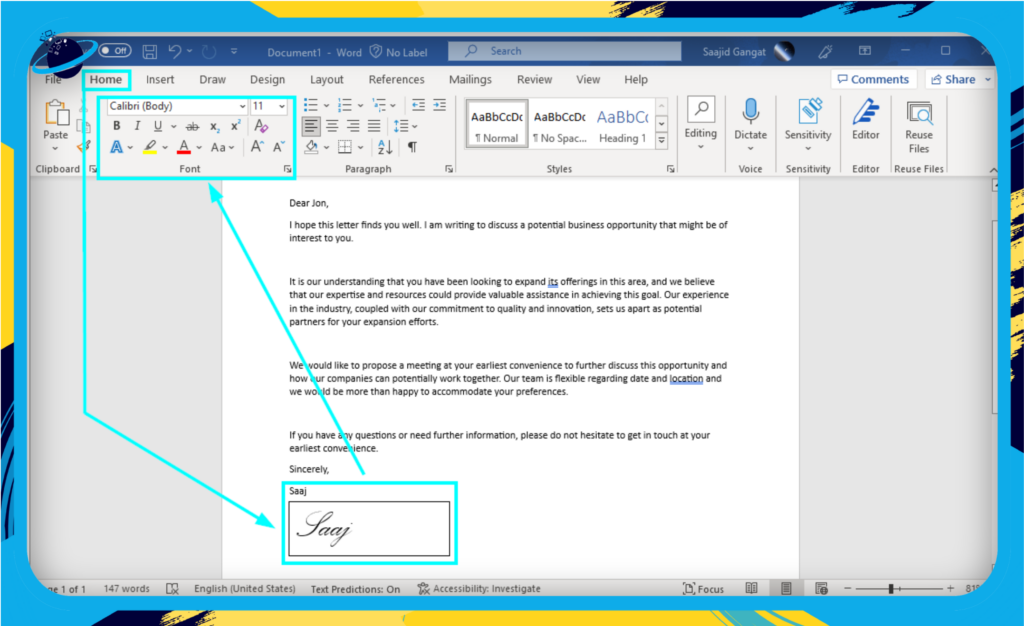
- Input your signature.
- Use the font settings in the “Home” tab to adjust the font.
- Now click on “Shape Format.”
- Select the dropdown for “Shape Outline.”
- Click on “No Outline.”
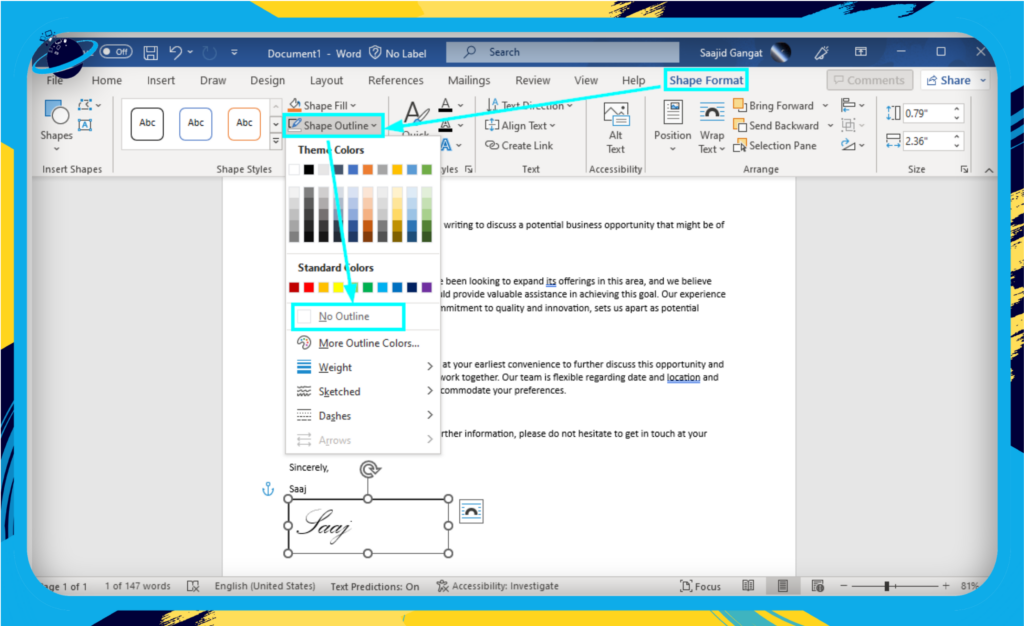
- Select “Home.”
- Click “Borders.”
- Choose “Bottom border.”
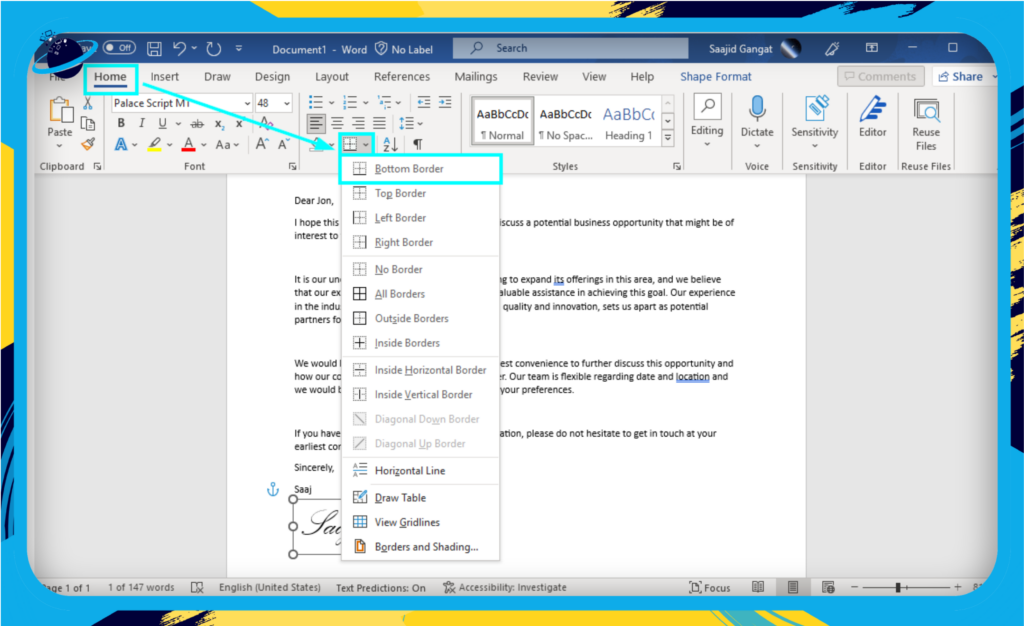
The bottom border will allow you to add a line under the signature to make it look more authentic.
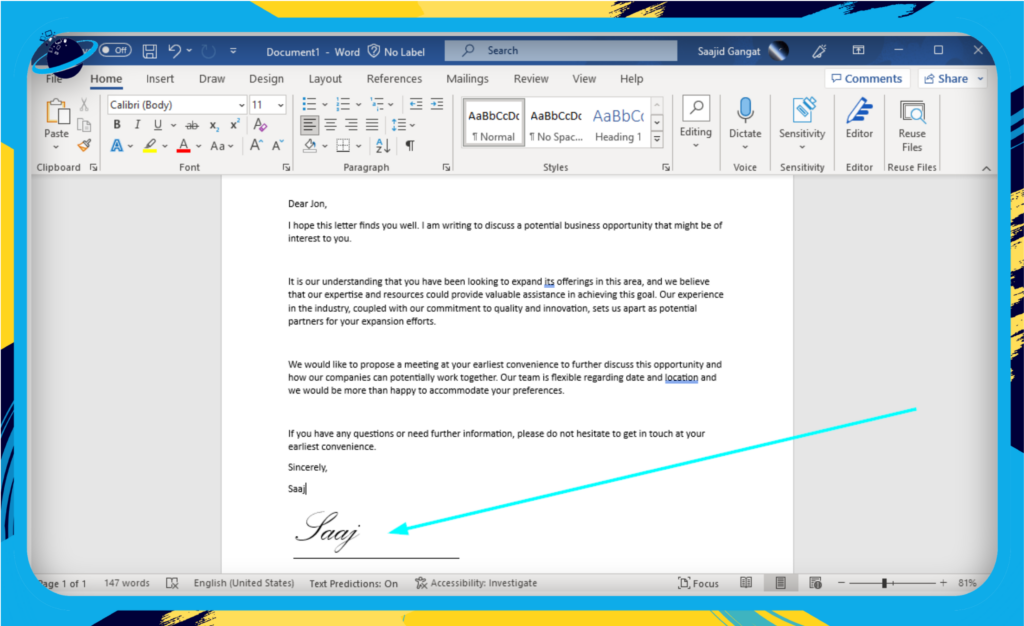
And voila! You’ve created a flexible, moveable signature box within your Word document. Just remember to save your document to keep the changes.
Conclusion
Thank you for reading our content on how to add a signature to a Word document on Mac. I have provided three different solutions you can use to help add a sign to Word on Mac. You can use any one of the methods to ensure you have a signature box on Word for Mac OS devices.
- Method One: Adding a Signature Box: This technique entails the insertion of a signature box, an excellent choice if your goal is to print the document or if there is a specified signing area in the document.
- Method Two: Utilizing a 1×1 Table for Signature: This method involves constructing a one by one table and incorporating your signature within that space.
- Method Three: Text Box Conversion into a Signature Box: This innovative approach involves generating a text box, erasing the border, and subsequently adding a border at the bottom to convert it into a signature box.
You have the flexibility to utilize any of these methods to append a signature to your Word document on Mac.
Should you encounter any complications or have inquiries while navigating through our content, please feel free to leave a comment in the section below. We assure you of our readiness to address your concerns.