SharePoint, a collaborative platform for managing, storing, and sharing data, necessitates backup as a precautionary step in the case of data loss, corruption, or inaccessibility. Because SharePoint Online is a cloud storage solution, it is vulnerable to online dangers like hacking attempts, malware incursions, ransomware, and so on. As a result, finding a reliable backup solution for SharePoint Online data is critical. There are several SharePoint backup options on the market, making selecting the best one a difficult task. In this blog, we will go over a complete list of different solutions for SharePoint Online backups. We will discuss the advantages and disadvantages of these and make sure a step-by-step guide is provided to ensure you know how to achieve these backups. Follow the step-by-step guide below to how you can backup SharePoint online.
- Manually backup SharePoint Online
- Backup using the OneDrive sync client
- Using Compliance Retention Policies to backup SharePoint Online
- Using a migration tool
We have compiled a list of different options to choose from when backing up your SharePoint online server. You may choose to adopt a few of these to try and see which ones suit your needs. They range from the easiest to the most complex. We will also discuss the limiting factors as well as the advantages of each of the four methods that are the most prominent. Follow the guide below to see how you can backup SharePoint online.
–
Manually backup SharePoint Online
In the event that your Microsoft 365 account is hacked, you may manually back up your SharePoint contents to your computer or an external disc. Follow the steps below to back up SharePoint manually:
Step by step process – How to Manually backup SharePoint Online
- First sign in to Office 365.
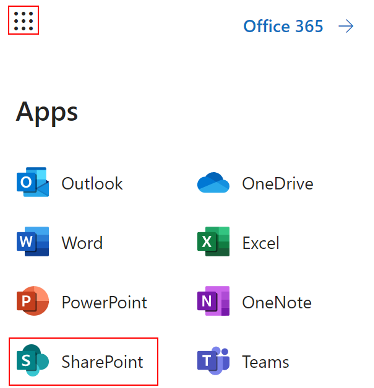
- Use the app launcher and navigate to “SharePoint”, and click on it.
- In SharePoint go to the Site where your files are located.
- In the menu bar, find and click on your document library.
- Choose the files that need to be backed up.
- Now, right-click and click on “Download”.
- Save the files to a portable drive so you may save your Microsoft SharePoint backup on it.
By default, material in SharePoint Online sites is saved permanently. You don’t have to worry about your data vanishing until someone actively deletes it, or if you have information management rules or other external actors that would erase it. However, there will be instances where content is erased on purpose or mistakenly. You need techniques to recover your data, whether it’s a single file or a full site collection. This is why using the native feature will allow you to keep within the SharePoint without subjecting your data to any other entities. That’s pretty much the only advantage and the fact that it’s already present for you.
Limitations of the Manual SharePoint Backup Method
- Because all actions are manual, it takes a long time.
- Because it’s entirely manual, there’s a good chance you’ll forget to get fresh or updated data.
- If something occurs to the computer/external drive, the backup will be lost.
- In the event of a data loss disaster, recovering SharePoint data will be a time-consuming task.
Alerts are not a backup option in and of themselves. You may, however, utilize them to keep alert if any sensitive information is being removed, giving you time to decide how to respond. For example, if there are certain document libraries that you are particularly concerned about, you may set up document deletion alerts for them, giving you time to determine what to do once the documents are in the first-stage or second-stage recycling bins.
–

Backup using the OneDrive sync client
You may sync SharePoint Online files to your desktop using OneDrive Sync Client, making them available offline. This may also be used to generate a copy of your SharePoint data as a backup. Here’s how to use the OneDrive sync client to back up SharePoint Online data:
Step by step process – Backup using the OneDrive sync client
- To begin, log in to Office 365.
- Navigate to “SharePoint” in the app launcher and click it.
- Go to the Site where your files are stored in SharePoint.
- Locate and choose your document collection from the menu bar.

- To save the documents to your OneDrive folder on your desktop, click Sync. This will urge you to confirm by opening the OneDrive folder.

- Open Microsoft OneDrive by clicking the button.

On your desktop, you’ll find all of the files you’ve chosen. However, because the files are synced with SharePoint, any deletion in SharePoint will be reflected on the desktop, erasing any previously backed-up data.
Copy all of the downloaded files to a different folder on your desktop or to an external hard drive to create a backup. Though the OneDrive Sync Client may be used as a backup, solely depending on it might be dangerous, as local PCs are susceptible to crashes and virus attacks.
Limitations of Using the OneDrive Sync Client to Backup SharePoint
- Infrequent Backups: Because taking a backup is a manual procedure, making consistent, regular backups will be difficult.
- Limited Storage: You will be compelled to discard outdated files that are no longer important in order to manage your storage space.
- End-user responsibility: This strategy works only if individual users are responsible for backing up their data. Individual user backups cannot be managed by an administrator.
–
Using Compliance Retention Policies to backup SharePoint Online
Retention Policies aren’t meant to operate as a backup for your data; rather, they’re meant to limit what data may (and should) be removed and when. Regulatory or legal policies frequently dictate whether or not to maintain or remove material. You may apply such policies to all material or simply content that meets specified criteria, such as content that contains specific keywords or contains specific sorts of sensitive information, using Retention Policies. Microsoft 365 Compliance Center makes it easy to set up compliance retention policies that store all versions of your SharePoint data. Follow through to see you can use Compliance Retention Policies to backup SharePoint Online.
Step by step process – Using Compliance Retention Policies to backup SharePoint Online
- First sign into your Office 365 account.
Use your account details or if you have a current Skype account with the Office account in question, you can use this.
- Use the application launcher to navigate towards “Admin”.
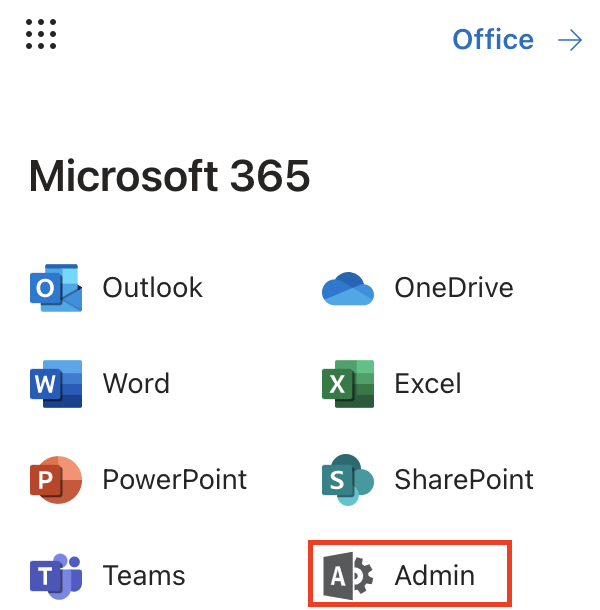
The launcher is illustrated by nine dots in the right corner, click on it and find “Admin” as shown above.
- Click on “Show All” to reveal “Admin centers”.

You may not need to click on “Show all” if for instance the admin center content that is required is pinned to the main menu. In this case just follow the next step and proceed to remove the blocked user.
- Under “Admin centers” on the left, click on “Compliance”.

Originally both the “Security” and “compliance” tab were as one single software however in the latest few updates by Microsoft both the security feature and the compliance feature have been separated. This improves functionality and refines what the user wants.
- Click on “Policies” on the left-hand menu.

- Now click on “Data loss prevension”.

Summery
All newly uploaded and changed files for the chosen SharePoint sites will be retained after the compliance retention policies are established.
SharePoint Backup Limitations Using Compliance Retention Policies
- Your Microsoft 365 storage allowance is affected by retained data.
- Retained files may only be exported offline and must be manually recovered in the case of a data loss. It will require a substantial amount of human labor and time to restore a big number of files.
Preventions lock
You can continue to alter your material in its original place even if it is subject to a retention policy. However, if someone updates or deletes information that is covered by the policy, a copy is stored in a safe place and kept for the duration of the policy. Retention Policies may be specified to limit how your material is handled even further. Once turned on for a given piece of content, they cannot be turned off or made less restrictive. You can utilize Preservation Lock to accomplish this criterion. No one, including the administrator, can turn off or make a policy less restrictive after it’s been locked. The Retention Policies, once again, are a precaution against unintentional (or malicious) material erasure, not backup. If you implement a Retention Policy that deletes material permanently, you will not be able to retrieve it once the policy is implemented.
Use a flow retention policy
Microsoft Flow has a variety of triggers and actions that may help you respond automatically to events like the deletion or modification of documents or objects. To start the procedure, the Flow would utilize an item/file removed or changed as a trigger. You may then determine what you want to do with it based on your individual circumstance. Copy the file to a different place, such as a SharePoint site, Azure storage, OneDrive for Business, a file system, or another service, or just transmit the file’s metadata via email (similar to an alert).
–
Using a migration tool
If you’ve already invested in a migration tool, you might be able to use it for backup purposes as well. Most migration programs allow you to do data migrations, which move only the material that has changed. Furthermore, such migrations may frequently be programmed to take place at predetermined periods. This allows you to do the migrations while the system is not in use, reducing the effect on your business. Below are some of the migration tools you can use to complete a successful backup.
Use Kernal migrator for SharePoint
Users can download a copy of their SharePoint to their local system as a backup, even though this is primarily a SharePoint migration tool. The program is quite dependable when it comes to migrations, backups, and restorations. This program may be used to meet all SharePoint needs, including backups and restores, at a low cost.
Main Characteristics
- SharePoint (both on-premises and online) is backed up to the file system.
- Filters such as Date Filter, File Filter, User Filter, and others are available for more flexible backup.
- Allows you to choose the location for your SharePoint files and folders.
- SharePoint 2010 migrations, SharePoint 2013, SharePoint 2016, SharePoint 2019 migrations, and SharePoint Online migrations
- Migrations from a file system to SharePoint, Google Drive, and OneDrive;
- Migrations from Google Drive to Google Drive and from OneDrive to OneDrive
Use Mover.io for SharePoint
Since its inception, Mover has swiftly established itself as one of the best cloud migration solutions in terms of speed and effectiveness, as well as security with a low-risk factor. They imposed a new stage in development and chose to delegate their responsibilities to Microsoft, who, with their own tools, can aid in the creation of possibly the most successful digital migration tool ever devised.
Step by step process – How to use Mover.io
- First, go to a verified site called “mover.io”.
- Scroll down and click on “Migrate Now”.
- Sign in to your Office 365 account.
- Now click on “Authorize New Connector”.
- After that select “Office 365 (OneDrive/SharePoint Admin)”.
- A new window will open, Here add your Display name and then click “Authorise”.
- Select your account.
- Now select your destination (Your new Office 365 SharePoint account).
- Once this is complete, All your files and data will be transferred over to your new account.
In-depth – Step by step process – How to Manually backup SharePoint Online
Step by step breakdown:
- First sign in to Office 365.
Use your account details or if you have a current Skype account with the Office account in question, you can use this.
- Use the app launcher and navigate to “SharePoint”, and click on it.
You can access the SharePoint application however this is for individuals who only have a SharePoint plan, A larger group of individuals have SharePoint in Office 365.
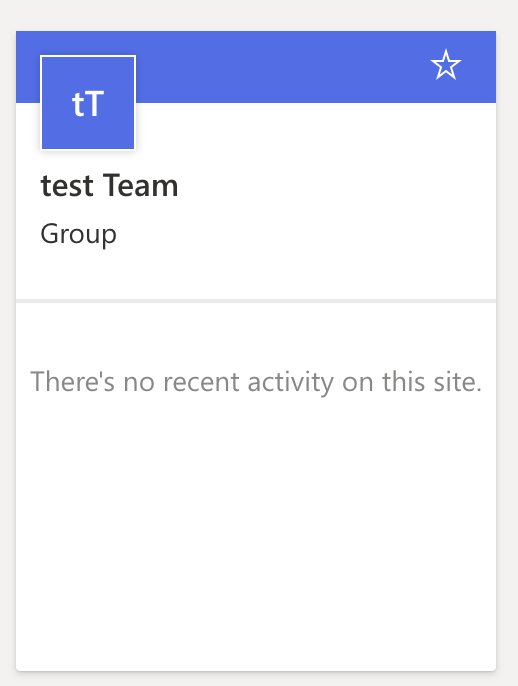
- In SharePoint go to the Site where your files are located.
In this example, the site above called “Blog Demo” will be used to create the preview.
- In the menu bar, find and click on your document library.
- Choose the files that need to be backed up.

- Now, right-click and click on “Download”.

- Save the files to a portable drive so you may save your Microsoft SharePoint backup on it.
That’s it for this Blog thank you for taking time out to read our content, please feel free to email our team about how it went if you followed the steps or if you need more help with the questions we answered in this Blog.