When using Microsoft Teams, the camera is arguably the quintessential aspect of the application. Teams is, as you will know, an application designed for online meetings.
Anyway, there will of course be errors that are prone to being unwantedly discovered, as is the case with most, if not all, aspects of the digital side of the world. One such issue in Microsoft Teams is one in which the camera does not work. For a video centric application, this is hardly ideal, and seeing as though you are reading this today, chances are this issue has affected you.
Thankfully, this is an issue with a resolution, and a relatively simple one at that. In order to get your Microsoft Teams camera working again, there are several little methods you can use. First though, you need to ensure a few things.
Make sure that any application that utilises the camera of your computer is closed. If your camera is one that is external from your computer, try unplugging it and reinstalling it, and of course, the whole ‘turn it off and on again’ method. I’m aware this might sound patronising, and that isn’t my intention, but it is always best to remind people of the simplicities when they are worrying about an issue.
If none of this works, that is fair enough. There are several other ways to see if your camera is in use.
- Check for any updates to Microsoft Teams or your software.
- Check your app permissions.
- Making sure that Microsoft Teams allows you to use your camera.
We’ve also created a YouTube video that walks through the most likely cause of your camera not working, which is relating to your camera permissions. You can watch that video on our YouTube channel here:
Now, some of these will be far more simple than others. For example, checking for any updates to Teams or your computer software will, in no way, require any sort of tutorial. The other two though are slightly more layered processes, and are ones that we will discuss in detail.
As is the case with all of our pieces, we will first offer you a step by step guide of the process, which may well be enough help for some as they attempt to complete the tutorial. Others though, may require more assistance, which is completely justifiable. As such, we will then break the process down further, with accompanying screenshots to help you as you go.
Stp by step: Camera isn’t working on Microsoft Teams – How to fix
- Open your ‘Settings’ on your computer.
- Of all options offered to you, look for the heading that reads ‘Privacy’ and click it.
- After clicking ‘Privacy’, you will be brought to a new submenu.
- Here, you will want to click the option labelled ‘Camera’, under the subheading of ‘App Permissions’.
- It is here you will be able to see if you currently allow apps access to your camera.
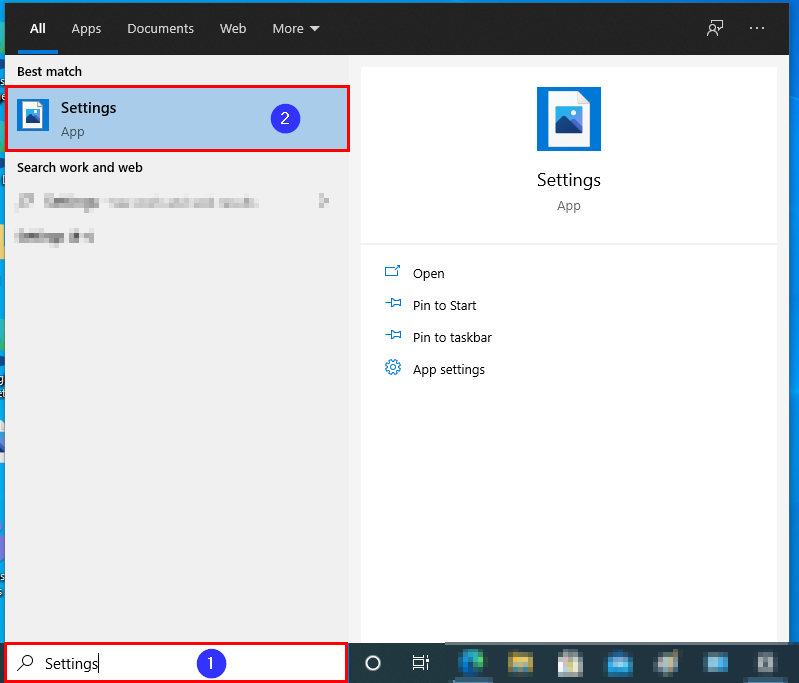
So, your first step, as you will have seen in the aforementioned steps, is to open the Settings of your computer. Of course, you can do this via the shortcut that you might have preset to be conveniently accessible. If you can’t find your shortcut though, don’t worry. If you are utilising Windows 10, look towards the search feature of the navigation bar at the bottom of your screen, and search for ‘Settings’. Click the first option that appears to you.
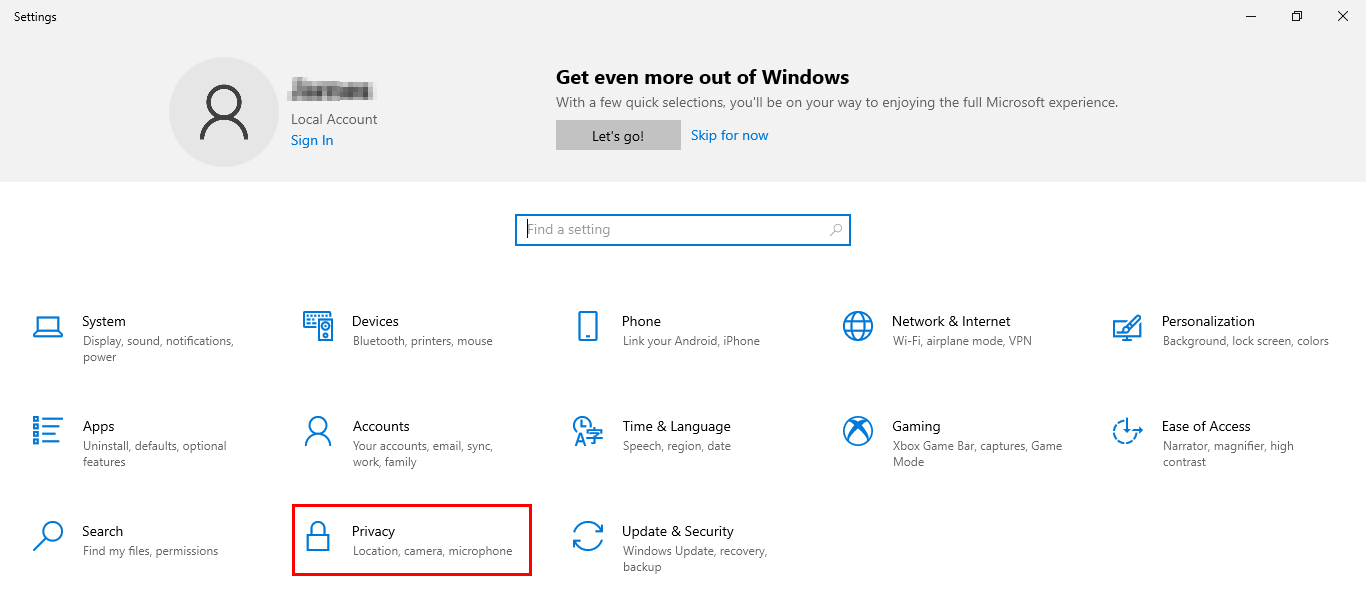
Opening ‘Settings’ will present you with a wide array of avenues, which each lead you to different aspects of your computer settings depending on which you click. For this process, though, you should look to click the subheading titled ‘Privacy’. In case you need help, there is a highlighted screenshot below.
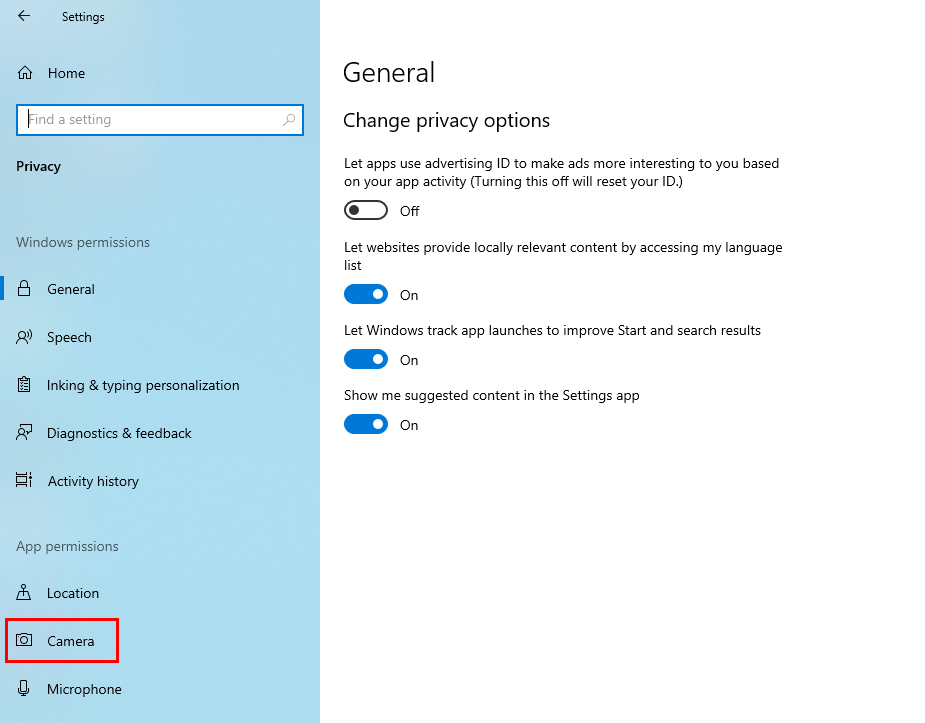
Clicking ‘Privacy’ will bring you to yet another submenu, populated with numerous options for you to browse. There will be a subheading titled ‘App Permissions’, which will be the second section of options on a listing menu to the left of your screen. Under App Permissions will be an option simply named ‘Camera’, and it is this you will want to click.
Clicking ‘Camera’ will bring you to the final section you need to access for this tutorial. Under this option, there will be a title that reads ‘Allow apps to access your camera’.
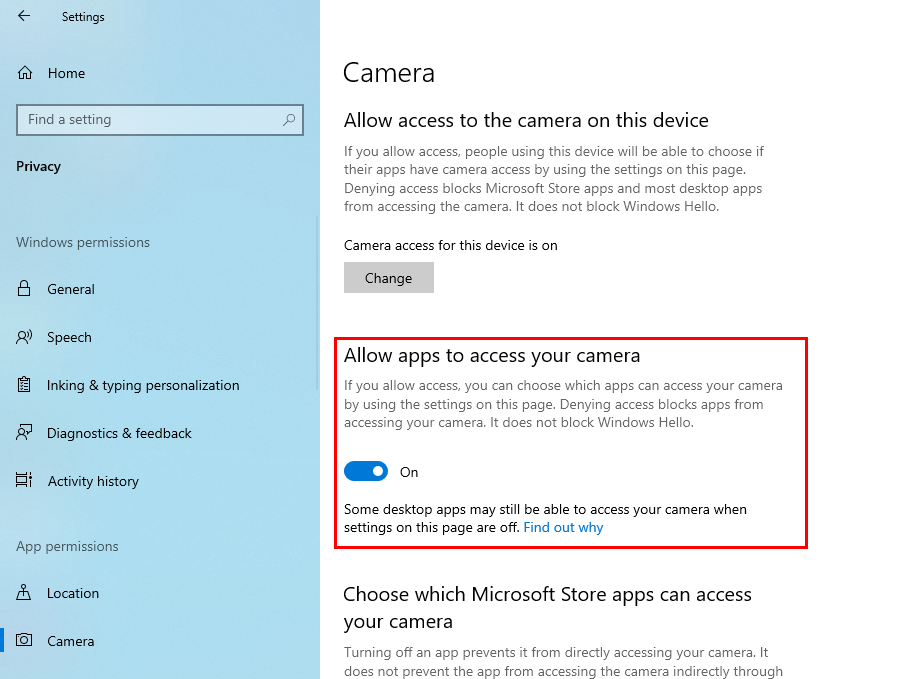
If this option is unticked, then that might be the reason you can not get your camera to work within Microsoft Teams. Make sure you set the option to ‘On’, as it is above. The change will automatically save, and the process is complete!
Next, we will be discussing making sure your camera is enabled within Microsoft Teams. To do this, you will need to go to device settings within Microsoft Teams. As was the case before, we will first offer you a step by step, before delving into the process further, so don’t worry if the simple sentence here is not enough detail for you to work with.
STEP-BY-STEP: CHECKING THAT MICROSOFT TEAMS ALLOWS CAMERA USE
- Open Microsoft Teams
- From the main Teams screen, click the three dots in the top right corner.
- Now, click ‘Settings’.
- From the main menu you are presented with, go to the subcategory labelled ‘App Permissions’.
- Here, check to see if your application allows access to and usage of your camera.
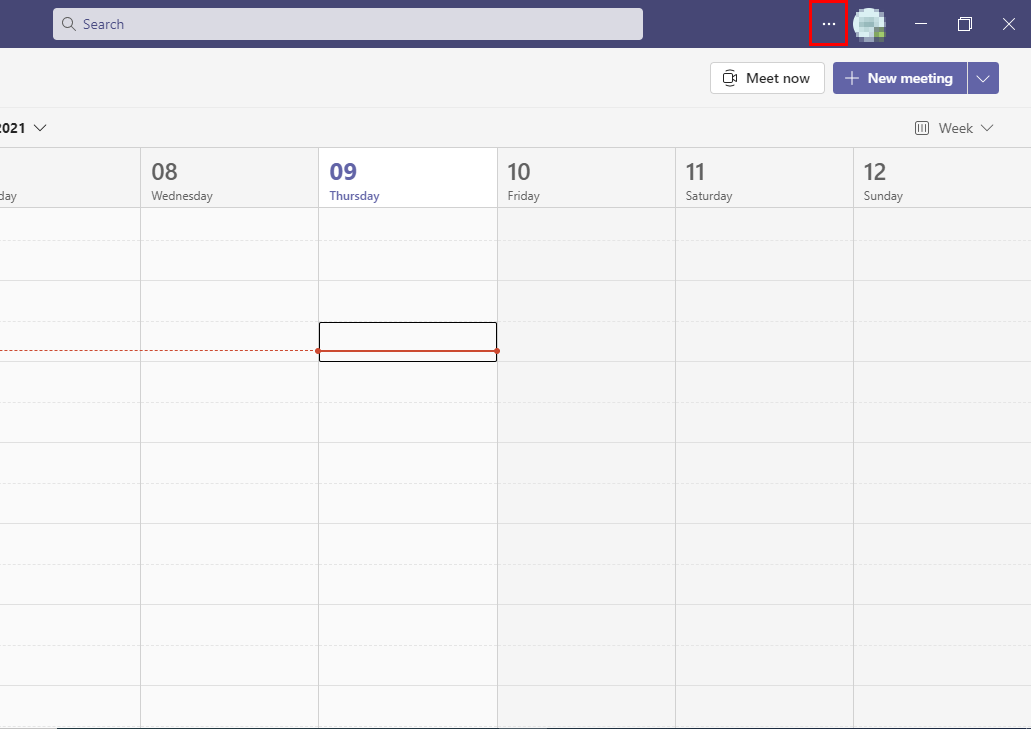
So, your first step will be to open Microsoft Teams. Of course, this is an easy task, but if for whatever reason you can’t find the shortcut to the application, simply search for Microsoft Teams in the navigation bar of your computer (if you are operating on a Windows system at least).

After opening Teams, chances are you will be greeted with the calendar that has become something of a main menu for the application. From here, you should look towards the top of your screen. In the top right corner, or near enough, there should be an icon of three dots, an ellipses. Click that. In case you need assistance, there is of course a highlighted screenshot below.
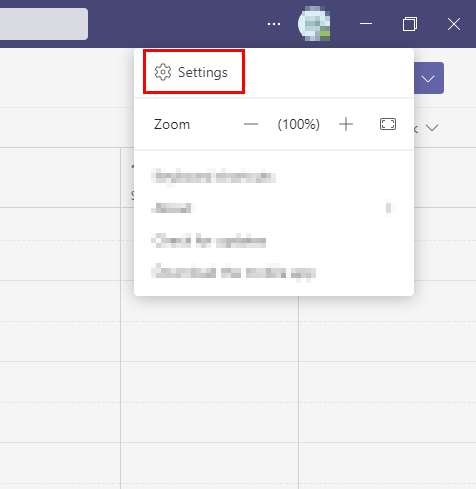
Clicking this will prompt a small menu to open, on which will be a handful of sections you can click and browse. For this process, you will want to click on the subheading titled ‘Settings’ which, yet again, has been highlighted below for you in case you need the assistance.
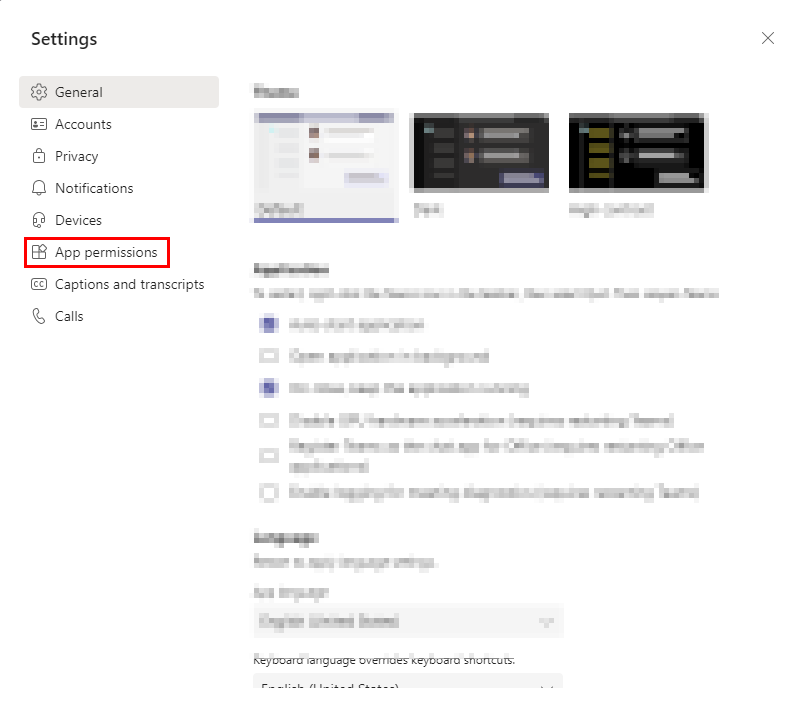
Clicking ‘Settings’ will, unsurprisingly, bring you to the settings dashboard. From here, you will be on the general tab by default. To the left of the menu is a list of different headings, each of which governing other aspects of the settings of Microsoft Teams. Here, you should look to click the subheading titled ‘App Permissions’.
Clicking this will bring you to the tab on which you can see if Teams allows permission for your computer to use its camera on the application. The top setting will be labelled as ‘Media’, and in order for Teams to access your camera, microphone etc, then the setting for ‘Media’ access needs to be enabled, as thus:

This change will autosave, and then you will have completed the process!
In today’s piece, we discussed two ways by which your camera may not be working within Microsoft Teams. Not only that, but we have offered you a way to resolve both issues, complete with screenshots and informative walkthroughs to best assist you.
Thank you for taking the time to read this blog, I hope you found it as helpful as you wanted it to be! As is the case with every piece we publish, if you encounter any issues whatsoever when following either of the tutorials, or simply wish to share some thoughts you may have, then please don’t hesitate to get in touch with a member of our team.