Because you have hundreds of papers in your SharePoint document libraries, you may inadvertently open documents merely to see what they’re about. Isn’t it wonderful to save time by seeing the contents of a document without having to click on each one? In this post, we will address a few different ways to preview a document in SharePoint. We will be using this scenario as a reference to the question we will be answering. A SharePoint user needs help: “In SharePoint Online, I would like to create a page that displays previews of all documents inside a certain folder in a document library. For example, we have a folder with 4 .pdf files and one .xls. I would like a page where we can quickly view all 5 files as preview tiles without clicking through each document. These documents are replaced on a regular basis.” Use the steps below to follow along.
Step by step process: Create a SharePoint page that displays readable previews of files in a folder.
- First, sign into your Microsoft 365 account.
- Click on the
 app launcher.
 - Then select “SharePoint” from the apps list.
- Select a site in which to create a file preview page.
- Go to “Pages” in the left menu.
- Click the “+ New” button at the top.
- Then select “Site Page” from the dropdown list.
- Name the new page.
- Click the + icon on the left to add a new section.
- Select “Two columns” from the popup menu.
- Hover your mouse over the top of the left column and click the + icon.
- Scroll down the popup navigation pane and select “Document library.”
- Hover your mouse over the top of the right column and click the + icon.
- Scroll down the popup navigation pane and select “File viewer.”
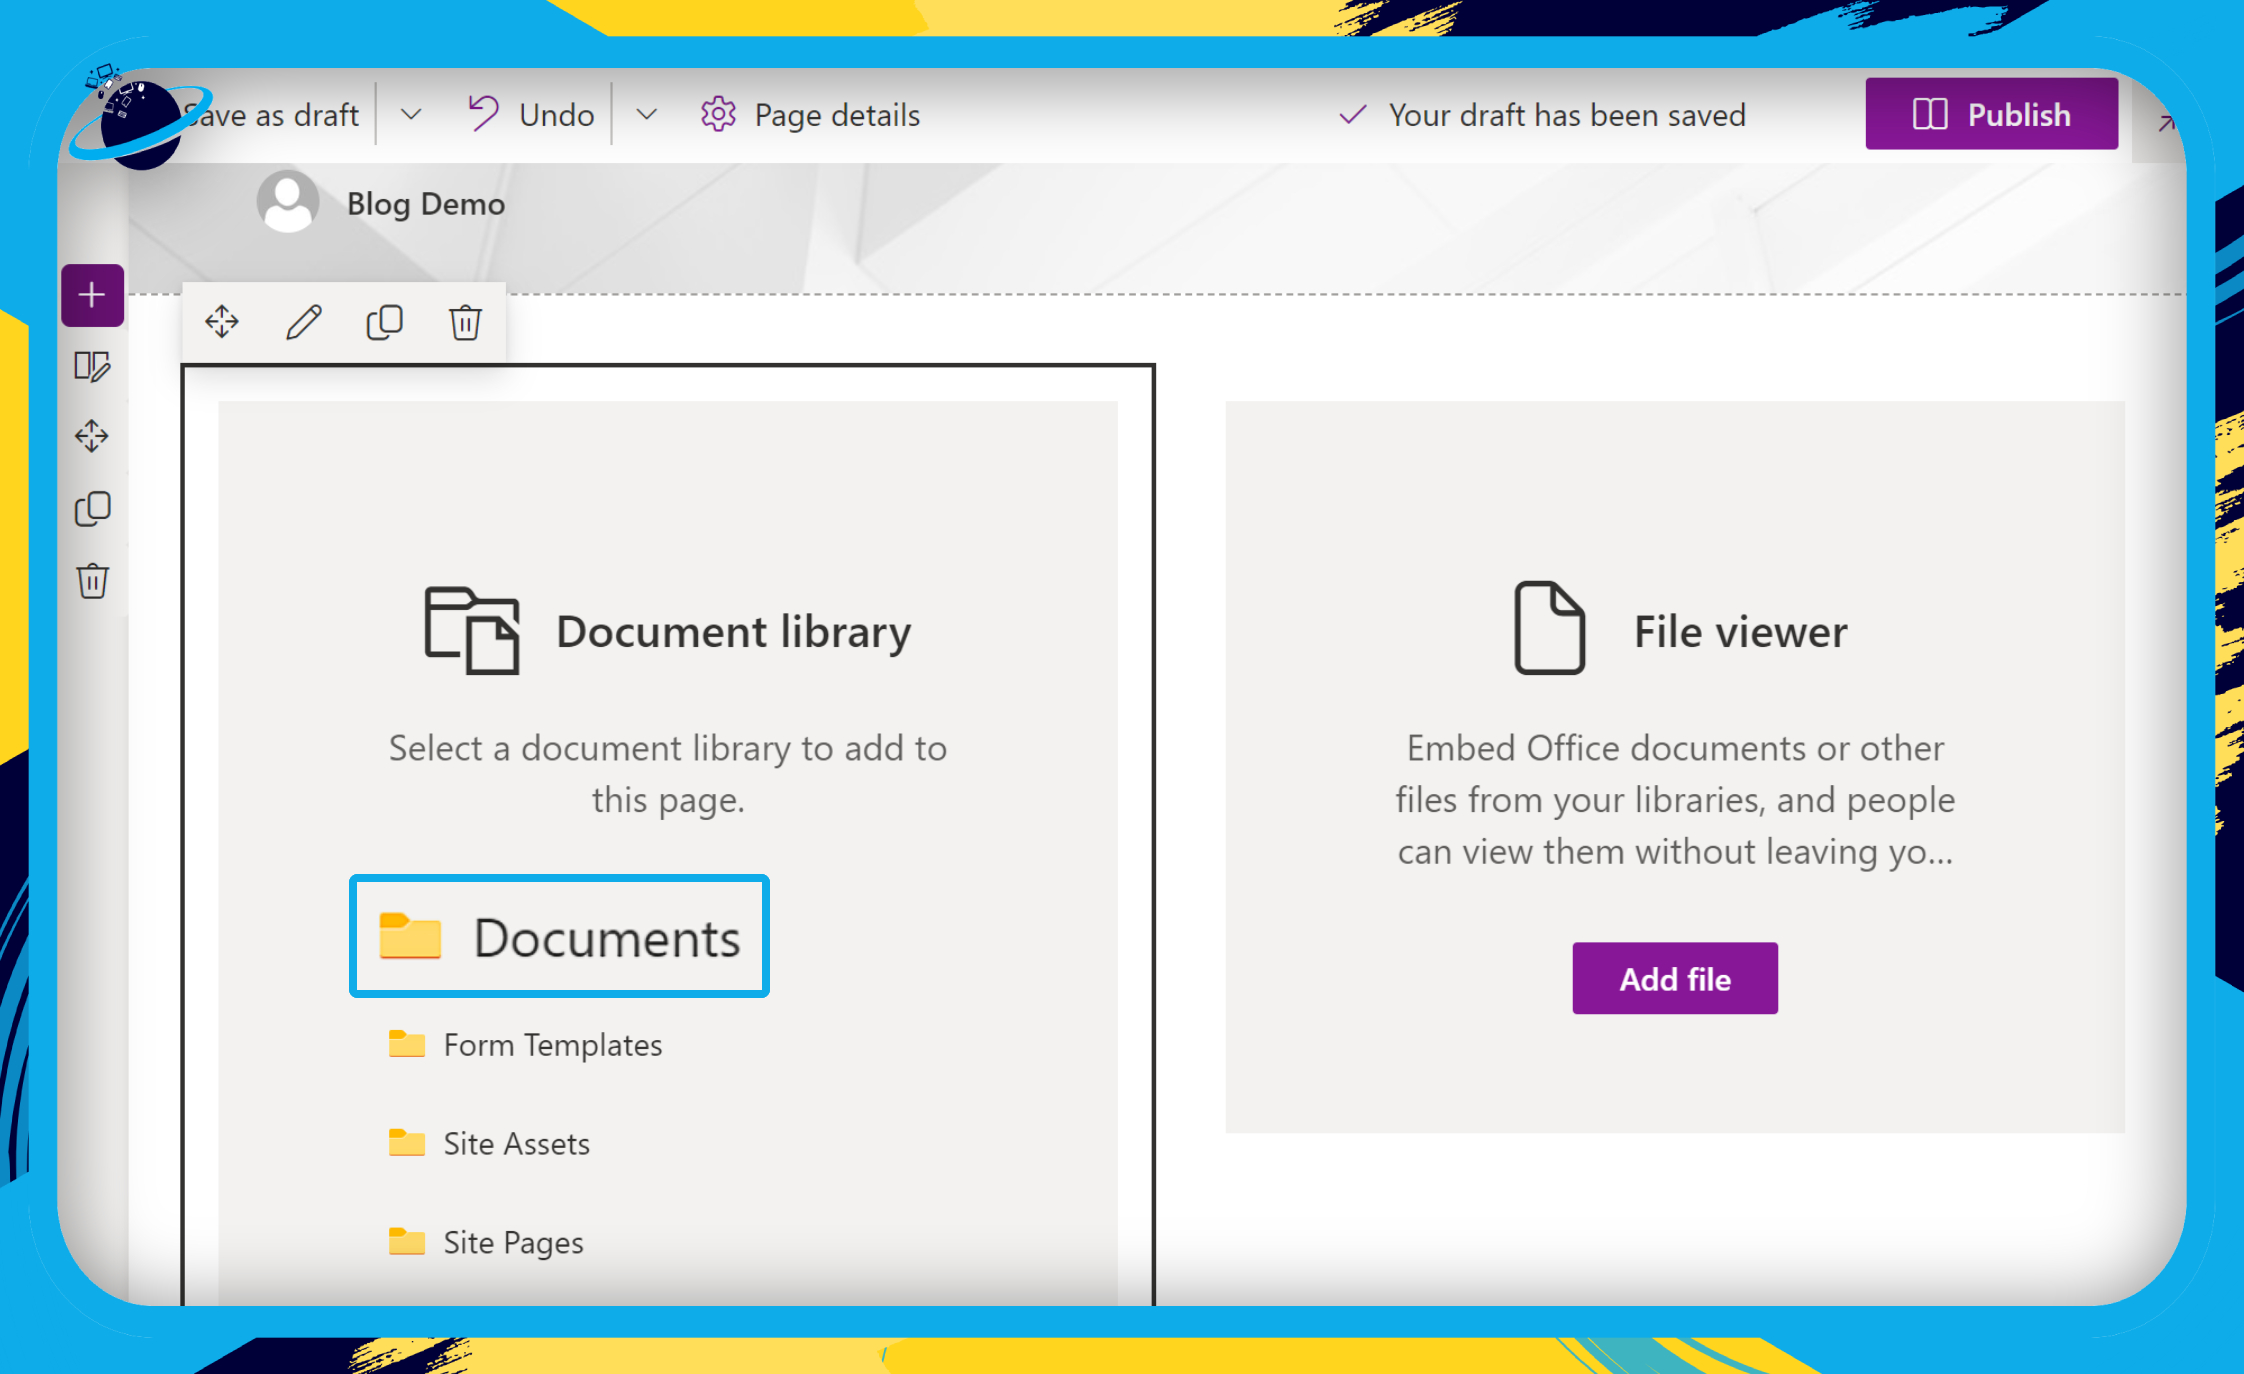
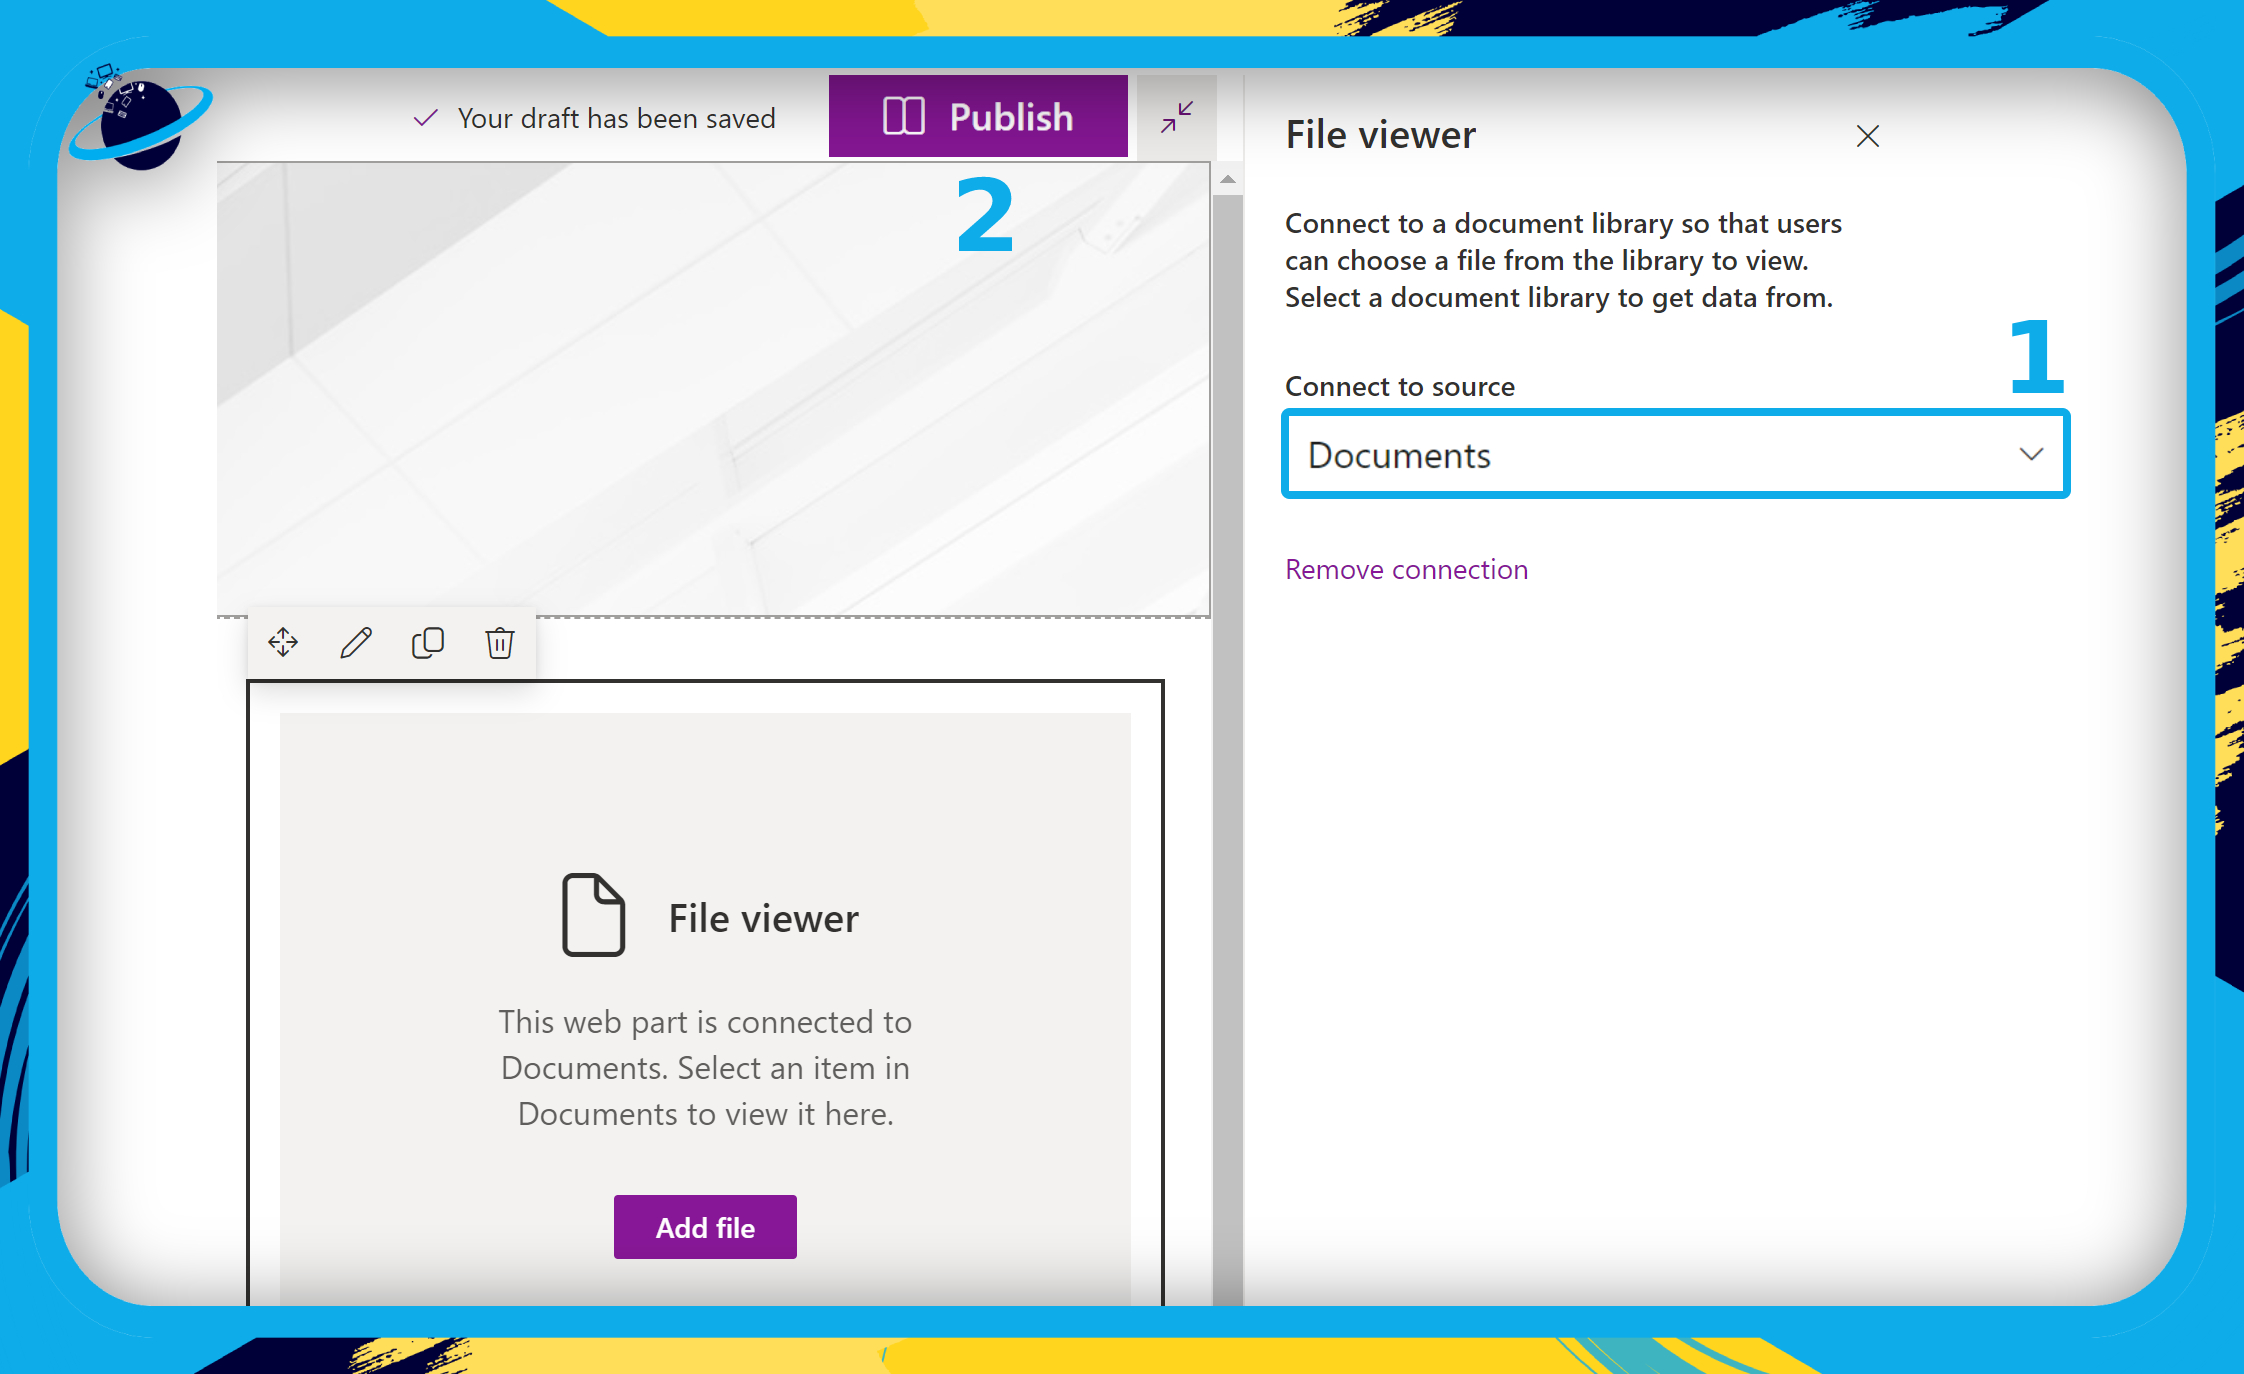
- Select “Documents” in the “Document library.”
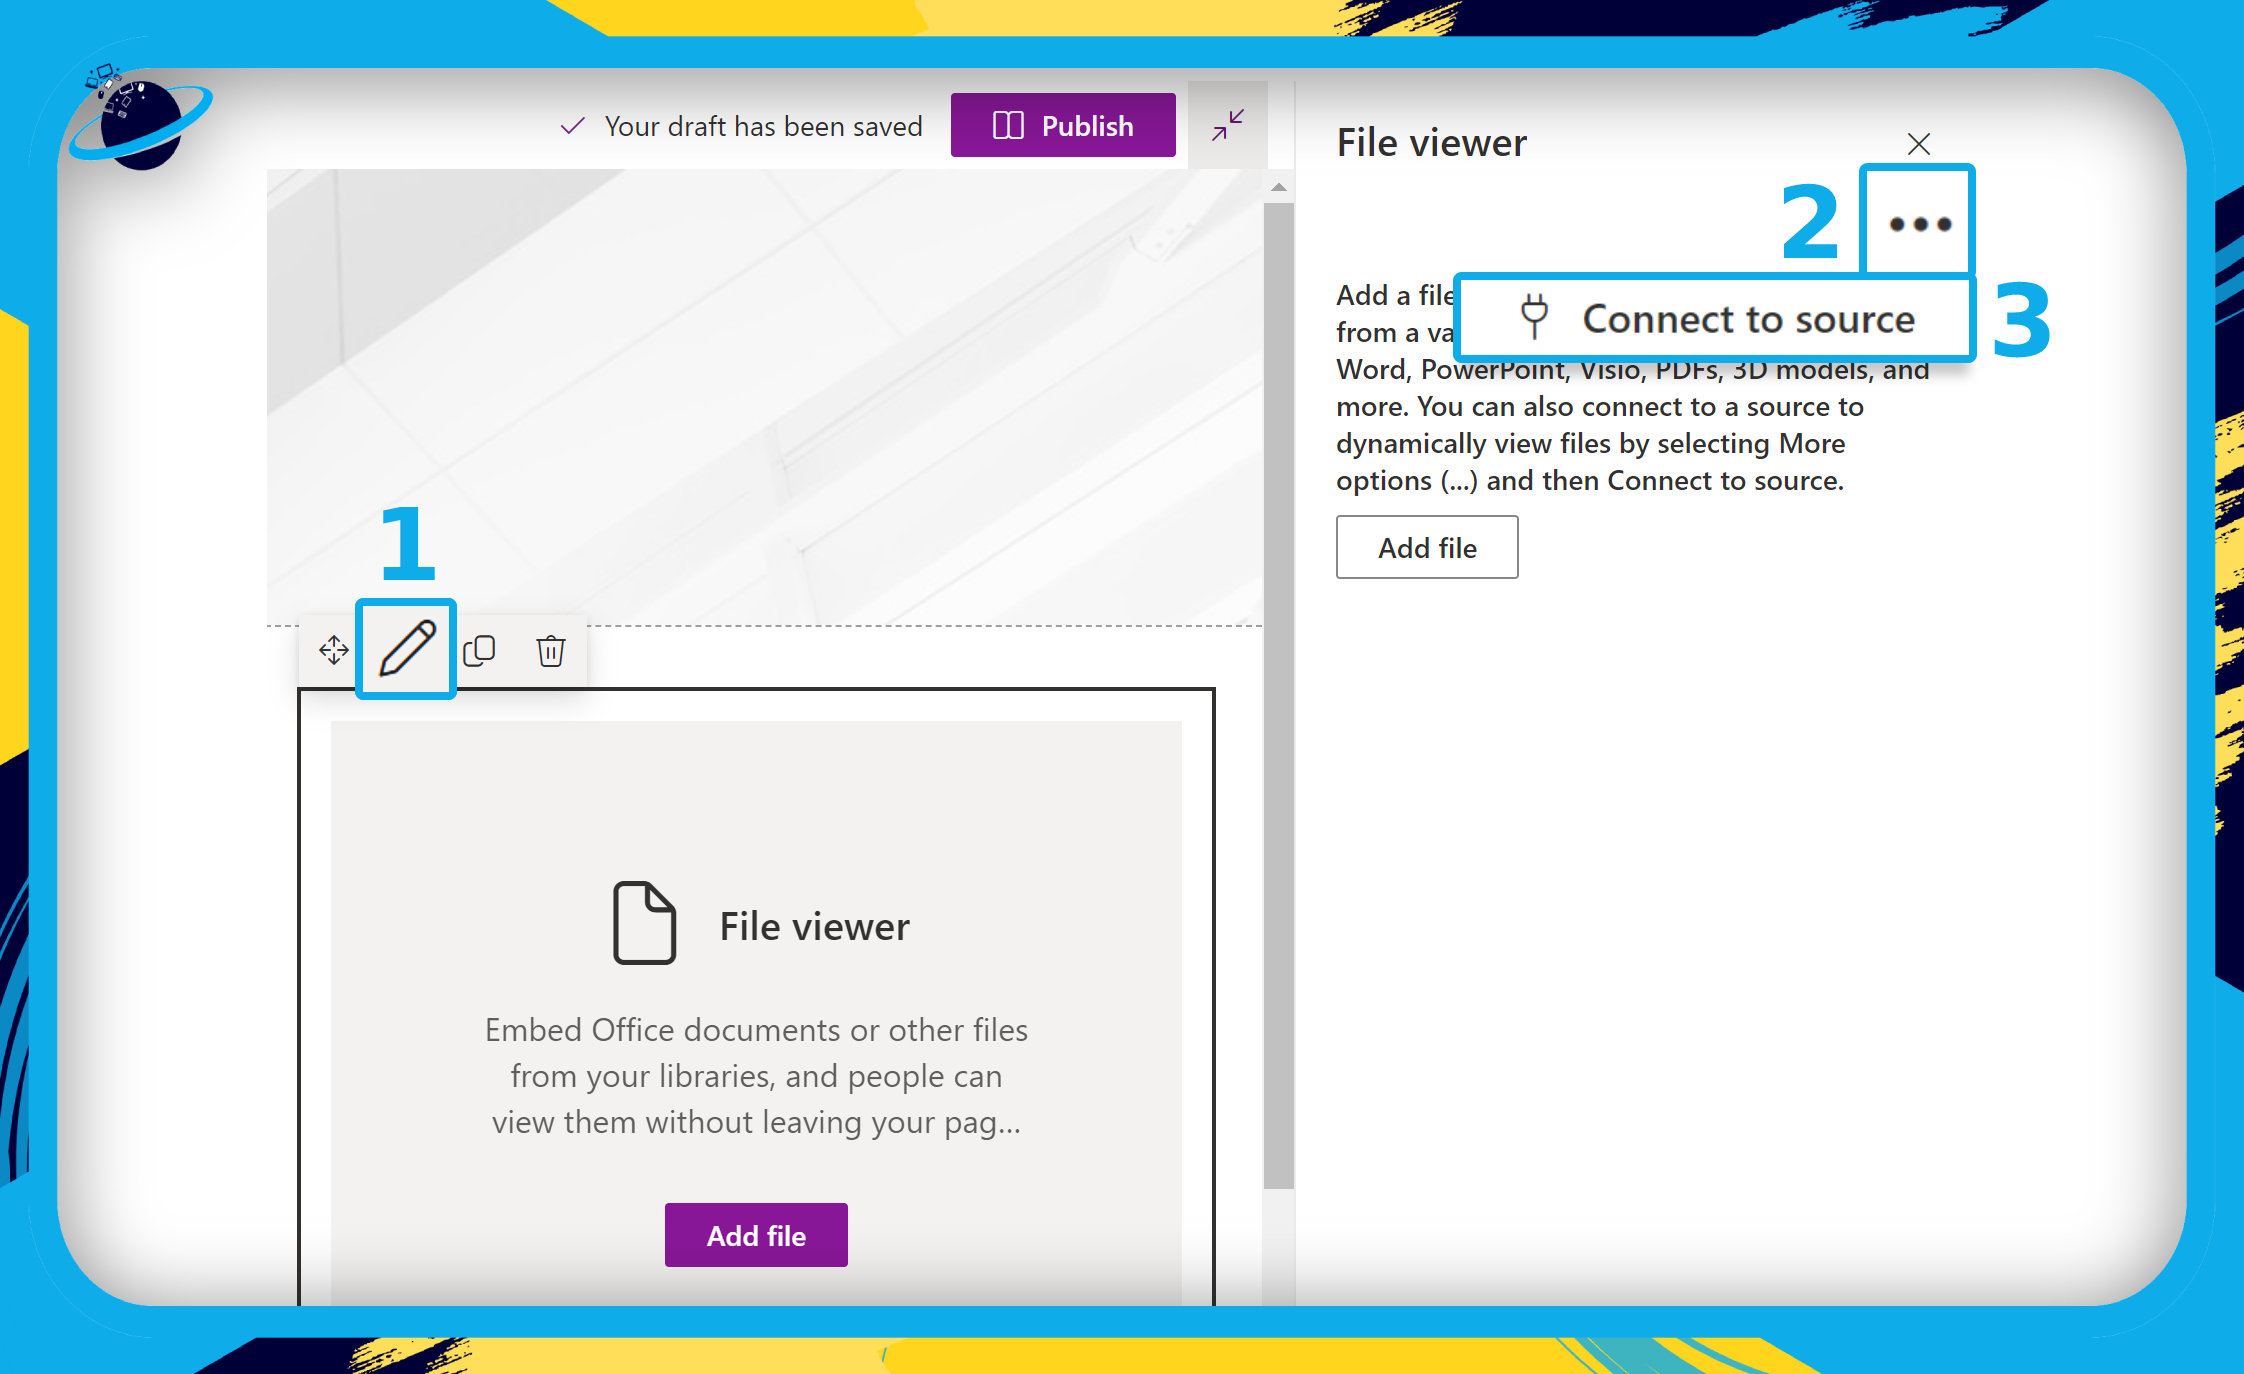
- Now click on the “File viewer” column and click the pen icon at the top.
- Click the three dots in the flyout pane on the right side of the window.
- Then select “Connect to source.”
- Select “Documents” in the “Connect to source” select box.
- Finally, click the “Publish” button at the top.
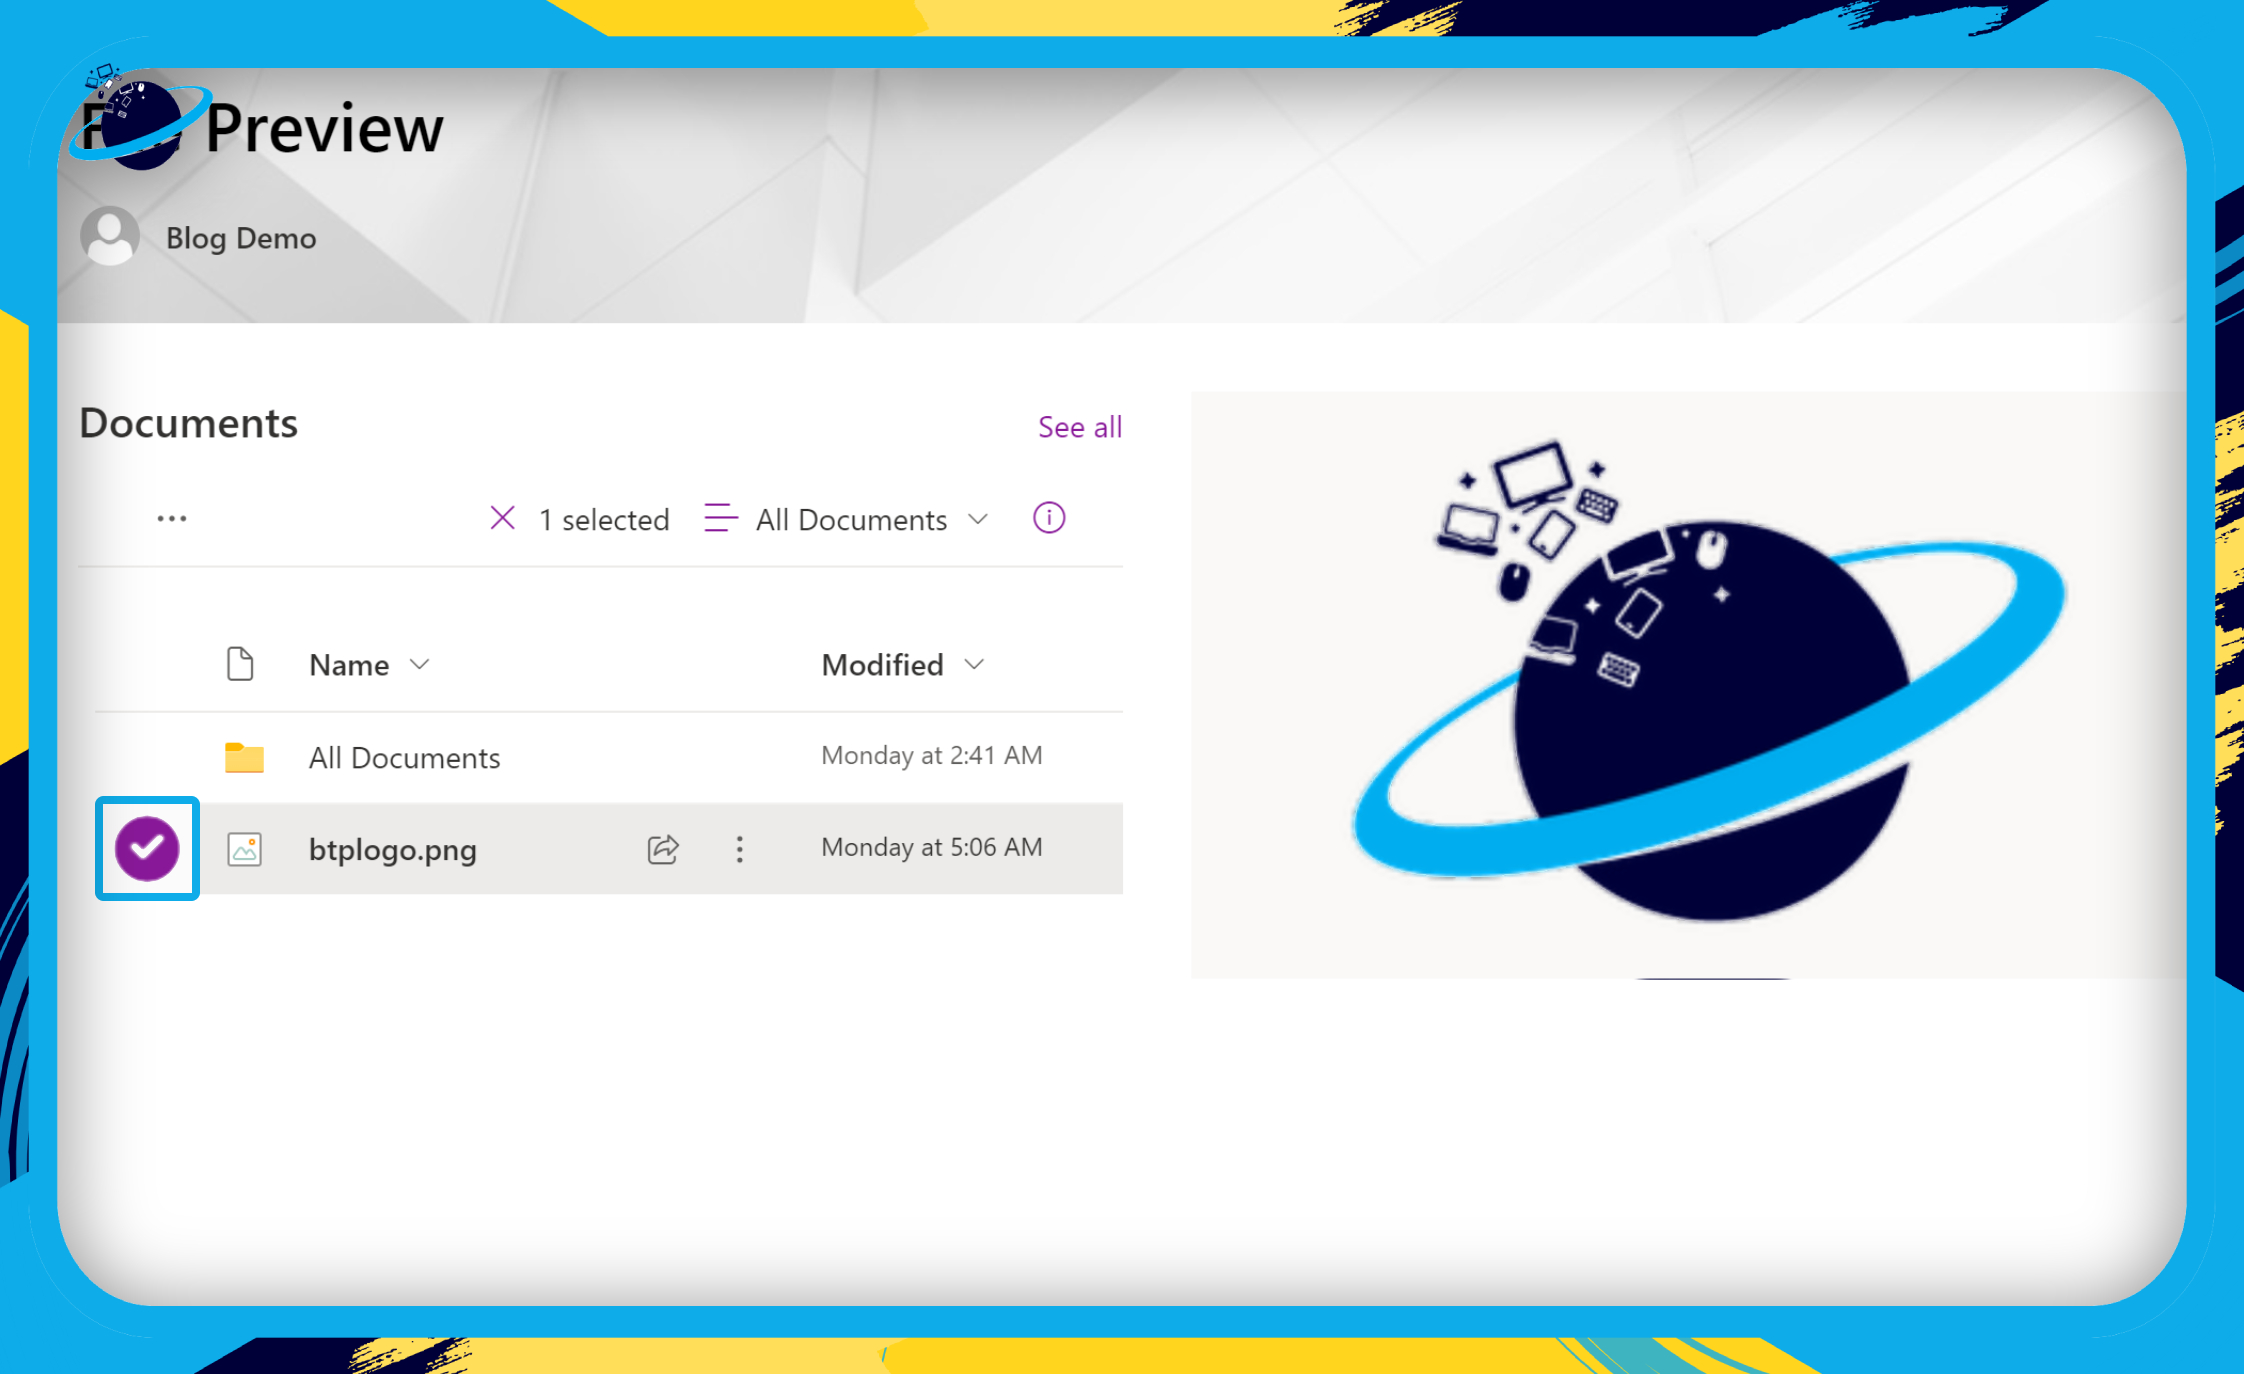
- Now go to the published page and click the circular check mark to preview a file.
Once it’s published, you will be able to preview both the document/document library on the left and the preview on individual file content on the right. This way you can view the content without having to click or open the document/file.

Alternative solutions to create readable previews of files in SharePoint Online
Document information panel:
The Document Information Panel, which is included in every SharePoint document library and list, may be used. To go to a file, click the checkbox next to it, then the little I in a circle, and you’ll see a little window with the file’s contents. The benefit of this choice is that you can scroll through the entire page in this little window to see what it’s about.
Tile views:
The usage of Tiles view is another alternative. In a document library, the documents are presented as a list by default. You may, however, change the view to Tiles. It will display tiny thumbnails of each file, which are effectively a snap shot (preview) of the file’s first page. Unlike the previous choice, you will not need to click on each file individually; all of the documents will be shown in front of you.
Document Hover:
This method requires no additional inputs from SharePoint such as editing the document view. Here you just simply hover over the file and it will allow you to see at a glance the content that is present within.
- Hover your mouse pointer over the document. You’ll be able to see text from within a document display in the pop-up!
- You may “adjust” the preview text by clicking the three dots (ellipsis) as seen in the figure below, which is a very useful feature.
- Then, after clicking Edit “At a glance”
- Sections can be added or removed as needed.
- For the time being, it appears that this only works with Word documents (not Excel, PowerPoint or PDFs).
Each of the methods above is not a direct alternative to the page preview, however, it’s good enough to show you a preview of the content you want to view.
If none of the preceding approaches have been of much assistance and have proven to be tough to implement, the most effective thing you can do now is clicking on the document. It will, as far as we know, open a document in the browser for editing (by default). While not strictly a “preview,” the default browser experience allows you to quickly examine the contents of a document without having to open it in the desktop app (which takes way longer to do). Yes, if you follow the recommendations in this blog article, you can save even more time opening (previewing) the document.
In depth step by step process: Create a SharePoint page that displays readable previews of files in a folder
Step by step breakdown:
- First, sign into your Microsoft 365 account.
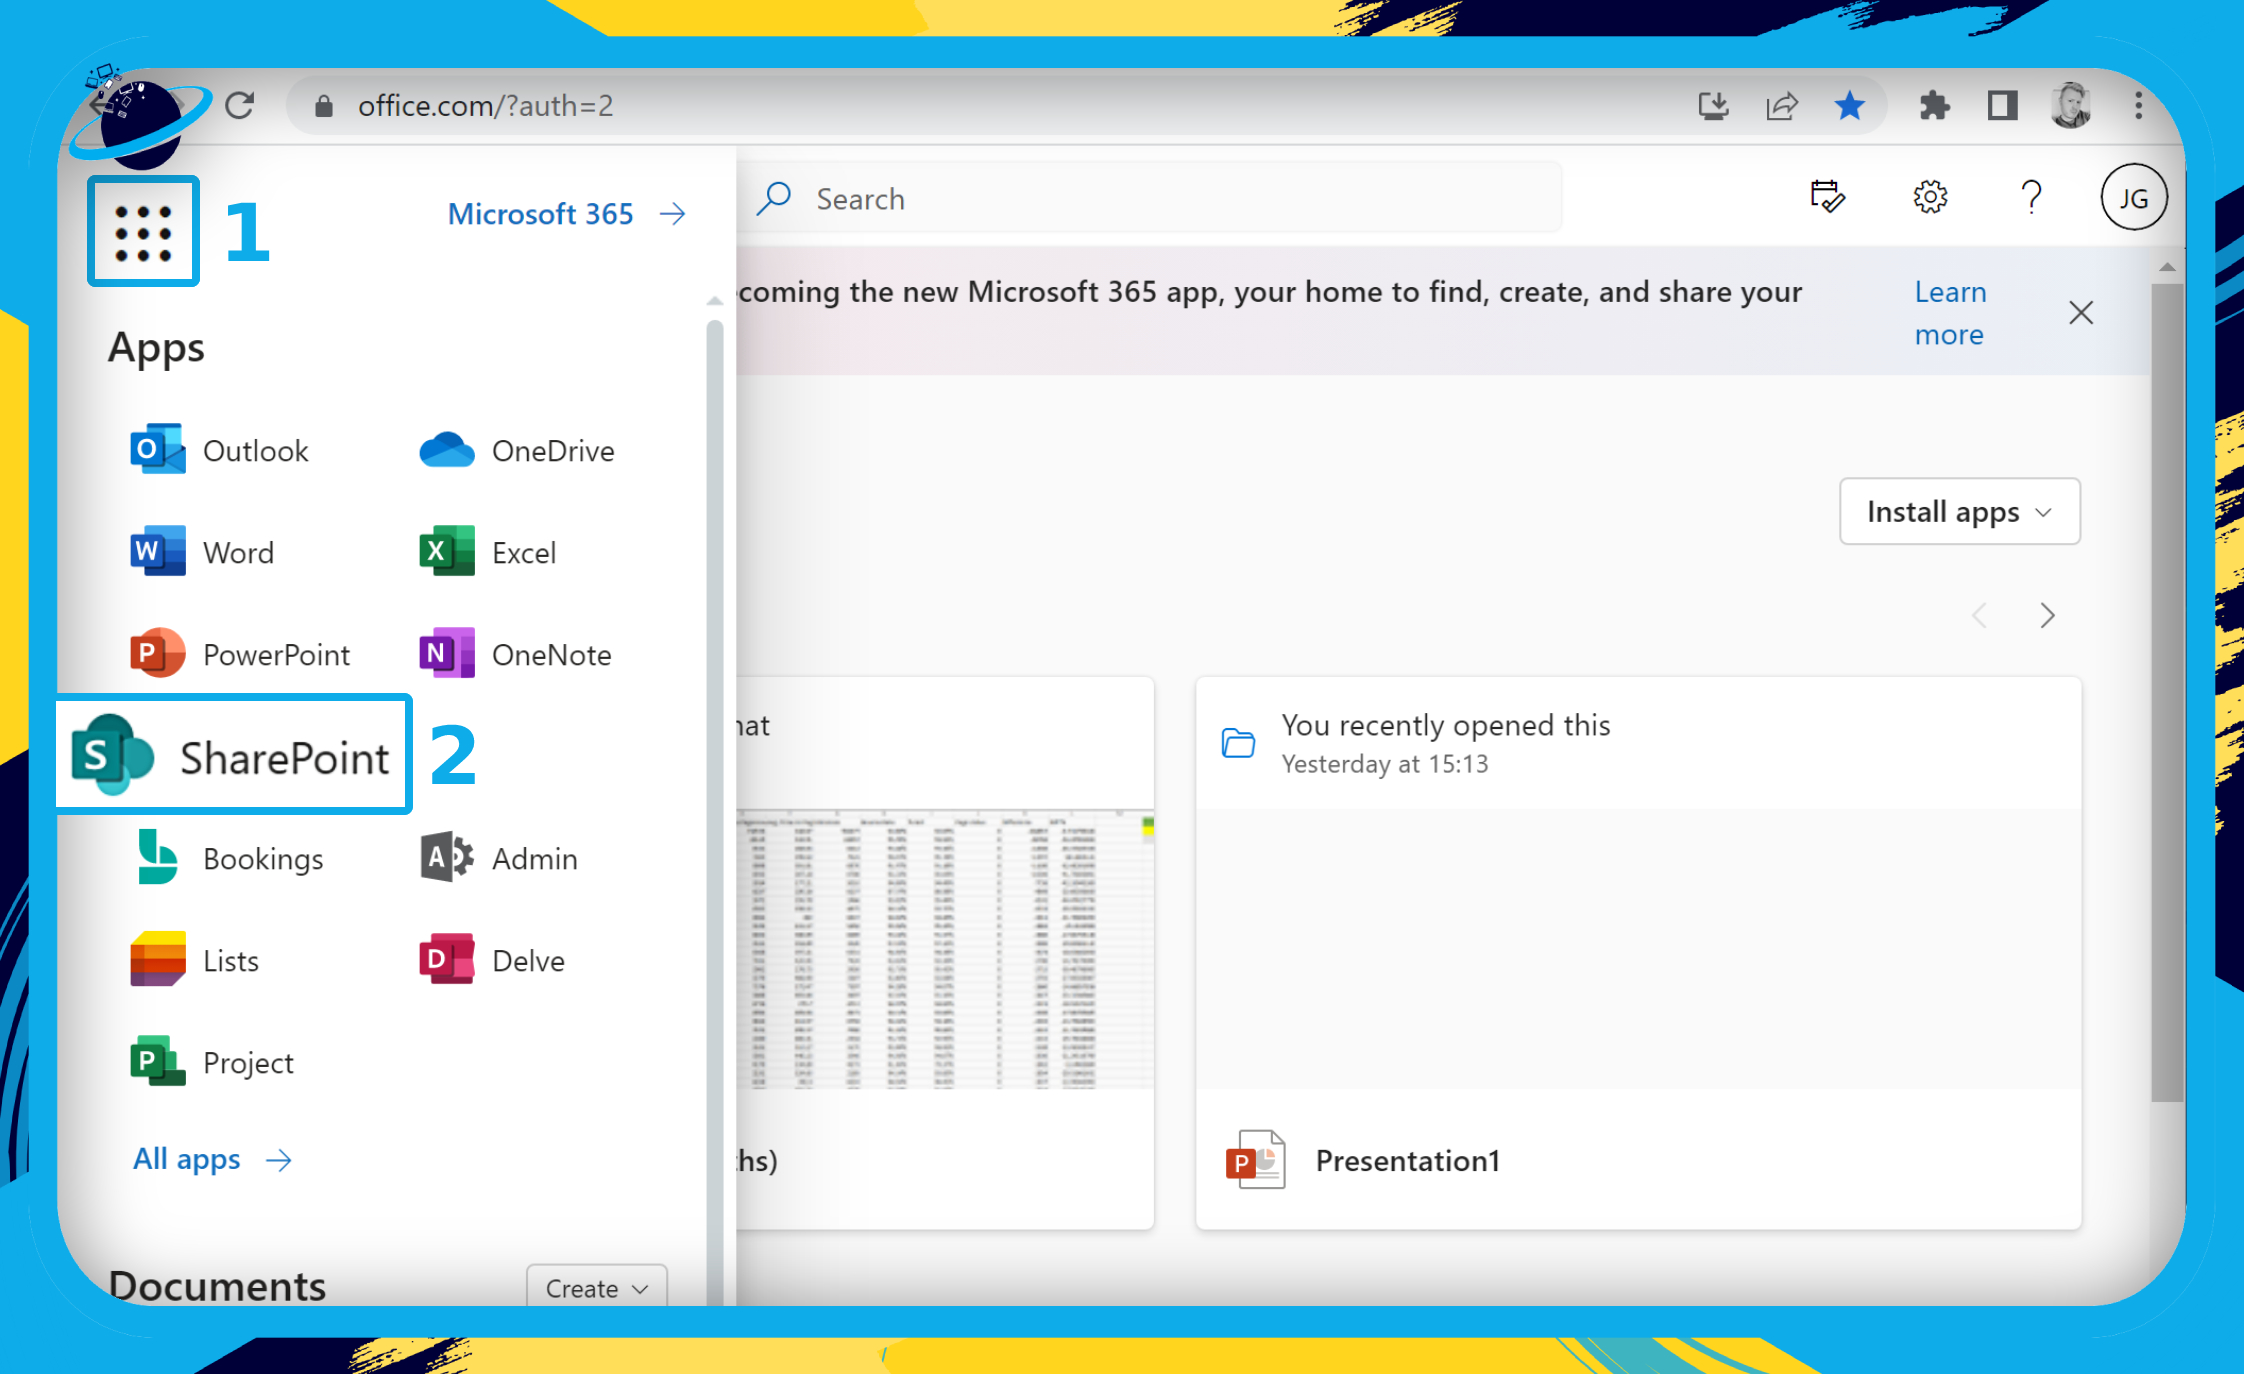
- Click on the app launcher. (1)
- Then select “SharePoint” from the apps list. (2)
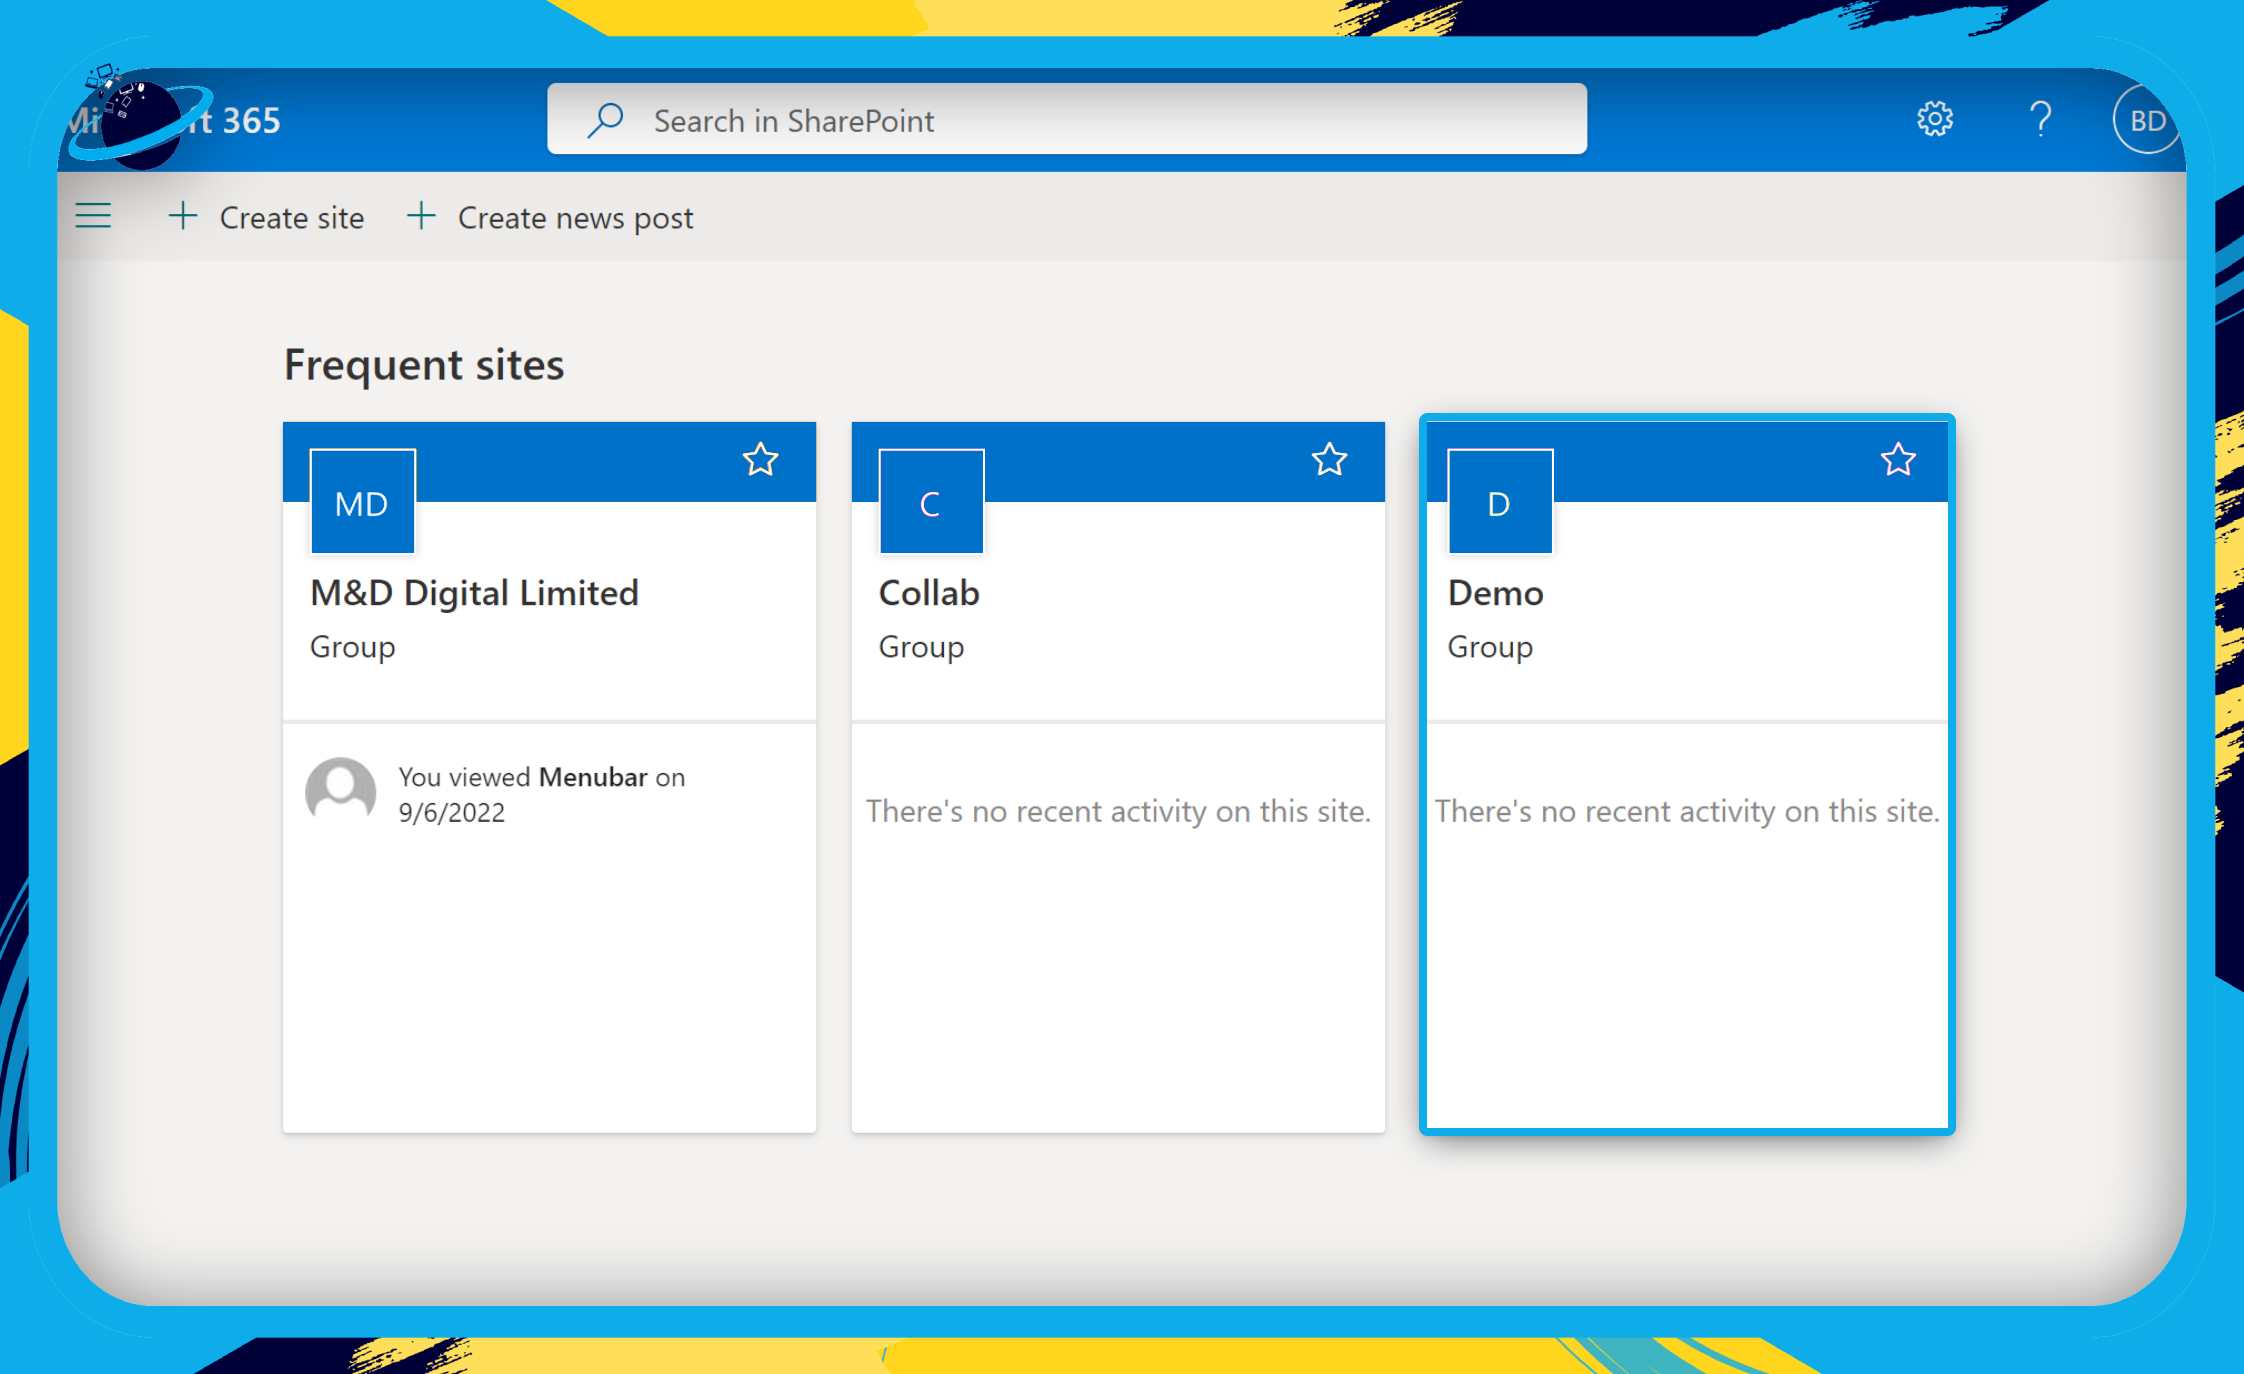
- Select a site in which to create a file preview page.
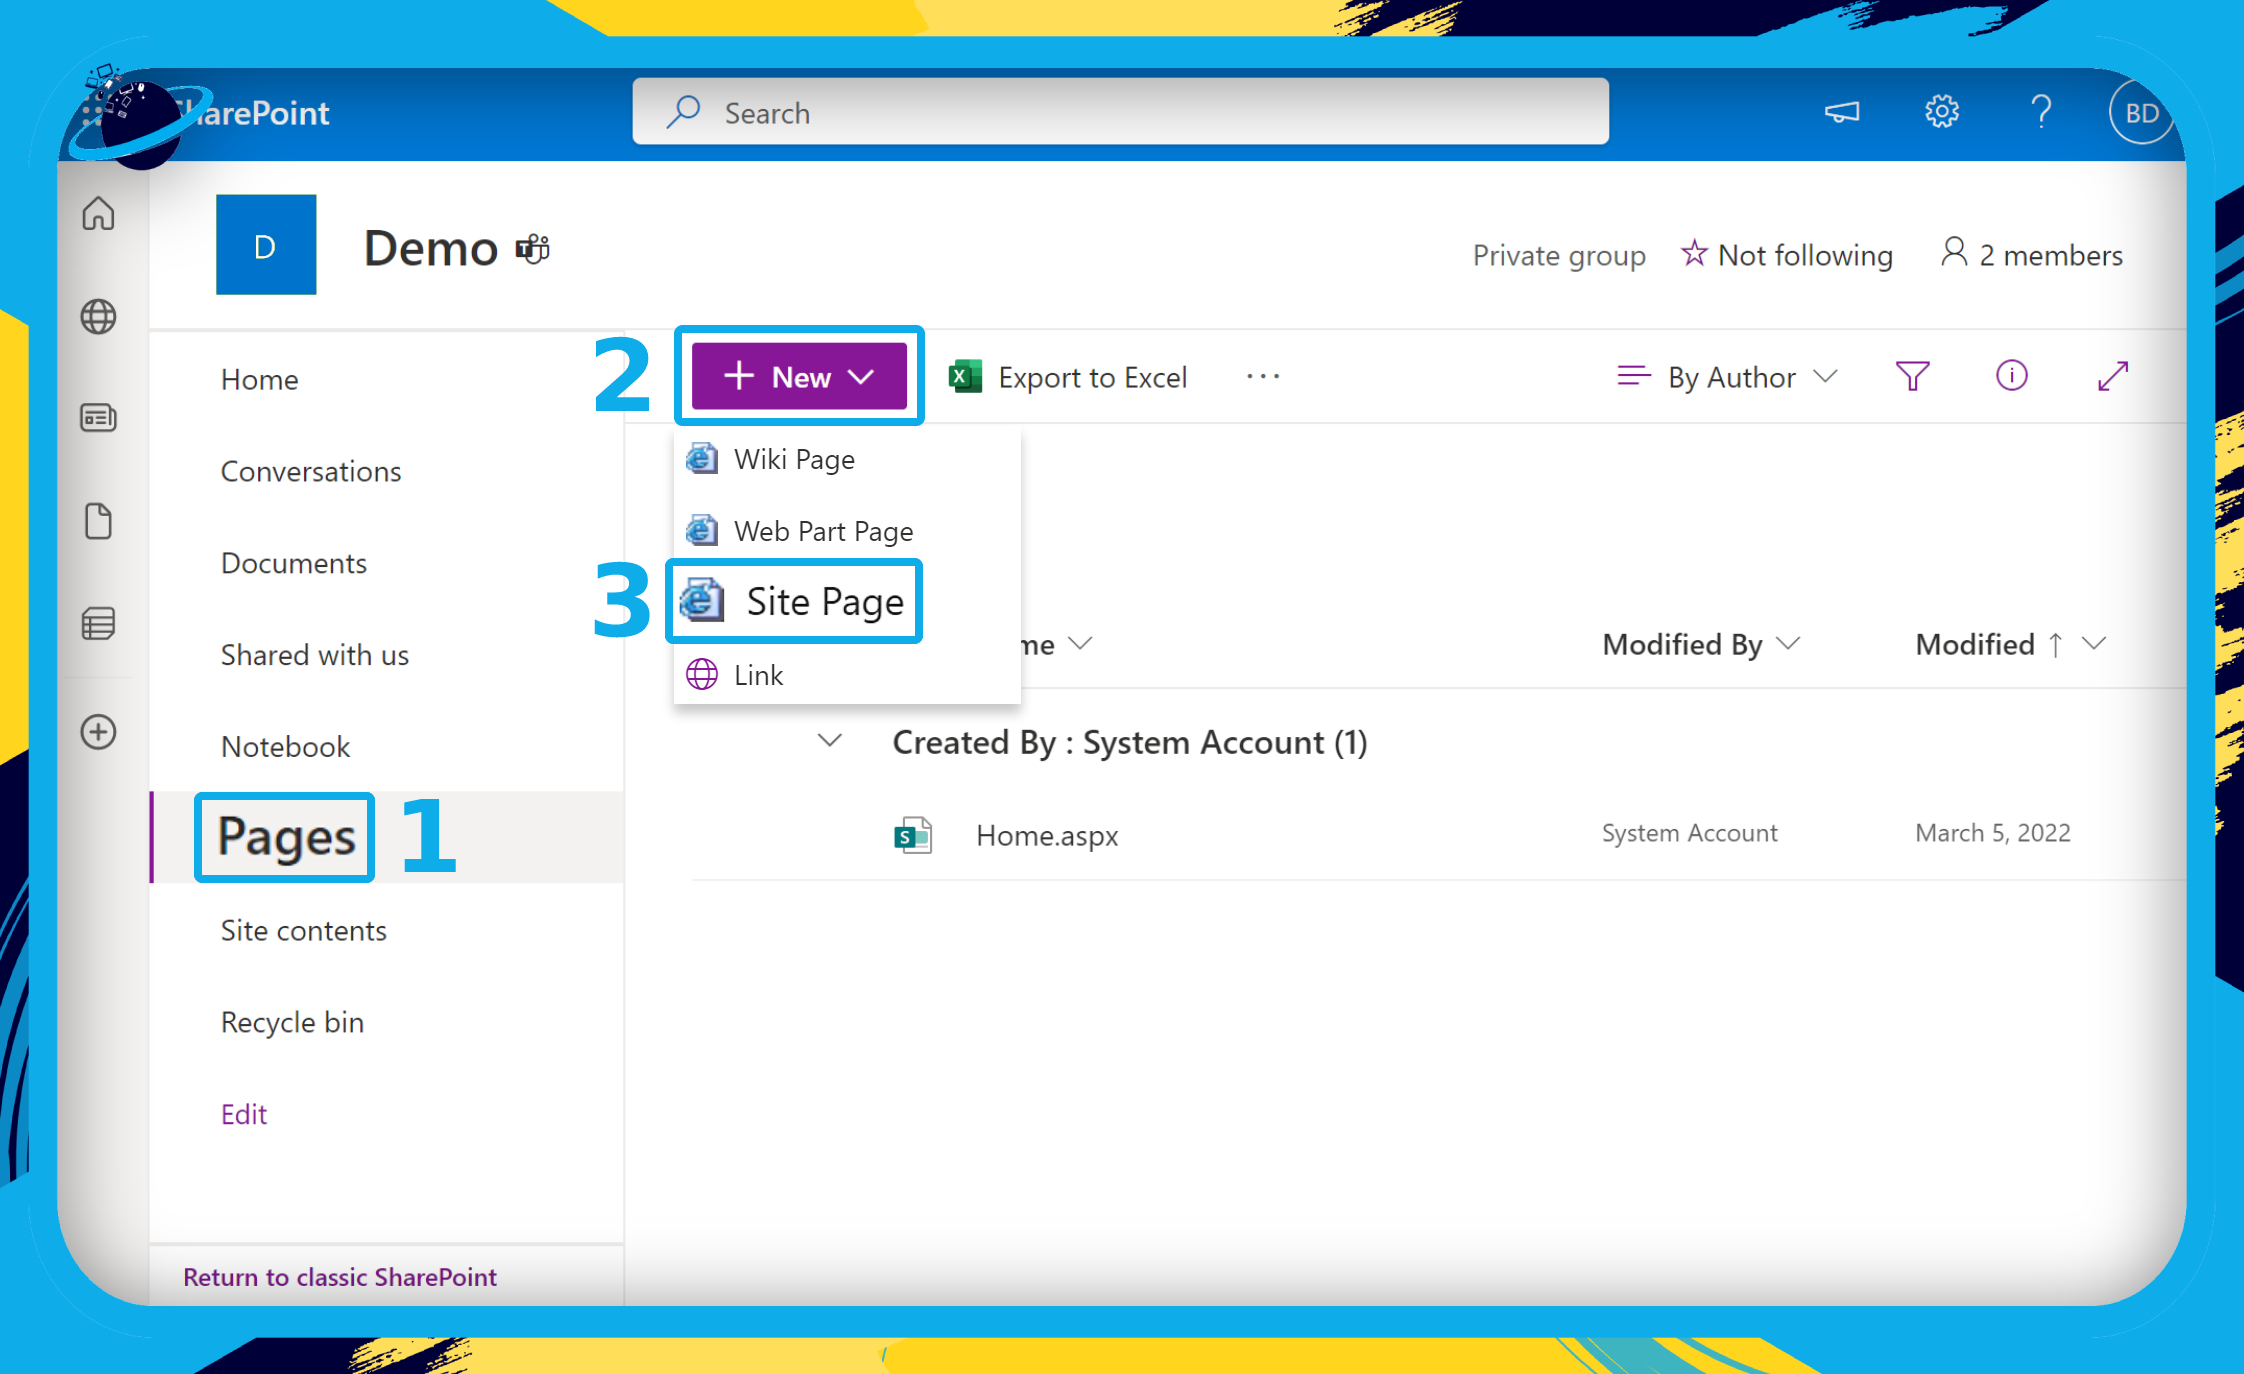
- Go to “Pages” in the left menu. (1)
- Click the “+ New” button at the top. (2)
- Then select “Site Page” from the dropdown list. (3)
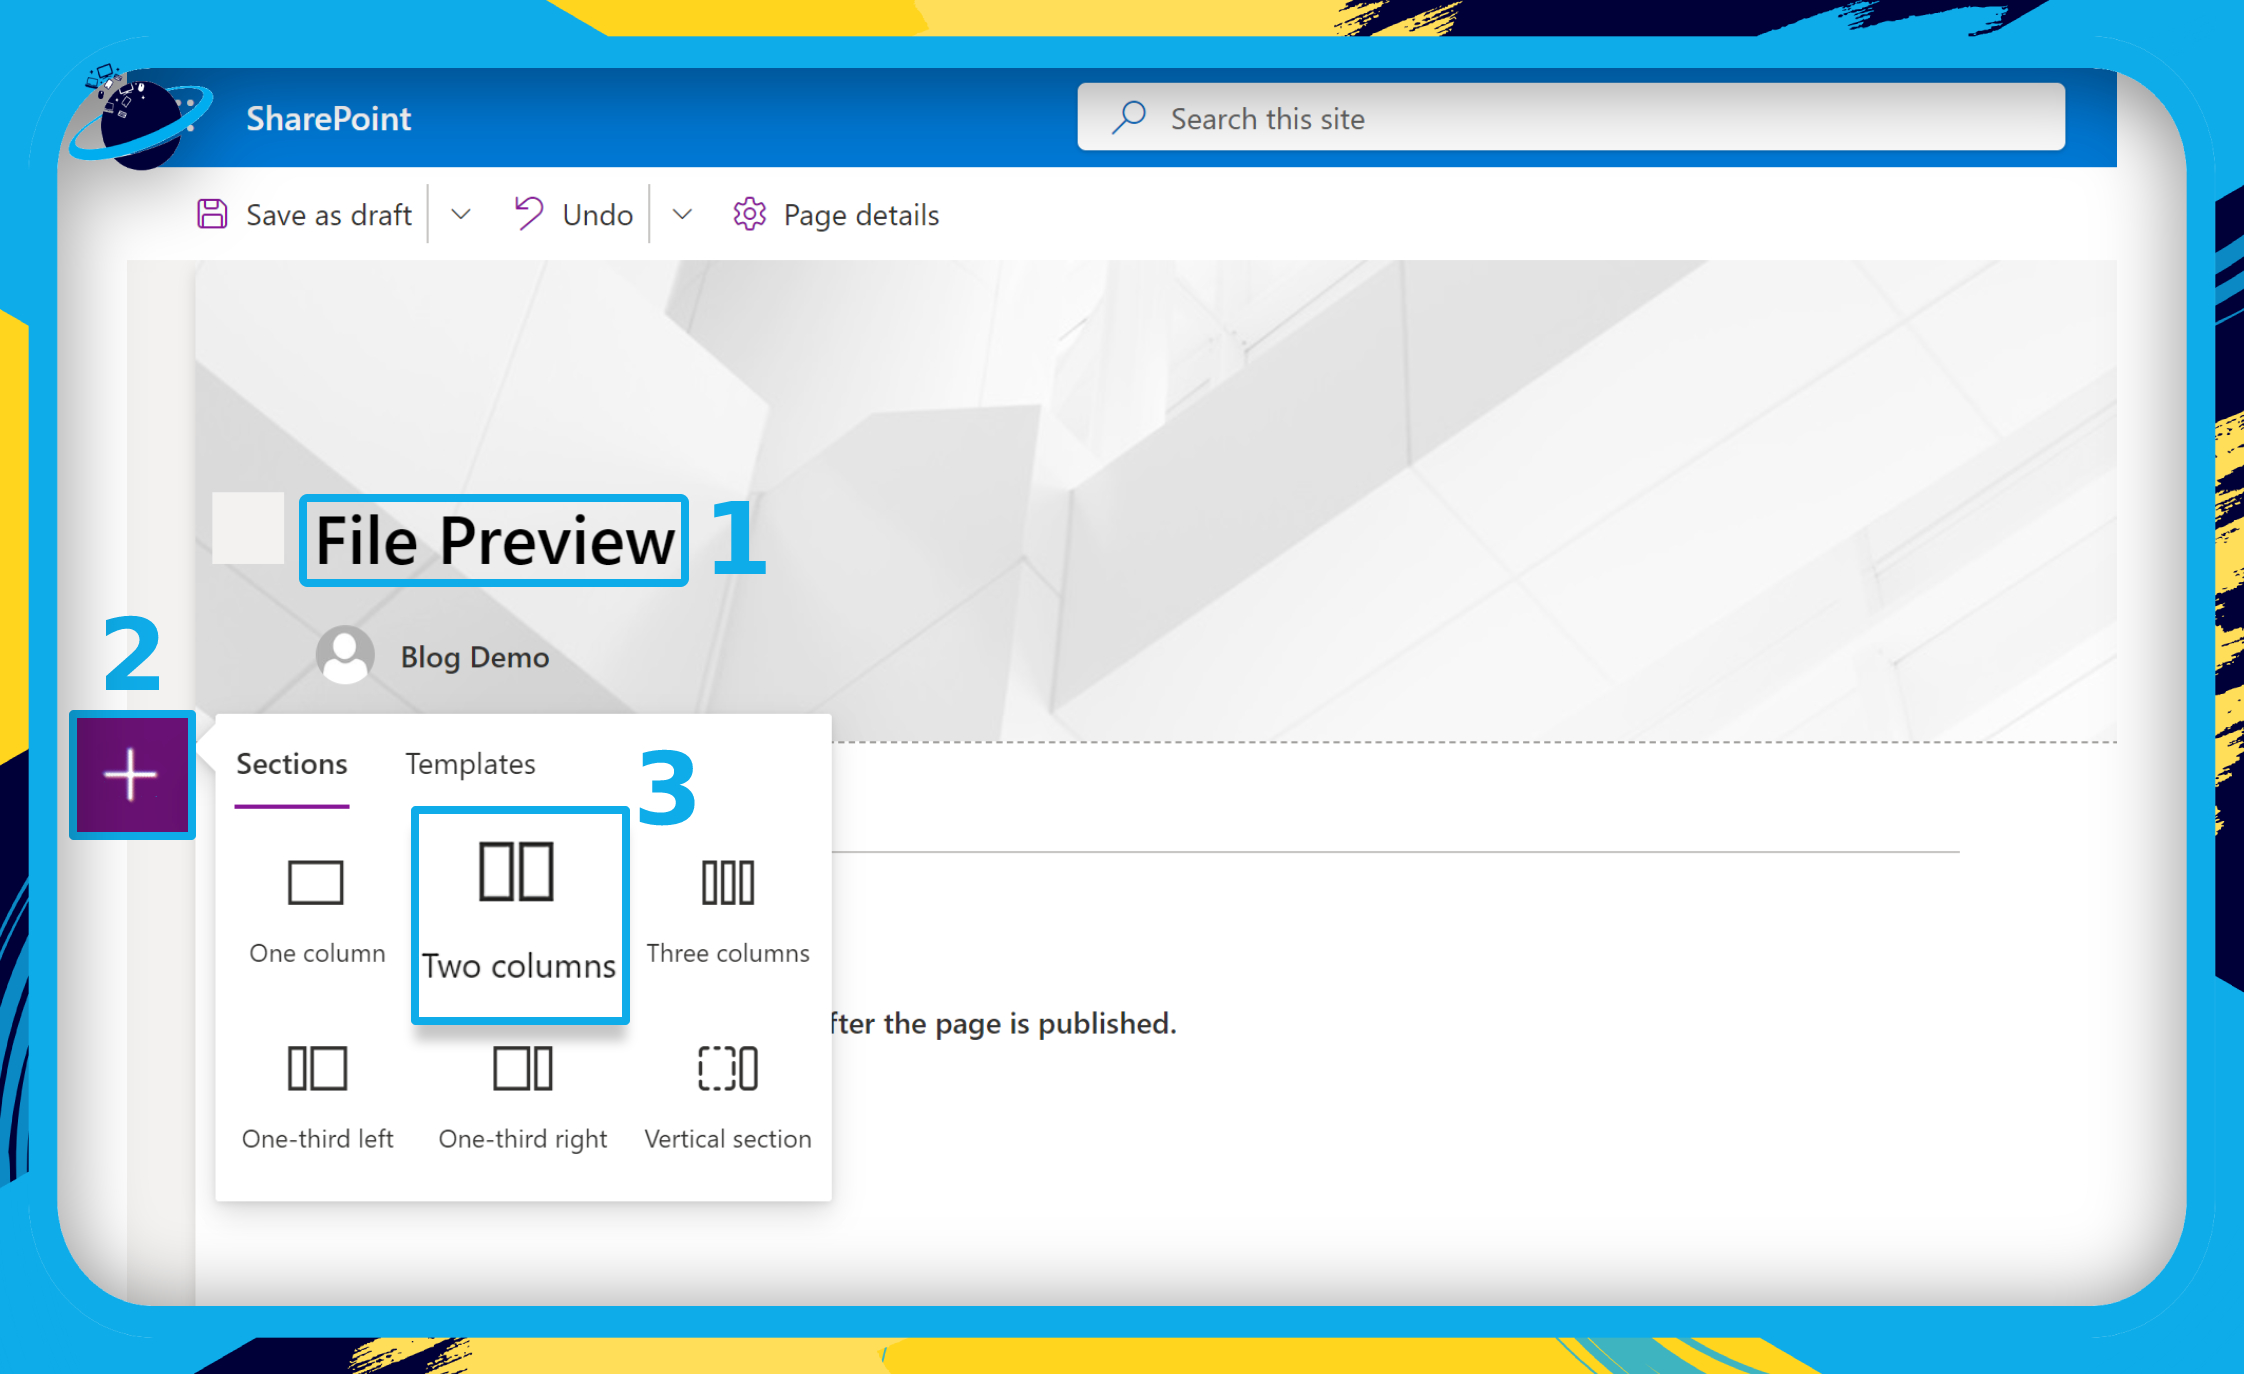
- Name the new page. (1)
- Click the + icon on the left to add a new section. (2)
- Select “Two columns” from the popup menu. (3)
- Hover your mouse over the top of the left column and click the + icon. (1)
- Scroll down the popup navigation pane and select “Document library.” (2)
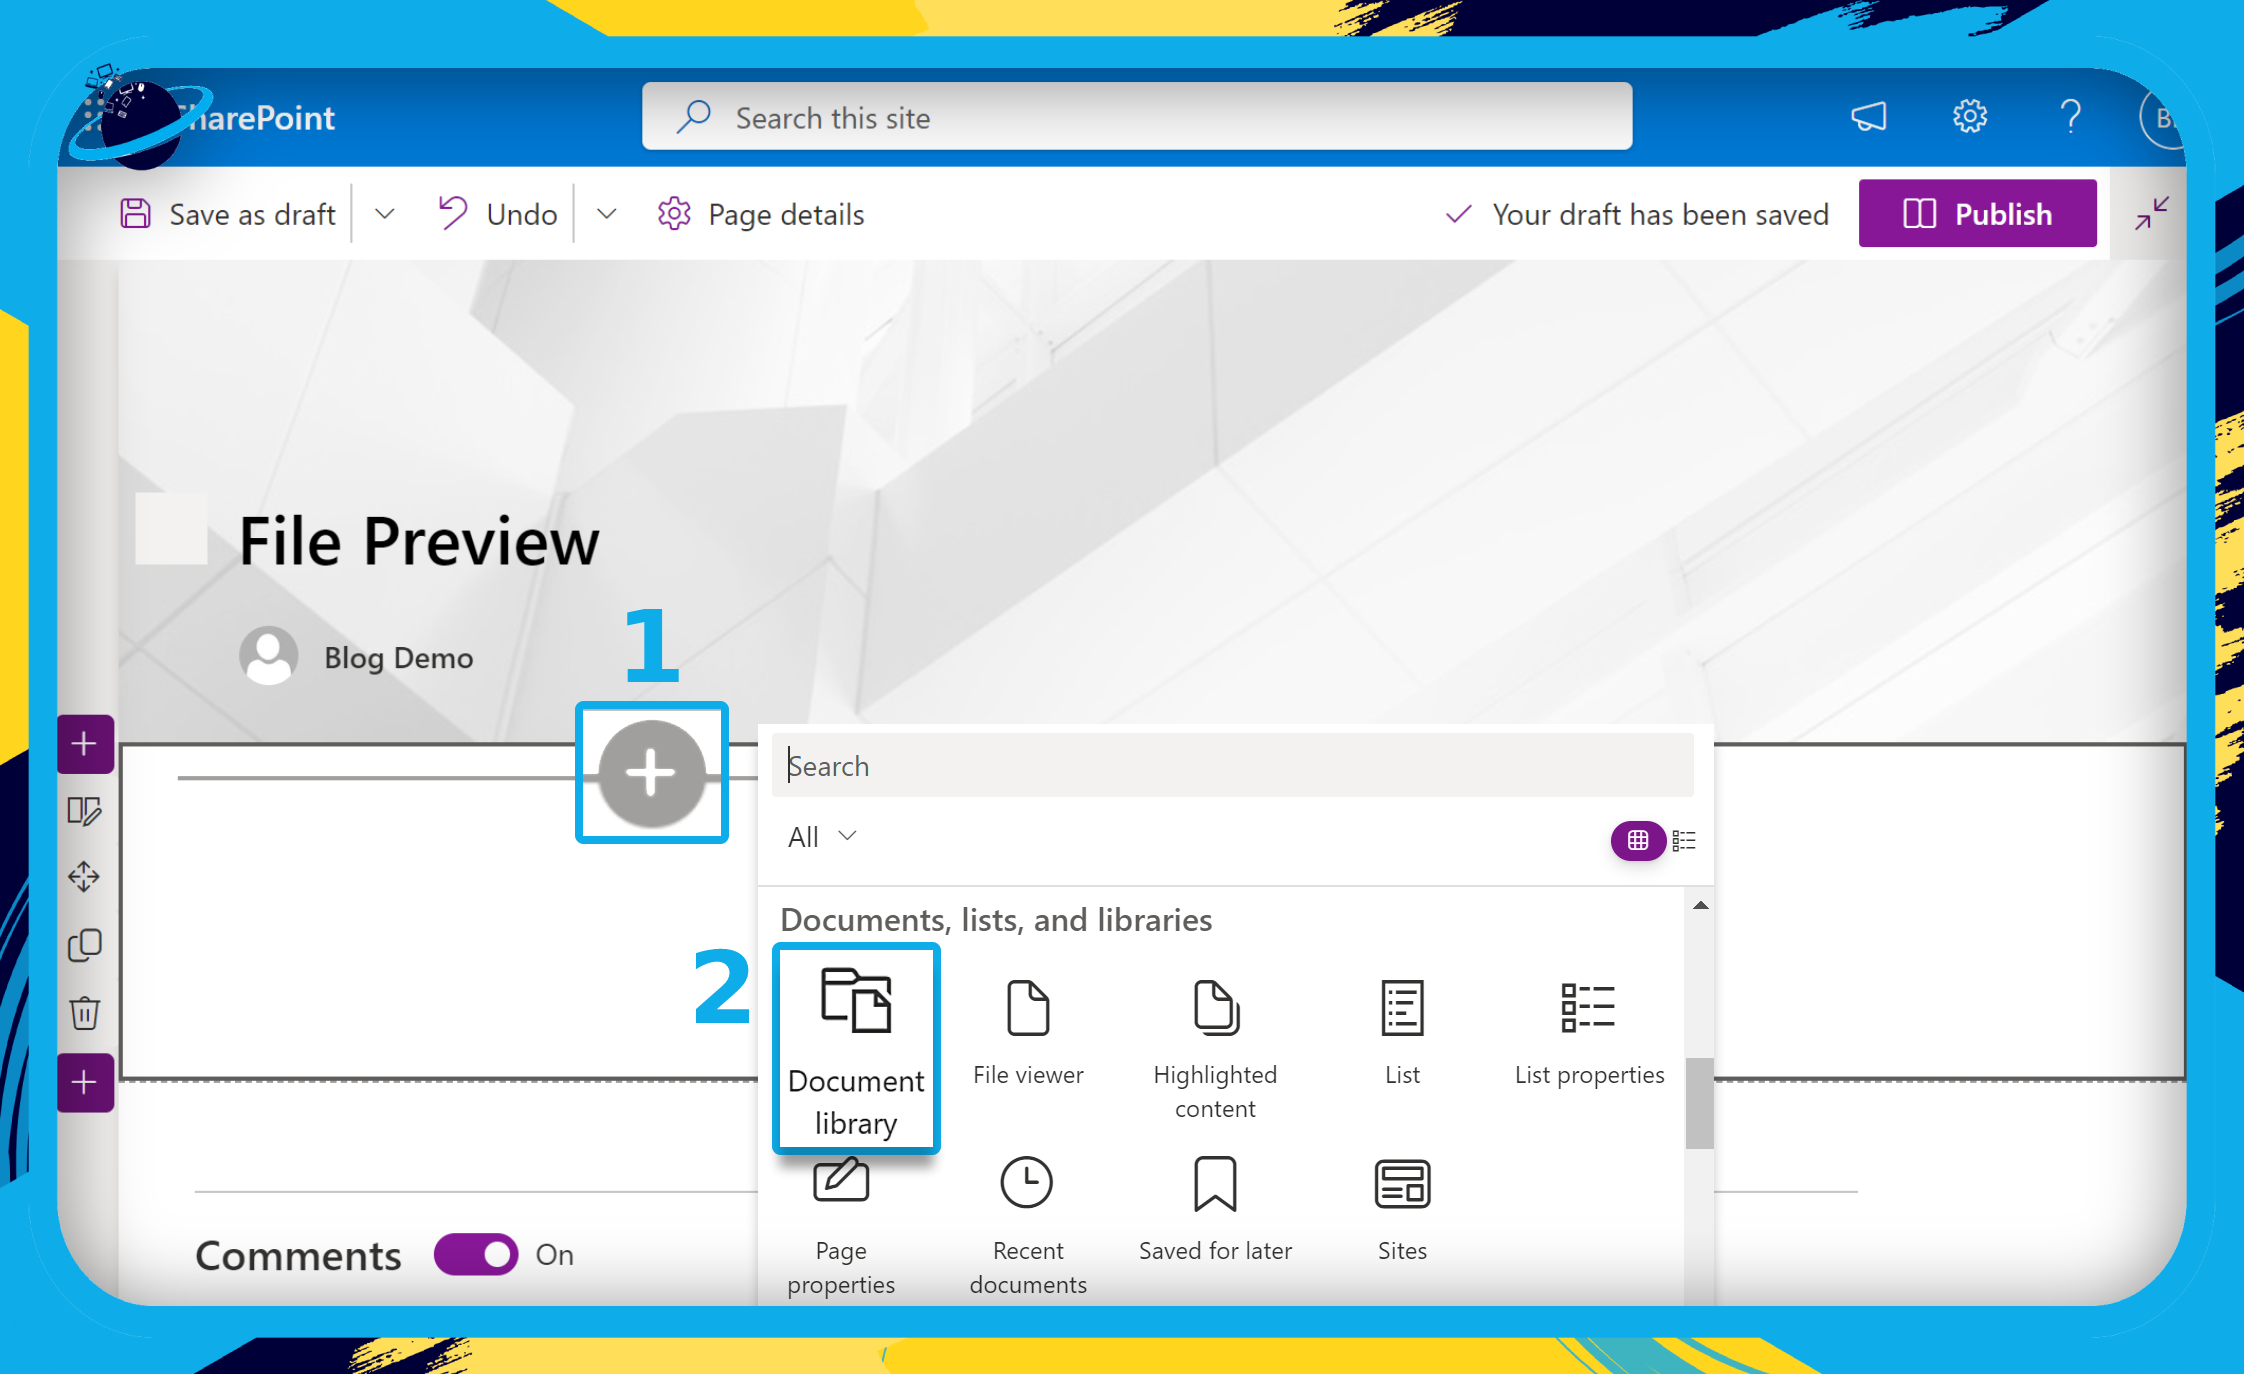
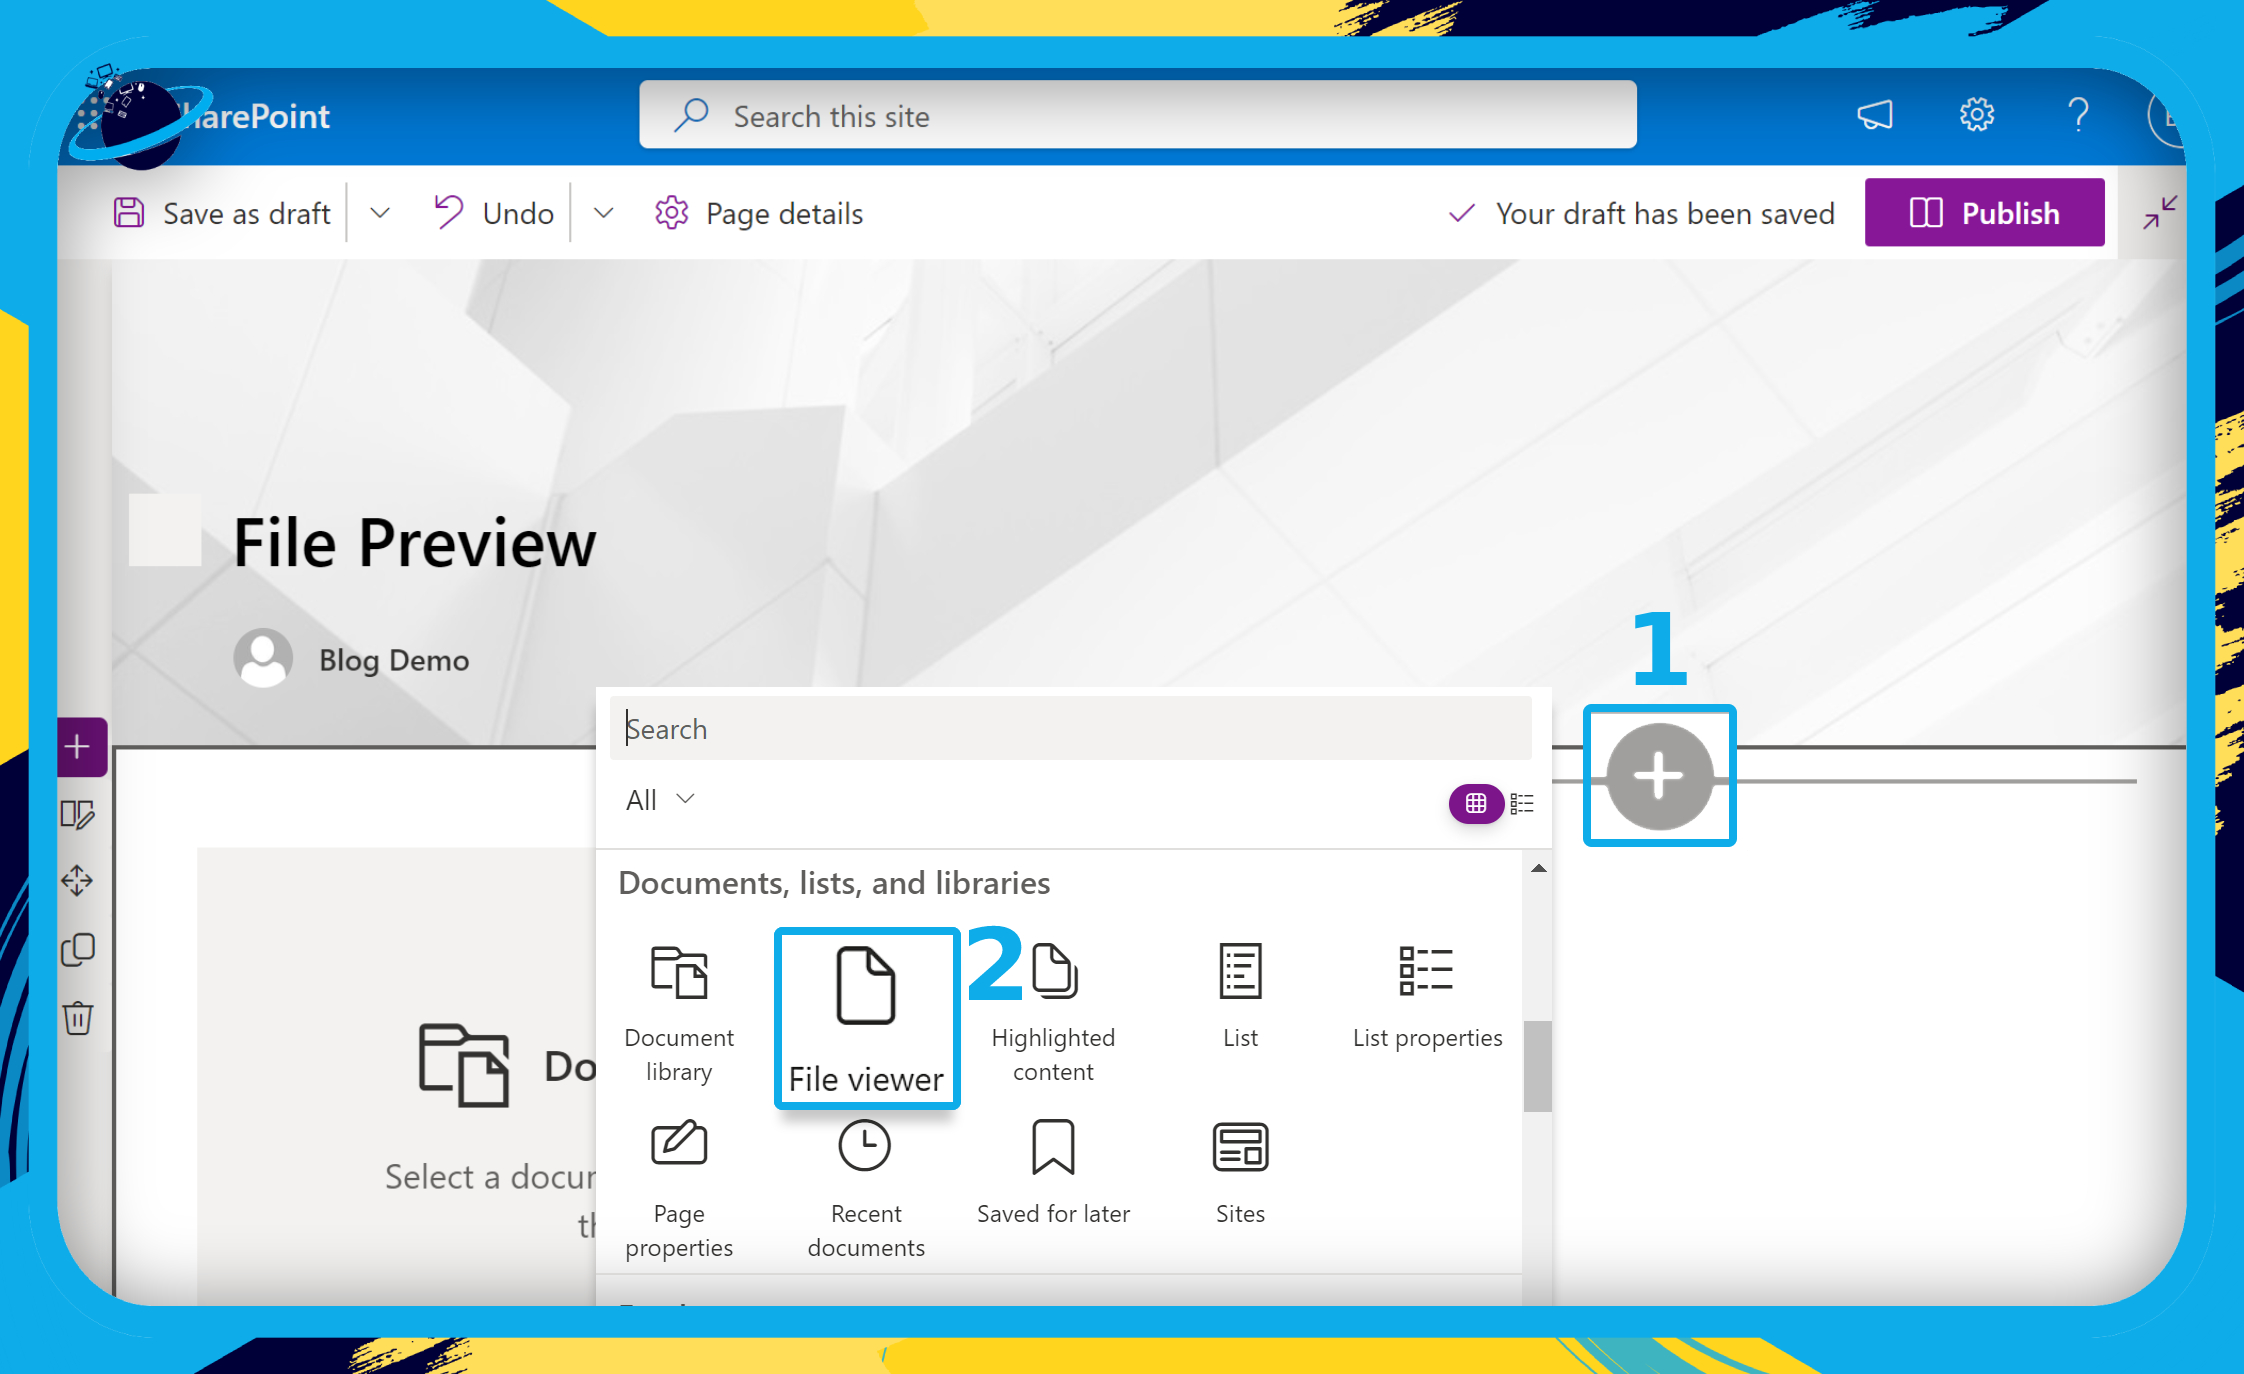
- Hover your mouse over the top of the right column and click the + icon. (1)
- Scroll down the popup navigation pane and select “File viewer.” (2)
- Select “Documents” in the “Document library.”
- Now click on the “File viewer” column and click the pen icon at the top. (1)
- Click the three dots in the flyout pane on the right side of the window. (2)
- Then select “Connect to source.” (3)
- Select “Documents” in the “Connect to source” select box. (1)
- Finally, click the “Publish” button at the top. (2)
- Now go to the published page and click the circular check mark to preview a file.
That’s it for this Blog — thank you for taking time out to read our content. Please feel free to email our team about how it went if you followed the steps or if you need more help with the questions we answered in this Blog.