When presenting in Microsoft Teams is essential that you have “do not disturb” enabled during the process of that meeting. Luckily for many users, the “do not disturb” availability setting in Microsoft Teams is automatically turned on when you go into a meeting. Unfortunately, there is no feature in the settings that allows you to turn this feature off whenever you go into a meeting; the “do not disturb” mode will always be switched on. However, despite having this feature automatically as a default in Microsoft Teams, users still report popup messages when presenting a meeting in Microsoft Teams. How can we fix this issue? Read through the guide below to find more information on how you can automatically turn on “do not disturb.”
Below is a guide on resolving the automatic “do not disturb” function not working in Microsoft Teams. All this you will need to go into the privacy settings of Microsoft Teams; from there, you will be able to edit out priority recipients who can overcome the “do not disturb” function of availability to relay a message across to you in Microsoft Teams
- Firstly, you need to open Microsoft Teams.
- Now click on your profile picture.
- After that, click on “Manage Account.”
- From here, click on “Privacy.”
- Click on “Manage priority access.”
- Find all the users you need to remove.
- Press the cross next to their name.
- Finally, close the settings panel proceed with your meeting.
If the steps above have been completed, you will have successfully resolved the issue surrounding why the automatic “do not disturb” functionality isn’t working. As stated before, there is, unfortunately, no way for you to control whether the do not disturb functionality comes on automatically or not. If you find that only priority messages are getting through, following the steps above will help alleviate those issues and prevent unwanted messages from showing up on your desktop when you are presenting.
In-depth step-by-step guide [with screenshots] – How to automatically switch to “Do Not Disturb” when presenting in Teams
Below is a much more in-depth guide on switching to “do not disturb” in Microsoft Teams. The guide below is a much more in-depth representation of the illustrated steps above with screenshots. Providing visual context is a much more effective way for users to get all the information required to proceed with the process
- Firstly, you need to open Microsoft Teams.
For this process, you can use either the desktop client or the browser client of Microsoft Teams. The steps are identical in either of the scenarios illustrated above. Although the most preferred way of managing any notification privacy-related settings is to conduct them within the desktop client of Microsoft Teams, it’s much more secure that way, and it’s often the better client to interact with.
- Now click on your profile picture.
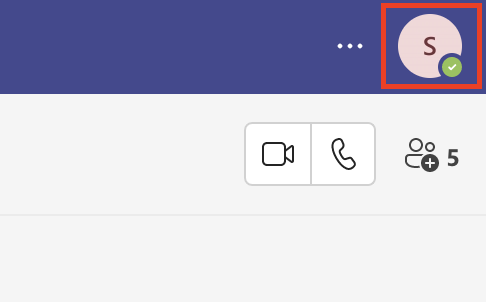
Your profile picture is located in the top right corner of the display; once you click on it, you will now have the ability to access functions within your Microsoft Teams account. This, of course, includes settings related to your privacy that are required to proceed with the steps ahead.
- After that, click on “Manage Account.”
You will have one more toggle to interact with one before you can access the privacy settings in Microsoft Teams. When you click on your profile picture, a panel will open up; in this panel, there will be a series of settings related to your profile such as changing your picture and the “Manage” accounts button, you will need to click on this button to proceed ahead with the steps.
- From here, click on “Privacy.”
There will be a menu; in this menu, you will be able to access functions such as the ability to edit out your notifications and, of course, your privacy. You will need to access the privacy settings as illustrated in the above screenshot to proceed ahead.
- Click on “Manage priority access.”
- Find all the users you need to remove.
- Press the cross next to their name.
- Finally, close the settings panel & proceed with your meeting.
If you follow the instructions above, you will have successfully fixed the issue that is causing the automated “do not disturb” capability to fail. As previously indicated, there is no method for you to choose whether or not the “do not disturb” capability is activated automatically. Discover that non-priority messages are getting through. The measures outlined above can assist in easing those concerns and prevent unwanted notifications from appearing on your desktop while you are presenting.

Why doesn’t Microsoft Teams automatically allow users to turn on/off the “do not disturb” function?
As you can tell from the content above, Microsoft Teams does not allow users to automatically turn on or turn off the do not disturb functionality within the program. This is mainly the UX of the application; it’s much more effective for users to have an unchangeable default of the “do not disturb” functionality coupled with the priority setting rather than having two separate settings, which would potentially overcomplicate the UI.
Therefore, Microsoft Teams have just decided it’s much more effective to keep the “do not disturb” function on when you are presenting a meeting as a default. You can, of course, change back the availability status upon request manually. So ultimately, users are not limited to what they can do in terms of availability in the program; Microsoft Teams how many implemented this just so they can focus on a wide array of different UX preferences the users may have when it comes to meeting presentation.
Conclusion
If the steps above have been completed, you will have successfully resolved the issue of why the “do not disturb” functionality isn’t working in Microsoft Teams. As discussed above, this function cannot be automatically turned on and off upon request; however, you can fix issues that could impede its ability to work correctly. We hope the guide above has helped you fix these issues; if not, simply leave a comment, and we will address any issues you come across when you are trying to follow the steps or the blog in general.