Azure AD, or Azure Active Directory in full, is the cloud-based identity and access management service provided to you by Microsoft. Azure AD helps the employees of the company that uses the program in organisation, allowing access to internal resources or cloud applications that belong to the company.
Sometimes though, whilst it is fairly easy to establish a device to Azure AD, you may well find the blocking or disabling of a device in relation to your Azure AD space quite challenging. Chances are, you have faced such an issue if you are here today, reading this blog post.
Thankfully, there is a means by which you can go to block or disable a device in Azure AD, and it is that which we will be discussing in today’s article. So, in order to block or disable a device in Azure AD, you must edit the settings of the ‘All Users and Groups’ bracket of options within the settings of your Azure portal.
Now, if this alone is not enough detail for you to work with, then don’t worry. It would hardly be fair to assume that one sentence would prove explanative enough for someone to answer a question they may not have much base knowledge on. As such, we will be breaking the process down in two further ways.
First, we will offer you a bullet pointed list of the steps you would need to take to complete the process. These steps will be listed, and will serve to be a swift and easy solution for those of you that have a substantial, pre-existing knowledge managing settings on Azure.
If these steps are enough for you to work with, then great! If not though, please still read on, as following the steps will be a complete breakdown of the process, complete with highlighted screenshots to best increase your aid. The hopes are that the detail within this walkthrough section will be enough for those of you that need any further assistance.
Before we delve into any of this though, we will first discuss what disabling a device within Azure AD actually does. If you disable a device, then it serves to prevent that device from authenticating successfully with Azure AD. As such, the device would then be prevented from accessing the resources that are otherwise protected by the conditional access provided by Azure.
So, now that this has been covered, we will move into the steps of disabling a device in Azure AD.
DISCLAIMER: You will need to have the permissions of a Global Admin in order to follow this procedure. If you feel you don’t have this level of access, then you would be best speaking to your local provider to see if it is something that can be changed.
Step by step: How to block or disable devices in Azure AD
- To open Azure, first, launch Microsoft Admin via any Outlook application.
- Now, click ‘Show All’ on the left side of your screen.
- From the options that have since appeared, click the one that reads ‘Azure Active Directory’.
- Now, to the left of your screen, click ‘Azure Active Directory’ to be brought to the screen on which you can edit your settings.
- From this new menu, you should look to click the tab titled ‘Users’.
- Now, to the left of your screen again, there should be an option titled ‘User Settings’. Click that.
- Under this subsection of options, there should be a tickbox with the title, ‘Administration Portal’.
- On this, you can choose whether or not you wish to provide limited access to your Azure Portal.
- Ensure you select ‘Yes’ under this heading.
So, you will first want to open your Azure portal. To do this, you will need to access Microsoft Admin, which can be launched from any Microsoft application. Say you use Outlook, once you have logged in, click the application launcher in the top left corner of your screen. After clicking that, you will be able to open Microsoft Admin.
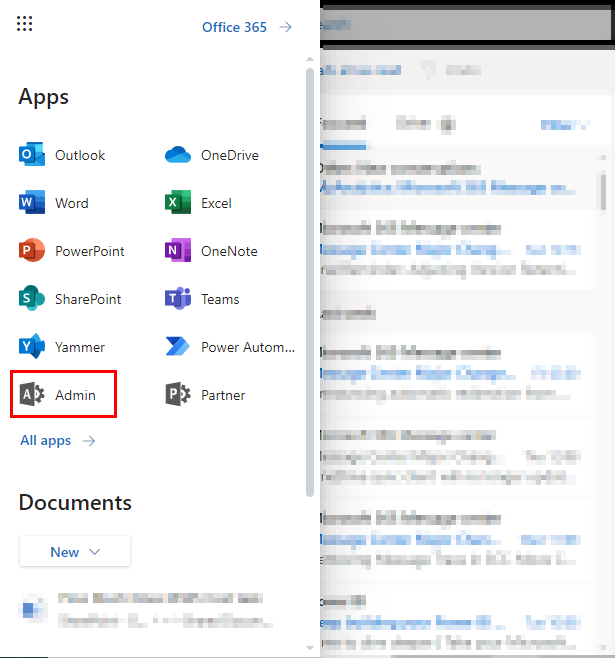
After opening Microsoft Admin, you will again need to look to the left side of your screen, on which there should be a listing menu of options. At the very bottom should be one that reads Show All, and it is that you should look to click. Should you need any assistance in finding it, then it has been highlighted in the image below.
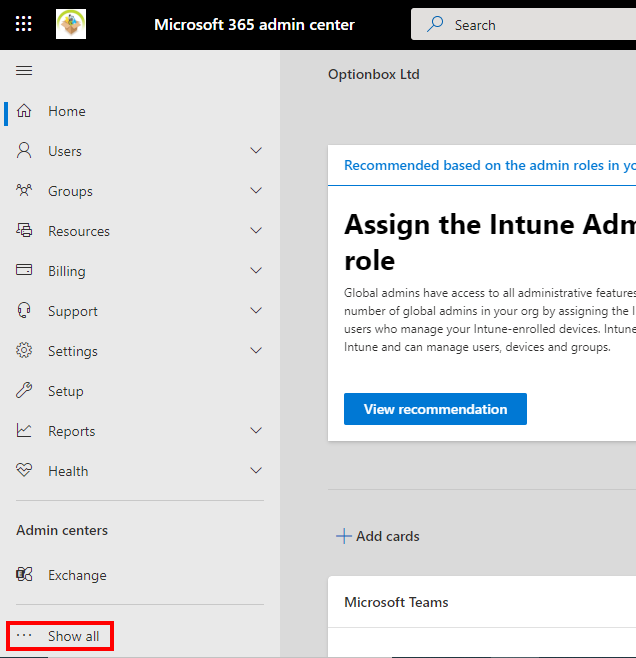
Clicking ‘Show all’ will not make a great difference to much of the menu, but the ‘Admin center’ subtab will rapidly expand. Under this, as a new addition, will be the admin center shortcut for Azure. As you could probably expect, it is this that you should look to click. Again, there is an image below this text to provide assistance should you need it.
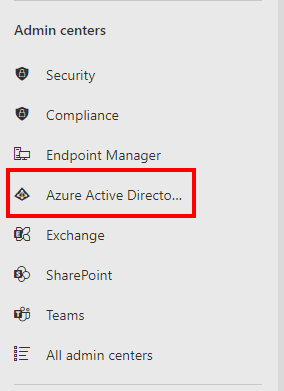
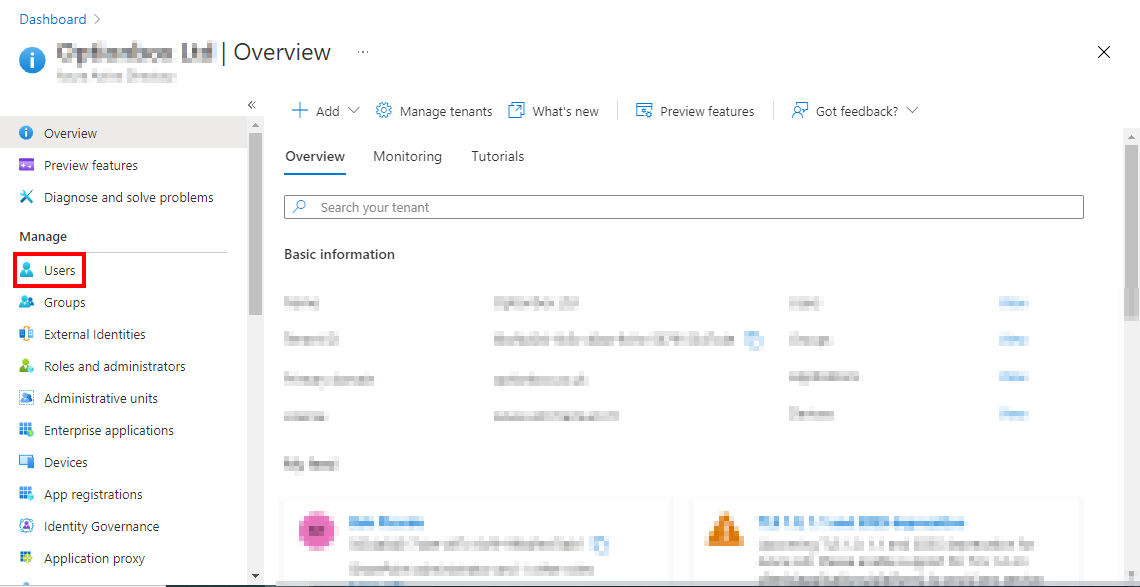
After opening this, you will be greeted with a brief overview of your Azure AD data. Now looking to the left of your screen yet again, you will see a small menu. On this menu, one of the options will read ‘Azure Active Directory’. It is this that you will want to click.
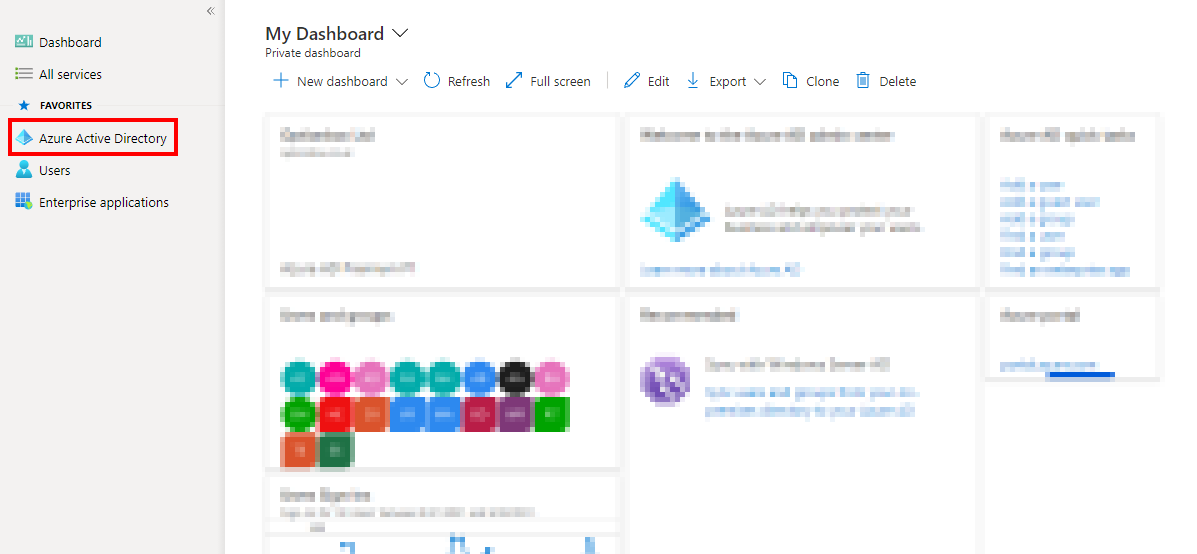
Clicking this will bring you to the main menu of the Azure AD admin portal. From here, you will want to click the subsection titled ‘Users’, which again, is shown in the below image.
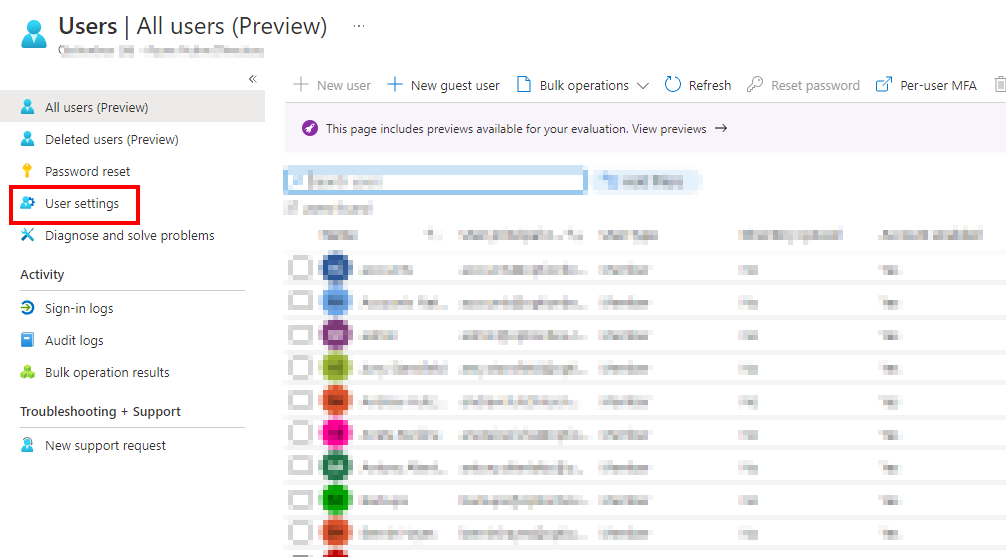
Clicking Users will, unsurprisingly, bring you to the user specific section of settings. From this screen, you should look to click the tab that reads ‘User settings’. Once again, this has been highlighted in the screenshot below.
Clicking ‘User Settings’ will bring you to where you need to be. Under this section of settings, you may have to scroll down very slightly, but there will be a subheading that reads ‘Administration Portal’. Ticking this would allow you to restrict access to your portal, be that in general or for specific devices.
Now, as was aforementioned, you will need admin permissions in order to follow this process. Not only to access Microsoft Admin, but in order to have the level of permission to make such a change in relation to the security of your Azure AD portal.
Nevertheless, the tick box you are looking for has been highlighted in the below screenshot.
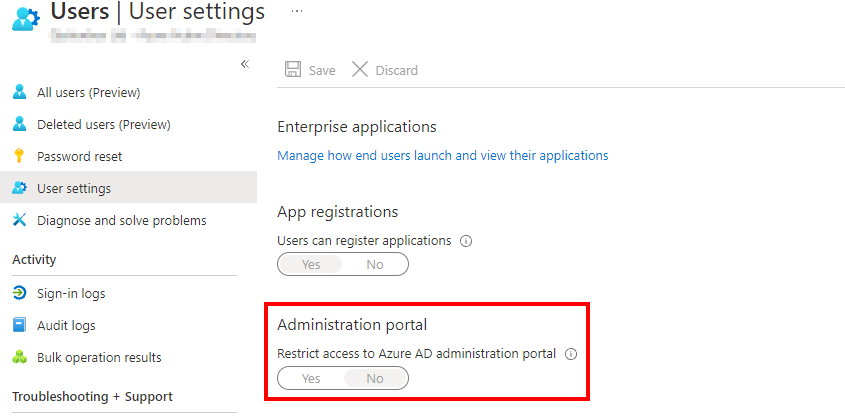
This along with any other changes you may make will be automatically saved, and so you don’t need to worry about manually saving them.
Thank you for taking the time to read this blog, I hope it was as helpful as you wanted it to be! As always, if you struggle with any part of the tutorial, or simply wish to ask us a question, please don’t hesitate to get in touch with a member of our team.