Microsoft Teams can be notorious for having tech problems, from being slow and not loading things correctly to having sign-in issues and only showing old chats. Some solutions can try to remedy the issues, but it isn’t assured that they will; this article will cover one of these methods.
One of the ways to fix a lot of the issues on Microsoft Teams is to go into the files and clear the cache data for Teams. This is done while Teams is shut down, and this article will cover a method for doing this on a Mac device, although it can be done differently for a Windows device.
Method
- Close Microsoft Teams
- Open “Finder”
- On Finder, press “Go” on the apple search bar
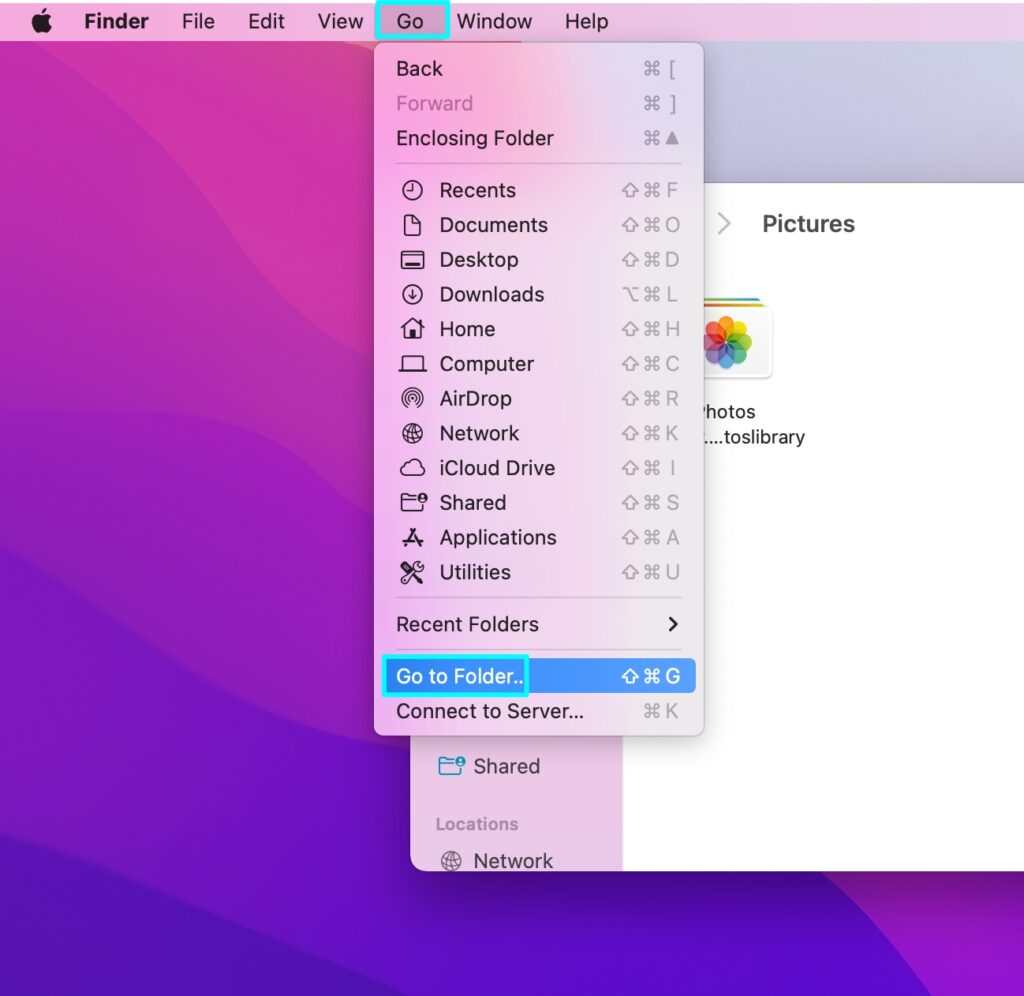
- Click “Go to Folder”
- Enter the following “~/Library/Application Support/Microsoft.”
- Right-click on the Teams file and press “Move to bin.“
- Open “Spotlight Search” using “Command + Space”
- Search “Keychain Access”
- Search “Microsoft Teams”
- Right-Click “Microsoft Teams Identities Cache” and press delete
Content list
- What is a data cache
- Why would you need to clear the Teams cache
- How to clear the Teams cache on a Mac
- Checking for Teams updates
- Conclusion
What is a data cache
A data cache or cached data is the term used in computing for information and memory that a website or app stores over time and use. It can benefit users by helping the website or the app to have faster open times but said data would take up space on your device.
There is a difference between the options of “Clear cache” and “Clear Data,” clear cache lets you remove temporary data on a website or app that will not affect your account and data saved on an account. In contrast, clear data will delete all app data.

Why would you need to clear the Teams cache
There could be a few reasons to clear the cache in Microsoft Teams, as there can be many issues with the software itself. Some of the main issues that could cause you to want to clear the Teams cache could be that the software is taking too long to load things, the app is performing much slower, things are not loading at all, system memory usage is too high, or just having an error that stops you from signing in, as well as other issues that the app can cause.
I have created a step-by-step guide below for clearing the cache for Microsoft Teams; this method will clear the temporary data and things locally stored on your computer, the same way it does on a web browser.
The things that will stay are chat logs, groups, and teams you are a part of, as these are connected through OneDrive. Any files you save on Teams will be saved, too, as they are in SharePoint, and any apps you have used will not be affected by this process.
Once the cache has been cleared, you may need to re-authenticate your profile, and it will try to recreate your local cache; you will also need to check to see if your accounts settings and preferences have been reset because you will then have to change the options back.
How to clear the Teams cache on Mac
- First, force the shutdown of Microsoft Teams

- Open “Finder,” this should be located on the dock bar, in “Launchpad,” or by the search bar in the top right corner.

- Go to the top left corner once clicking on the “Finder” window, and it will say “Go,” click this.
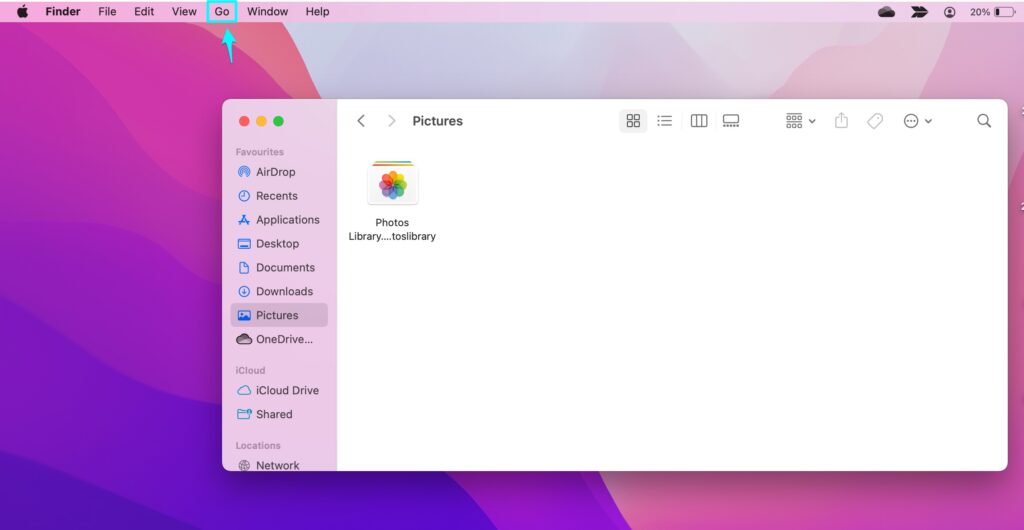
- Next, find the option on the list called “Go to Folder,” this will let you find the cache data for Microsoft Teams.
- Next, enter the following address in the box, then press “return” on your keypad.
~/Library/Application Support/Microsoft
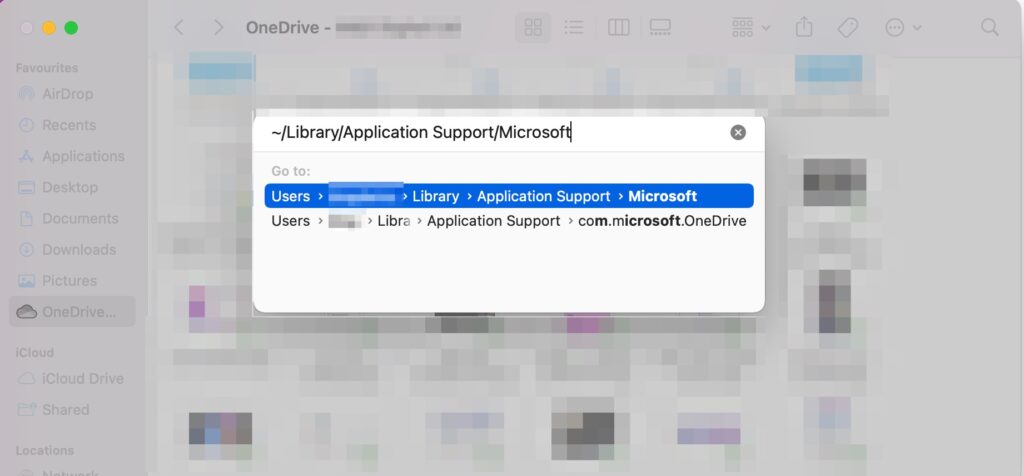
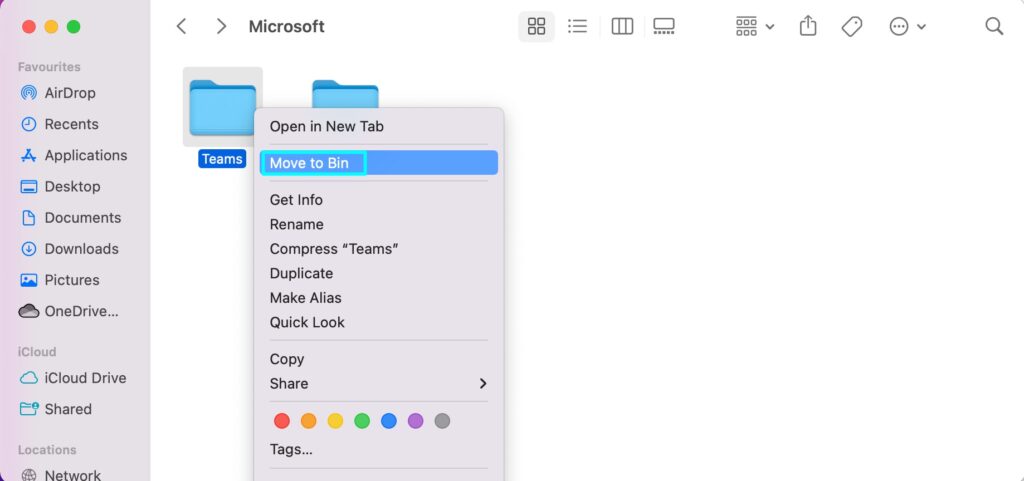
- This will open the file for Microsoft.
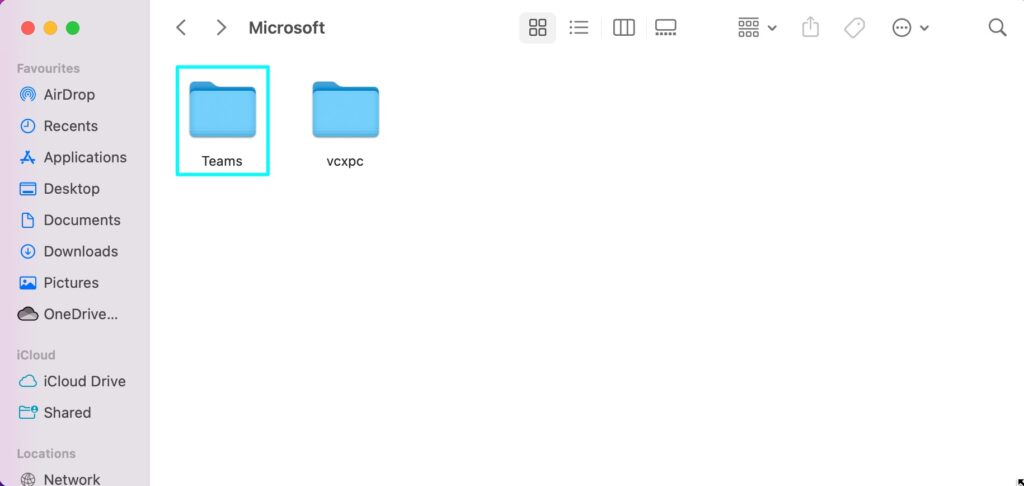
- The next step is to right-click on the “Teams” folder and press “Move to bin.”
Before
After

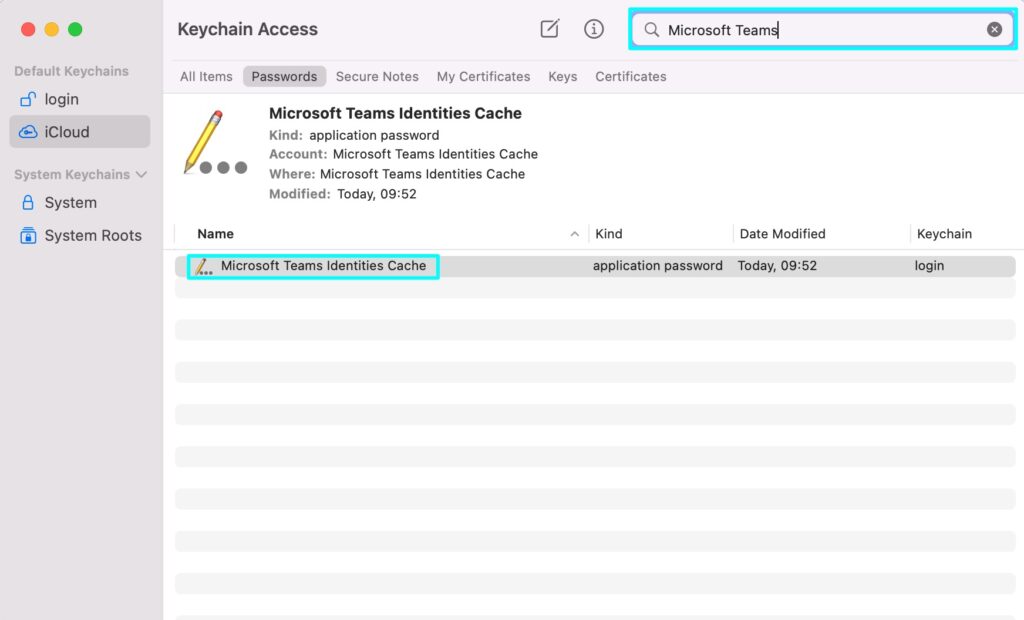
- After deleting that file, close the finder app down and search using the magnifying glass in the top right for “Spotlight Search.” There is also a shortcut for this which you can use by pressing “Command + Spacebar.”

- Search for “Keychain Access” in this search bar and click what appears.

- After loading this new window, you can use the search bar to find “Microsoft Teams.”
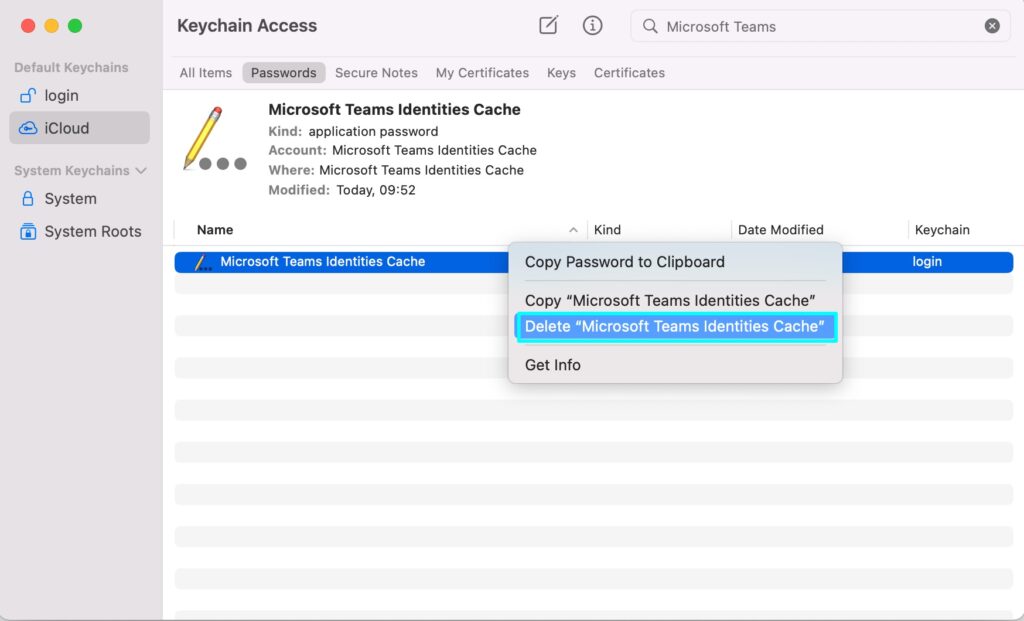
- The last step is to right-click on “Microsoft Teams Identities Cache” and press delete; this will successfully clear the Microsoft Teams cache. You can restart Microsoft Teams, and while it may take longer to open, it is because it will try to re-install data.
That is the entire method for removing the cache data for Microsoft Teams on a Mac; once you have done this, you should restart your device and try to load Microsoft Teams again; this may take some time, but it will then ask you to sign in to an account, and it will load everything the way it used to.
Checking for Teams updates
Clearing the Teams cache should usually fix some of the issues with Microsoft Teams and should let you use the app properly; however, if there are still some issues with the app or you want to do some more to fix it, then you should check if the app itself needs updating. This is simple, and I have made a short guide for this below.
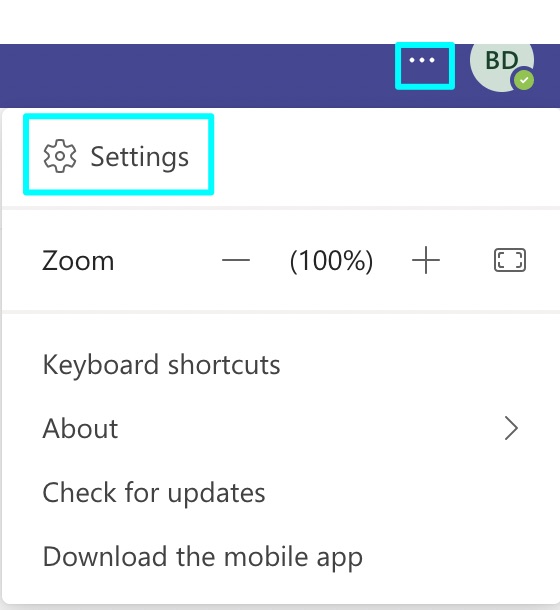
- Open Microsoft Teams

- Click “…” next to your profile and click “Check for updates.”
Conclusion
Sometimes, clearing Microsoft Teams’ data cache can fix many issues that seem to plague the software. The process isn’t too complicated as long as you follow the instructions provided; otherwise, it can appear confusing. Once the cache has been cleared, you are free to check over Teams and see if it has fixed the problems you have been having with it; it may just take a little longer to set up after following this guide. You can check if any updates need to be installed on the app; this can be done by clicking on “…” next to your profile icon on the app and clicking “Check for updates,” which will see if anything is ready to download.
Thank you for taking the time to read through this article; I hope it answered what you were looking for, and check out our other content if you have any other tech problems.