In Windows 10, you will of course have preset aspects of the program. Duties that are necessary, duties that you don’t often think of, such as certain keys on the keyboard being programmed to record certain things. Sometimes though, you may wish to nullify one, or several keys. Ones that carry no purpose, or ones that you consistently, yet accidentally, catch when typing.
Thankfully, wanting to disable certain keys is a fairly easy desire to sate. In order to do this in Windows 10, you will first want to download the free Microsoft application, PowerToys, and from there access the ‘Keyboard Manager’ section of options to rebind keys to a certain purpose.
Don’t worry if this isn’t enough detail for you to work with. As with every blog, there will first be a step-by-step guide for the process, which itself will be followed by a more detailed, further analysed breakdown of the entire procedure. Not only will the blog discuss what to do on PowerToys, but it will first detail how to go about installing the free Microsoft application.
STEP-BY-STEP: How to Disable Keys on Windows 10
- Install Microsoft PowerToys.
- Proceed with the setup wizard of PowerToys.
- When at the main menu of PowerToys, click ‘Settings’ to advance from the start menu.
- After clicking ‘Settings’, find the ‘Keyboard manager’ tab of settings.
- Click the ‘Remap a Key’ option.
- Click the ‘+’ to add a key remap.
- Underneath the first ‘Type’ presented to you, click the box for the dropdown menu.
- After doing this, simply enter the letter you wish to remap.
- Press enter, then under the second box, click ‘Undefined’ in order to disable your initial key.
- Click ‘OK’ in the top right corner of the application to save your changes.
Again, don’t stress if you feel this isn’t enough detail for you to go on. As was aforementioned, there will now be a more detailed breakdown of the process, starting with how to install Microsoft PowerToys.
How to install Microsoft PowerToys
The process to install Microsoft PowerToys is, luckily, a very straightforward one. Being a free to install application makes it simple, and being a Microsoft creation makes it reliable, as they would never advertise anything that could even slightly negatively alter their product.
In order to find PowerToys, simply search for it in your default search engine. From there, make sure you follow the link to the official Microsoft site. Here, you should be greeted with this menu:
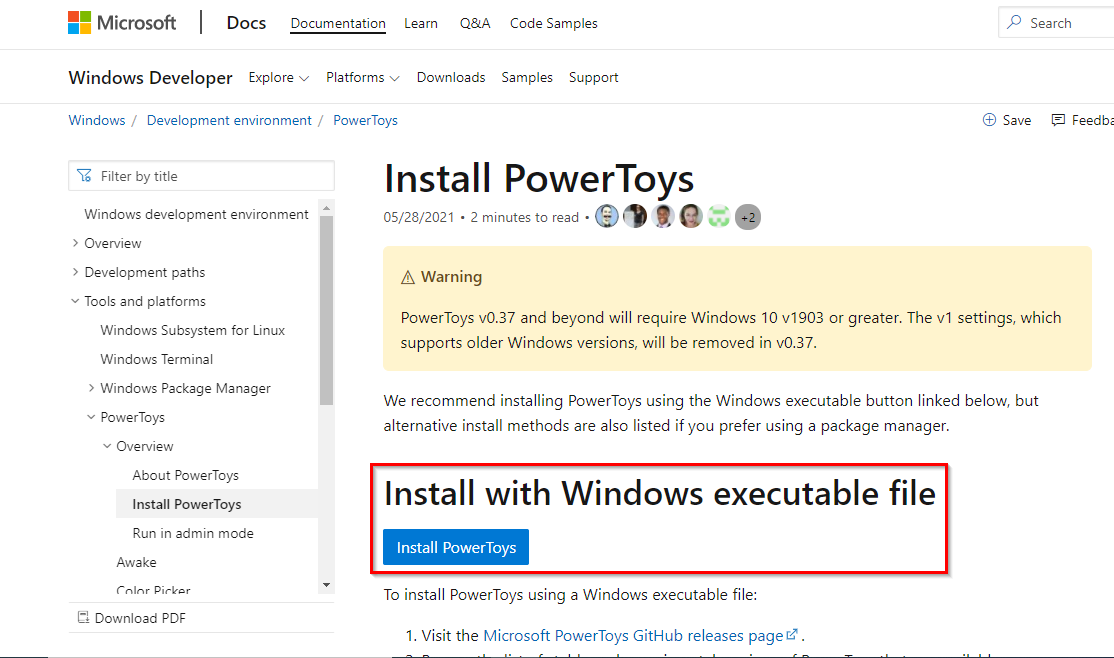
Make sure to click ‘Install PowerToys’, the blue box underneath the heading encapsulated within the red rectangle on the above screenshot.
Clicking this should bring you to a new page, with the links you need to download the program:
Now, highlighted is the SetUp Wizard of the program, which you will want to download. This isn’t to negate the remaining three options though, as all of these should be clicked to ensure everything has been downloaded.

Once the files have been downloaded, which you can check in whichever capacity it is that oversees your computer downloads, click the SetUp link to open the program wizard. Your screen should now look something like this:

Follow through the wizard as you would with any other program. Once you have completed the setup and, by process, the installation of the application, you will be greeted with something of a tutorial menu within PowerToys, like this:
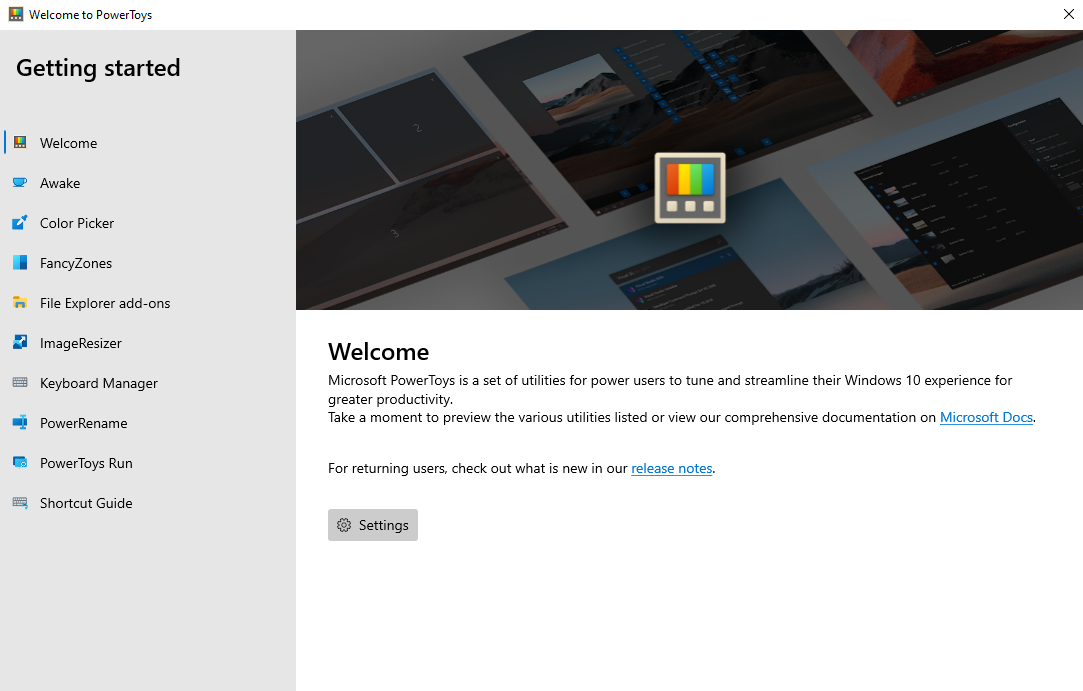

How to disable a key in Microsoft PowerToys
From this welcome screen, clicking any of the other subsections will present you with descriptions about each of the options. This, though, is only an informative window. To be able to delve further and make actual changes within your system, you will first want to click ‘Settings’, the option presented to you on the ‘Welcome’ tab. It is visible in the above image.
After clicking Settings, you will be greeted with the official menu of all PowerToys settings. From here, you will want to click the ‘Keyboard Manager’ subsection, which has been emboldened, once more, by the red rectangle in the screenshot below.
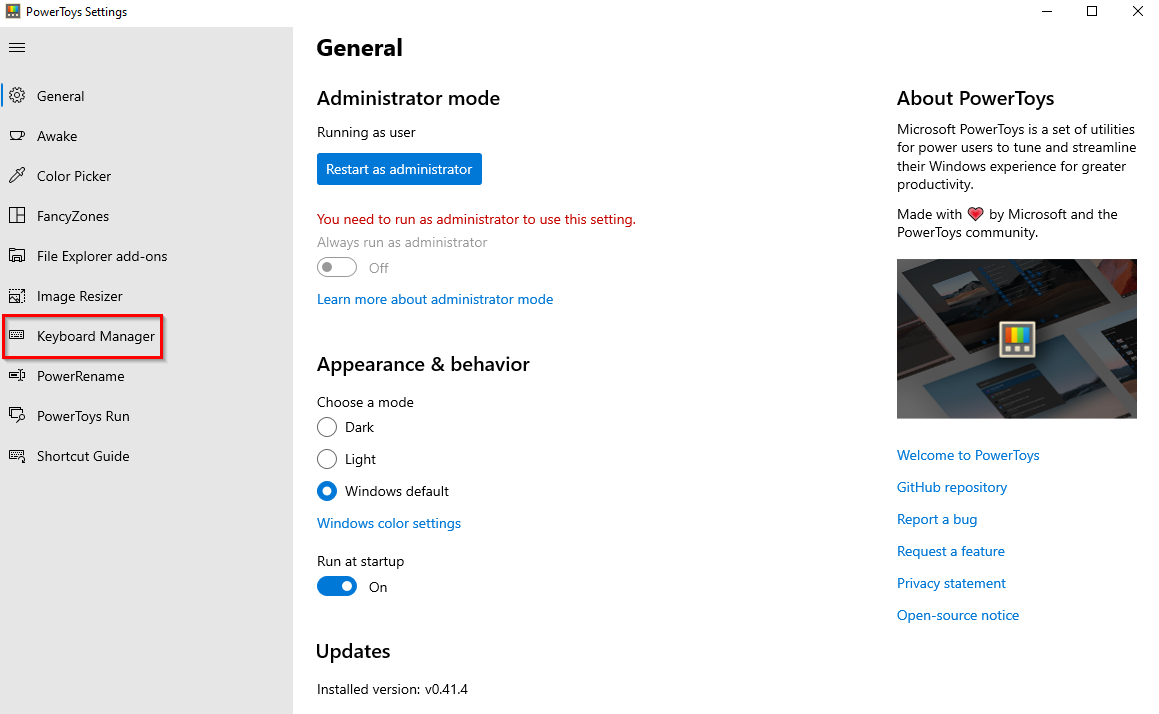
Clicking Keyboard Manager will bring you to a new menu. It is here that you will be able to navigate to the section in which you can officially edit, or disable, keys on Windows 10.
From the Keyboard manager menu, you will want to click ‘Remap a Key’, which has been highlighted below.
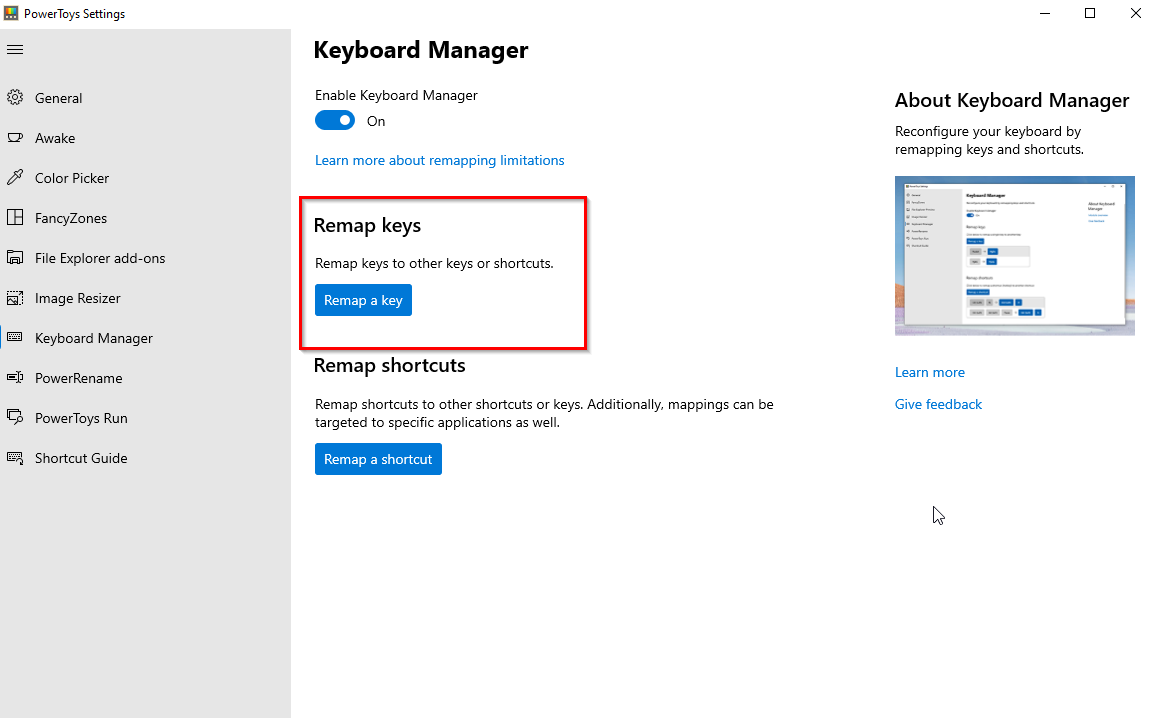
Clicking the remap option will open a new menu in a separate window from the one you have been working on up until this point. It is here that you will be able to re-issue, or simply disable, the purpose of any keys on your keyboard.
To add a new key, you will first want to click the ‘+’ symbol, the one highlighted below:
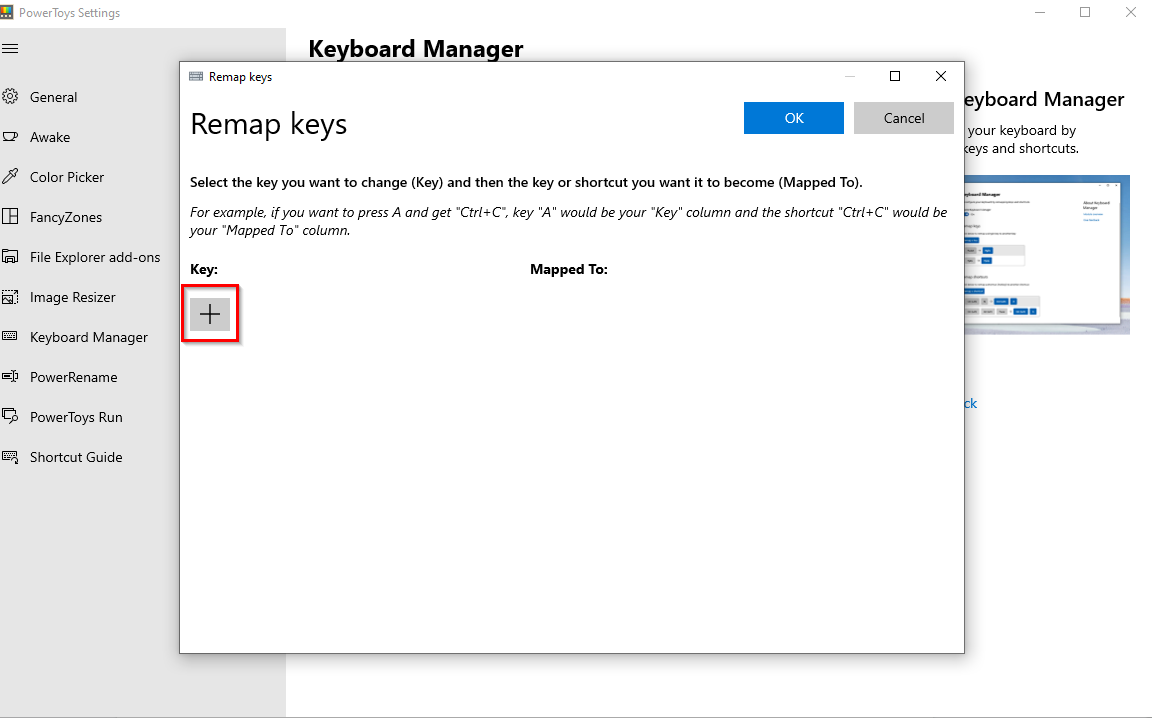
Clicking the ‘+’ will open the submenu in which you can add a new remapping. On the left side, the subheading will be titled ‘Key’. Under this it will say ‘Type’, and under that will be an empty box with a downward facing arrow. It is here that you will want to enter the key you wish to remap.
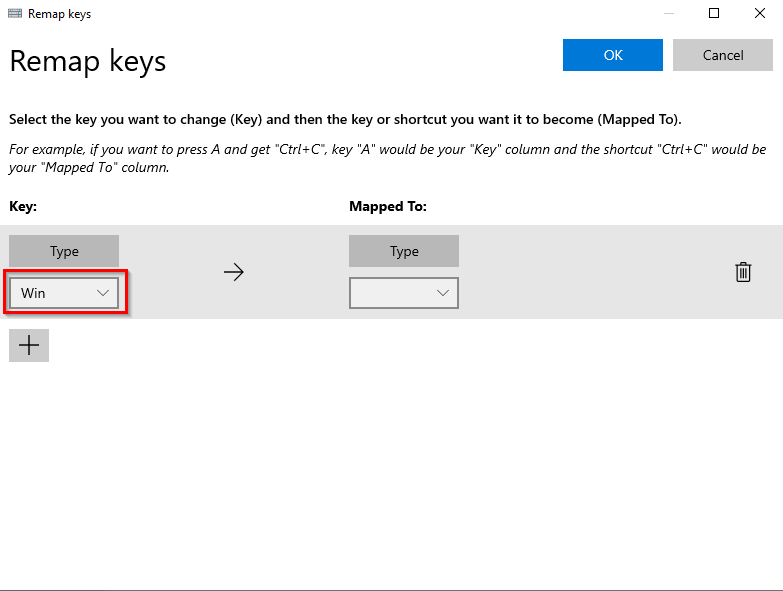
Now, whilst you can enter the key manually, for example, typing ‘A’, or ‘3’, chances are the key you wish to disable is one that is of far less usage than those types. For this example, we will be disabling the Windows key. So, to select this, scroll until you find the ‘Win’ option and click that to select it. After this, you ‘Key’ option should look like this:
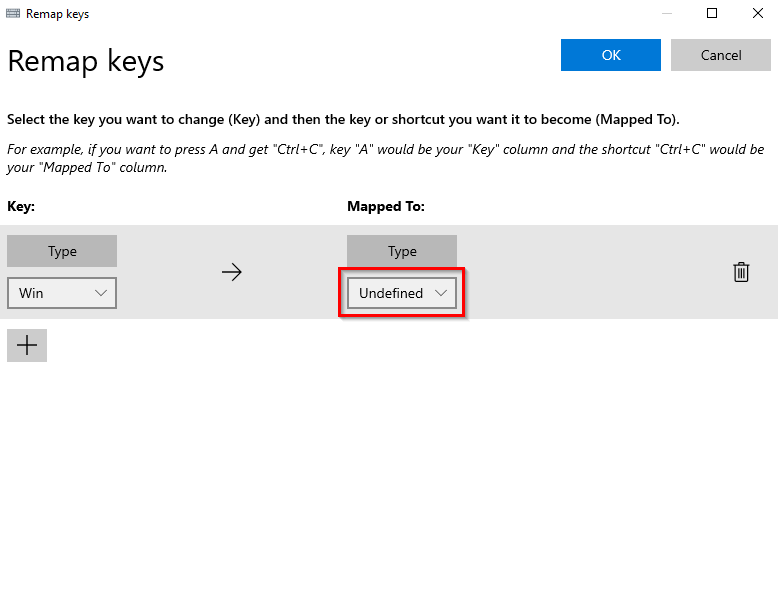
Having selected the button you wish to disable, you should now look to the second box, headed by the ‘Mapped To’ title. Again, you will have a box labelled ‘Type’, with the box under that providing you with a dropdown menu of options. Of these options, scroll down until you find ‘Undefined’. Select this, and you should have a screen that looks like this (of course, without the red rectangle to assist annotation):
Once you have selected the button you wish to reprogram, and the command for which you want it to follow, click ‘OK’ in the top right corner to save your changes.
After doing so, you will have successfully disabled a key on Windows 10! This is a repeatable process, one you can do with as many, or as little, keys as you’d like.
Thank you for taking the time to read this blog, I hope you found it as helpful as you wanted it to be! As always, if you run into any issues or simply wish to tell us how you found the writing, then please don’t hesitate to get in touch with a member of our team.