If you use Outlook regularly, you may know the term read receipt within the program. Read receipts are small bits of information users receive when someone has read their e-mail. While sometimes this feature could potentially put users in quite an anxious position, sometimes it could often be a good way to know if someone has read your message or not. In this blog, I will show you how you can set up a read receipt in Outlook. Read through to better understand how you can set up a read receipt in Outlook.
Outlook allows users to set up read receipts directly when composing an e-mail in Microsoft Outlook. To set up read receipts, you will need to compose an e-mail for the user, and then you will need to request a read receipt within the program. To set up a read receipt, you will need to first click on the More options tab, and then you will need to click on the Show message option. You will then be able to request a read receipt and have completed setting up a read receipt in Outlook. Microsoft Outlook does not provide a dedicated way to turn on a universal feature for reading receipts.
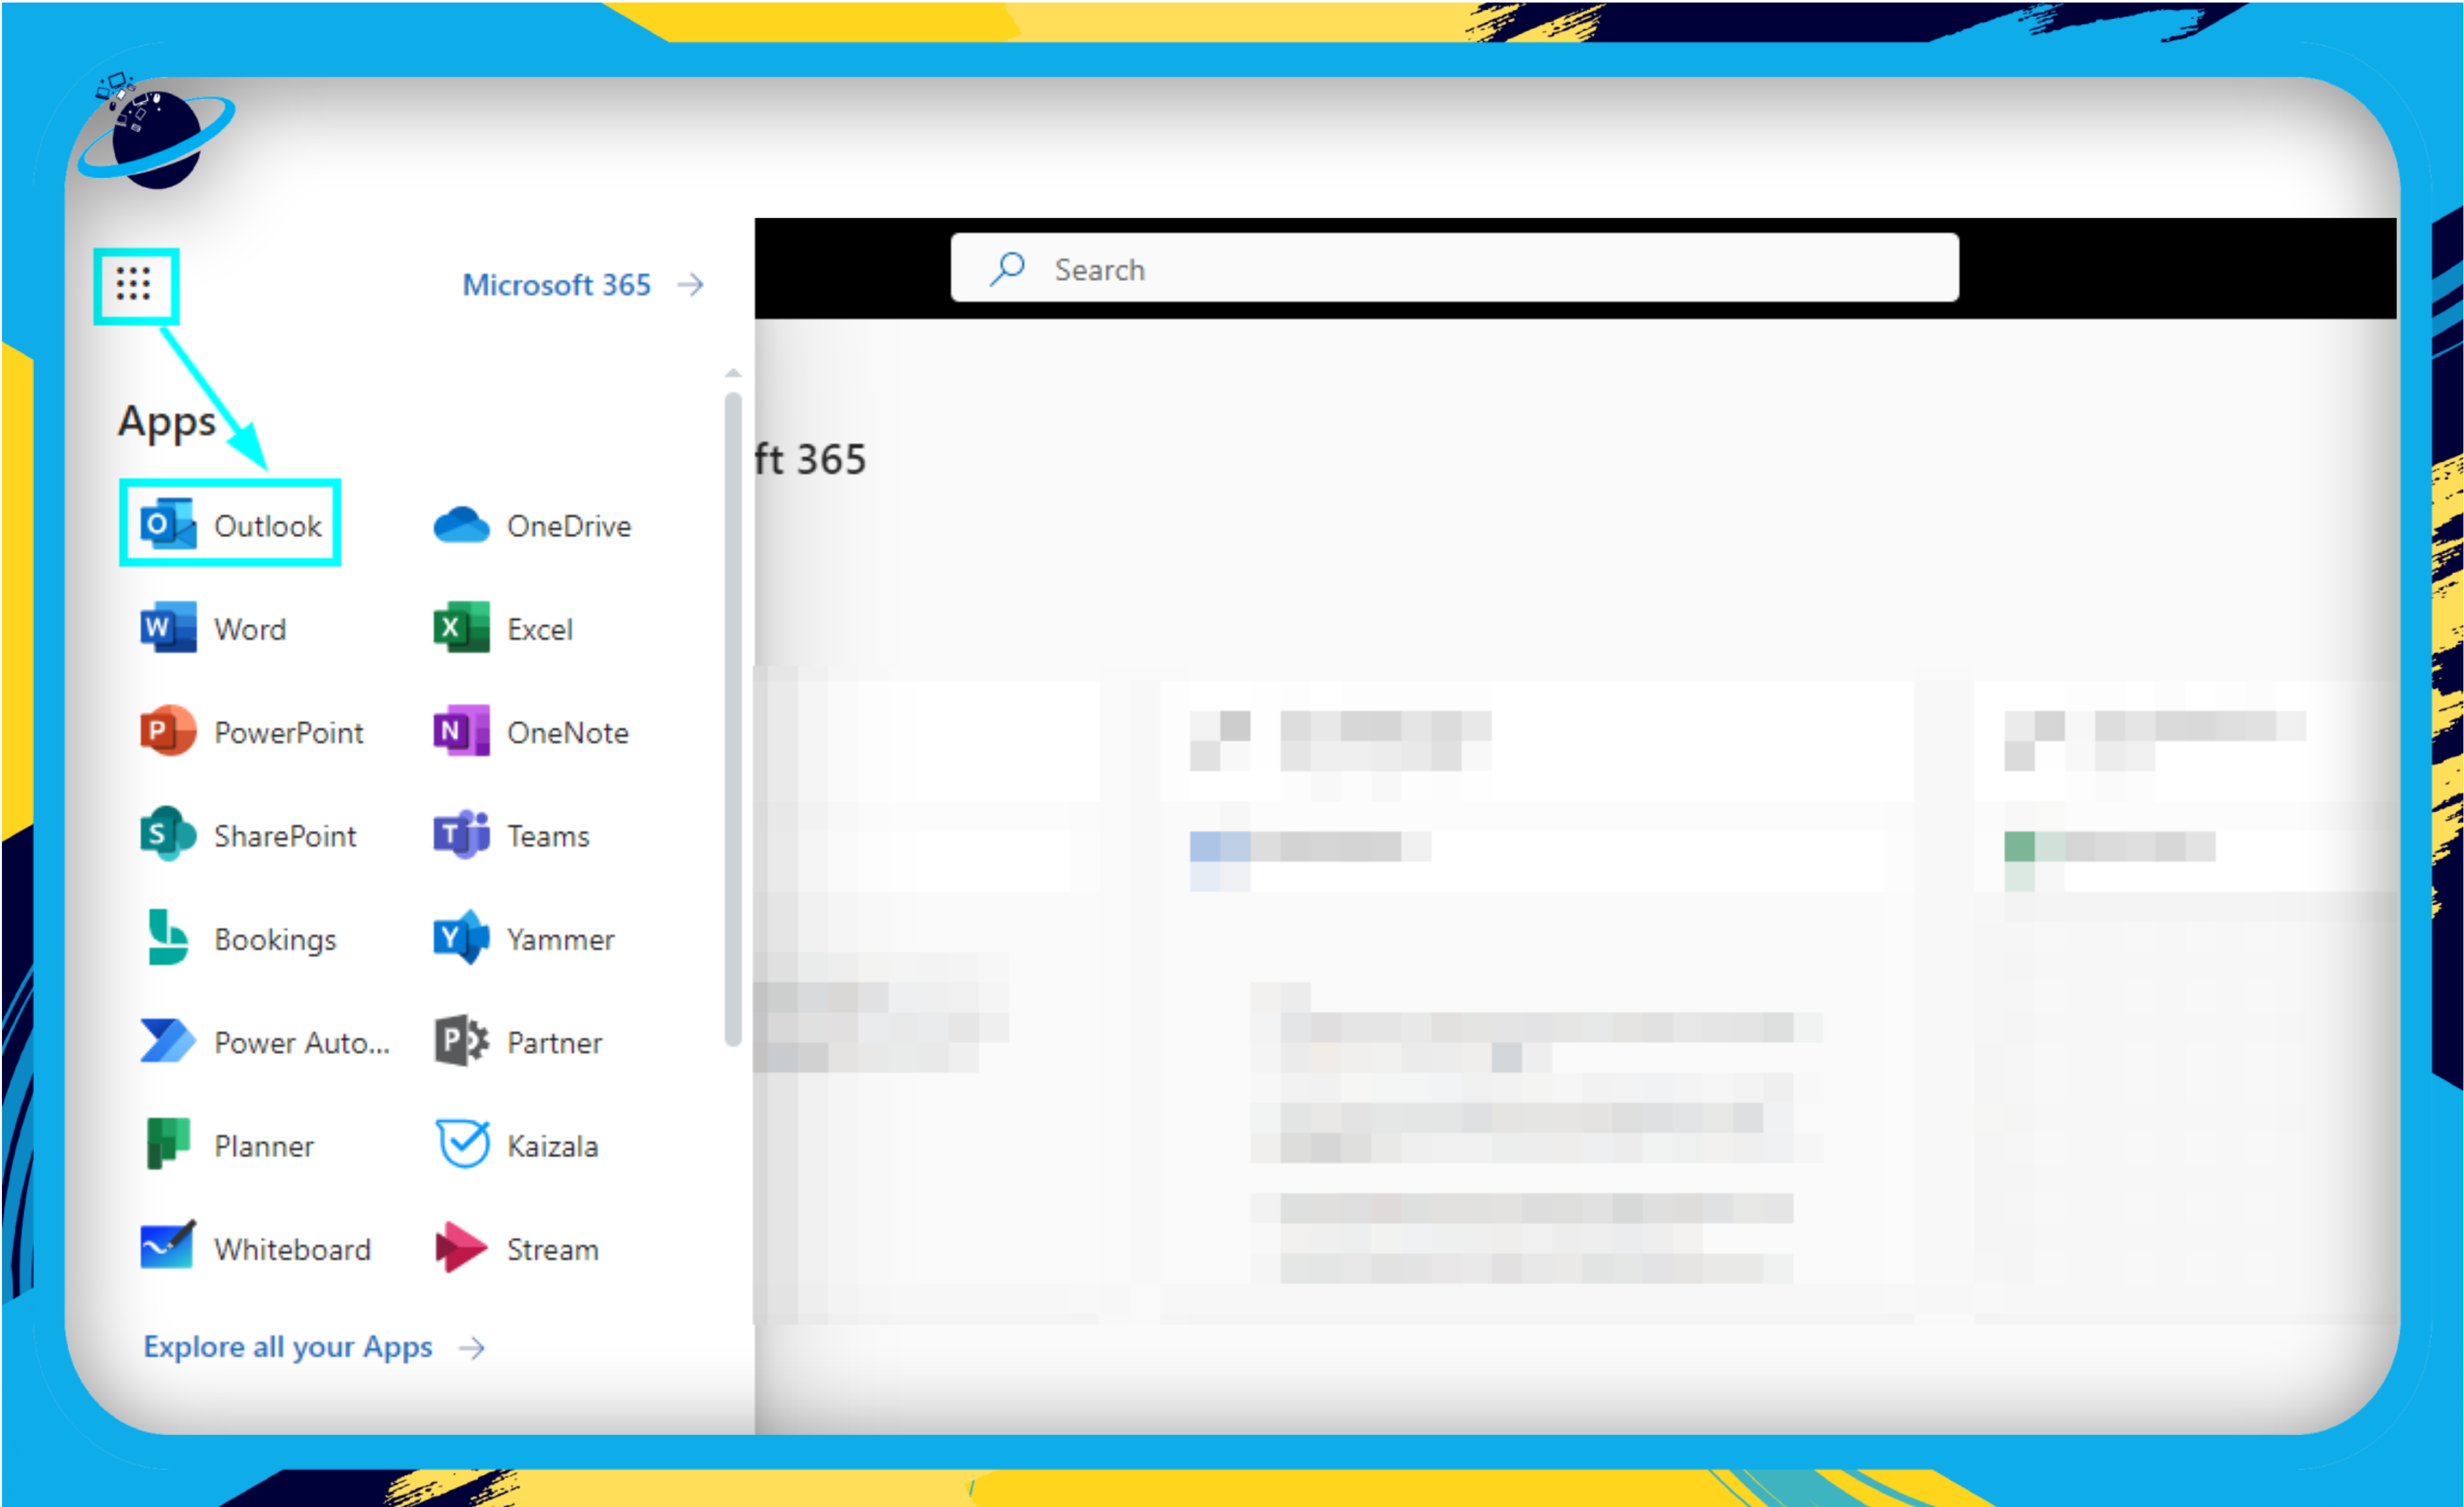
- First, open Office 365 and sign in.
- Click on the
 launcher.
 - Select
 “Outlook” from the launcher.
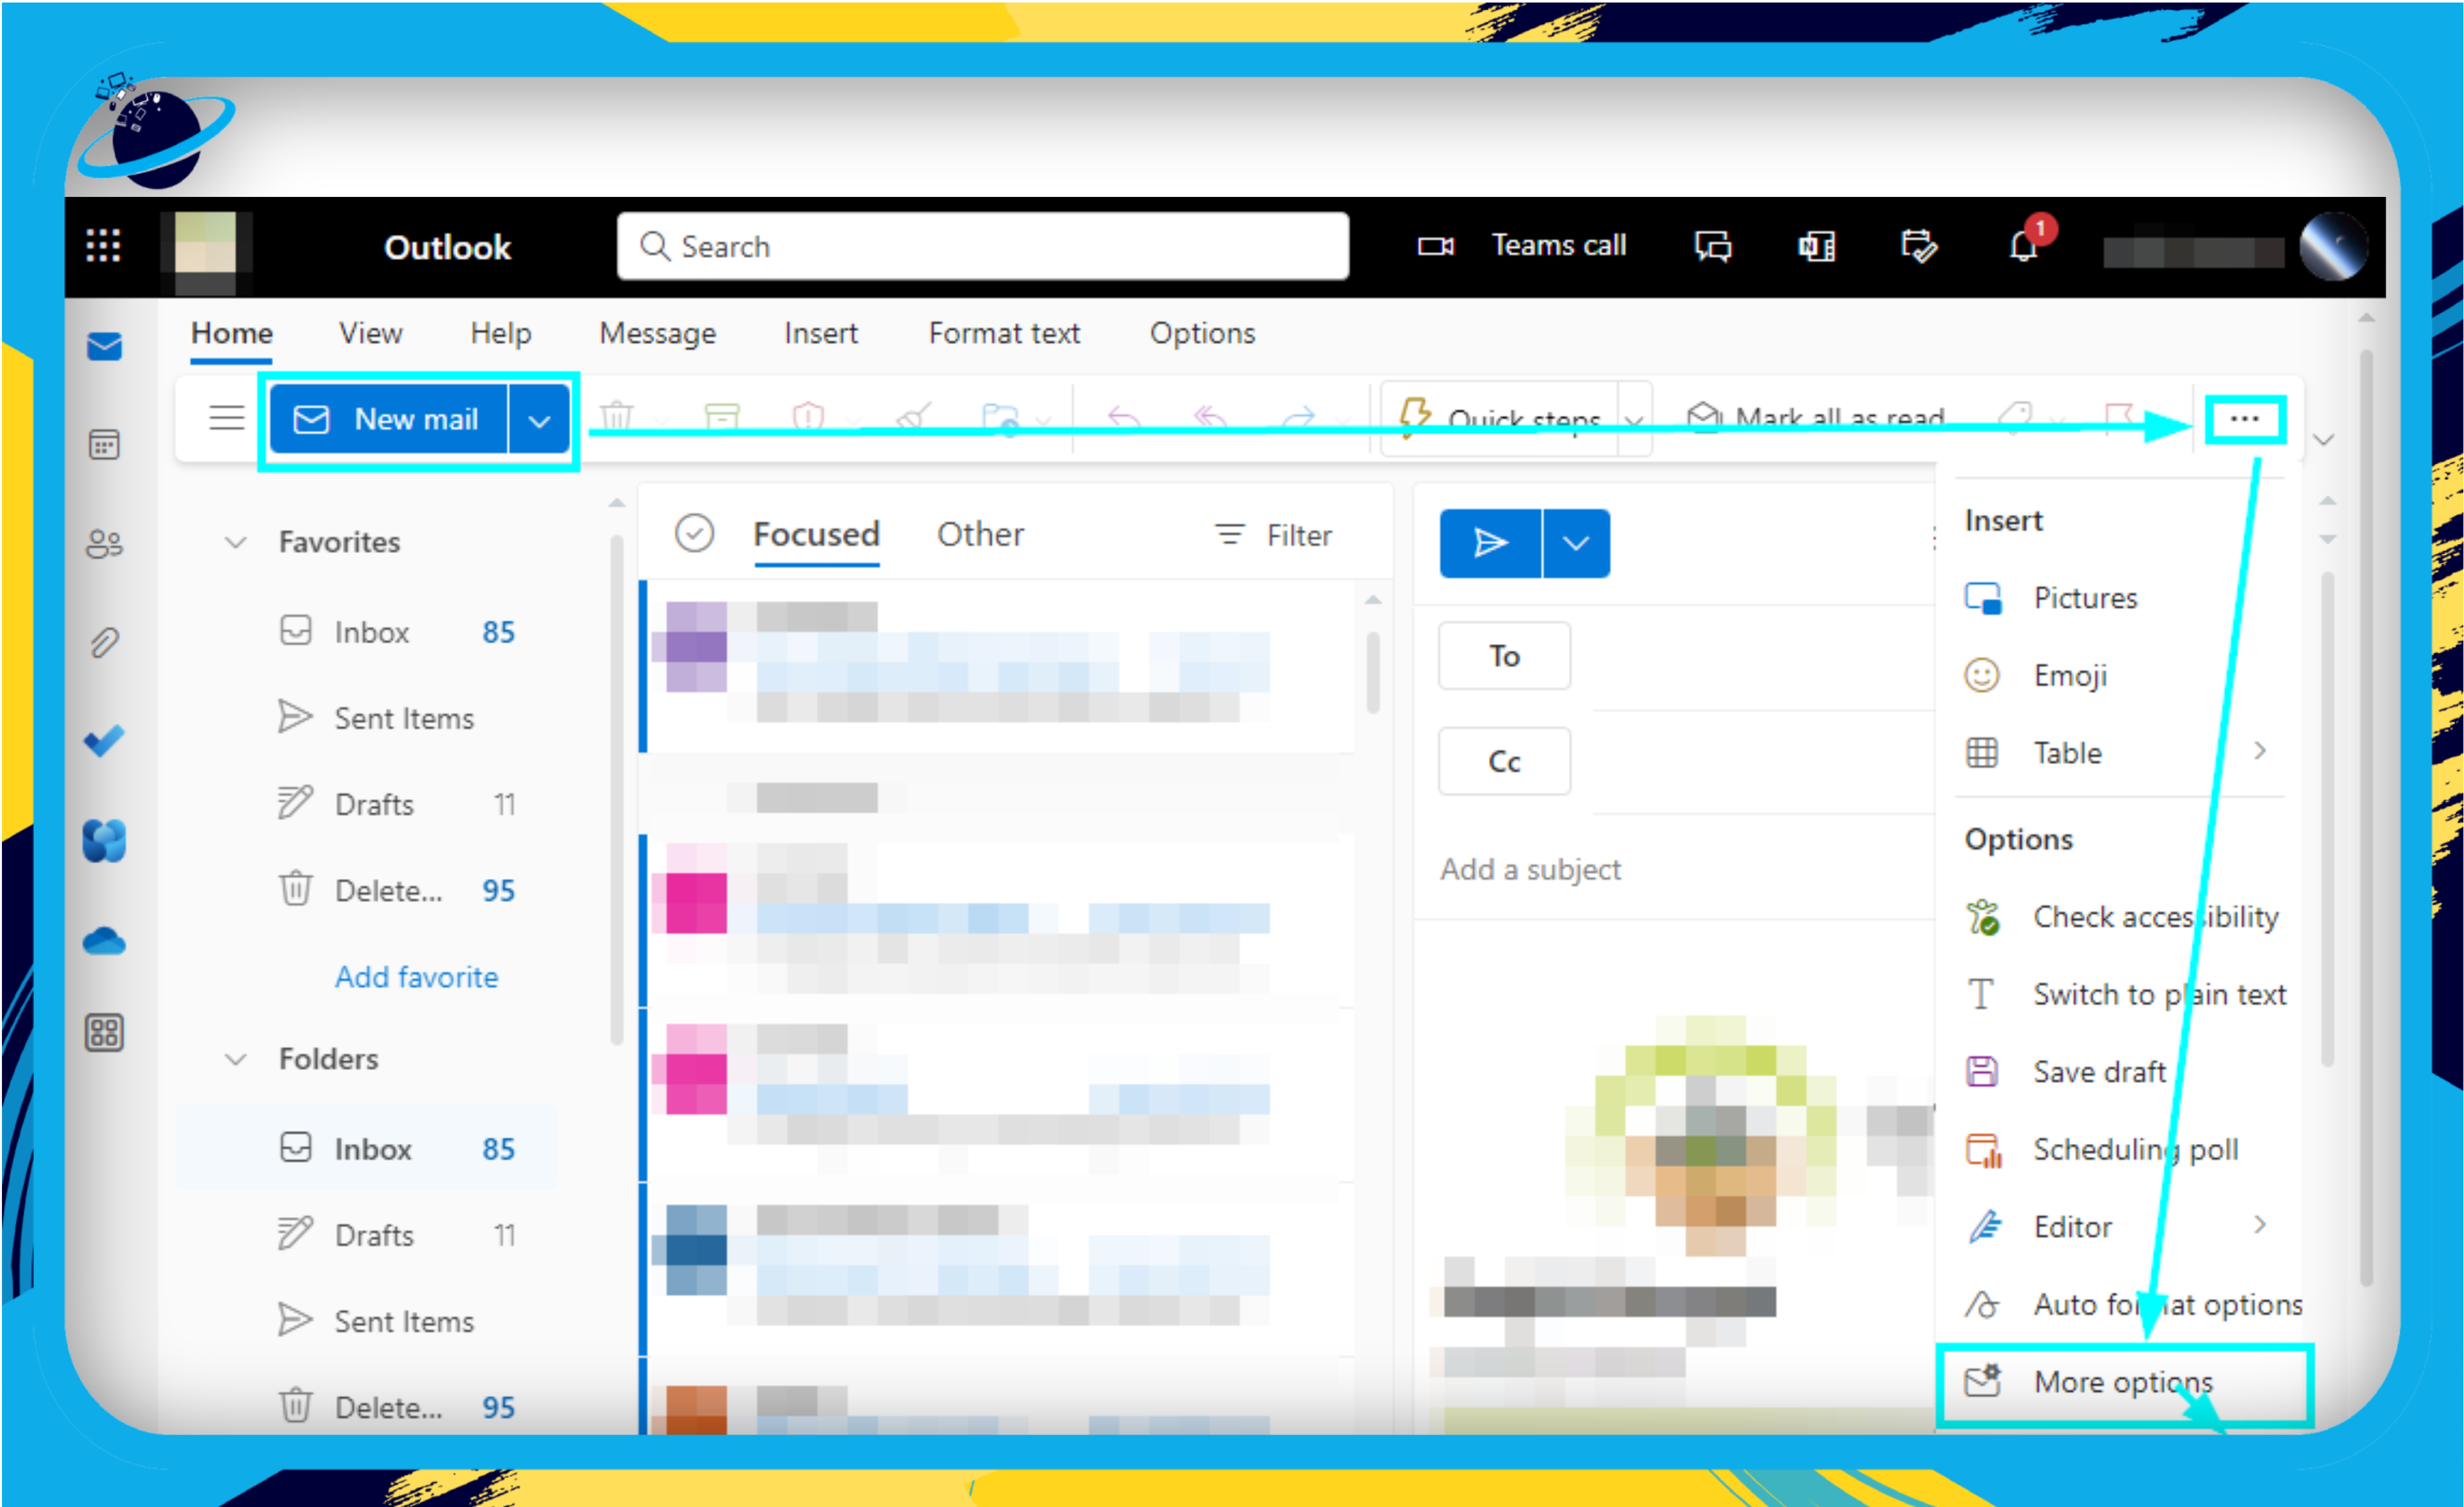
 - Click on “New Mail.”
- Select the three dots and click on “More options.”
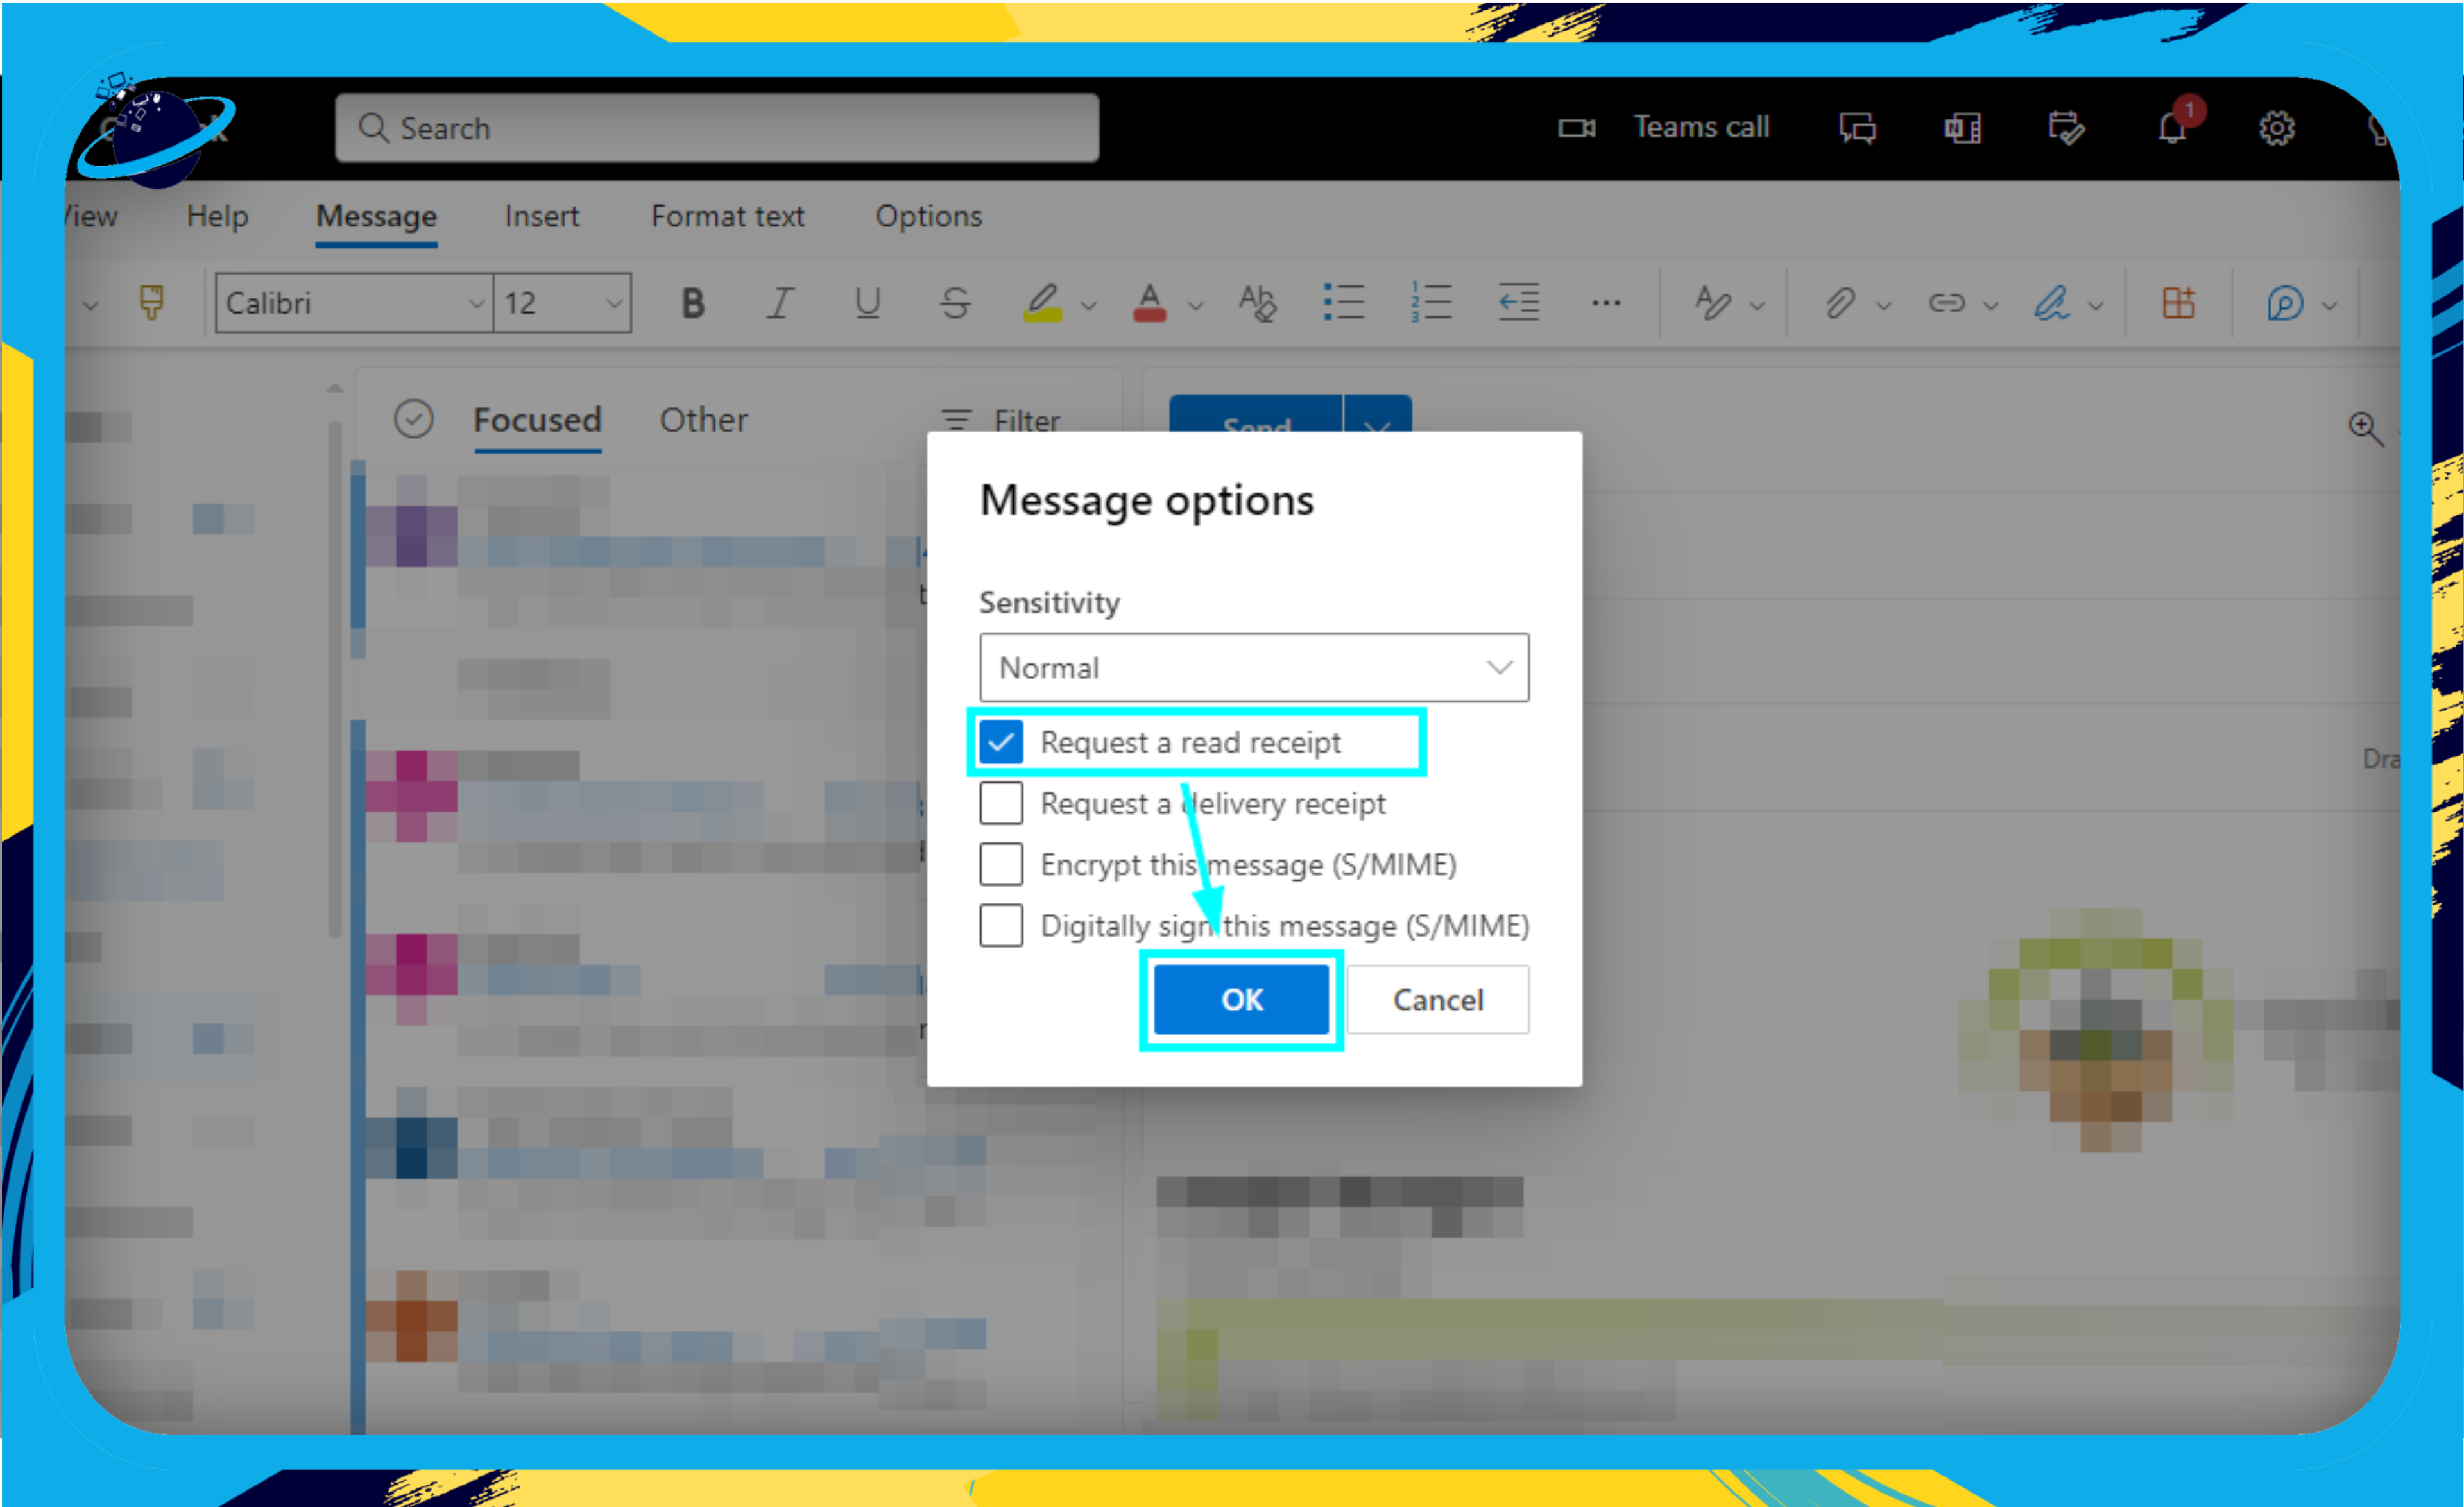
- Ensure “Request a read receipt” is selected.
- Click on “OK” to complete the process.
You will have set up a read receipt in Outlook for the web. Outlook allows users to request read receipts as a form of a setup for that particular user. Unfortunately, the process shown here is not universal and will not work on a universal level for individual users that need assigning with the request. The setup process will only work for a single user upon completion. However, upon completion, the sender gets a notification if the recipient chooses to acknowledge the read receipt.
An in-depth guide on how to set up a read receipt in Outlook on the web
Sometimes it can be quite difficult to navigate through the User Interface (UI) of a specific program or software. For example, if you are following the steps above, you may have encountered a situation where you do not understand the UI of Outlook. If you encounter a situation where you can’t follow Microsoft Outlook properly, you can use the in-depth guide to help.
- First, open Office 365 and sign in.
- Click on the launcher.
- Select “Outlook” from the launcher.
- Click on “New Mail.”
- Select the three dots and click on “More options.”
- Ensure “Request a read receipt” is selected.
- Click on “OK” to complete the process.
A read receipt will be requested once the steps above are complete. Microsoft Outlook will automatically attain a read receipt from a user once they have read the message in Outlook. You will automatically receive a notification of the read receipt once the user has read the message in Outlook. Read receipts can sometimes be seen as quite an obstructive method of gathering message-based information. However, certain users find this to be quite effective in ensuring that the user has read the message in Microsoft Outlook.

Why may you want to set up read receipts in Outlook?
Read receipts provide a fantastic way for users to ensure that messages have been read within the program. When you send a message to someone, you may often like to keep an eye on whether the user has read the message or not. When the users read the message, they can approve the read receipt, which indicates their message has been read. The process above ensures that users receive the request for a read receipt within the program. However, once the process is complete, you will have managed to attain information on whether a user has read the message in Outlook or not.
Conclusion
Thanks for reading our content on setting up read receipts in Outlook. I have given you the steps to set up read receipts in Outlook for users. To set up a read receipt in Outlook, you will need to understand the process is not universal and will not work for all accounts. You will need to go through the process each time you compose a new message and want to set up a read receipt for that message. If there are any issues you come across when following through the process, simply drop a comment below, and we will address them.