You may use Microsoft Outlook to allow another person, known as a delegate, to accept and react to meeting requests or responses, as well as send e-mail messages on your behalf. It’s similar to having an assistant help you manage your incoming paper mail. You may also give your delegate extra capabilities, such as the ability to read, create, or fully manage things in your Exchange mailbox. The most frequent application of Delegate Access is between a manager and his or her assistant, with the assistant delegate being in charge of processing the manager’s incoming meeting requests or e-mail messages, as well as arranging the manager’s calendar. Although this article assumes this situation, Delegate Access can also be utilized between peers.
How to stop a delegate receiving meeting invitations in Outlook 365:
- First, sign into Outlook 365 using your details.
- Once you have signed into Outlook go to “file”
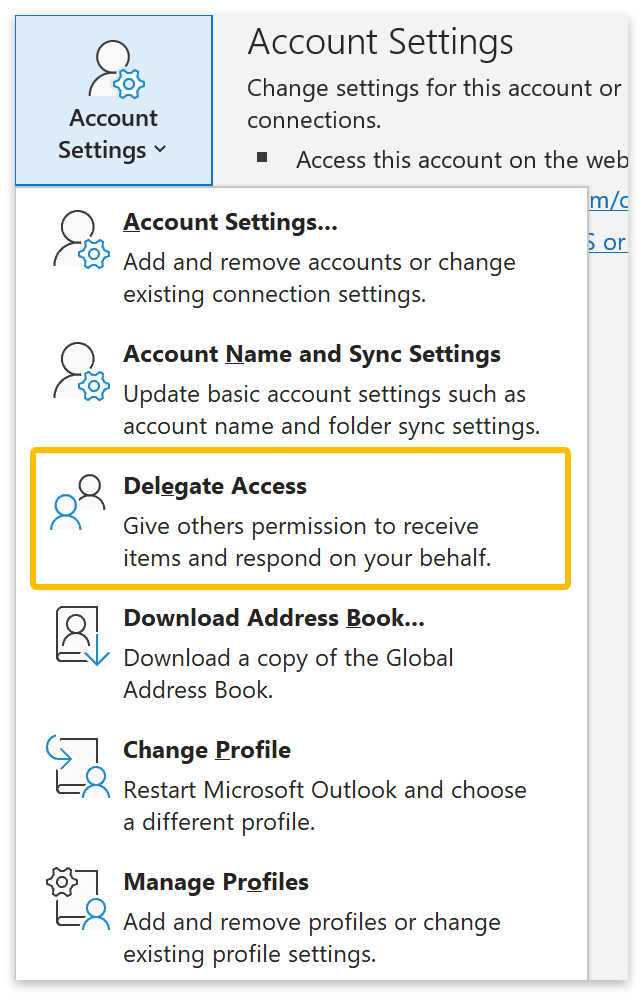
- Click “Account Settings”, and then click “Delegate Access”.
- Click on “Access”, then click the name of the delegate for whom you wish to alter permissions.
- Change the permissions for any Outlook folder that the delegate has access to.
- Select the Automatically send a message to delegate summarising these permissions check box to send a message to alert the delegate of the updated permissions.
We’ve also created a video to help guide you through the process:
   |
If a delegate just needs access to meeting requests and answers, the default permission settings, which include Delegate does not get copies of meeting-related communications delivered to me, are adequate. The Inbox permission setting can be left at None. The delegate’s Inbox will not receive meeting requests or answers.
Because the delegate answers to the meeting on your behalf, the meeting is automatically placed in your Calendar folder, the delegate is granted Editor privilege (can read, create, and change items) by default.
You should not rely on the Private function to keep the specifics of your appointments, contacts, or tasks hidden from others. Don’t give anyone Reviewer (can read things) permission to your Calendar, Contacts, or Tasks folders to ensure that others can’t see the items you’ve set as private. A user with Reviewer (read items) authority to your folders might examine the information of a private item using programmatic techniques or other email tools. Only use the Private option when sharing folders with individuals you know and trust.
More information on using the EAC PowerShell to stop delegates receiving meeting invitations in Outlook
The Exchange Admin Center (EAC) PowerShell has far more powerful functionality that allows one or more individuals to stop delegates from receiving mail invites for another Exchange mailbox. Send As allows a user to send a message as if they are the mailbox owner. With or without Delegate Access, Send As permissions can be utilized. The receiver will only see the manager’s name next to From if Send As permissions are allowed.
This feature must be configured by an Exchange or Microsoft Windows administrator. When there is a shared Exchange mailbox, such as when a staff person sends e-mail messages to clients from a shared Exchange mailbox rather than from his or her own Exchange account, this scenario is more prevalent.
  | |
 Compatible with Windows, Mac OS, and Android. Compatible with Windows, Mac OS, and Android. | FROM $6.00 user/month |

How to stop a delegate receiving meeting invitations in Outlook 365
Step by step breakdown of process:
- Sign into Outlook using your details and navigate to “File” on the top menu.

This feature is only available if you use the application version. It will not be present on the website or the Office 365 version where content related to the Outlook platform is stored and managed in Exchange.
- Click “Account Settings”, and then click “Delegate Access”.
The delegate feature is located in a convenient post within the Outlook file and share server so it’s easy to access and manage. Unlike the web version where you would need the assistance of more than one software to access the required features to stop the delegates from receiving invites.
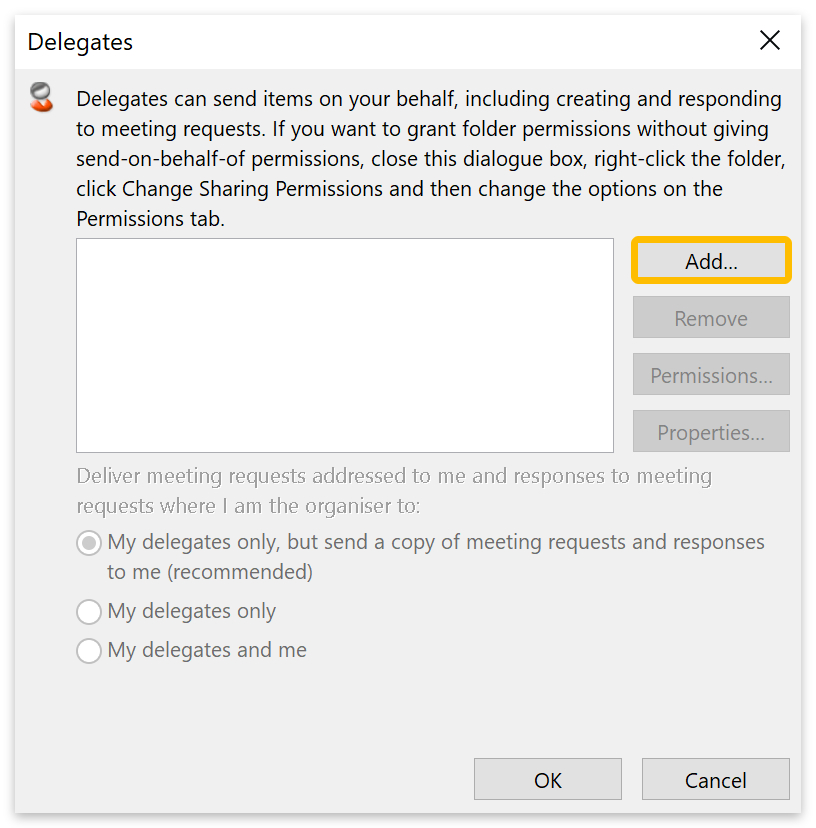
- Click the “Add” button when the Delegates box opens.
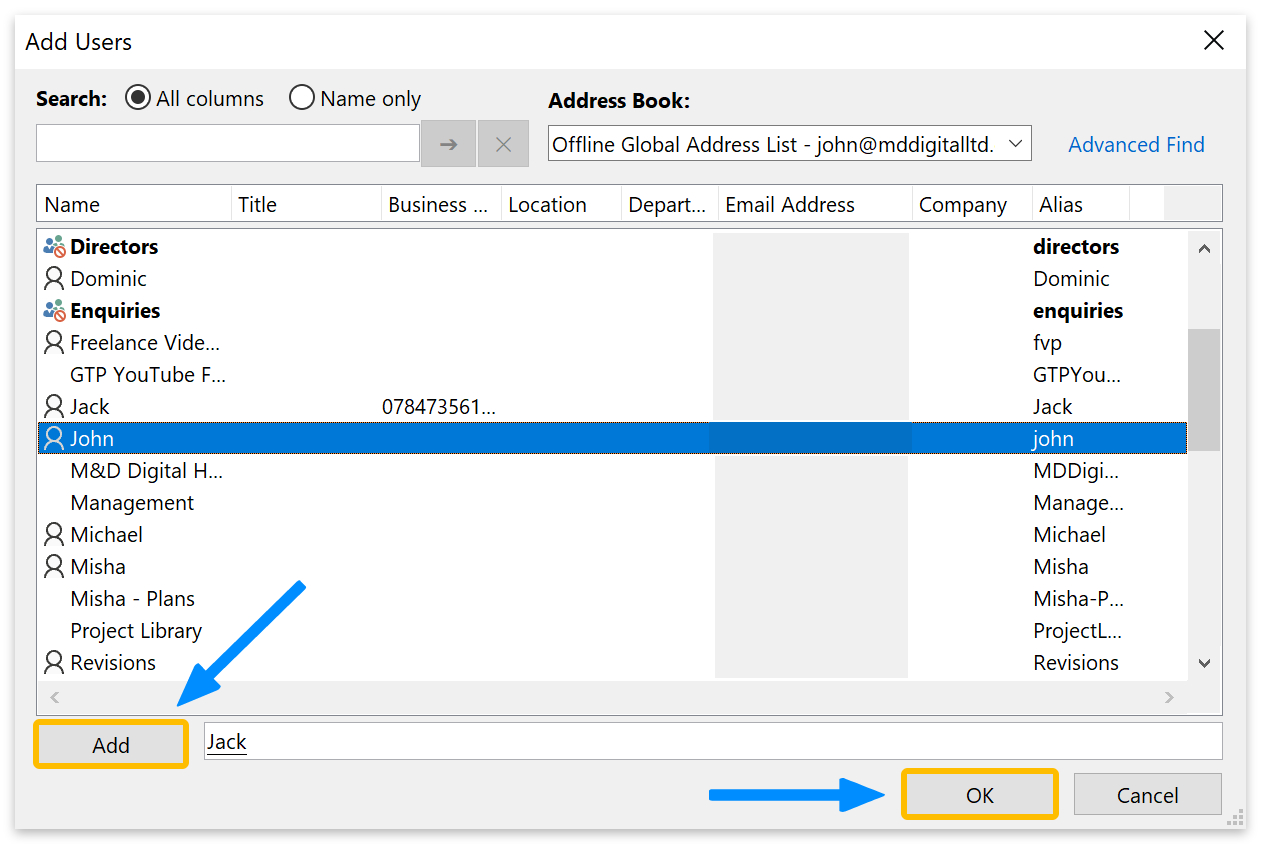
- Next, click on the names of the people you want as delegates.
- Click the “Add” button and click “OK” when you’re done.
- Set your delegate’s permissions, then click the “OK” button, and “OK” again in the Delegates box.
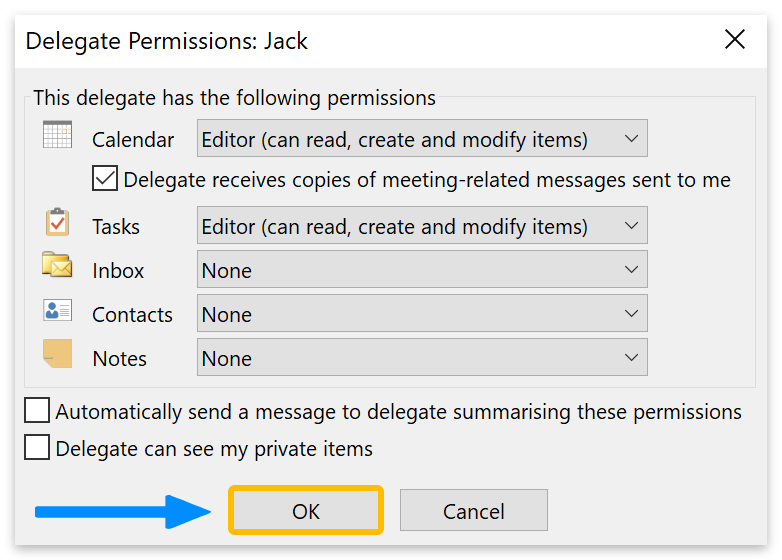
Assign the required permissions on the following screen. Delegates have modified privileges to your Calendar and Tasks by default. Because the two repositories are connected for some purposes, it is recommended that you allow access to tasks if you plan to grant access to the Calendar. Not to mention that delegates are automatically configured to receive copies of meetings that are provided to you. By unchecking the relevant checkbox, you may turn off this function. As we need these permissions promptly turned off to answer the blog they will be unchecked.
![]() Note: It’s a good idea to check the box next to “Automatically send a message to delegate summarising these permissions.”
Note: It’s a good idea to check the box next to “Automatically send a message to delegate summarising these permissions.”
That’s it for this Blog — thank you for taking time out to read our content. Please feel free to email our team about how it went if you followed the steps or if you need more help with the questions we answered in this Blog.