Excel offers a range of different tools and features to make a variety of different accounting or database tasks a lot more efficient to manage. One such feature is called Macros. Excel Macro is essentially a recording and replay tool that simply captures your Excel actions and replays them as many times as you wish. VBA Macros save time by automating time-consuming procedures. Macros are a type of computer code that runs in the Excel environment, but you don’t have to be a programmer to use them. To make sophisticated changes to the macro, you’ll need a basic understanding of VBA. However, some users have reported that the macro-enabled sheets and files will not open. There are multiple reasons why the file won’t open, and in this blog, we will cover some of the most prominent issues in regards to the problem. I’ll provide you with a breakdown of each point and give you tips on how to better manage your files.
Well, macros in the XLSM files may store and execute destructive, malicious code. As a result, it is critical to exercise caution while opening the executable XLSM file type, particularly if you received it over email or downloaded it from a third-party website. These are the main methods I’ll cover to help you open a Macro enabled Excel file, follow through for more information on how you can achieve this.
   |
Add a new file location to open macro enabled Excel file
You may find this to be a complex and tedious process considering you need to move the XLS format of files to the Macro enabled, how can we achieve this.
Fortunately, there is a straightforward method for accomplishing this. Instead of selecting a matched file from the search results, right-click the file and select Open File Location from the context menu. The folder containing the file will then be opened by Windows. You should be able to tell if this is the correct file just by looking at it. If it is, you may edit, copy, rename, or delete the file while the folder is open, as well as deal with other files in the folder.
Step by step process – Add a new file location
- Firstly, open Excel.
- Now click on “File”.
- After that click on “Options”.
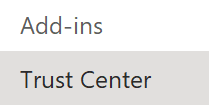
- Follow on by clicking on “Trust Center”.
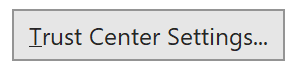
- Now click on “Trust Center Settings”.
- After that, choose “Trusted Locations”.
- Then click on “Add new location…”.
- Type out the folder path where the workbook is saved.
- Click on “OK”.
- Now reopen the workbook.
- Get Excel for just $6.99 per month from the Microsoft Store!
It’s a convenient function, but it doesn’t always deliver what you want. Your search may turn up many files with the same or similar names, with no clear means of knowing which one is the one you seek. Other times, you’ll want to be able to access the folder where the file is located and work with it among other files in that folder rather than just editing the file you’re looking for.
This or a similar method may be used in a variety of locations in Windows. For example, if you use the Firefox browser to download a file from the Internet, you can right-click the file and pick Open Containing Folder before closing the Downloads window — useful if you forget where your downloads are saved by default.
   |

What are the Benefits of Excel Macros
We are creatures of habit as people. There are some tasks that we do on a daily basis, every day of the week. Wouldn’t it be nice if there was a way to push a single button and have all of our usual duties completed? Yes, I can hear you say. Excel macros assist you in accomplishing this. A macro is a recording of your normal processes in Excel that you can replay with a single button in layman’s terms.
You work as a cashier for a water utility firm, for example. Some consumers pay using their bank accounts, and at the end of the day, you must get the data from the bank and format it according to your company’s needs.
You may format the data by importing it into Excel. You will be expected to conduct the same process the next day. It will quickly become dull and uninteresting. Macros help to alleviate these issues by automating common processes. To record the steps of a procedure, you can use a macro.
Variations in the file location
This or a similar method may be used in a variety of locations in Windows. For example, if you use the Firefox browser to download a file from the Internet, you can right-click the file and pick Open Containing Folder before closing the Downloads window — useful if you forget where your downloads are saved by default.
Alternatively, you may right-click a file in a Windows 7 Library and choose Access File Location to open the real location where the file is located, rather than seeing it in a Library.
 |  |  |
| Stellar Plus – $6.48/mo | Essential – $8.33/mo | Deluxe – $7.99/mo |
Open through the XLSM file logs to open macro enabled Excel file
If none of the above-mentioned options work for you, try using the open button to repair the macro-enabled Excel file not opening issue.
To do so, follow these steps:
- To open the Open window, first-run Microsoft Office Excel 2013 and select File > Open from the menu.
- Using the integrated file browser, navigate to the folder containing the XLSM file > select the XLSM file.
- Then, to open the Excel XLSM file, click the Open button.
- To enable the macros, click the “Enable Content” button at the top of the yellow bar.
That’s all there is to it; hopefully, you can now open an XLSM file with Excel 2013.
In-depth – Step by step process – Add a new file location
Step by step breakdown
- Firstly, open Excel.
- Now click on “File”.

- After that click on “Options”.

- Follow on by clicking on “Trust Center”.
- Now click on “Trust Center Settings”.
- After that, choose “Trusted Locations”.

- Then click on “Add new location…”.

- Type out the folder path where the workbook is saved.

- Click on “OK”.
- Now reopen the workbook.
That’s it for this Blog thank you for taking time out to read our content, please feel free to email our team about how it went if you followed the steps or if you need more help with the questions we answered in this Blog.