Learn how to use the Microsoft Teams virtual whiteboard to boost your team’s productivity and creativity. Our guide covers its user-friendly interface, basic doodling, project planning capabilities, and tips and tricks for success in the digital workspace. Whether you’re new to Teams or an experienced user, this guide has everything you need to take your collaboration game to the next level.
 Table of content


An Overview of the Virtual Whiteboard Feature
The Microsoft Teams Virtual Whiteboard is more than just a digital canvas; it’s a powerful tool that fosters creativity, promotes engagement, and bridges the gap between in-person and virtual collaboration. Let’s have a closer look at its core components.
The Virtual Canvas
At its heart, the Virtual Whiteboard provides an unlimited digital canvas that you can use to jot down ideas, create diagrams, and visualize concepts. The canvas can be easily expanded in any direction, providing virtually endless space for your team’s creativity.
Tip: You can navigate around the canvas using the pan and zoom features, allowing you to focus on specific details or get an overview of the entire whiteboard.
The Whiteboard Tool
The toolbar, located on the side of the whiteboard, is your main point of interaction. It features a range of tools that allow you to interact with the whiteboard:
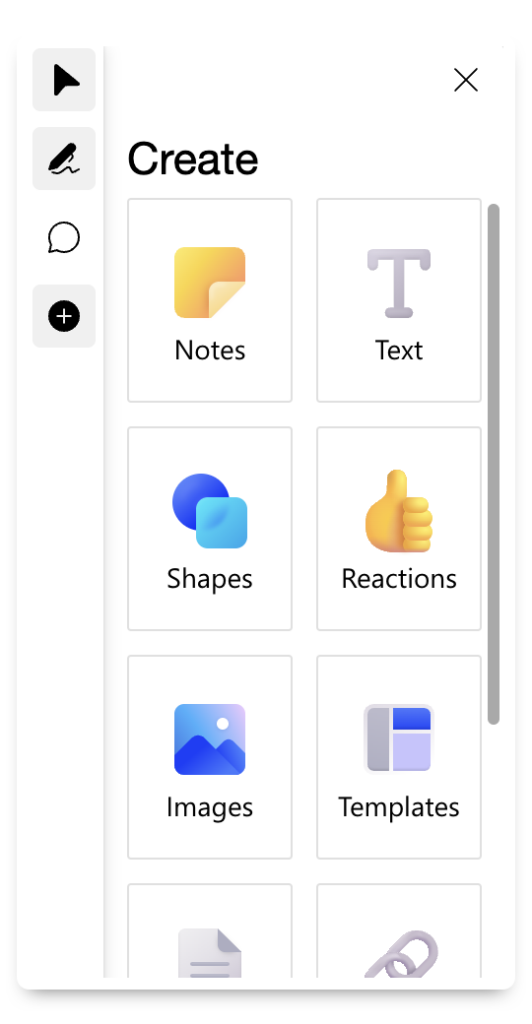
- Pen Tool: This tool will allow you to draw directly onto the Whiteboard canvas. Clicking on it will reveal an extensive collection of different pen styles. You can quickly note vital information or highlight key points on a diagram. The features will expand into another bar towards the top of the Whiteboard and feature the eraser and ruler tools for more control over the content.
- Shape tool: If you need some predefined shapes, the Shape tool is perfect for you. In events where you need precise shapes to define an outcome, you can use the Shape tool for a cleaner and more professional output.
- Text Tool: The text tool allows you to type directly onto the canvas, making it ideal for those who prefer typing over handwriting.
- Sticky Notes: These can be used to write down ideas, tasks, or anything else that you need to remember. They can be moved around, making them perfect for grouping and categorizing ideas.
- Images: You can upload images directly onto the canvas. This is great for adding visual elements to your discussion or brainstorming session.
- Documents: If you are researching a document or giving feedback on an illustration, you can use the Documents tool to easily insert documents such as PDFs, JPEGs, and more onto the canvas.
- Templates: If you need more structure to the canvas, you can use premade templates from the Whiteboard collections. For instance, if you need a template to brainstorm ideas for a particular topic, you can choose the brainstorm option.
Remember, the toolbar is your toolbox – it equips you with everything you need to turn your ideas into visual representations. Spend some time familiarizing yourself with these tools, and you’ll be on your way to a more engaging, efficient, and effective collaborative experience.
Next, we will dive into how to access and navigate this wonderful feature. So, keep reading and prepare to elevate your Microsoft Teams game to unprecedented levels.
Accessing and Navigating the Microsoft Teams Virtual Whiteboard
Before you can start jotting down ideas or collaboratively sketching out a plan, it’s important to understand how to access and navigate this handy tool. Don’t worry; it’s quite simple and intuitive.
How to add the Whiteboard program to a Teams channel or team?
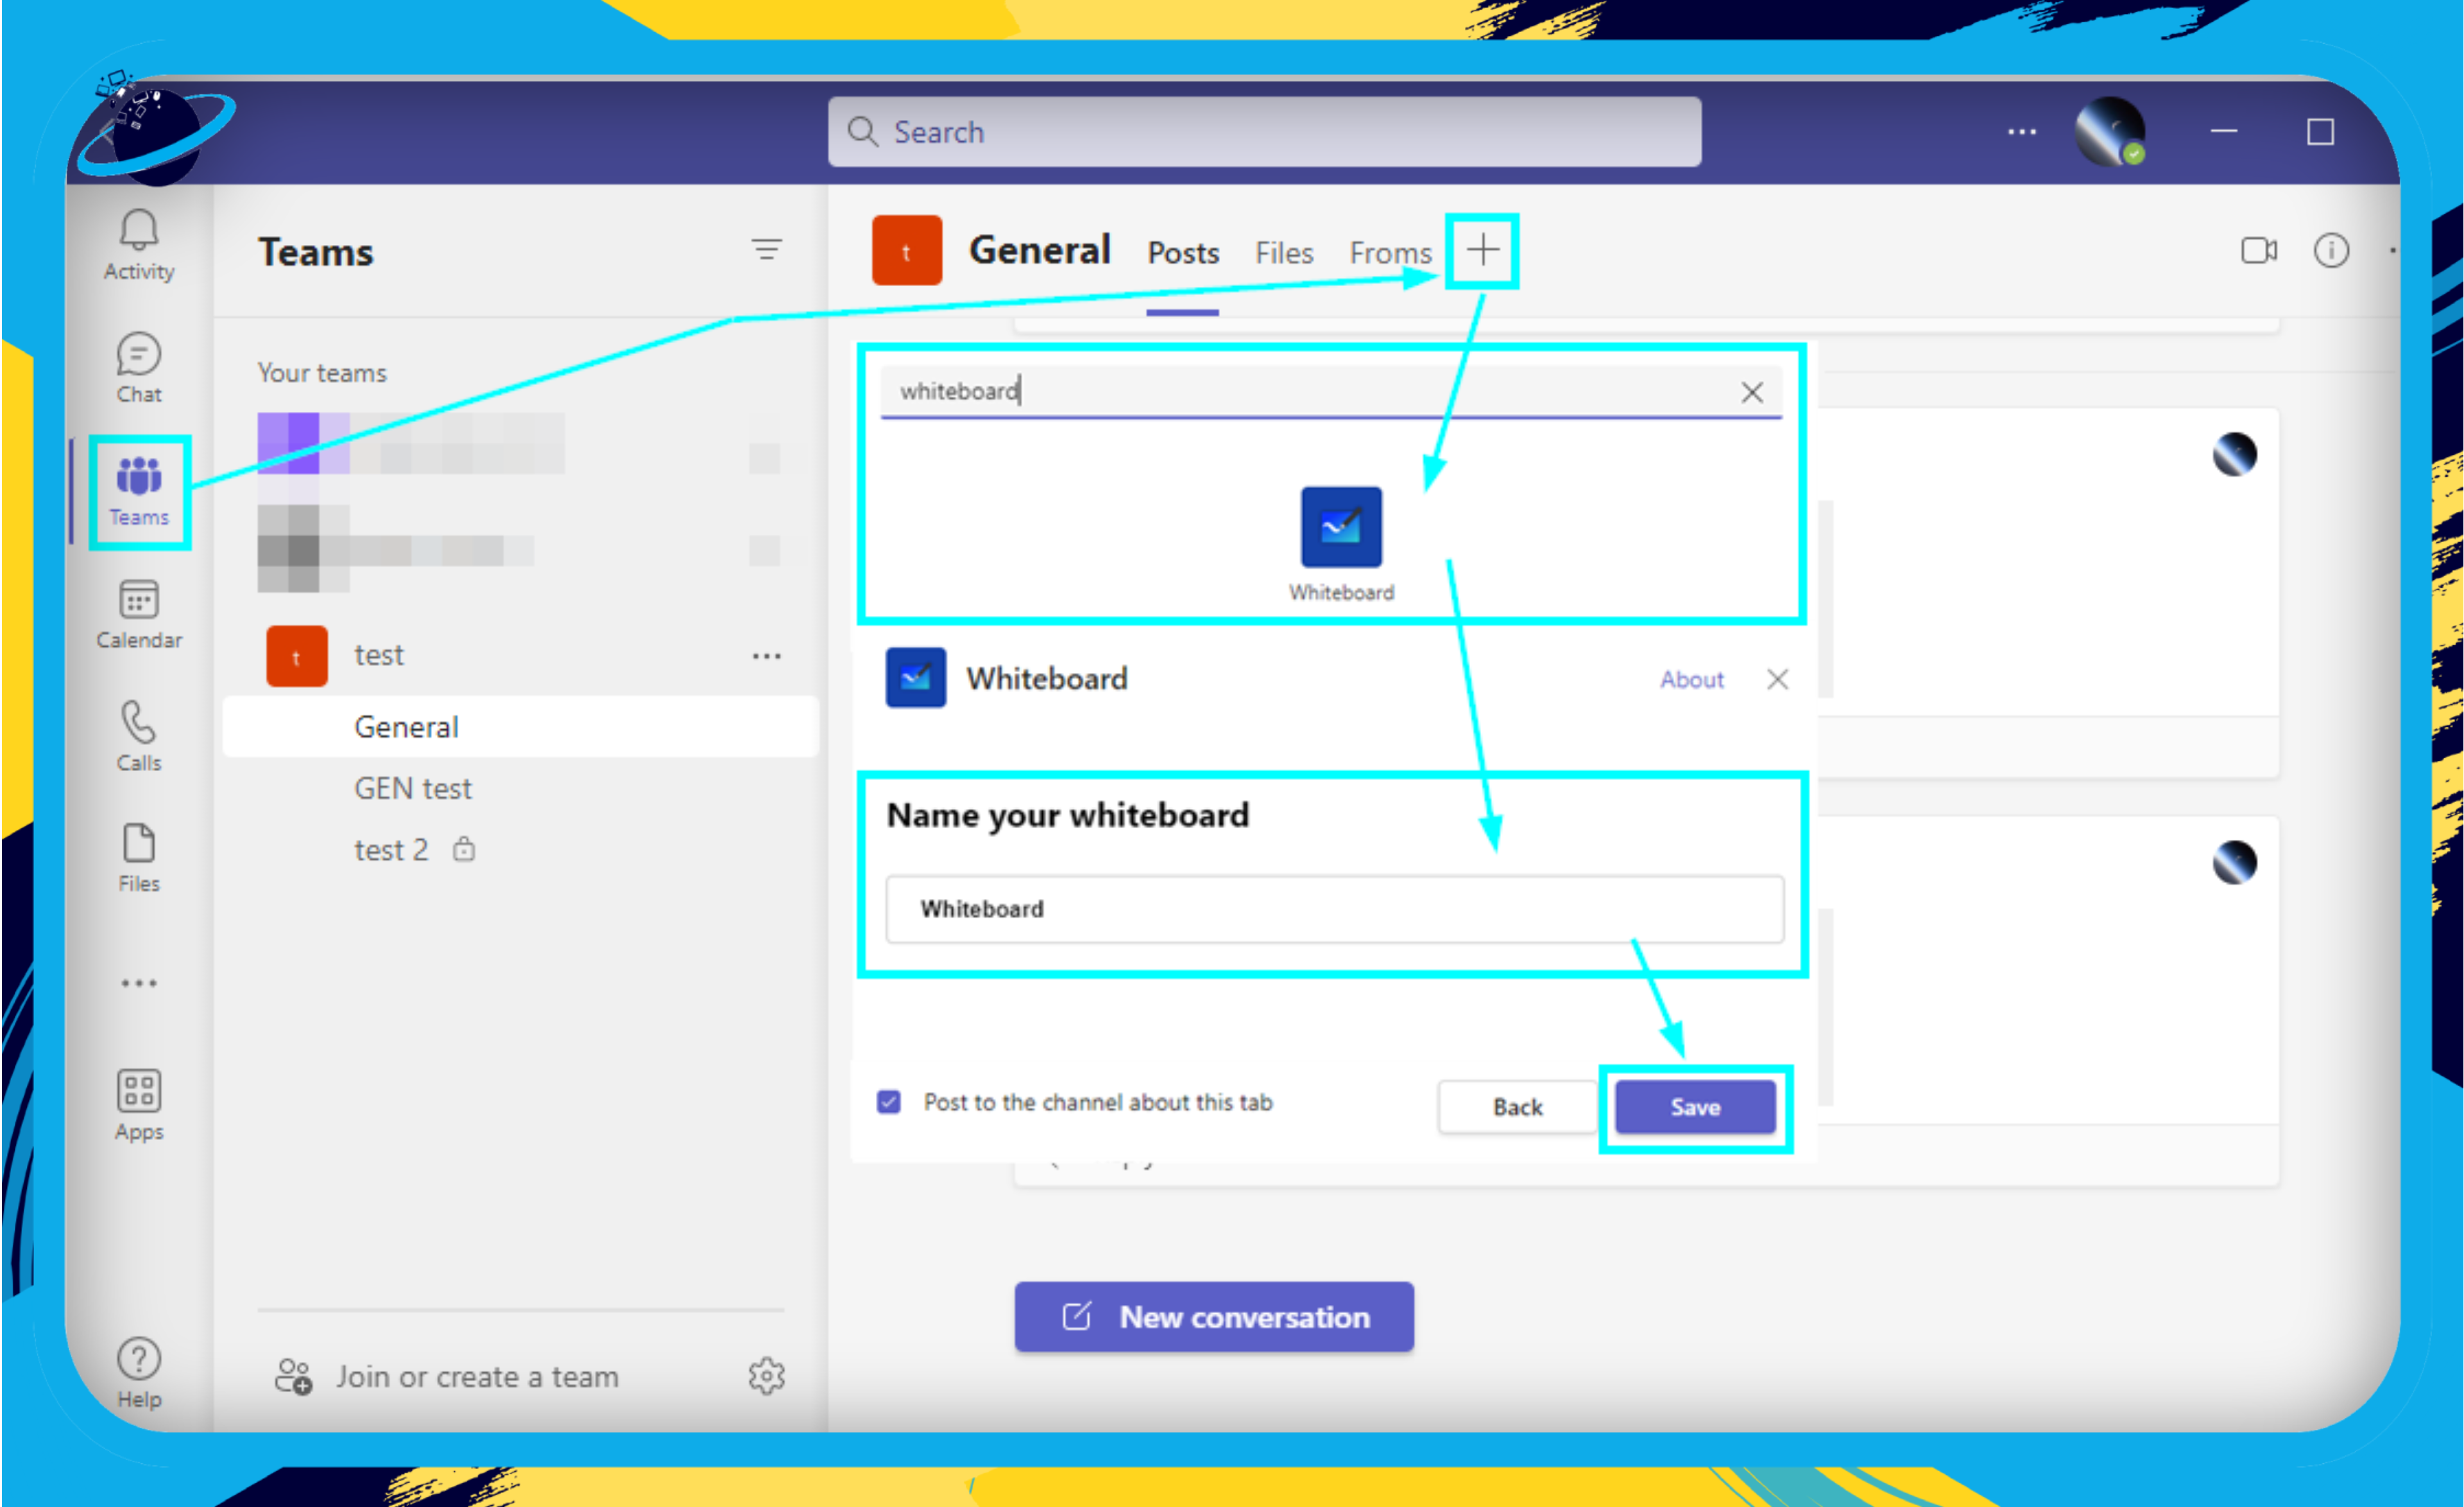
Effective Whiteboard program collaboration starts with implementing the app into a team or channel. Once integrated, users can access the program and collaborate, giving crucial feedback or ideas. Follow these steps to incorporate the program into a channel or team.
- First, open Microsoft Teams.
- Select “Teams.”
- Choose a team.
- Click on the “+” symbol at the top.
- Type and select the Whiteboard program.
- Configure the whiteboard and hit “Save.”
How to Access the Whiteboard in a Teams meeting
Microsoft Teams makes it easy to start a new whiteboard session:
- Start or join a Microsoft Teams meeting.
- Click on the Share content button (it’s the square with the upward arrow).
- From the options, select Microsoft Whiteboard.
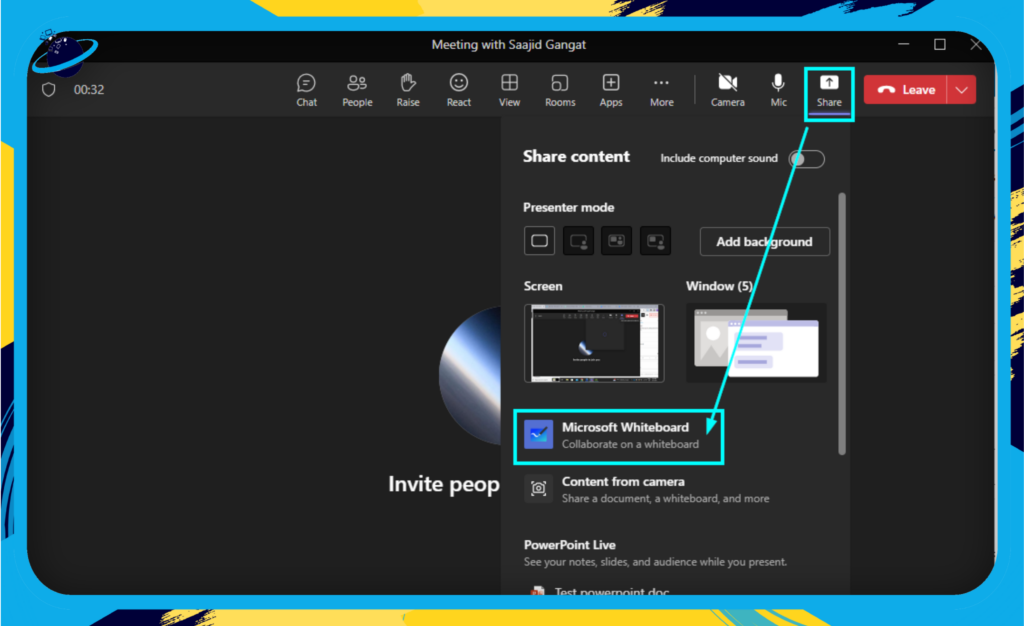
And there you have it; your Virtual Whiteboard is ready for action!
Navigating the Whiteboard
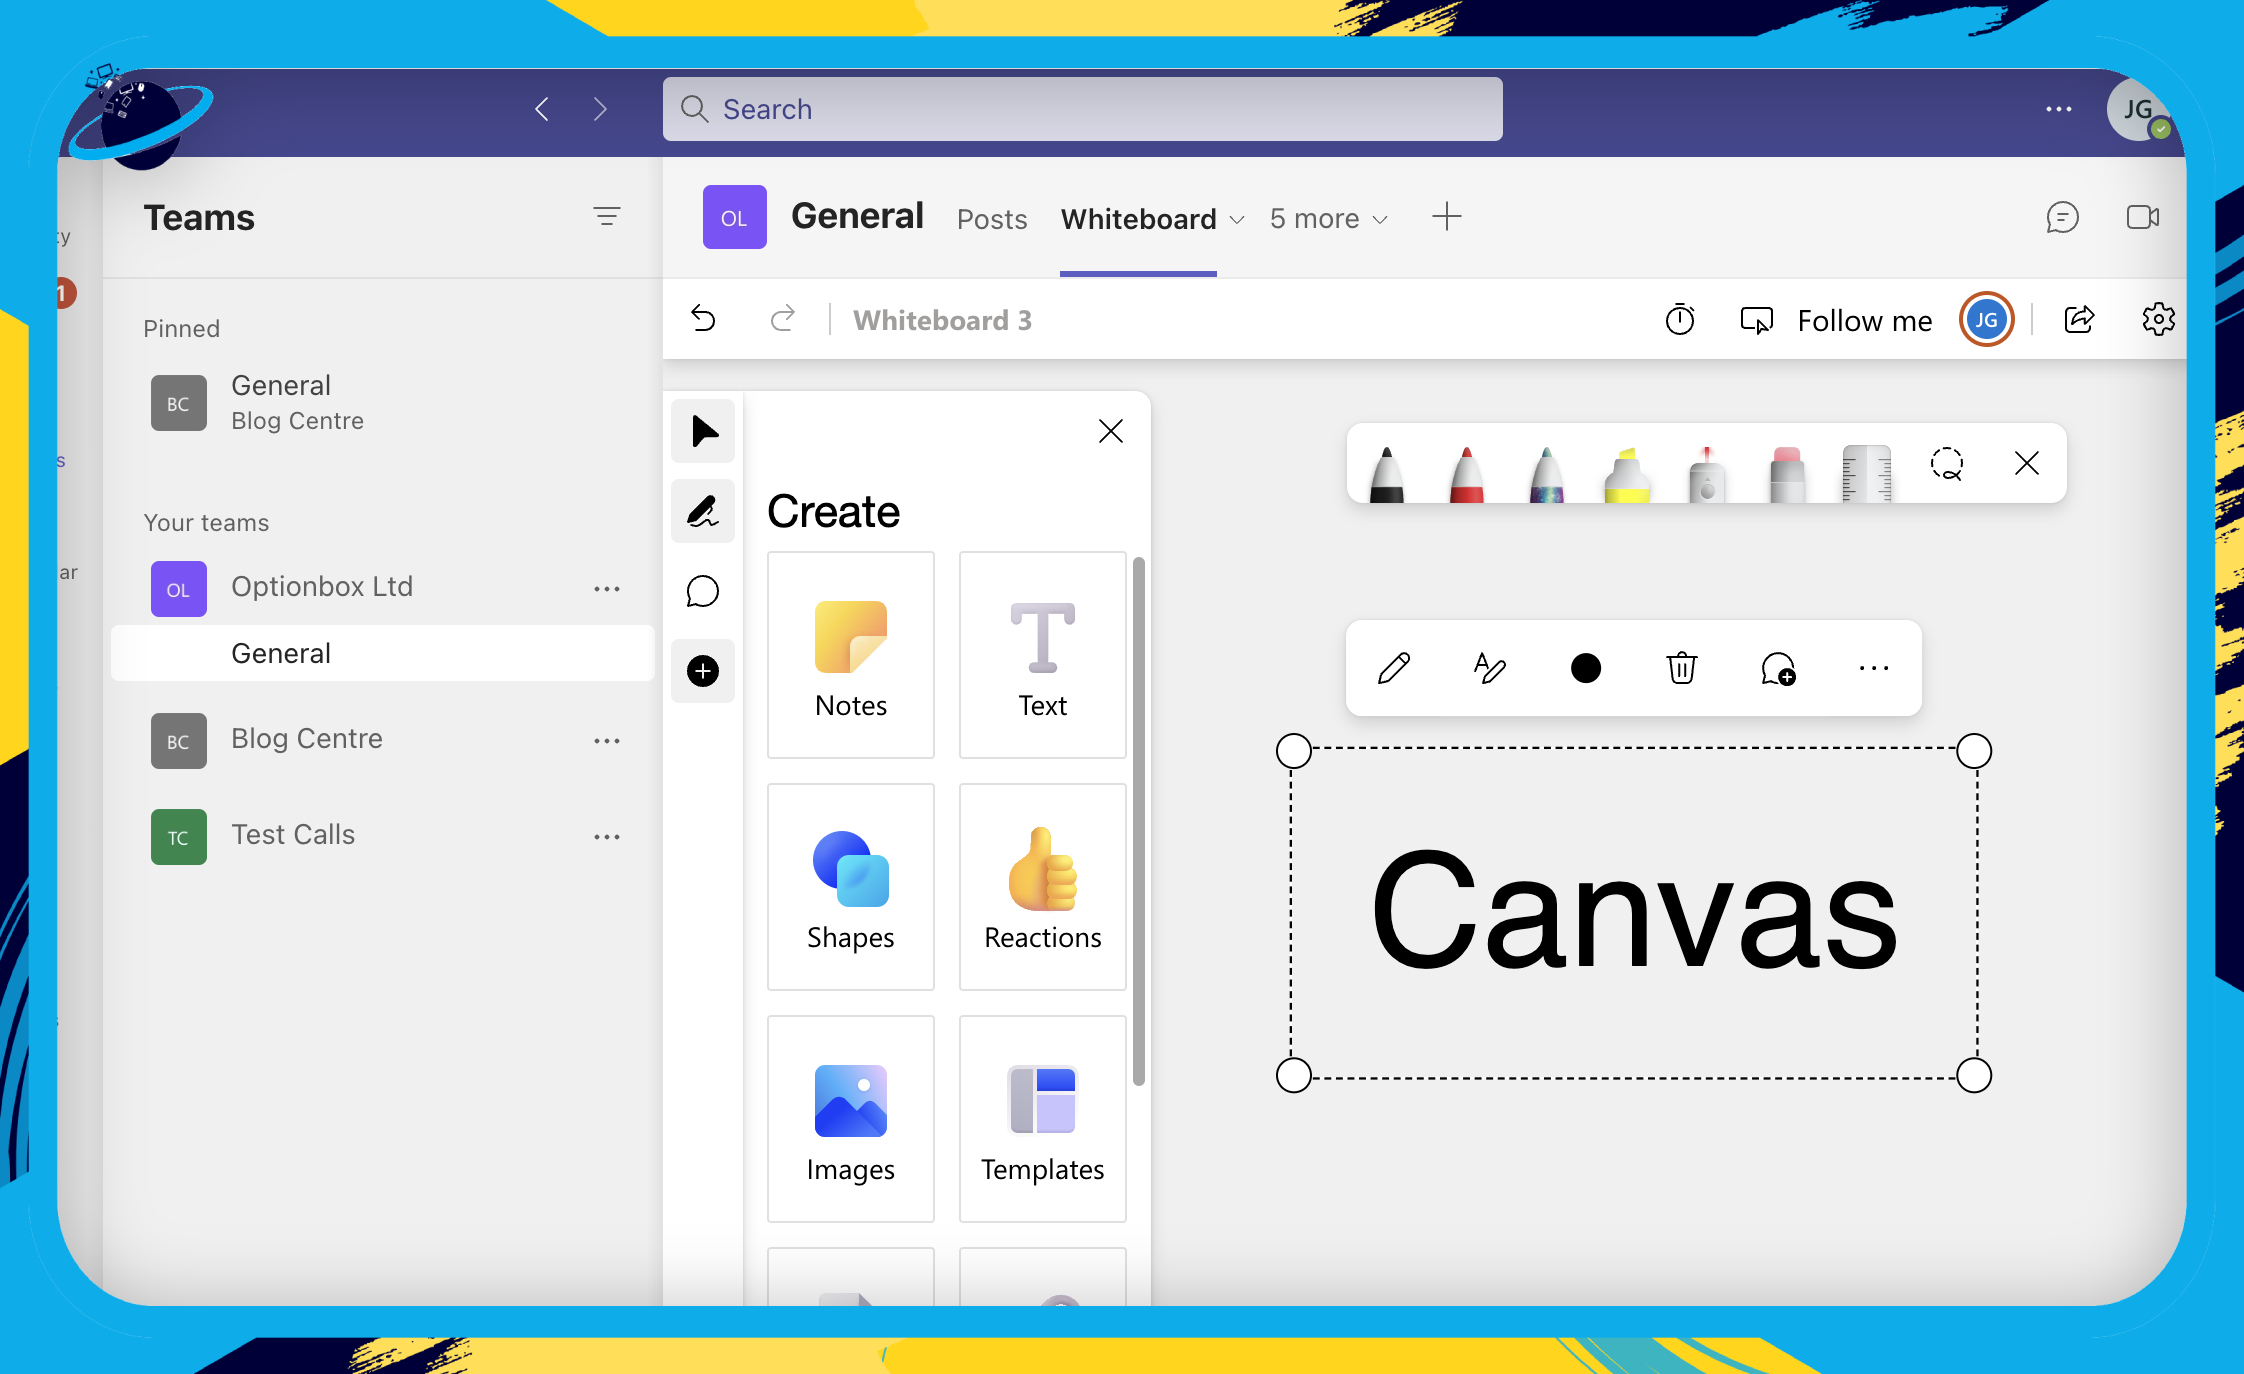
Microsoft Teams’ Virtual Whiteboard comes with a user-friendly layout. It’s important to understand the basic navigation controls:
- The Canvas: This is your main workspace, where all the magic happens. You can add text, drawings, images, sticky notes, and more.
- Toolbox: Located at the side, the toolbox holds all the tools you’ll need. Some of the key features include Text and Shape tools:
- Text and Note: Add written notes with the Text tool, or use the Sticky Note for more visibility.
- Insert Picture: Need to reference an image or a diagram? No problem, you can add it directly to your canvas.
Remember, the Microsoft Teams Virtual Whiteboard is an interactive tool. That means everyone in the meeting can add to the whiteboard in real-time. It’s not just about one person’s ideas but the team’s collective brainpower. So jump right in and start exploring!
Stay tuned for our next section, where we’ll dive deeper into the key features and capabilities of the Microsoft Teams Virtual Whiteboard. There’s a lot more to this tool than meets the eye, and we’re excited to help you uncover its full potential.
Key Features of Microsoft Teams’ Virtual Whiteboard
Microsoft Teams’ Virtual Whiteboard is more than just a digital canvas. It’s a versatile tool designed to foster real-time collaboration, creativity, and productivity. Let’s delve into the key features that make this possible.
Drawing and Writing Tools
The whiteboard provides a suite of drawing and writing tools. These include a pencil, pen, and highlighter, each with customizable colors and thicknesses. So whether you’re sketching an idea or emphasizing a critical point, the right tool is at your disposal.
- Pencil: This tool is ideal for freehand drawing and creating rough sketches.
- Pen: Perfect for more precise writing or drawing.
- Highlighter: Use it to emphasize key points, sentences, or areas on the whiteboard.
Sticky Notes
Sticky notes are an invaluable feature for brainstorming and categorizing ideas. You can create notes in various colors, making it easy to sort and group related concepts.
Text Box
Want to type instead of draw? The Text Box tool is your go-to. You can type in information, create lists, or add detailed descriptions, all in adjustable font sizes to ensure your message stands out.
Shape Tools
The Shape Tools include lines, squares, circles, and arrows. These are perfect for creating diagrams, flowcharts, or simply organizing information in a visually appealing manner.
Import Images
Enhance your whiteboard with relevant images. The Import Images tool allows you to bring visual aids, logos, diagrams, or any other images directly onto your whiteboard.
Infinite Canvas
The Microsoft Teams’ Virtual Whiteboard offers an Infinite Canvas. This means you can keep expanding your workspace as your ideas grow, ensuring you never run out of room.
Overall, Microsoft Teams’ Virtual Whiteboard is equipped with diverse features designed to cater to your team’s unique needs. Whether you’re mapping out a complex project plan or conducting a light-hearted brainstorming session, these features provide the flexibility and functionality to make your collaboration efficient, engaging, and effective.
Collaborative Uses of Microsoft Teams’ Virtual Whiteboard
The Virtual Whiteboard’s true power lies in its ability to facilitate and enhance collaboration within your team. Let’s explore some of the most common and effective ways businesses are using this tool:
Brainstorming Sessions
- Brainstorming becomes a breeze with the whiteboard’s easy-to-use features. Everyone on the team can actively participate, drawing, typing, or adding sticky notes simultaneously, fostering a dynamic exchange of ideas.
- Use different colors and shapes to categorize and distinguish between ideas, making the brainstorming session more organized and efficient.
Project Planning
- Utilize the whiteboard as a visual project planning tool. You can create diagrams, flowcharts, or even Gantt charts to plan out project timelines and deliverables.
- Microsoft Teams’ whiteboard allows you to import images and documents, giving your team a comprehensive view of all project-related information.
Training Sessions
- Trainers and educators can make use of the whiteboard to illustrate concepts, making it easier for attendees to grasp new information.
- The infinite canvas provides enough space to work out extensive problems or create detailed diagrams without having to erase or squeeze in information.
Remote Team Building
- In these times of remote work, maintaining team cohesiveness can be challenging. Use the whiteboard for fun team-building activities. Run Pictionary games or collaborative doodling sessions to help the team bond and break the monotony of work.
Meeting Summaries
- At the end of a meeting, use the whiteboard to summarize key points and decisions made. The visual nature of the whiteboard can help with information retention and provide a clear overview of the meeting.
The beauty of Microsoft Teams’ Virtual Whiteboard lies in its versatility. It’s a tool designed to encourage collaboration and creativity. So don’t hesitate to explore and experiment with its features. Remember, the more you use it, the more you’ll uncover its potential to transform your team’s productivity.
Tips and Tricks for Mastering the Microsoft Teams Virtual Whiteboard
Congratulations! By now, you’ve learned the basics of using the Microsoft Teams Virtual Whiteboard. But, as with any tool, there are ways to take your usage to the next level. Let’s explore some tips and tricks to become a real whiz with this collaborative canvas.
Mastering Keyboard Shortcuts
One way to make your interaction with the Virtual Whiteboard more efficient is to learn and use the available keyboard shortcuts. Here are some handy ones:
- Ctrl+Z/Cmd+Z: Undo the last action
- Ctrl+Y/Cmd+Y: Redo the last action
- Ctrl+C/Cmd+C: Copy selected items
- Ctrl+V/Cmd+V: Paste copied items
Utilize the Lasso Tool
The lasso tool, found in the toolbar, is your best friend when it comes to moving or resizing multiple objects simultaneously. Just draw around the items you want to select and voila – you can move or resize them all together.
Exploit the Infinite Canvas
The Microsoft Teams Whiteboard provides an infinite canvas. That means you can keep expanding your ideas without worrying about running out of space. Use the hand tool or Space+Drag to navigate around the canvas.
Customize the Background
Did you know you can customize the background of your whiteboard? You can choose a grid background for precise placements, a lined background for text-heavy sessions, or even import a custom background to suit your needs.
Use Sticky Notes
For a well-structured brainstorming session, sticky notes can be a game-changer. You can color-code them for different categories, and they can be easily moved and re-arranged.
Integrate with Microsoft 365
The Microsoft Teams Virtual Whiteboard is deeply integrated with Microsoft 365. You can directly import images or documents from OneDrive, use Microsoft Forms for polling, or even insert a PowerPoint presentation directly into your whiteboard session.
Remember, mastering a new tool is not a one-time effort. It’s a continuous process of exploration, learning, and practice. Keep these tips and tricks in mind, and over time, you’ll find the Microsoft Teams Virtual Whiteboard to be a powerful ally in your quest for efficient and engaging collaboration.
Conclusion
We’ve journeyed through the landscape of Microsoft Teams’ Virtual Whiteboard together, and by now, it’s clear that this tool is much more than just a digital canvas. It’s a powerful engine for collaboration, innovation, and productivity that can transform the way your team works, especially in a remote environment.
- Key takeaways include The whiteboard’s user-friendly interface that makes navigation simple and intuitive, even for first-time users.
- The range of features that cater to varied needs, whether you’re brainstorming, planning projects, or facilitating training sessions.
- The power of real-time collaboration, breaking down geographical barriers and fostering more effective team interactions.
Navigating Potential Challenges
Of course, no tool is without its limitations, and we’ve explored some of those associated with Microsoft Teams’ Virtual Whiteboard. While it’s a robust platform, it might not have all the advanced features found in some specialized whiteboard software. However, Microsoft is continually updating its offerings, and we expect to see many enhancements in the future.