Moving user mailboxes is a regular occurrence for Exchange administrators, and it involves a few procedures that you may not be aware of. When a user either leaves the organization or is no longer part of the organization for particular reasons, their data can still be available. A colleague may want to address certain data points within the server, therefore, needs access to the mailbox data. Exchange offers a solution to allow users to migrate data between different mailboxes. You can have data moved across relativity simply with a few functions that need editing. You’ll learn how to make requests to transfer Exchange mailboxes from one database to another in this blog post. Follow the steps below to see how you can move Exchange mailbox data from one user to another.
Step by step process – How to move Exchange mailbox data from one user to another
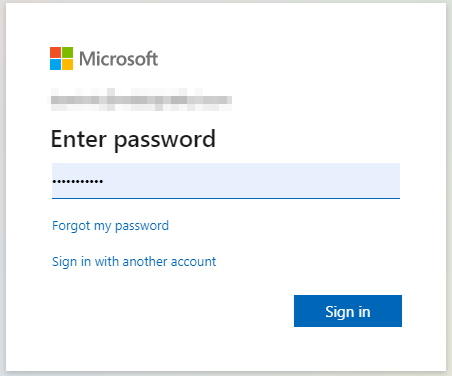
- First, sign in to your Office 365 account.
- Use the app launcher and navigate to admin.
- In the admin dashboard, under “admin center”, click on “Exchange”(you may need to click “Show all” to access).
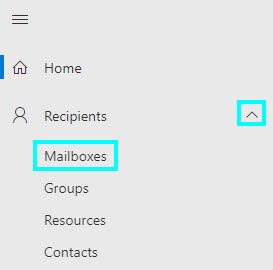
- Under “recipients” click on “Mailboxes”.
- Locate the selected user UserA in the “Mailboxes” tab and double-click on it. A window with mailbox attributes will display.
- Select “More Options” from the drop-down menu.
- You’ll find a database number, you will need this to proceed.
- Close the ”Edit user mailbox” panel.
- Click on “Migration”.
- To begin a new relocation request, click the “+” sign.
- Select “Move to a Different Database” from the dropdown menu.
- Click “+” and add User A.
- Then click on Next.
- You’ll be asked for a batch name, this can be anything.
- In the Target Database, select the mailbox database.
- In the Target Archive Database field, select the destination mailbox.
- Click on Next.
- You may now choose from a number of choices for the migrating batch. These stages are entirely up to you, with explanations provided for each choice.
- Finally, Click on “Complete the migration” to start.
That’s it, those are the steps you need to transfer mailbox content from one domain to another, it is a long-winded process, however, it will be worth the effort, as you will have the full log of data from the User A, without having to manually transport anything. Exchange uses a binary format of verification; the database number serves as an ID for Exchange to verify that you have access if you are authorized to command tasks such as these in a user’s Mailbox.
Need to edit something? Don’t worry you can do this even after creating the migration move, content considered unusable often referred to as bad items may be prominent. All active move requests are listed on the Migration tab. Click the pen symbol to modify the bad item limit. The usual mailbox move properties page will appear next. As illustrated below, you may modify the “Bad item” limit here.

Another approach to move Exchange mailbox data from one user to another
When it comes to any sort of audit, a simple approach may not be the best. The contents of the user’s mailbox may always be exported as an a.PST file. Then import it into the mailboxes of the other users. If you’re worried about people emailing the dismissed user, reset their passwords, get into their OWA account, and set up an out-of-office message telling them of a new email address. People are not left in the dark in this way. Allow a week or two for this to take effect, then deactivate the account.
A Personal Folders file (.PST) is an Outlook data file used to store local copies of messages, calendar events, and other items from your Exchange mailbox. It has a similar design to Outlook 2003 and can hold all of your Outlook folders, such as the Inbox, Calendar, and Contacts. You can consider this as a custom CSV template made for Outlook content such as photography, mail, or even files, which can all be stored within a PST format.
Because.PST files can get rather big, you should only use them for certain business purposes. To reduce the risk of data corruption and preserve server and network efficiency, we suggest that PST files not exceed 500MB in size.
In depth – Step by step process – How to move Exchange mailbox data from one user to another
Step by step breakdown:
- First sign in to your Office 365 account.
Use your account details or if you have a current Skype account with the Office account in question, you can use this.
- Use the application launcher to navigate towards “Admin”.
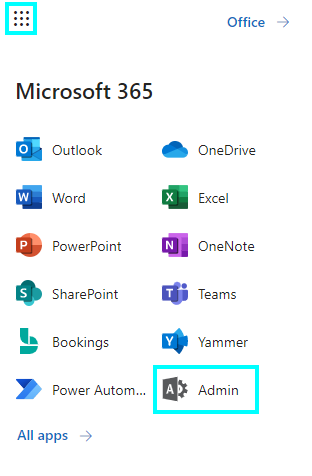
The launcher is illustrated by nine dots in the right corner, click on it and find “Admin” as shown above.
- In the admin dashboard, under “admin center”, click on “Exchange”(you may need to click “Show all” to access).
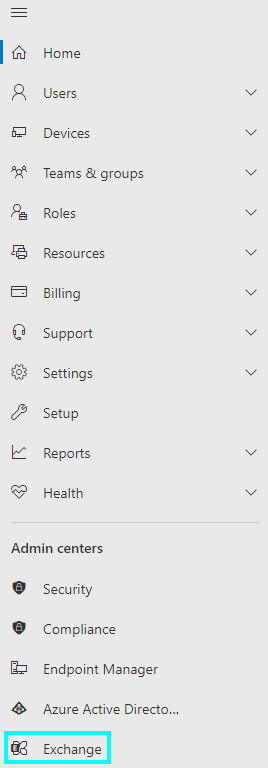
In this example “Exchange” was pinned to the menu bar, however, in your dashboard you may need to click on “show all” which will bring you to the Exchange panel.
- Under “recipients” click on “Mailboxes”.
- Locate the selected user in the “Mailboxes” tab and double-click on it. A window with mailbox attributes will display.

- Select “More Options” from the drop-down menu.

- You’ll find a database number, you will need this to proceed.

- Close the ”Edit user mailbox” panel.

- Click on “Migration”.

- To begin a new relocation request, click the “+” sign.

- Select “Move to a Different Database” from the dropdown menu.

- Click “+” and add User A.

- Then click on Next.

- You’ll be asked for a batch name, this can be anything.

- In the Target Database, select the mailbox database.

- In the Target Archive Database field, select the destination mailbox.

- Click on Next.

- You may now choose from a number of choices for the migrating batch. These stages are entirely up to you, with explanations provided for each choice.

- Finally, Click on “Complete the migration” to start.

That’s it for this Blog thank you for taking time out to read our content, please feel free to email our team about how it went if you followed the steps or if you need more help with the questions we answered in this Blog.