Microsoft recently updated SharePoint (January 2024), giving users the option to add alternative text to tables. In this guide, we’ll show you how to create a table in SharePoint, while highlighting the new accessibility settings. Let’s make a table!
We’ve also created a video to help guide you through the steps:
What are the New Accessibility Settings for Tables in SharePoint?
The new accessibility settings for tables in SharePoint allow users to add alternative text and provide an option to toggle header and first column formatting. These updates rolled out in January 2024. For more details, please read below.
🔵 Alternative Text
Add text to describe the table. This text will appear while hovering over any of the cells in the table, and gives users a better understanding of what the table is for.
Alternative text, often referred to as “alt text” or “alt tags,” serves a crucial purpose in web accessibility. The main purpose of alternative text is to provide a textual description of an image for individuals who may not be able to see it. This includes people with visual impairments who use screen readers or other assistive technologies to access web content.
When a website includes images without alternative text, users relying on screen readers miss out on important information conveyed through those images. Alt text provides a concise and accurate description of the image content, enabling users with visual disabilities to understand and engage with the content of a webpage.
🔵 Bold Table Header and First Column
There are now checkboxes that allow you to quickly bold text in the header row and first column. However, if you’ve already applied a table style to the header row, you won’t need to reapply the header bolding.

How to Make a Table in SharePoint
To make a table in SharePoint, you’ll need to use a Text webpart, as tables still don’t have their own webpart. In this guide, we’ll take you through the steps of how to create a table in SharePoint, while highlighting the new accessibility settings.
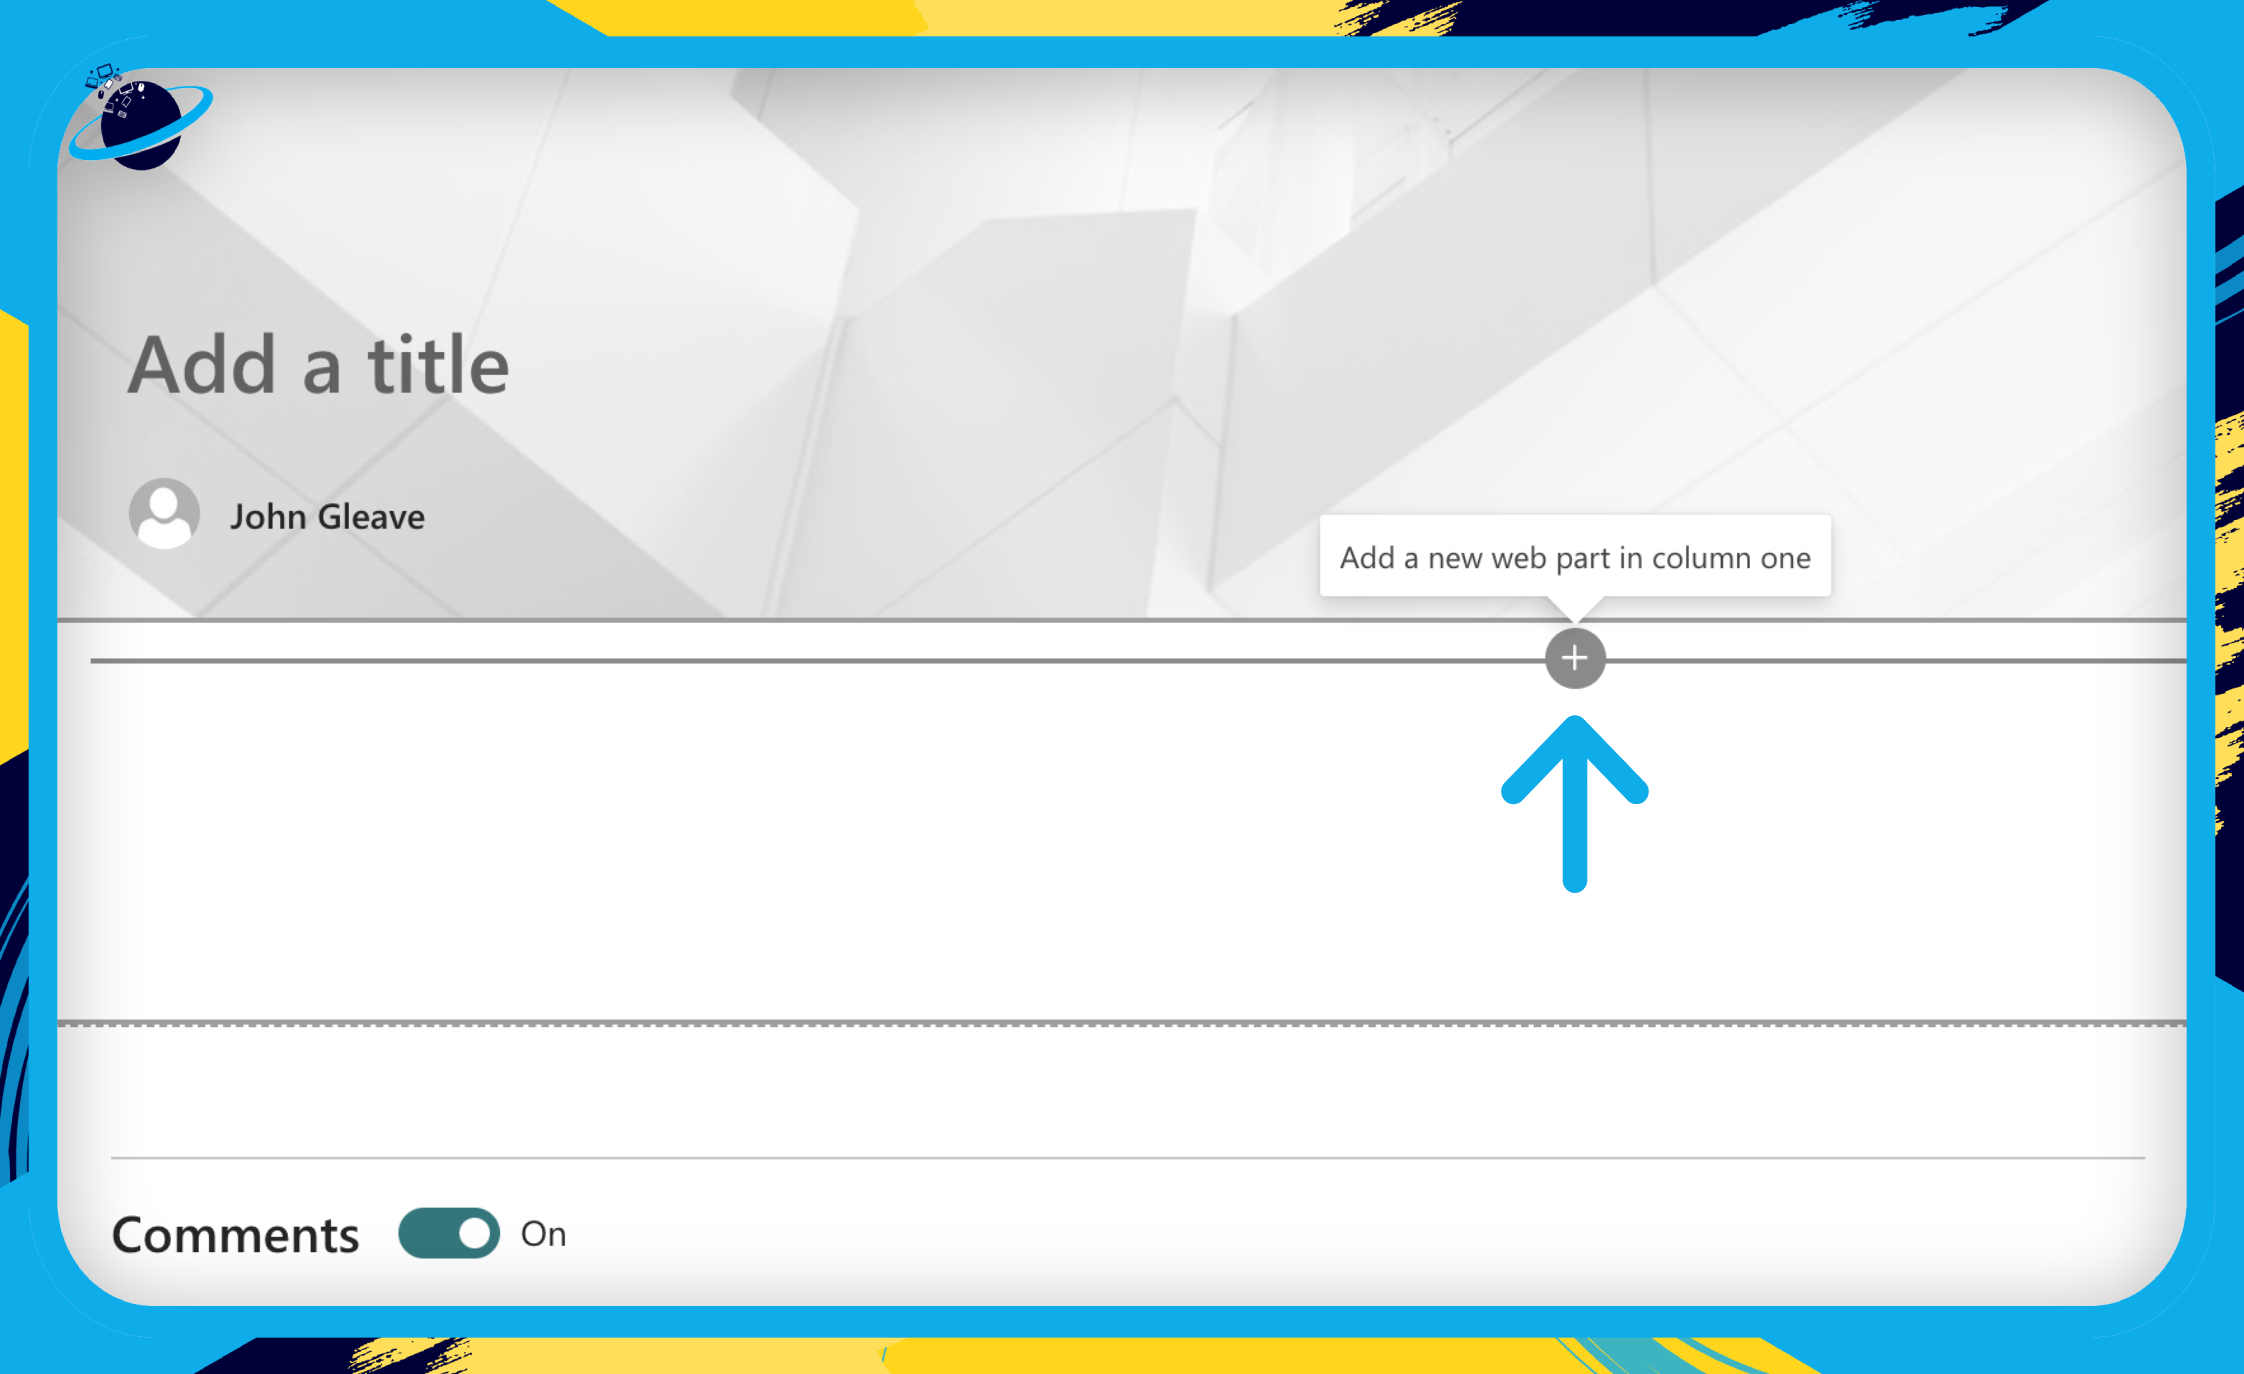
- Start by hovering just below the title section, and clicking the
 plus icon when it appears.
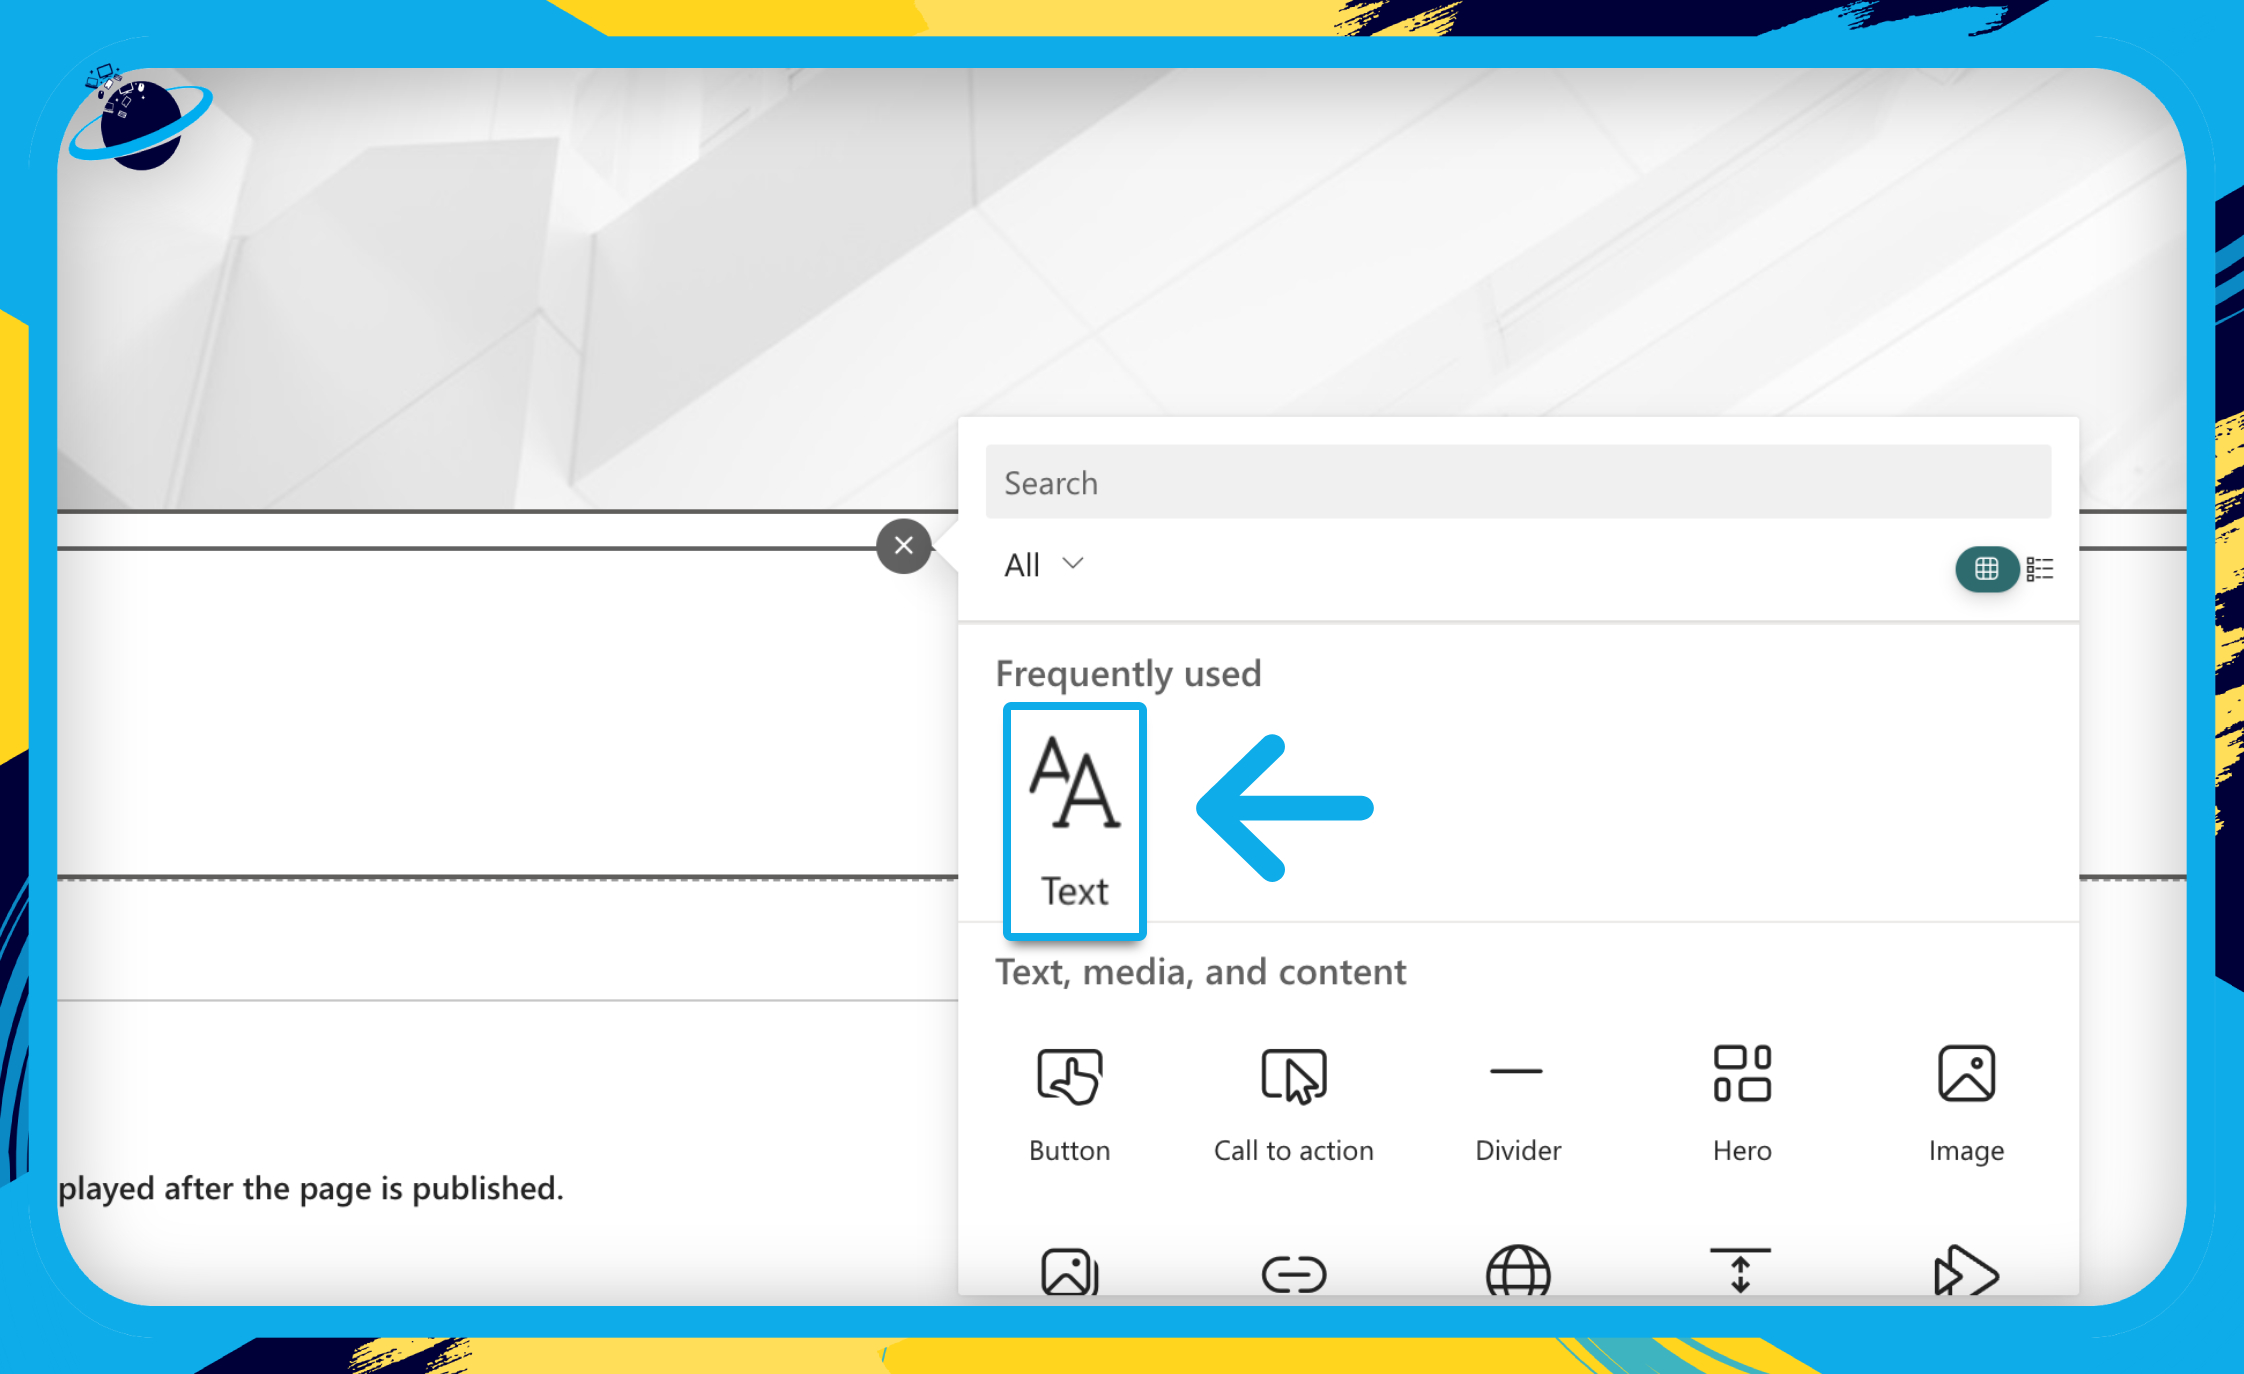
- Next, select the “Text” webpart.
- You can now insert a table using the “Insert table” icon in the Text webpart’s menu bar.
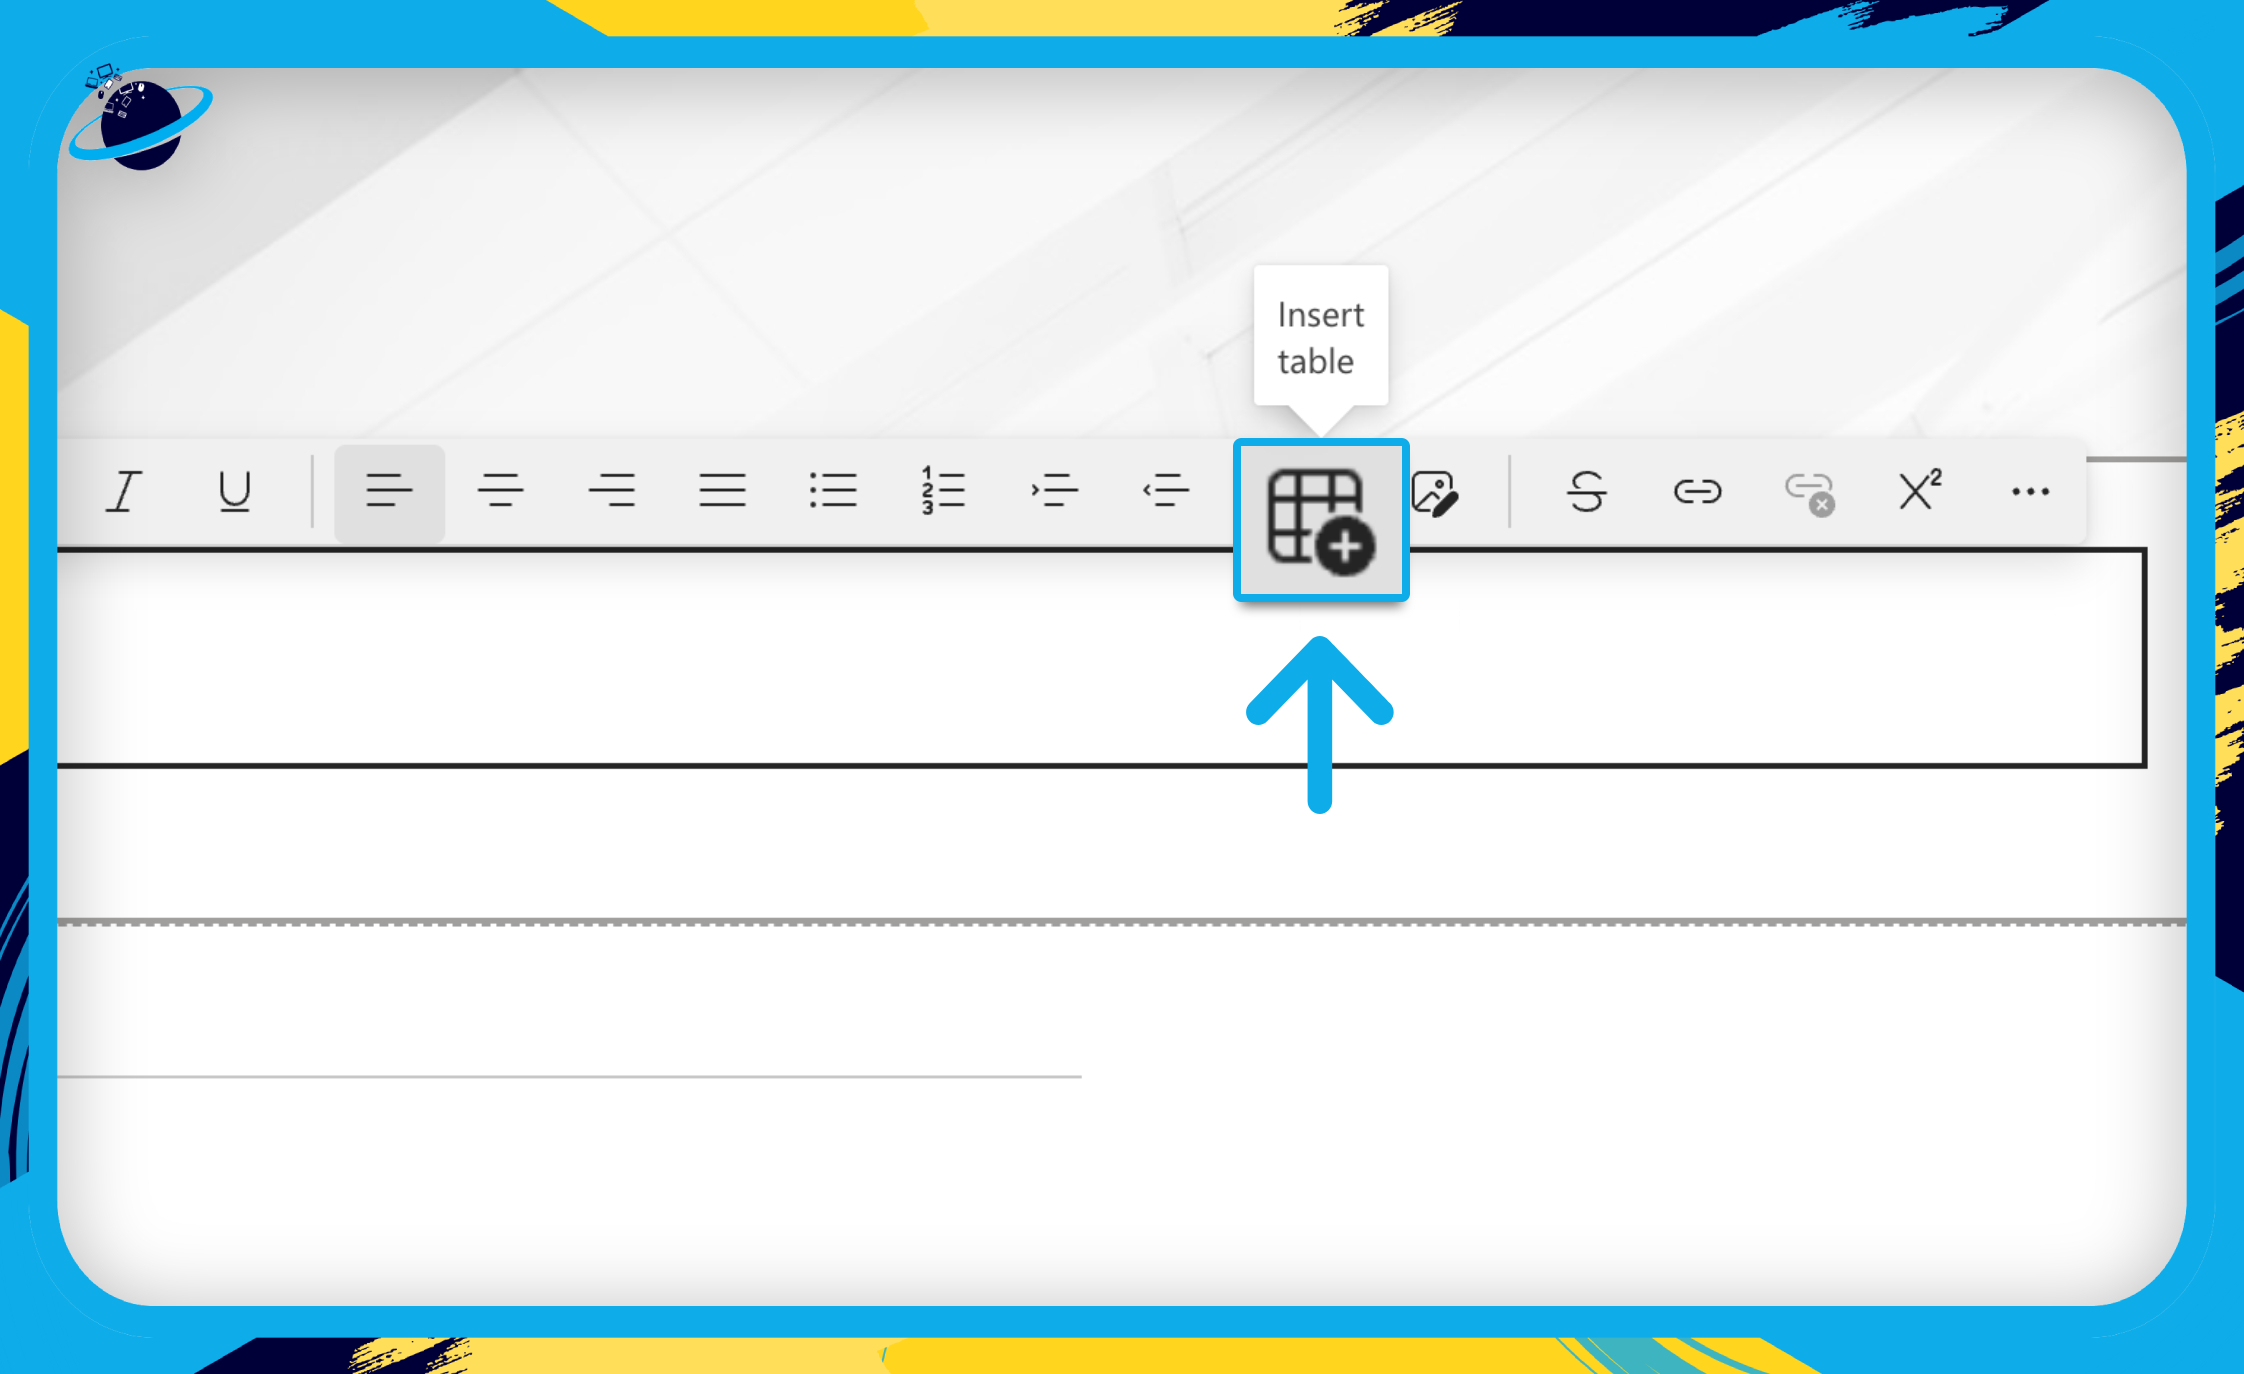
![]() Note: Tables default to 3×3 and cell merging is currently unsupported (Jan 2024). If you need to merge cells, we suggest you create a table in Microsoft Word and paste it into the SharePoint Text webpart.
Note: Tables default to 3×3 and cell merging is currently unsupported (Jan 2024). If you need to merge cells, we suggest you create a table in Microsoft Word and paste it into the SharePoint Text webpart.
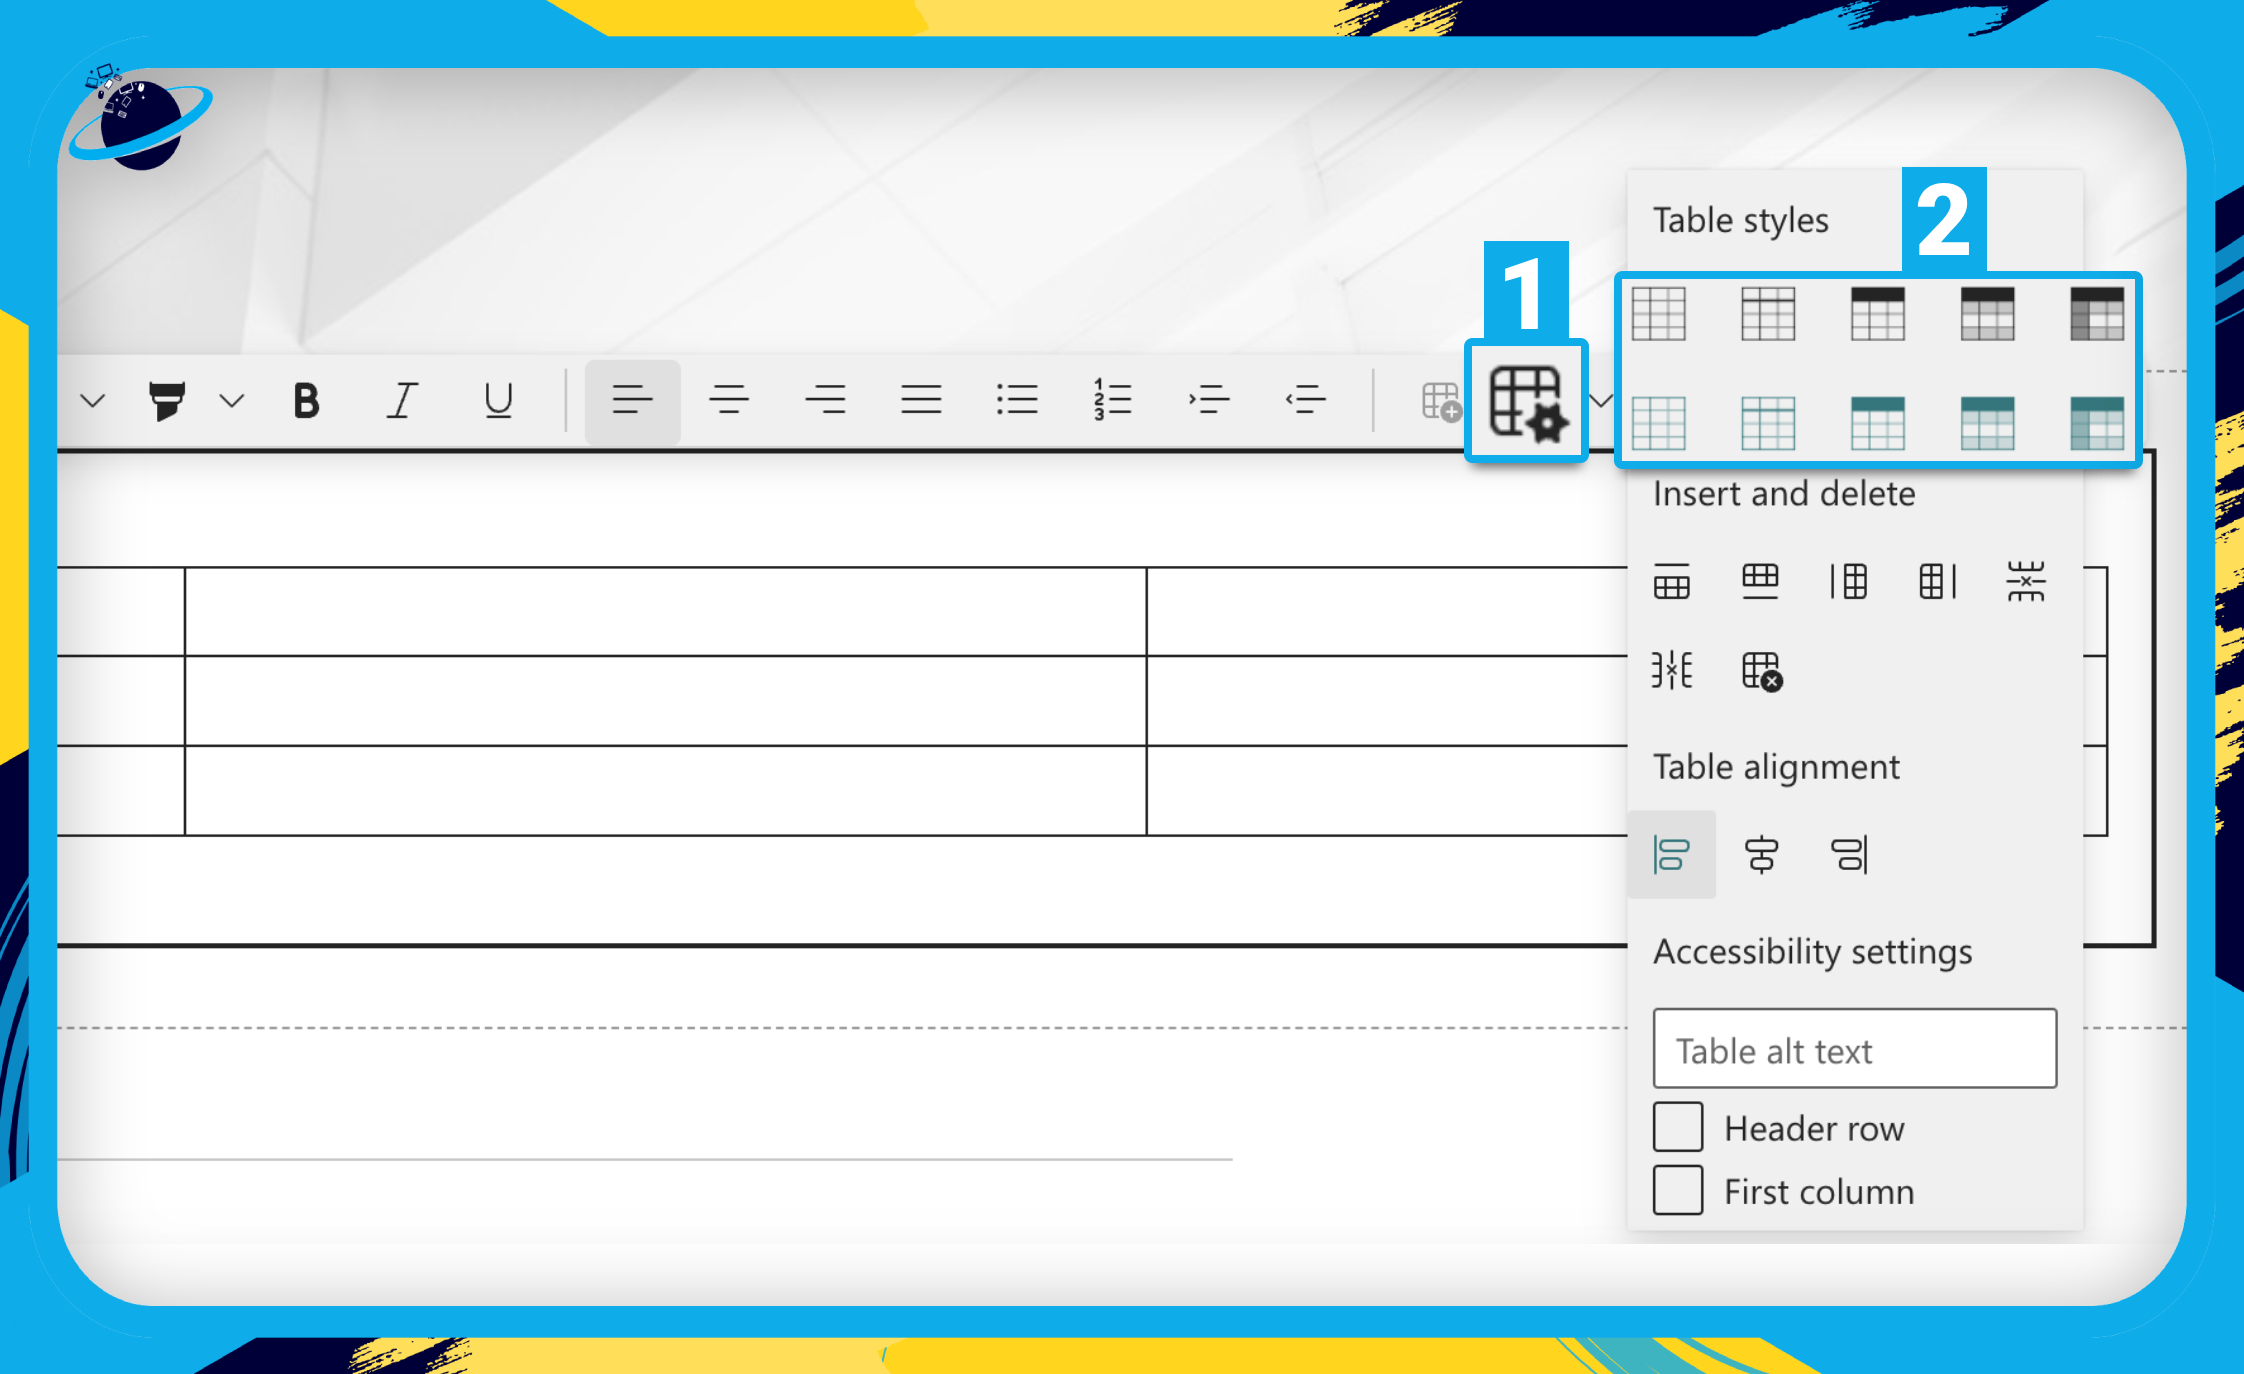
- Click the
 “Table styles” icon to modify the table and use the new accessibility settings. [1]
 - Now select a table style. [2]
If you select a “Theme” style, the colors will be inherited from your current theme. To modify your theme, follow these quick steps:
- First, click the
 cog icon in the top right of the screen.
 - Then select “Change the look” in the dropdown menu.
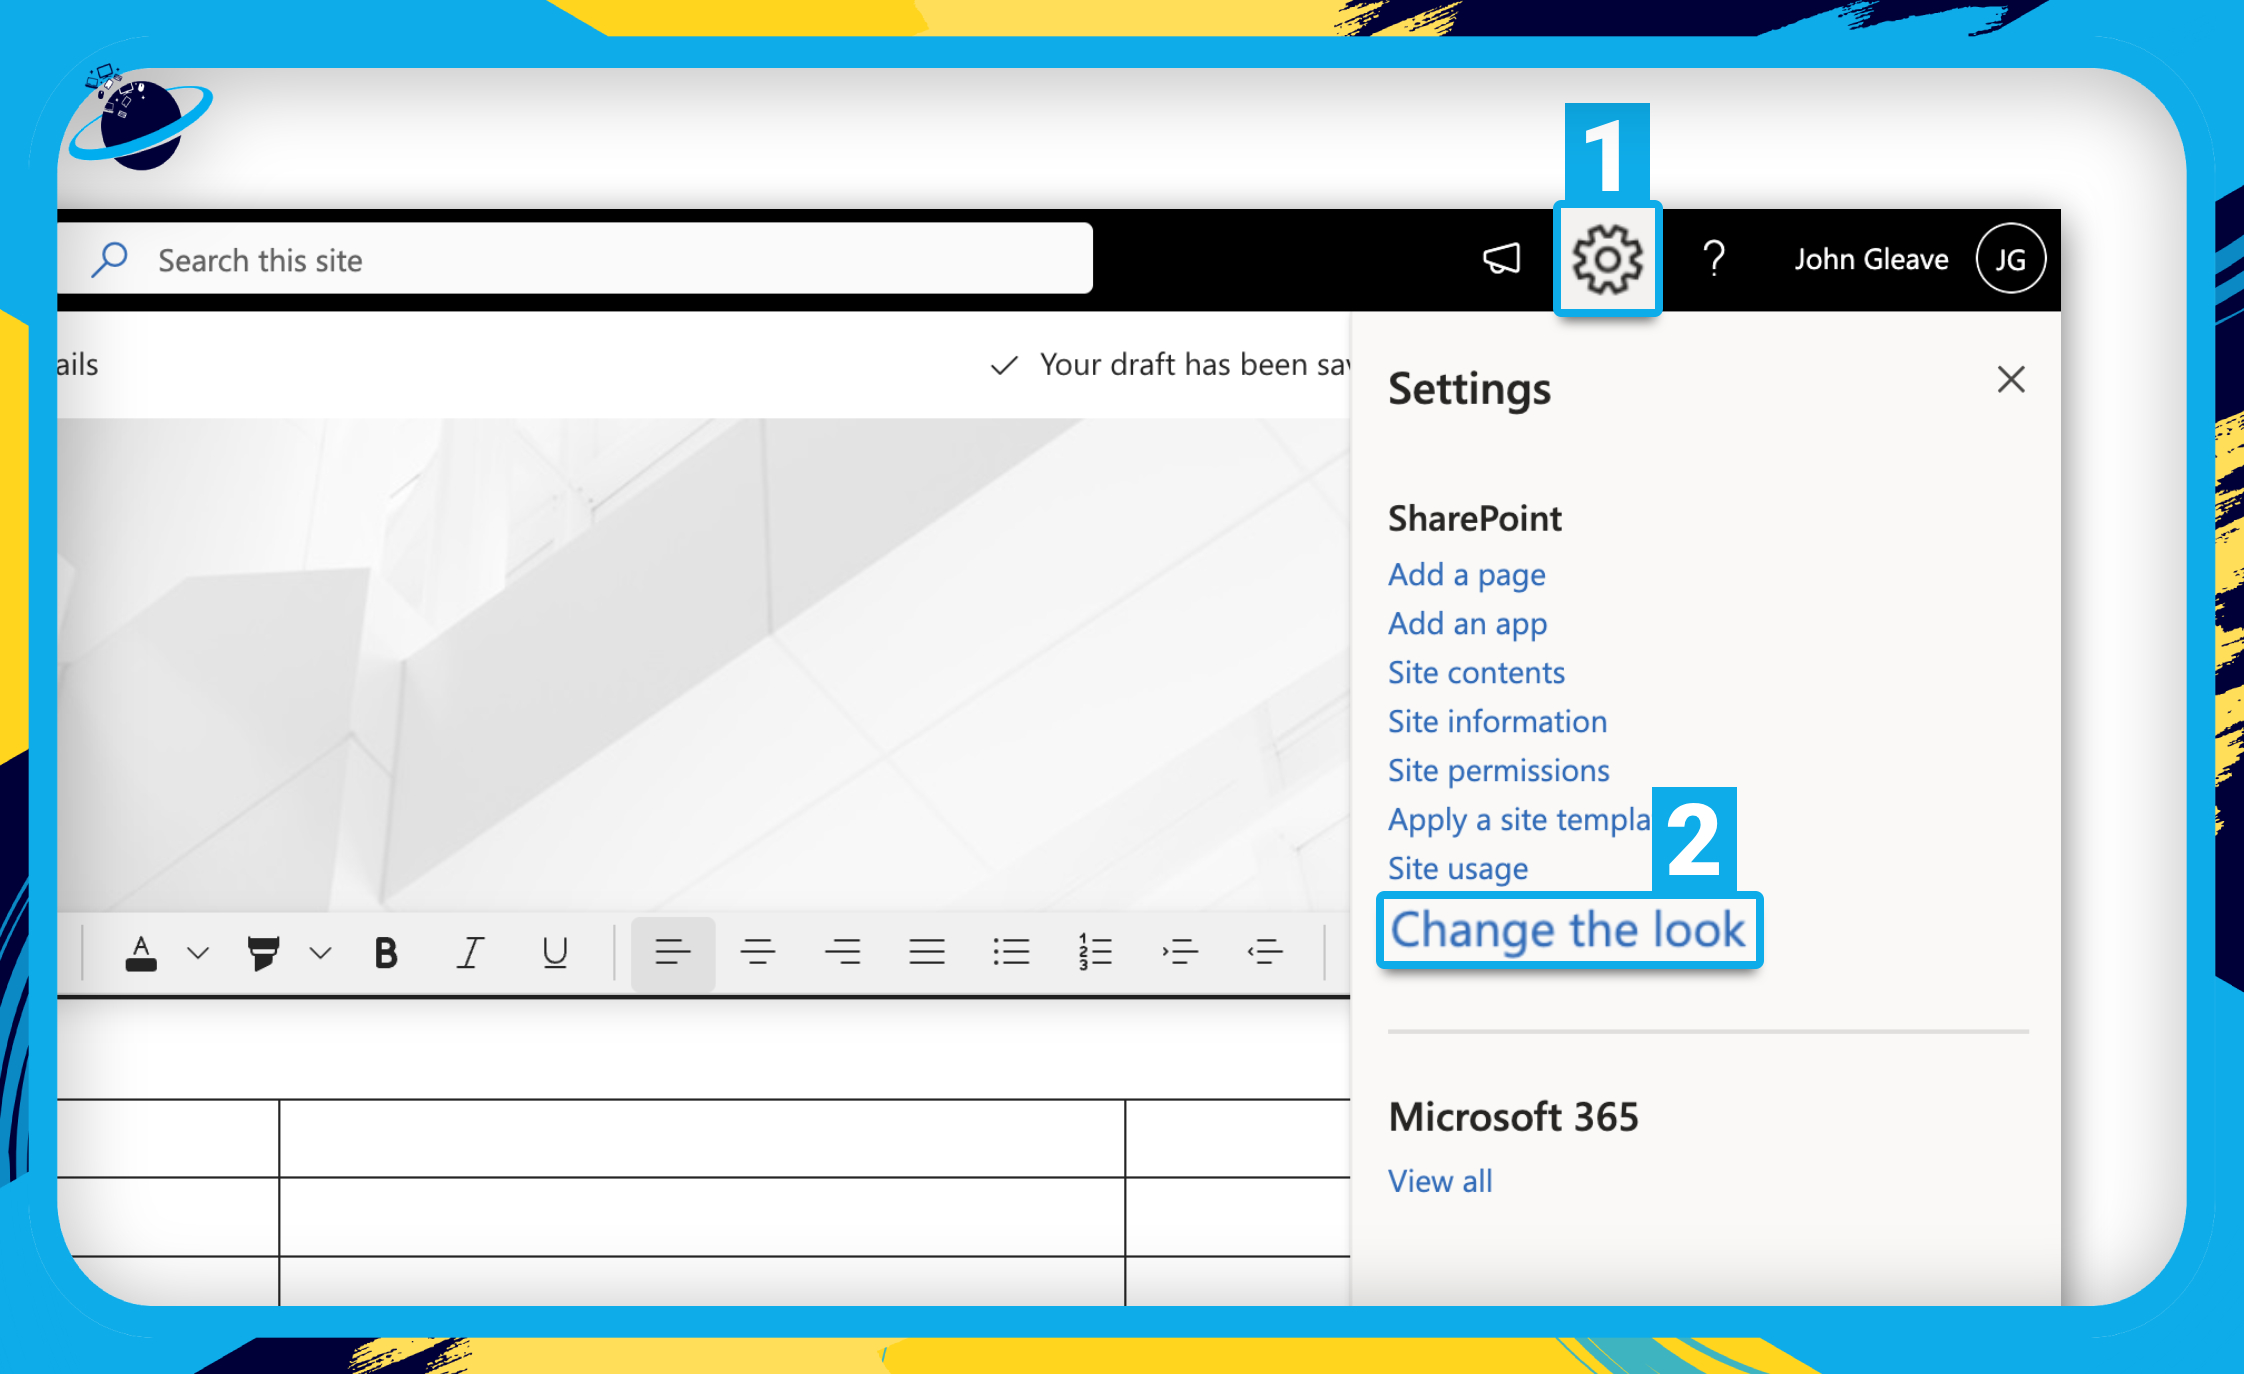
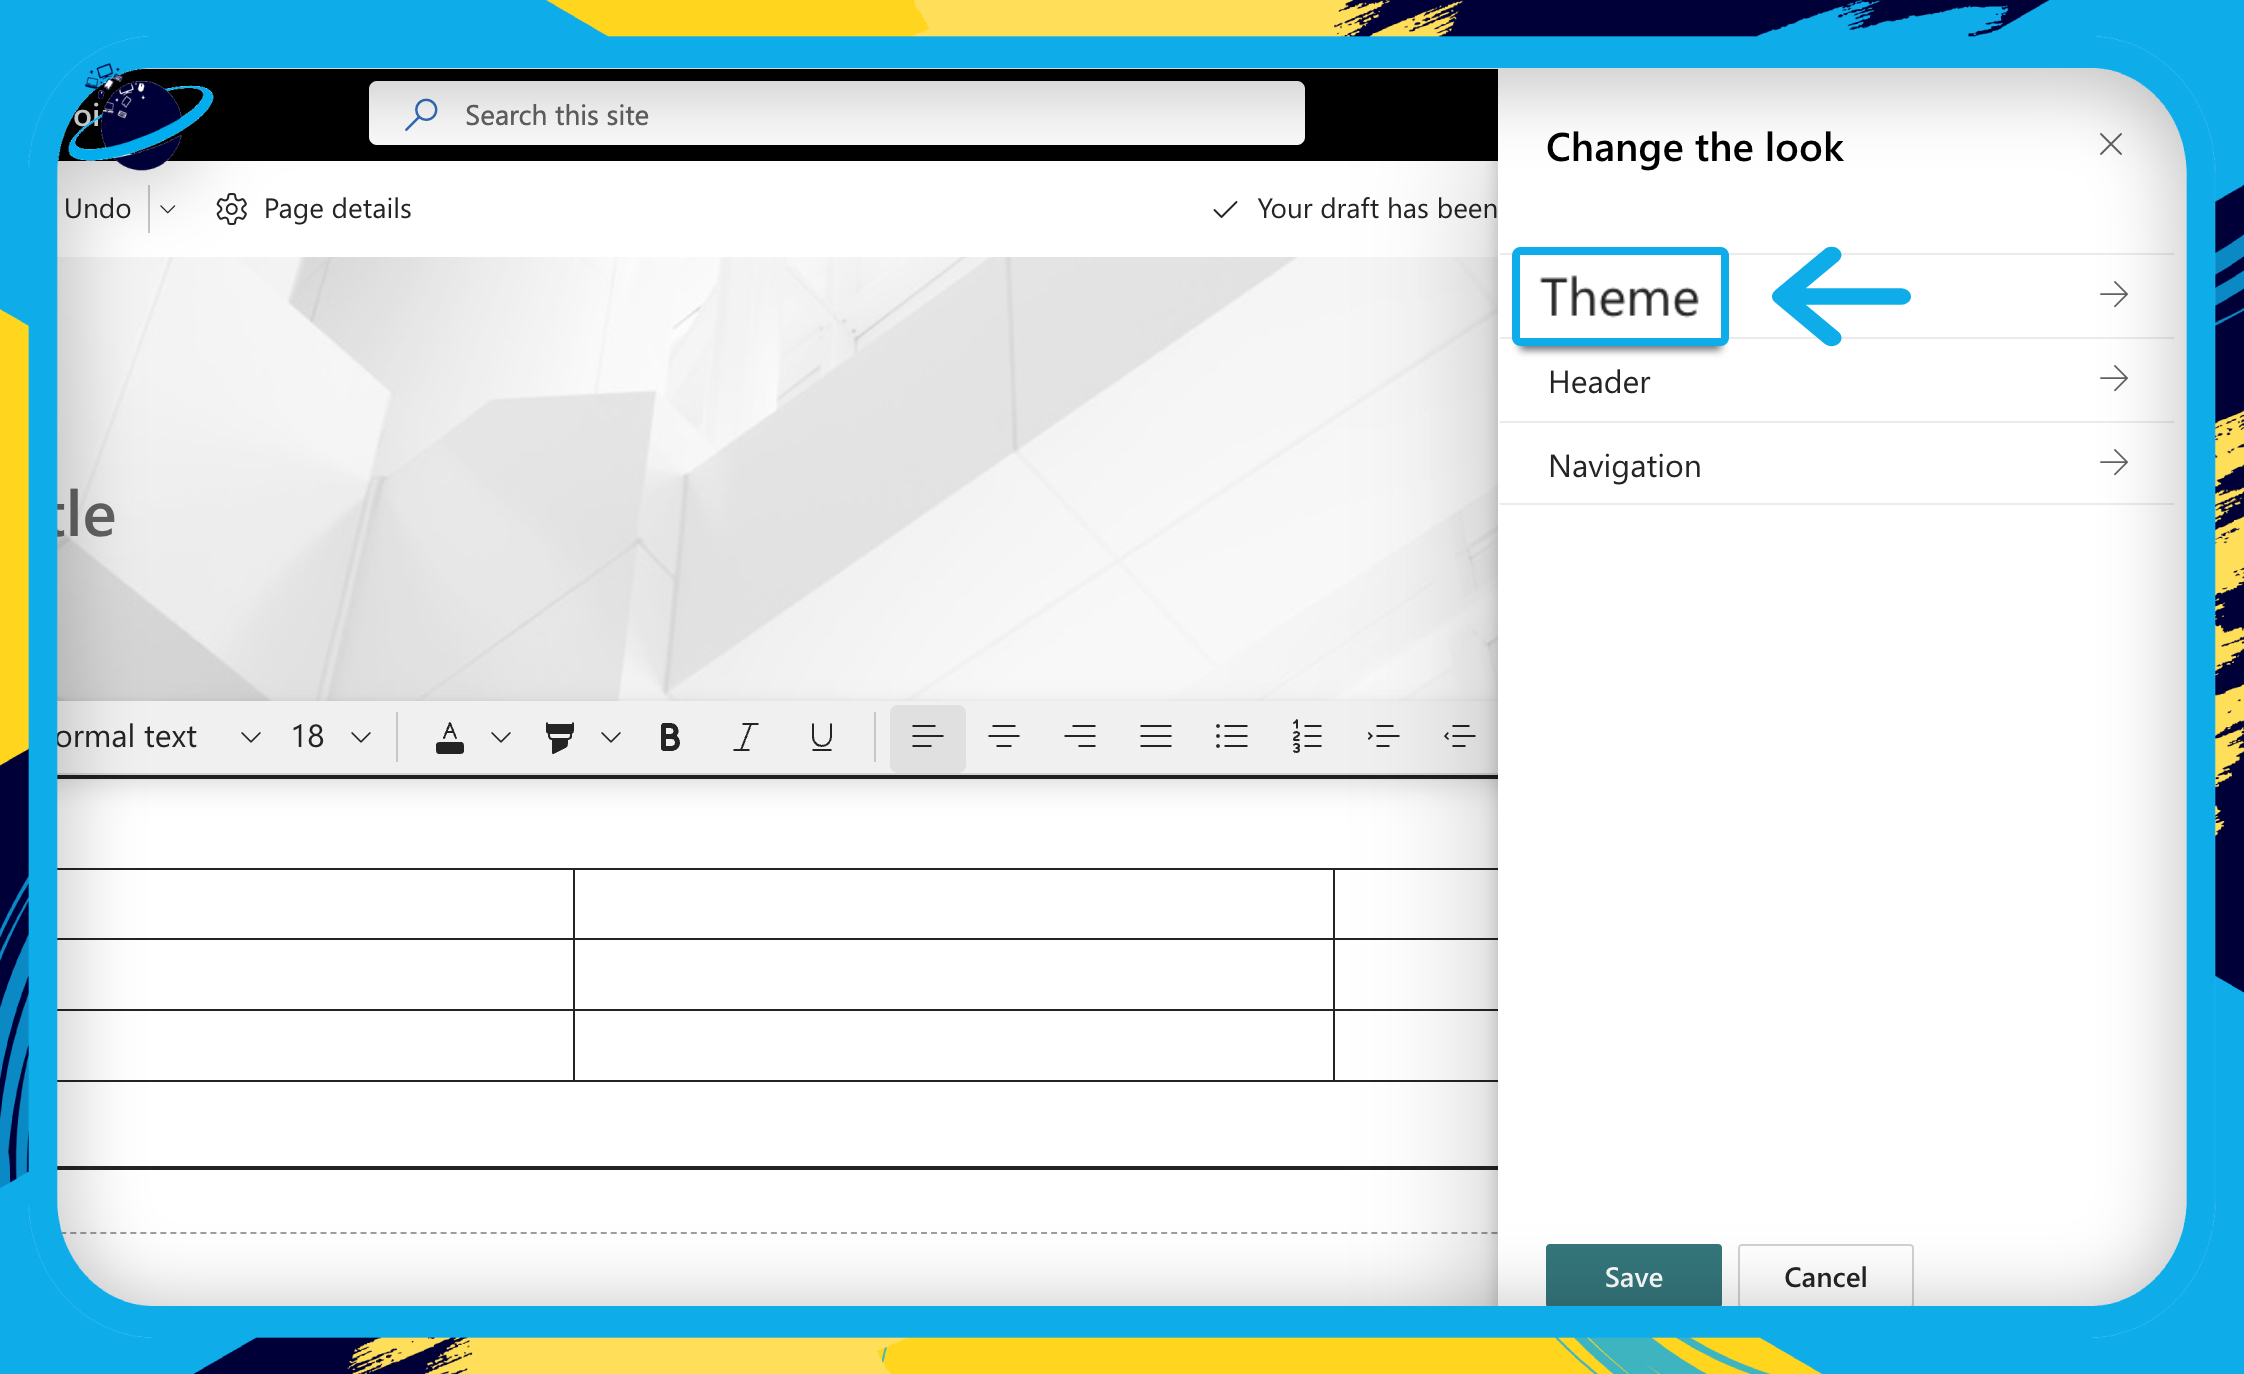
- Now select “Theme” and choose a new color theme.
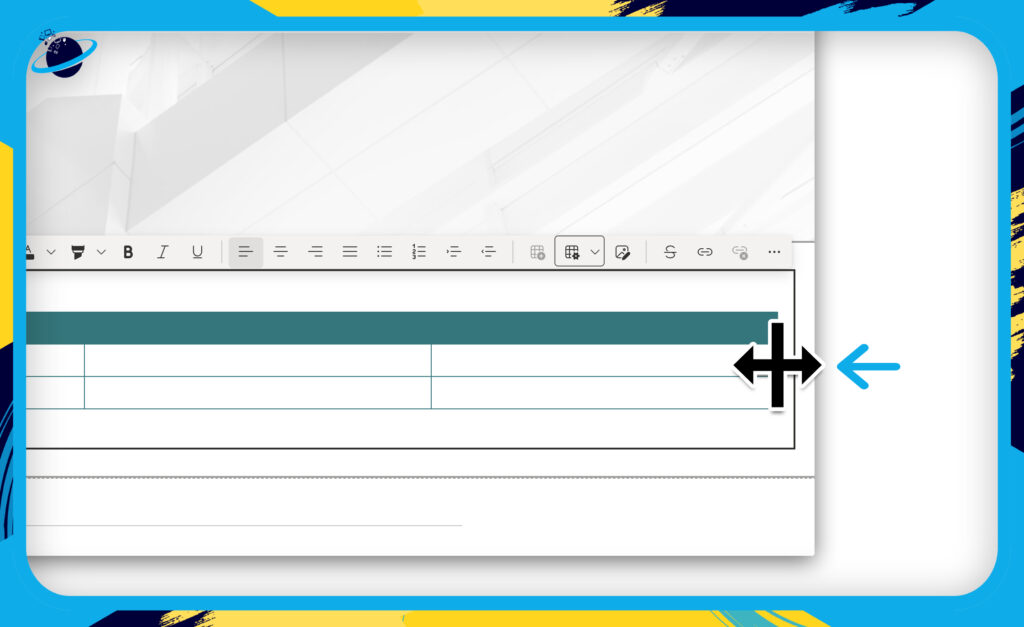
If you want to change the table’s alignment, you’ll need to reduce the width first. The table alignment positions the whole table within the Text webpart and does not affect the cells’ text alignment.
- To resize the table, click and drag the table’s right border.
- You can drag the borders when the
 resize icon appears.
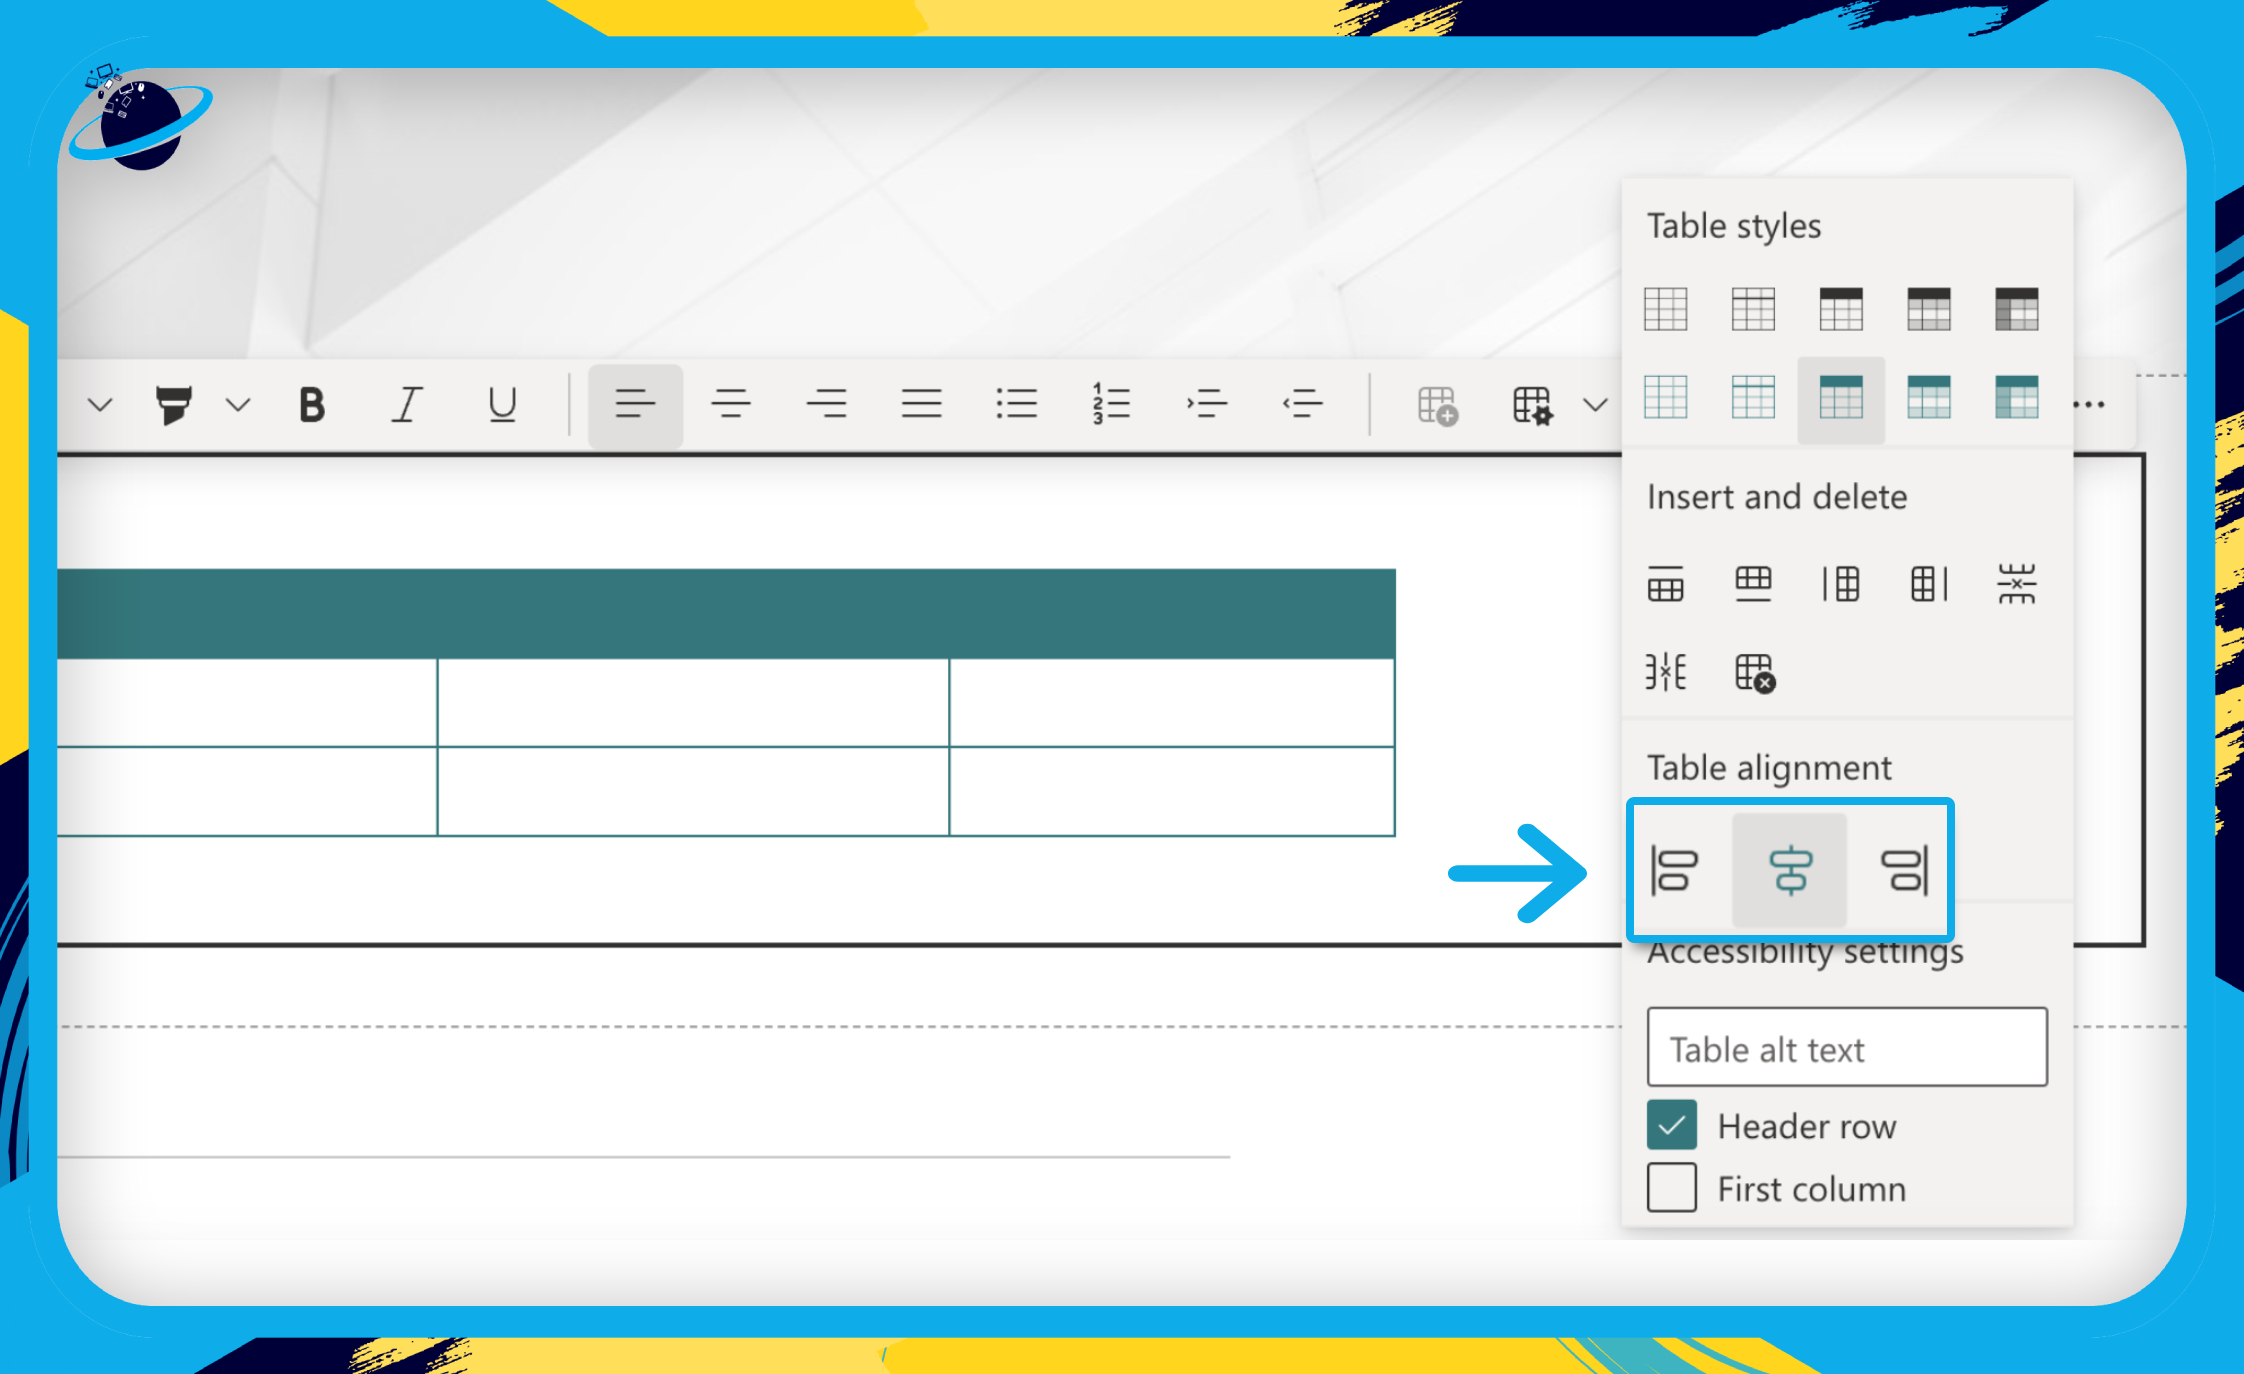
- Now click the “Table styles” icon again and select a new alignment.
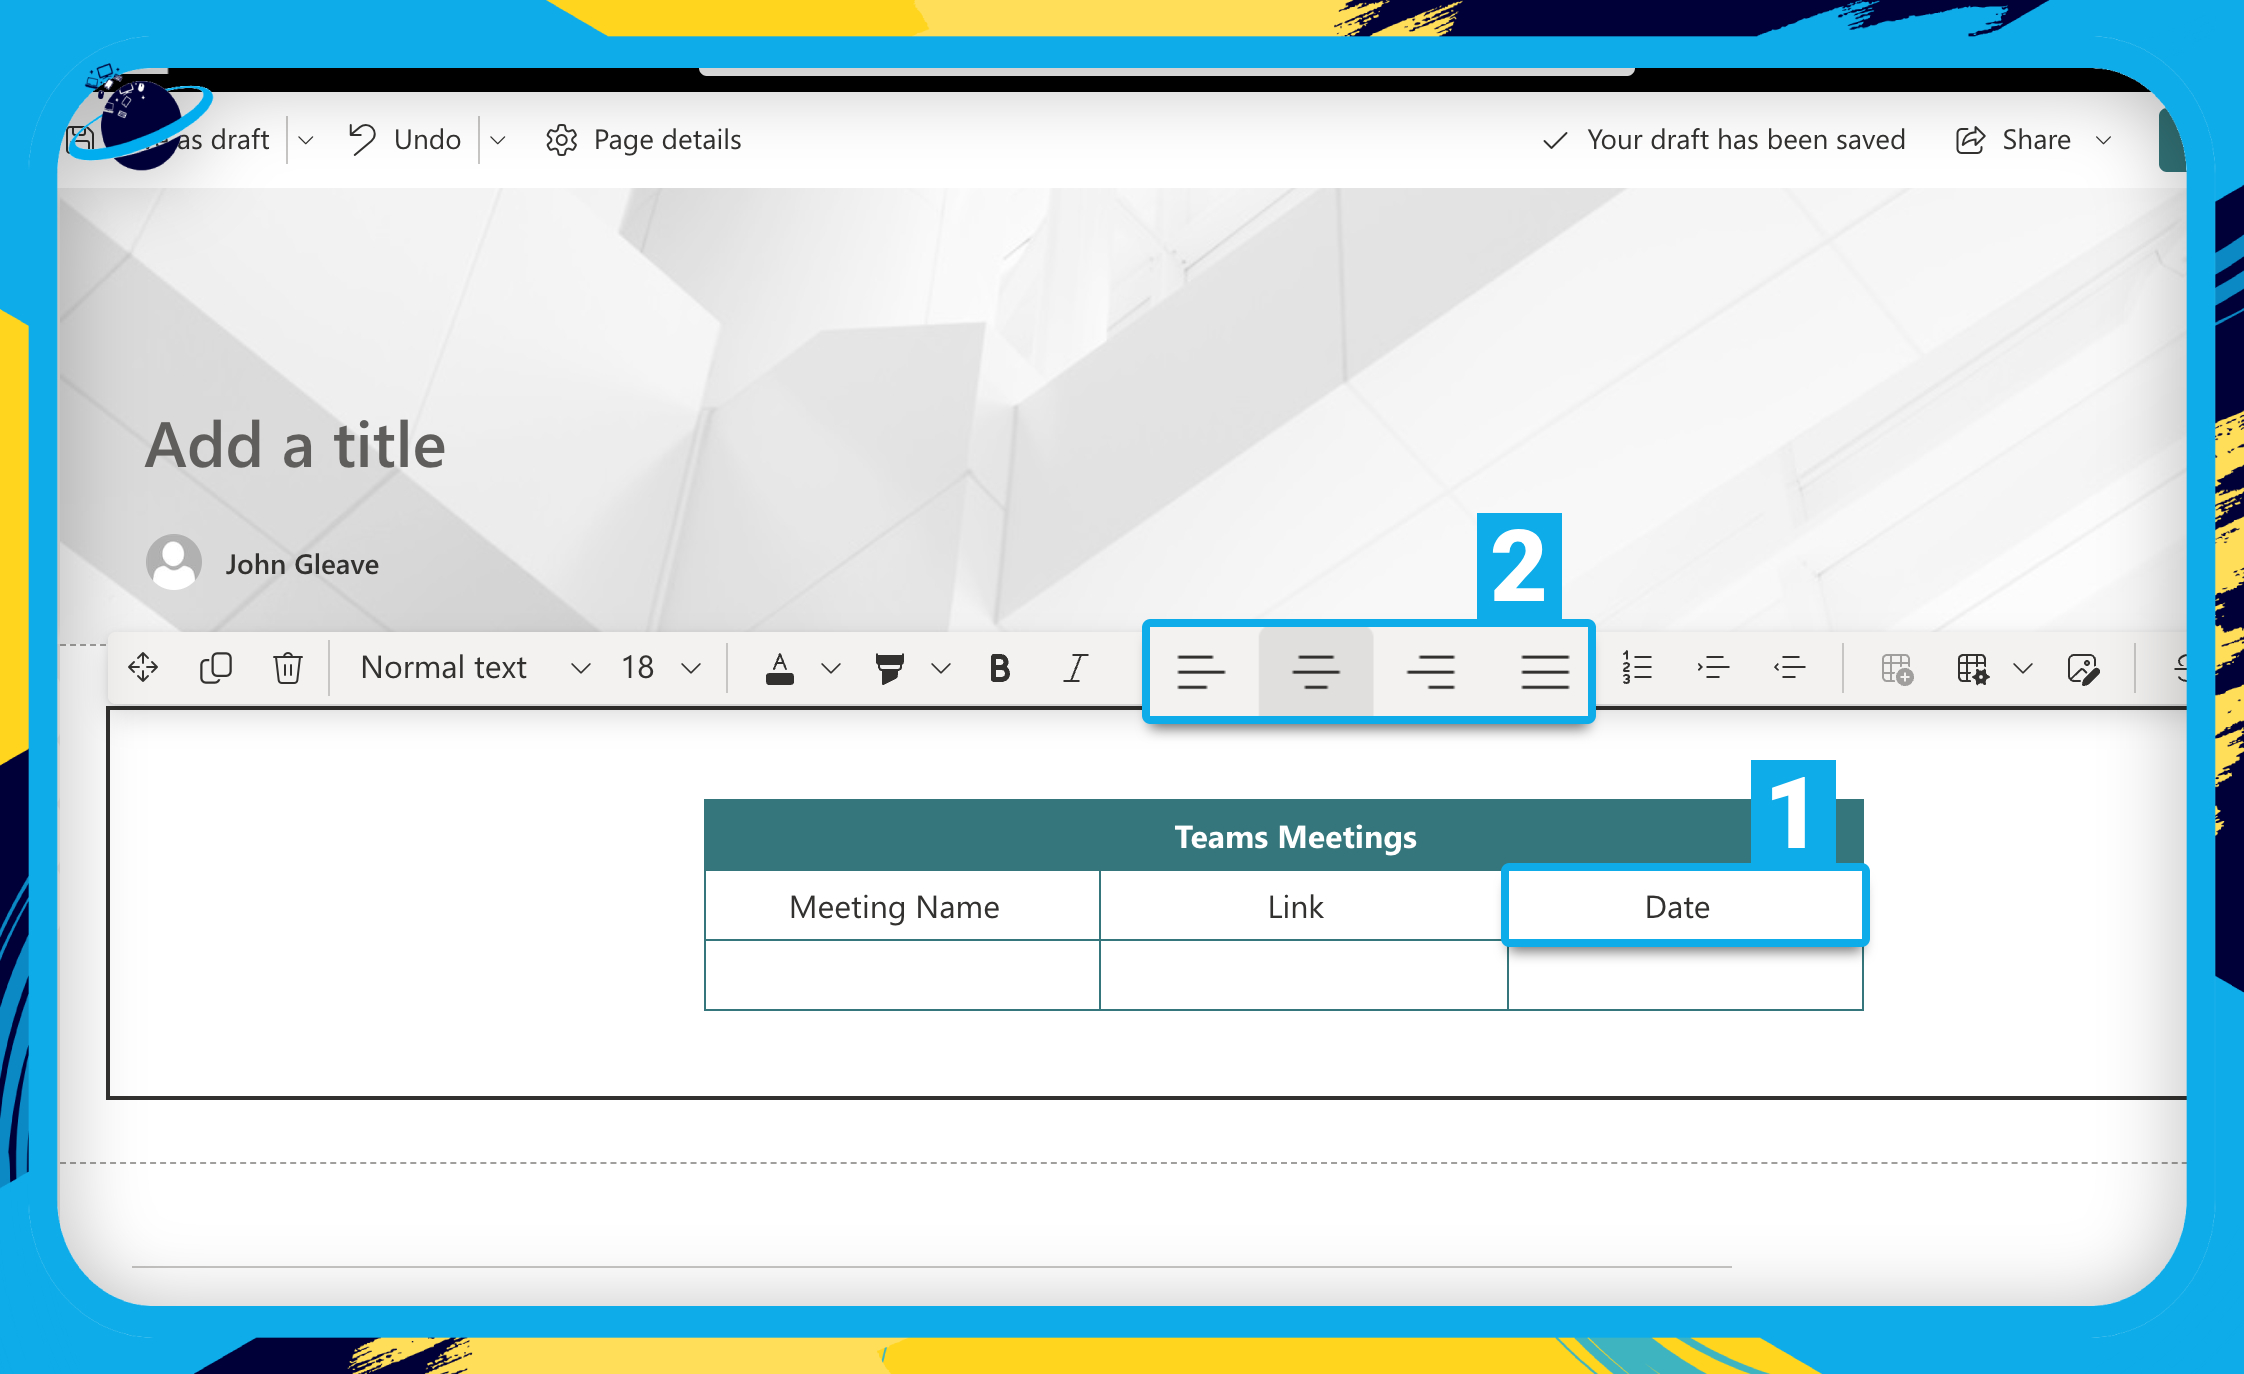
- To align the text, select a cell, or click and drag to select multiple cells. [1]
- Then select an alignment in the menu bar above the Text webpart. [2]
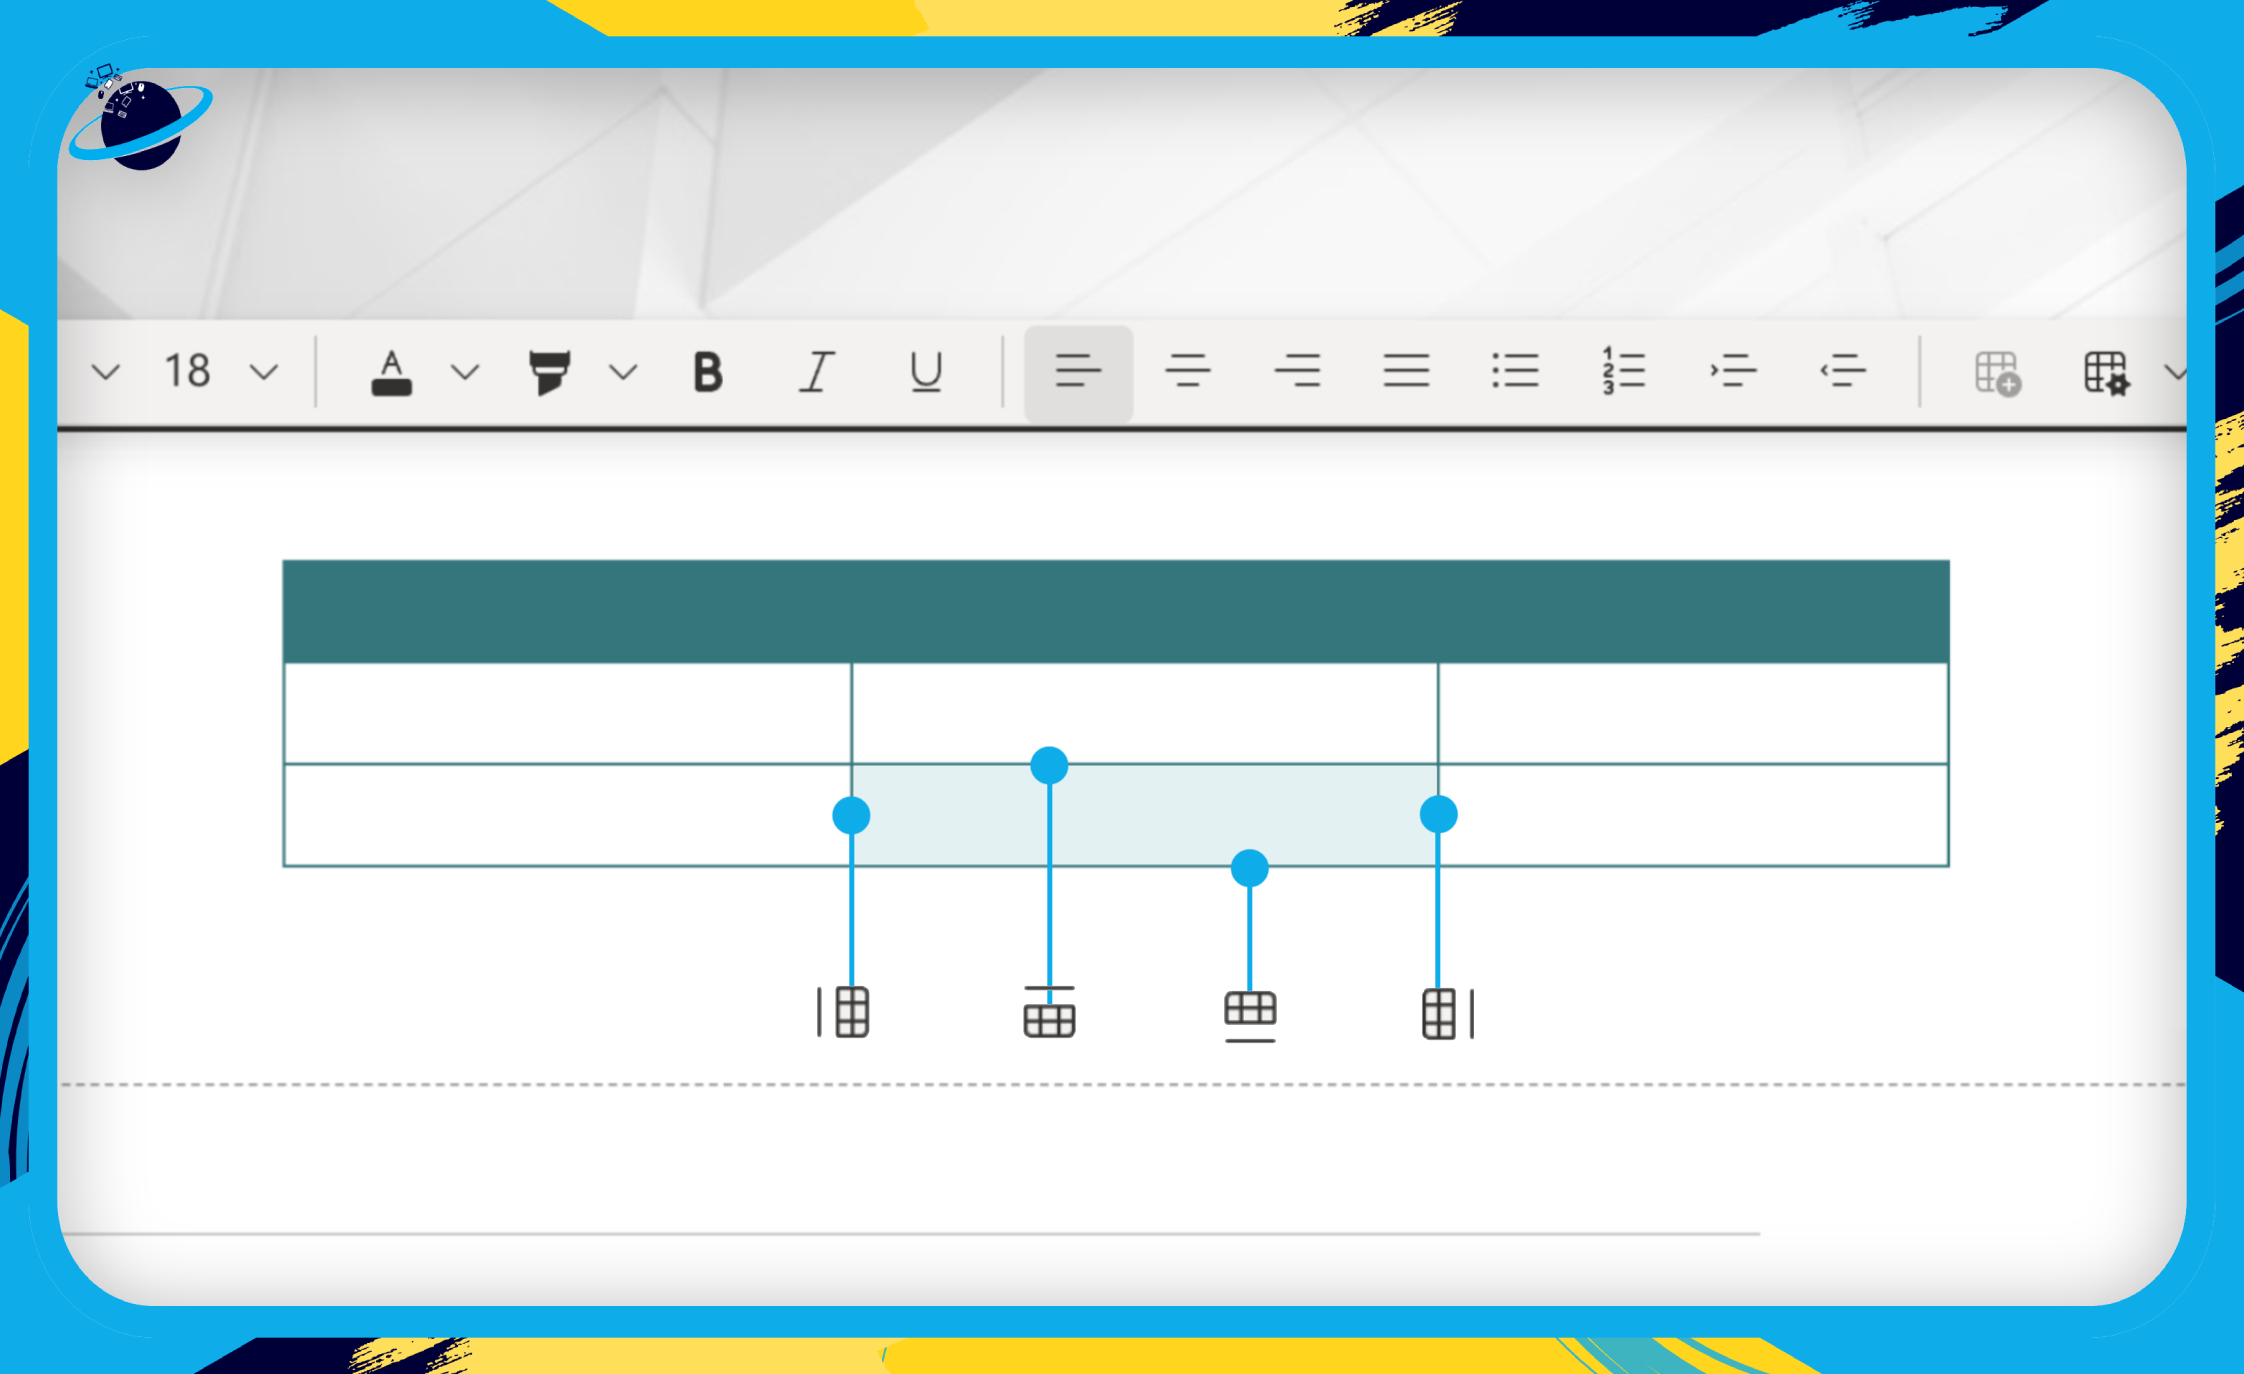
- To insert new rows and columns, select a cell.
- Then, in “Table styles” select one of the following icons:
 | Insert a new column to the left of the selected cell. |
 | Insert a new column to the right of the selected cell. |
 | Insert a new row above the selected cell. |
 | Insert a new row below the selected cell. |
New Accessibility Feature
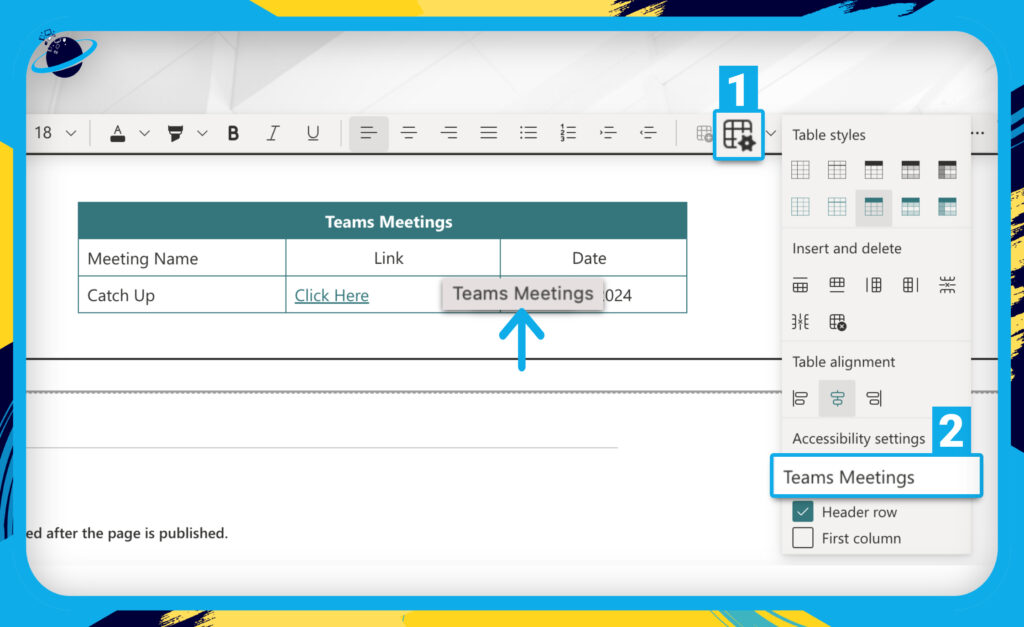
- Once you’ve inserted a table, click the “Table styles” icon. [1]
- In the dropdown menu, head to “Accessibility settings” and describe the table in the textbox. [2]
- The text description will appear above the table while hovering over it.
Bolding the Header Row and First Column
Here’s what happens when you check or uncheck the boxes next to “Header row” and “First column.”
Conclusion
The recent update to Microsoft SharePoint in January 2024 introduces valuable accessibility settings for tables. The addition of alternative text allows users to provide descriptive information about the table, enhancing the experience for individuals with visual impairments who rely on screen readers.
Furthermore, the update introduces the ability to bold text in the header row and first column with convenient checkboxes. This feature streamlines the process of emphasizing key information in tables without the need for extensive formatting adjustments.
As we’ve outlined in this guide, creating tables in SharePoint involves using the Text webpart and taking advantage of the new accessibility settings. Users can customize table styles, adjust alignments, and insert rows or columns with ease. The emphasis on accessibility settings, including the option to add alternative text, reflects Microsoft’s commitment to making their products more inclusive and user-friendly.
Thanks for reading!