Within Microsoft Outlook, it is not uncommon to encounter at least one issue throughout the time in which you use the application. One of those issues is when Outlook gets stuck on synchronising subscribed folders, and if that is the problem that you have recently encountered, then that’s probably why you’re here.
Thankfully, there are a couple of means by which you can solve the issue. In this blog, we will not only offer a step-by-step of each method, but we will then delve into a more thorough analysis, a walkthrough complete with accompanying screenshots, there to assist you in the process.
The first way in which you can resolve this issue is by accessing the Account Settings of your Outlook, removing your email, and re-adding it.
   |
Step by step: Fix Outlook synchronizing error via account settings
- Open the desktop version of Microsoft Outlook on your computer.
- From here, click ‘File’.
- In the File menu, click ‘Account Settings’.
- On the subsequent drop-down menu, click the tab titled ‘Account Settings’ (this isn’t a typo, there are simply two options with the same title).
- On the menu that arises, click your email address.
- After highlighting your email, click ‘Remove’ on the navigation bar.
- Once this is done, exit Outlook, and then reopen it.
- After opening Outlook again you should, once more, click ‘File’.
- From here, click ‘Add account’.
- Enter the details to your Outlook account, email and password.
- Click ‘Connect’ to re-establish your account.
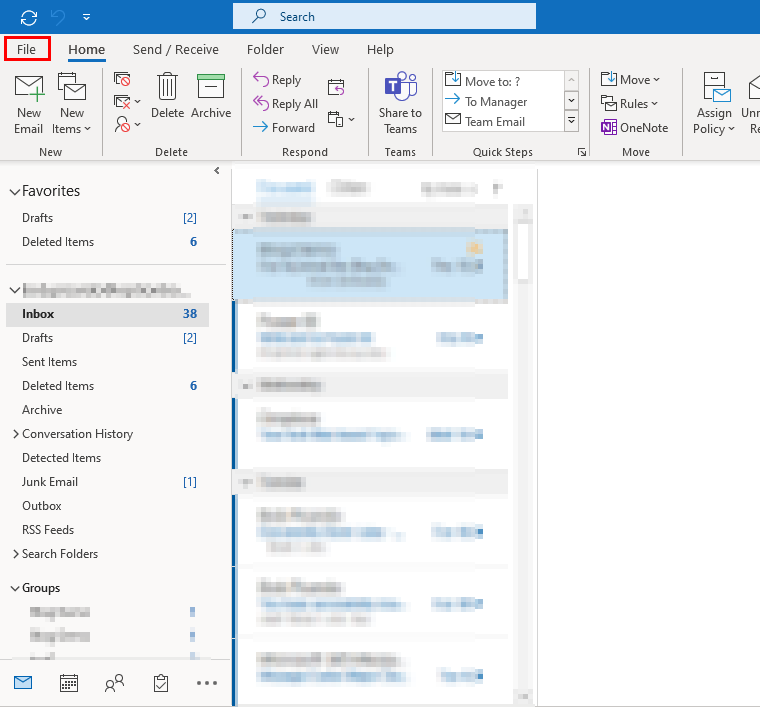
So, your first step in this process is to open Microsoft Outlook. As was specified above, you will need to run the desktop version of Outlook in order to follow these steps. In case you’re unaware, by this, it is meant that the Outlook you access on your browser does not possess the settings needed for this process. The desktop version, however, does.
Once you’ve opened this, click ‘File’ in the top left of your screen. It has been highlighted below:
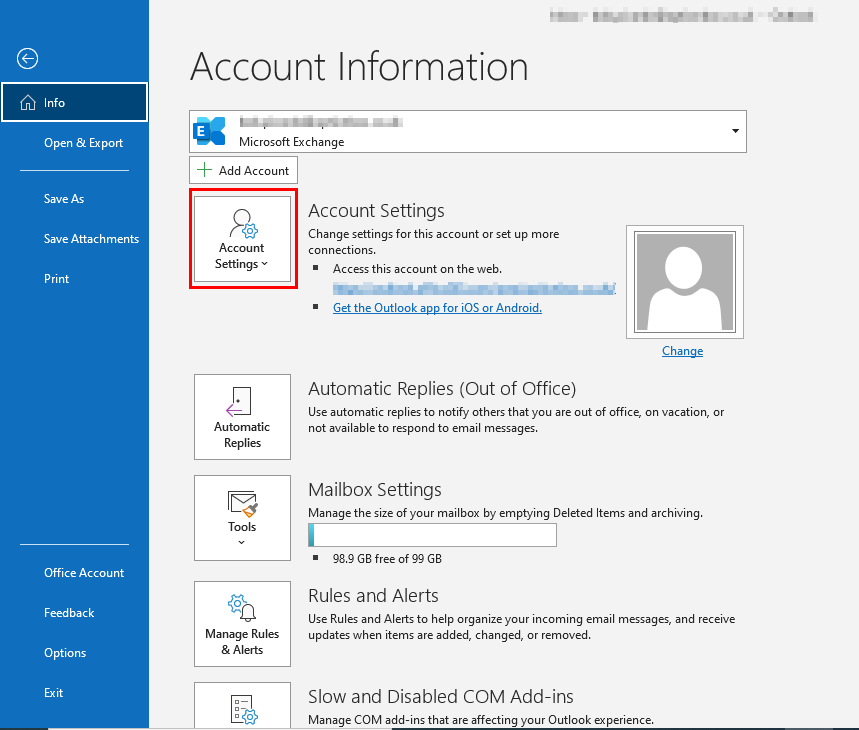
Clicking File will bring you to the file menu, unsurprisingly. Looking at this screen, you will understandably be presented with a variety of options. Of all options listed to you, you will want to click the box titled ‘Account Settings’.
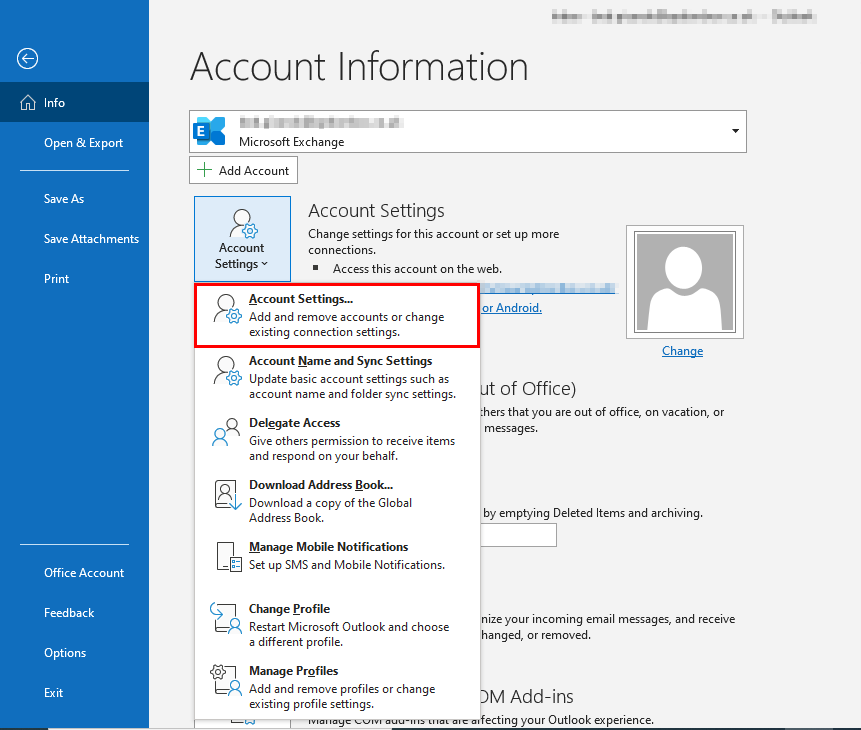
Clicking Account Settings will open a dropdown menu, with even more options for you to choose from. Here, you will want to click the top option, titled ‘Account Settings’. As was said above, this isn’t a typo, it just so happens that under the heading ‘Account Settings’, there is an option titled ‘Account Settings’.
Clicking this will bring you to a new menu, on which you will see your email(s) in a table headed by numerous subsections topping the list.
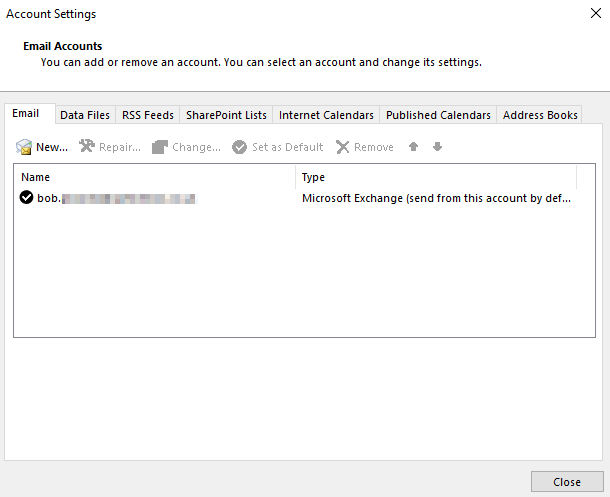
In order to remove your email from this list, you first need to highlight the email you want to remove. After doing so, click ‘Remove’, which has been emboldened in the below screenshot.
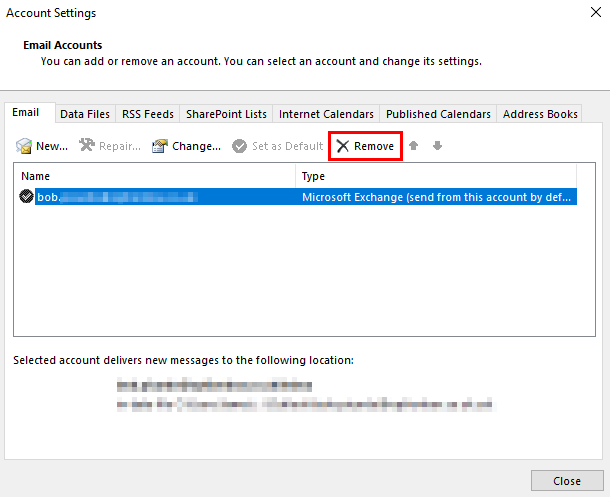
Clicking remove will complete the removal of the email, as you’d expect, and you will have then completed the first portion of the process.
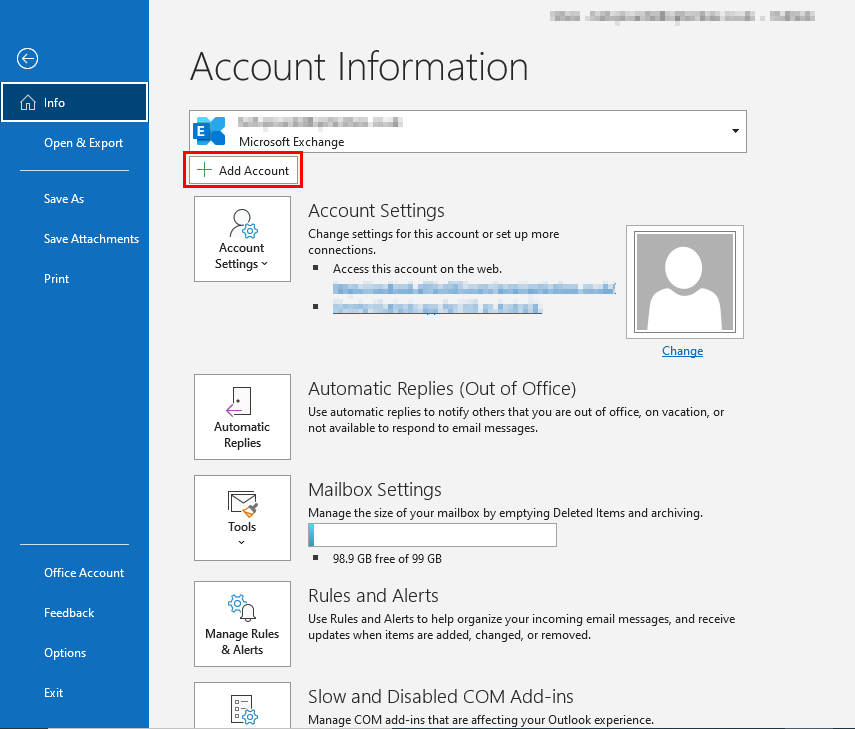
After removing the email, and closing Outlook, you will want to open Microsoft Outlook once more. From here, you will want to follow the same initial step as you have in the first section of this walkthrough. From your inbox, click ‘File’.

After clicking File, instead of clicking ‘Account Settings’ as you did earlier, this time you will want to click ‘Add Account’, which can be found as a small box just above the ‘Account Settings’ block you have previously clicked on. Should you need assistance in finding it, it has been highlighted in the below screenshot.
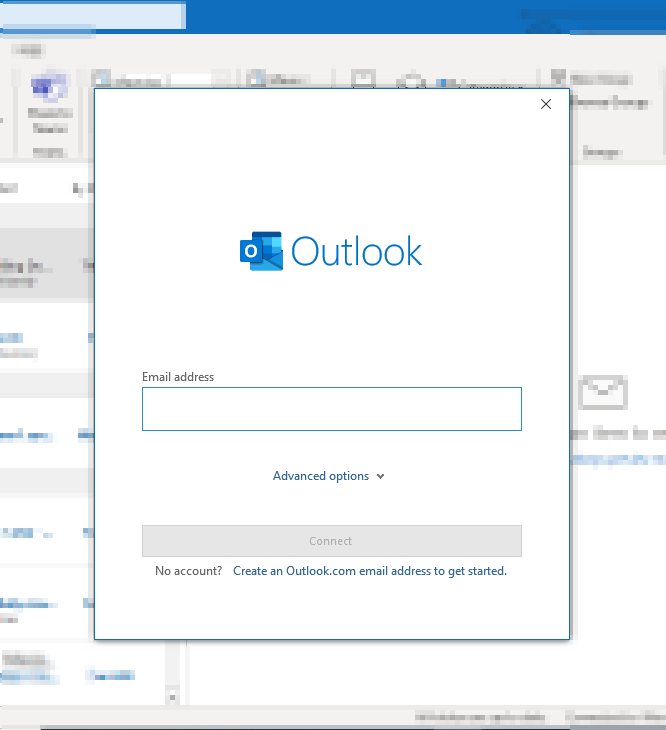
Clicking ‘Add Account’ will open a small submenu, on which you will be able to enter your email address and password to re-register your account with the computer. Prior to entering anything, your menu should look like this:
After entering your email, the greyed out option titled ‘Connect’ will turn blue, as thus:
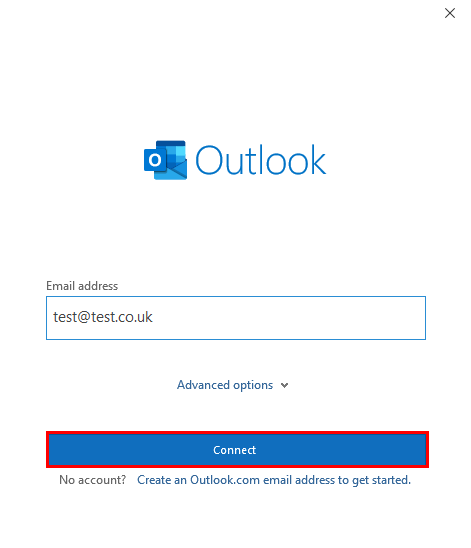
The ‘Connect’ box has been highlighted by the red above. Click that to reconnect your email, and from there, you should have successfully resolved your synchronising subscribed folder issue!
Now, there is another method, as was discussed at the beginning of the article. This, however, will not be explored in as great a depth. Instead, we will provide you with a step-by-step guide which should prove to be a useful second option to this process if, for some reason, the above method fails to work for you.
These steps will detail a process involving the IMAP Folders, which some of you may still access depending on the make and model of your computer or software.


Step by step: Check the IMAP folder to resolve synchronizing issue in Outlook
- RIght click on your email account, and then click ‘IMAP Folders’.
- First, click ‘Subscribed’, and then swiftly navigate to ‘Query’.
- There will, presumably, be many options on your list. Select them all.
- In order to sync up the folders, select them all.
So, in this blog, we have covered two means by which you could alleviate the issue of Microsoft Outlook getting stuck on synchronising folders. The first way, which was covered in much greater depth, was with regard to editing the account settings of your Outlook. The second, though much briefer in description, provided you with the method to check your IMAP folders in order to
Thank you for taking the time to read this blog, I hope you found it as helpful as you wanted it to be! As is the case with every article we write, if ever you run into any issues, or simply wish to inform us of your thoughts on the piece, then please don’t hesitate to get in touch with a member of our team.