SharePoint offers its users a platform of content management and sharing tools to help improve the overall functionality of a company or organization. Tools that allow for users within a group to share content assisted with a company to other colleagues and even members external with a one-time pass link which allows for external members to view the document but not download or edit it. Speaking of editing, users who use SharePoint have reported documents not updating to the latest version of themselves when an edit is made. Documents fail to update therefore causes a lot of inconveniences for users who may be trying to edit files on a timely basis. In this blog, we will be looking at solutions to help users resolve “SharePoint not updating with the latest version of a document” and find possible solutions to help prevent the error from occurring again. We will also address some of the issues that can cause “SharePoint not updating with the latest version of a document” so users are more aware of what they are dealing with and what approaches they need to take to resolve “SharePoint not updating with the latest version of a document”. Follow the step-by-step process below to see how you can resolve “SharePoint not updating with the latest version of a document”.
How to fix SharePoint not updating with latest version of a document (Save settings):
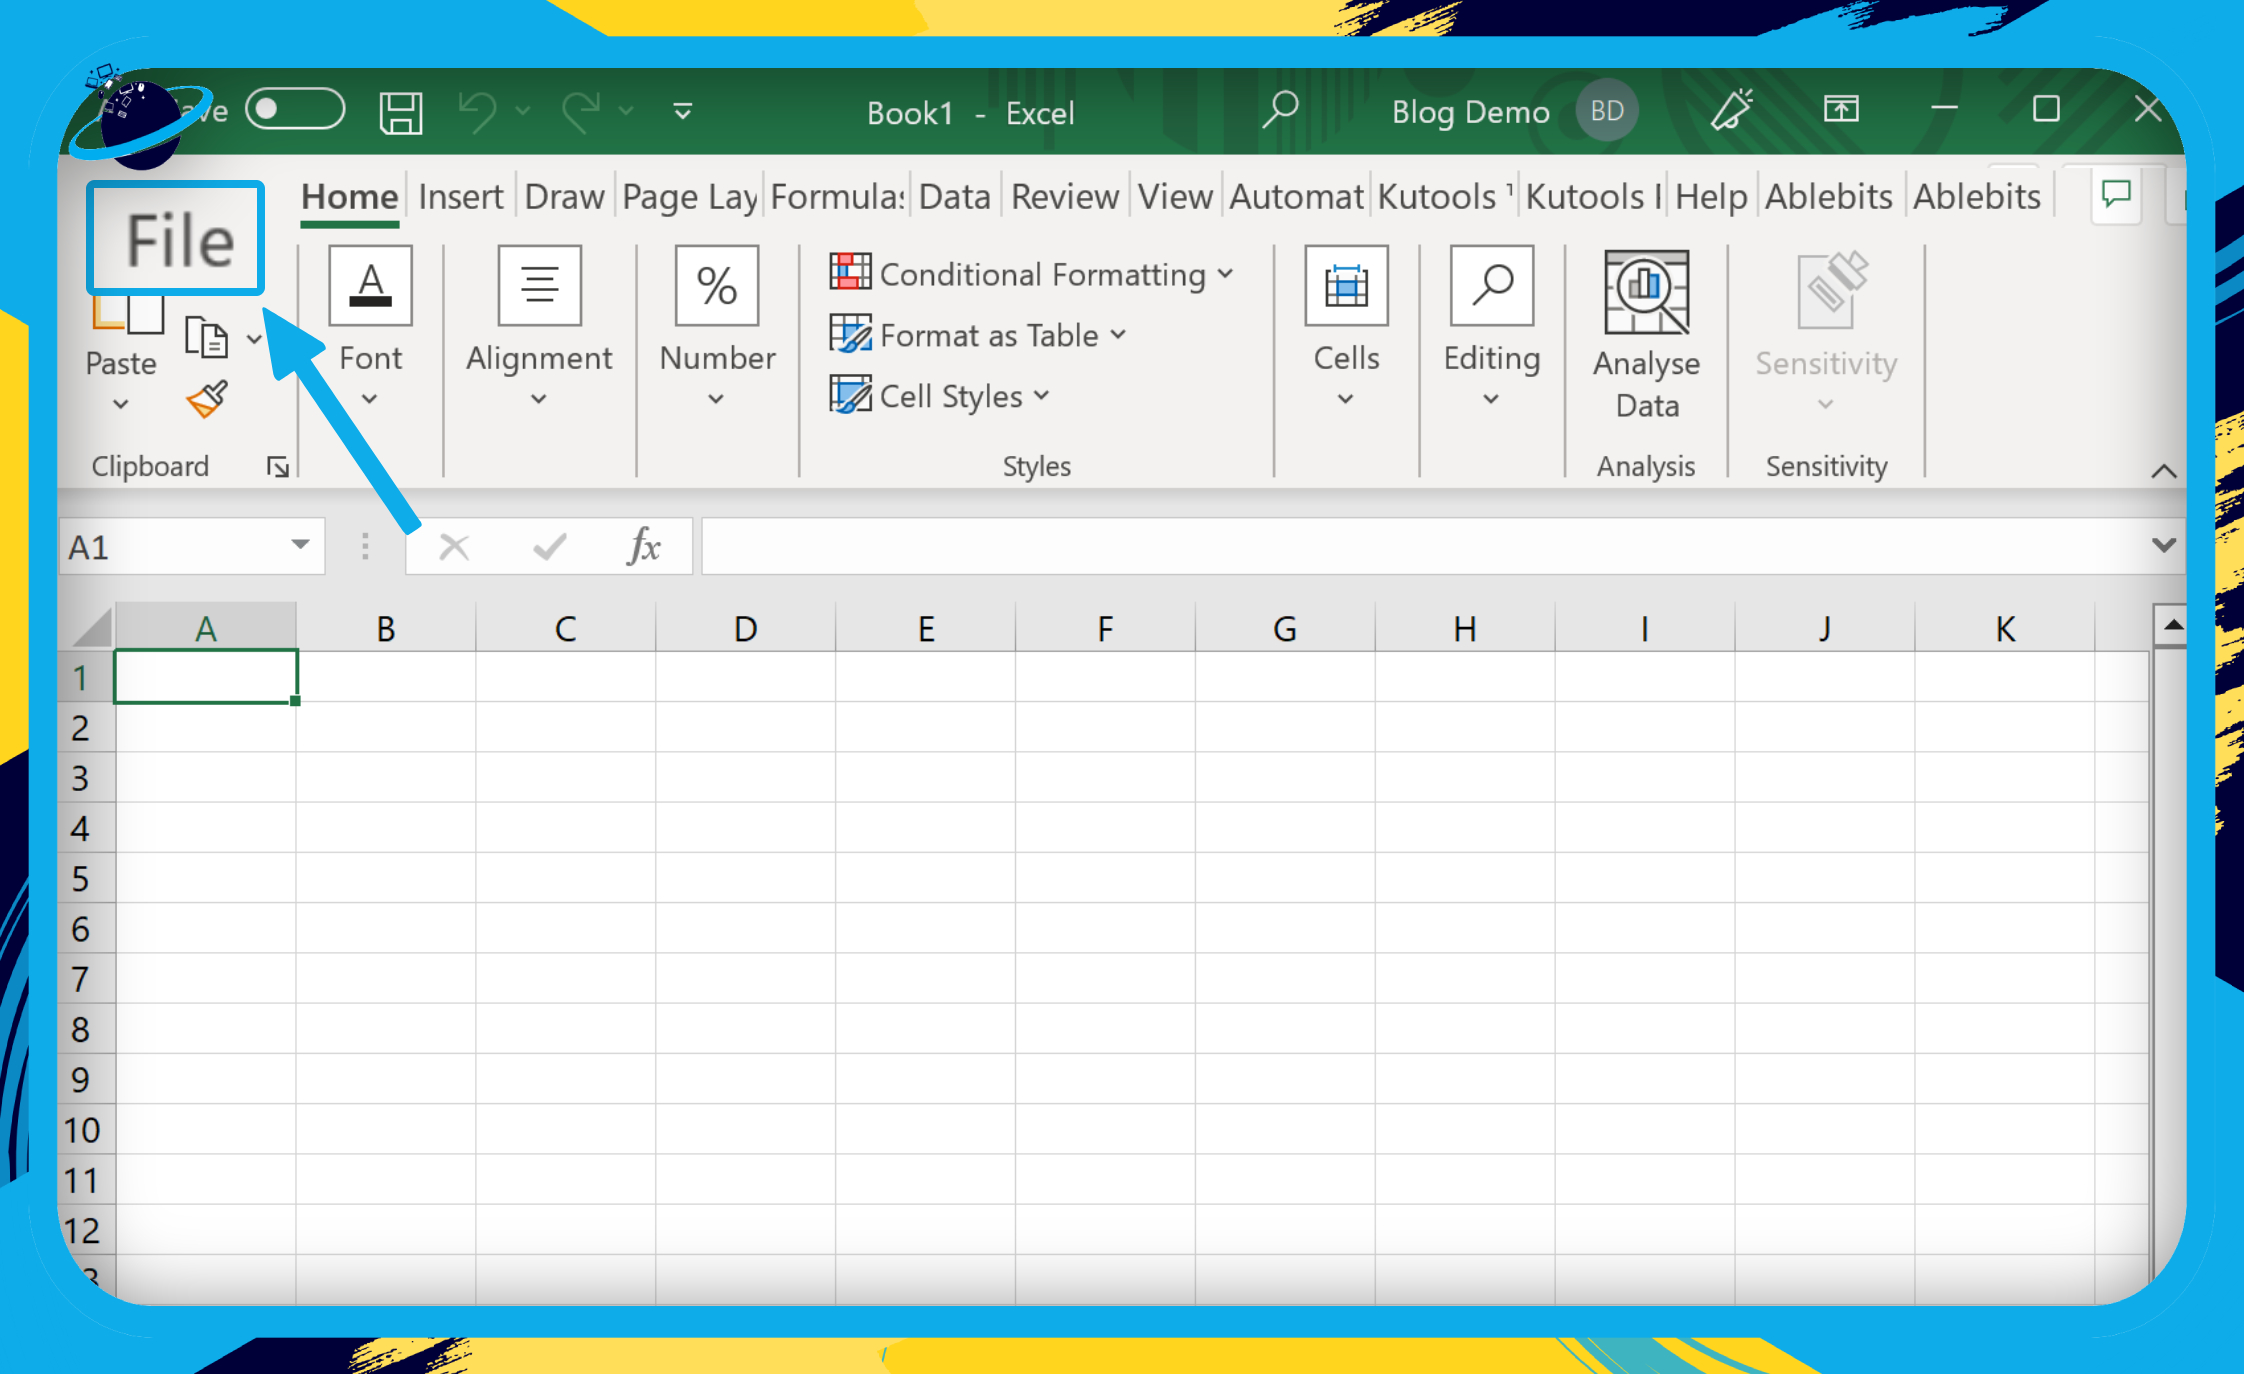
- Open a Microsoft Office application, such as Excel or Word.
- Click on “File” in the top menu.
- Go down to “Options” at the bottom of the left menu.
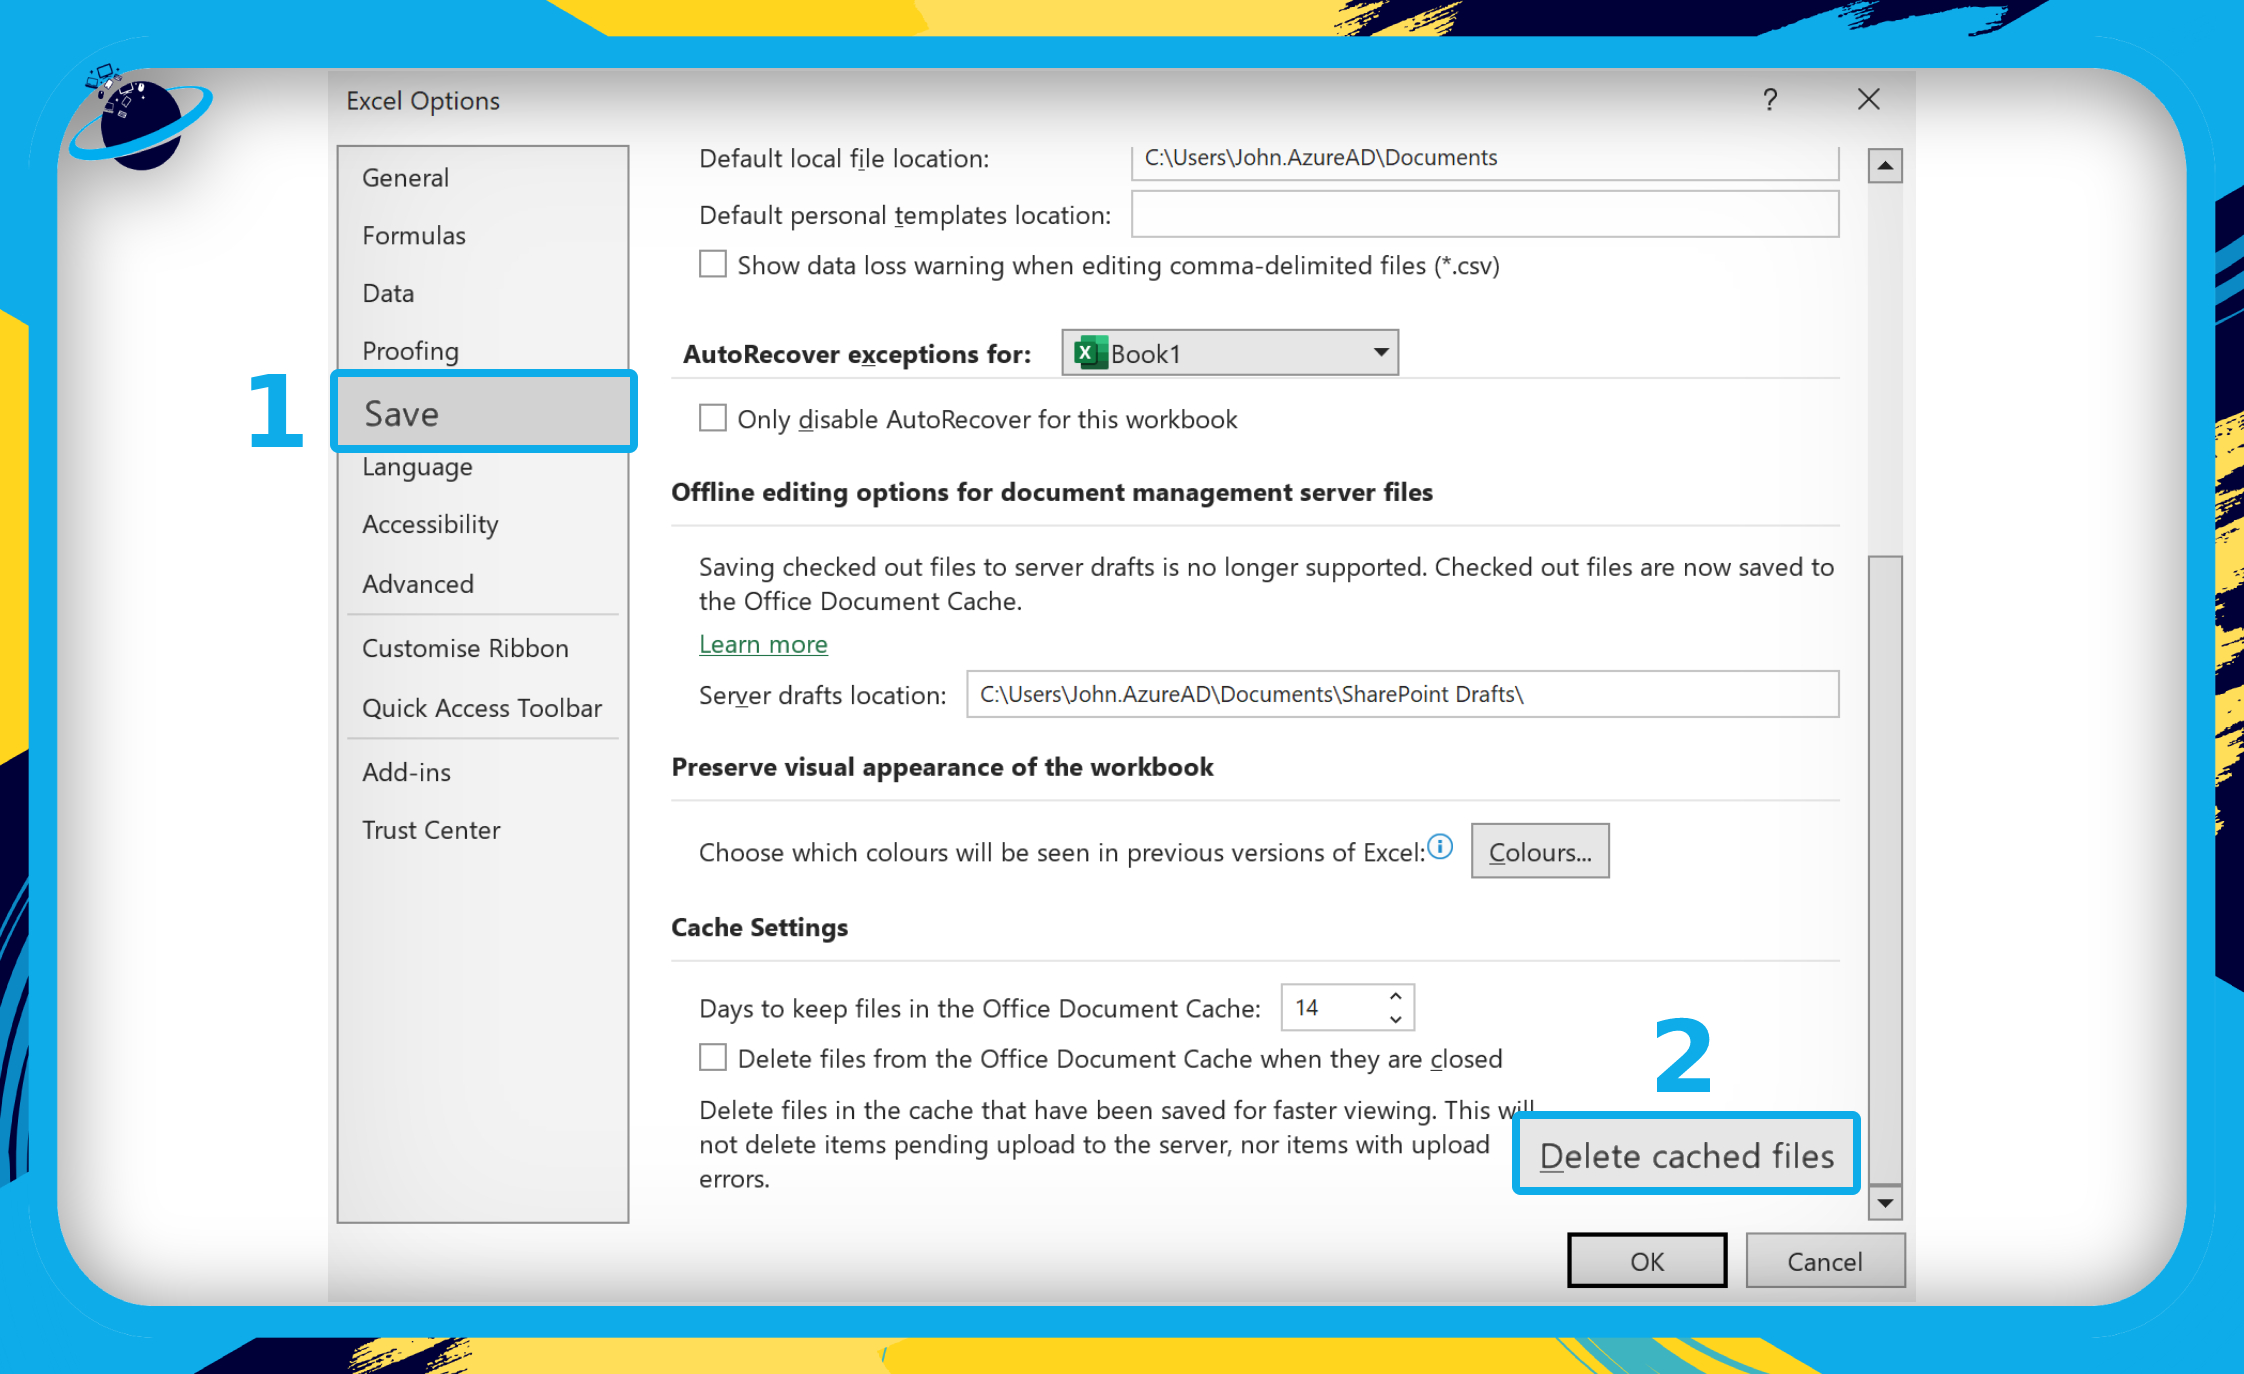
- Click on “Save.”
- Go down and click the “Delete cached files” button.
How to fix SharePoint not updating with latest version of a document (Office Upload Center):
- Type “Upload Center” into your Windows search bar.
- Click “Open.”
- Go to “Settings” in the Upload Center.
- Then click the “Delete Cached Files” button.
Please note that the Microsoft Upload Center is being replaced and may not appear for Microsoft 365 users. In that case, use solution 1 to delete cached files.
  | |
 Compatible with Windows, Mac OS, and Android. Compatible with Windows, Mac OS, and Android. | FROM $6.00 user/month |
Alternate solutions to fix SharePoint not updating with latest version of a document
It’s easy to sync a Document Library with your computer. Simply navigate to the appropriate location in SharePoint Online and click the big Sync button at the top of the page. After that, SharePoint will install the appropriate OneDrive for Business agent for your device, download all of the data to your local system, and set up continuous sync. On the other side, maintaining such synchronization is more challenging. You’ll see a red “x” in the dark blue cloud icon in your system tray if the sync isn’t working. When you right-click on this icon, a list of sync issues will appear, which should contain all of the files that aren’t synchronizing properly. Here are some of the measures I use to try to address problems.
Pause and restart the folder sync in OneDrive to update the latest version of a document
Stopping the sync by right-clicking the OneDrive for Business system tray icon is the first thing you should do. After that, restart the sync and wait for it to attempt to repair itself. As a result of this procedure, SharePoint will be compelled to re-examine the files it needs to synchronize.
Clone, synchronize, remove, or rename folders to update the latest version of a document in SharePoint.
If a file isn’t syncing (in File Explorer, there’s a red “x” instead of a green checkmark or blue sync sign), try copying and pasting a duplicate of it in its current location. Allow for the upload of this new file (it will have the same name as the original but with the word “copy” attached to the end). Rename the duplicate to the original filename after removing the non-syncing file. This is by far the most effective strategy I’ve ever employed.
Repair if there is a problem with the folder, which is stopping the latest version of a SharePoint document from updating
If all other options have failed, it’s time to bring in the big guns. A “repair” option appears when you right-click the system tray icon. While this looks to be a straightforward first step, “repair” is a far-reaching solution that archives everything you currently have synced to your PC and then re-downloads everything from SharePoint online. This necessitates a substantial amount of storage, bandwidth, and time. You’ll also have to manually examine that archived folder for any changes you made to local files that never made it back to SharePoint.
Corrupted SharePoint files may be stopping an update to the latest version of a document
If the file previously opened but no longer does, it might be a corrupt file or the format is incompatible with any of your programs. Make sure you try to open a file after you save it to ensure it was saved correctly. If you’re sharing a file with others, be sure they all save their files in the same format. If a spreadsheet is opened as an.xls file, for example, make sure it’s saved as an.xls file.
The following file formats are not supported in SharePoint
Newer versions of Office provide new features that aren’t accessible in previous versions. Earlier versions can read documents generated by newer versions, while newer versions cannot read documents created by older versions. Excel 2016, for example, saves files in the.xlsx format, but Excel 2003 only reads files in the.xls format. Make sure your users have appropriate versions of Office for documents when sharing files in SharePoint. If you use Microsoft 365, you may use the web link to download the most recent version on your desktop.
   |

How to fix SharePoint not updating with the latest version of a document
Solution 1: Delete cached files in the Save settings of an Office document
Please note that this solution works for the desktop version of Microsoft Office.
- Open a Microsoft Office application, such as Excel or Word.
- Click on “File” in the top menu.
- Go down to “Options” at the bottom of the left menu.
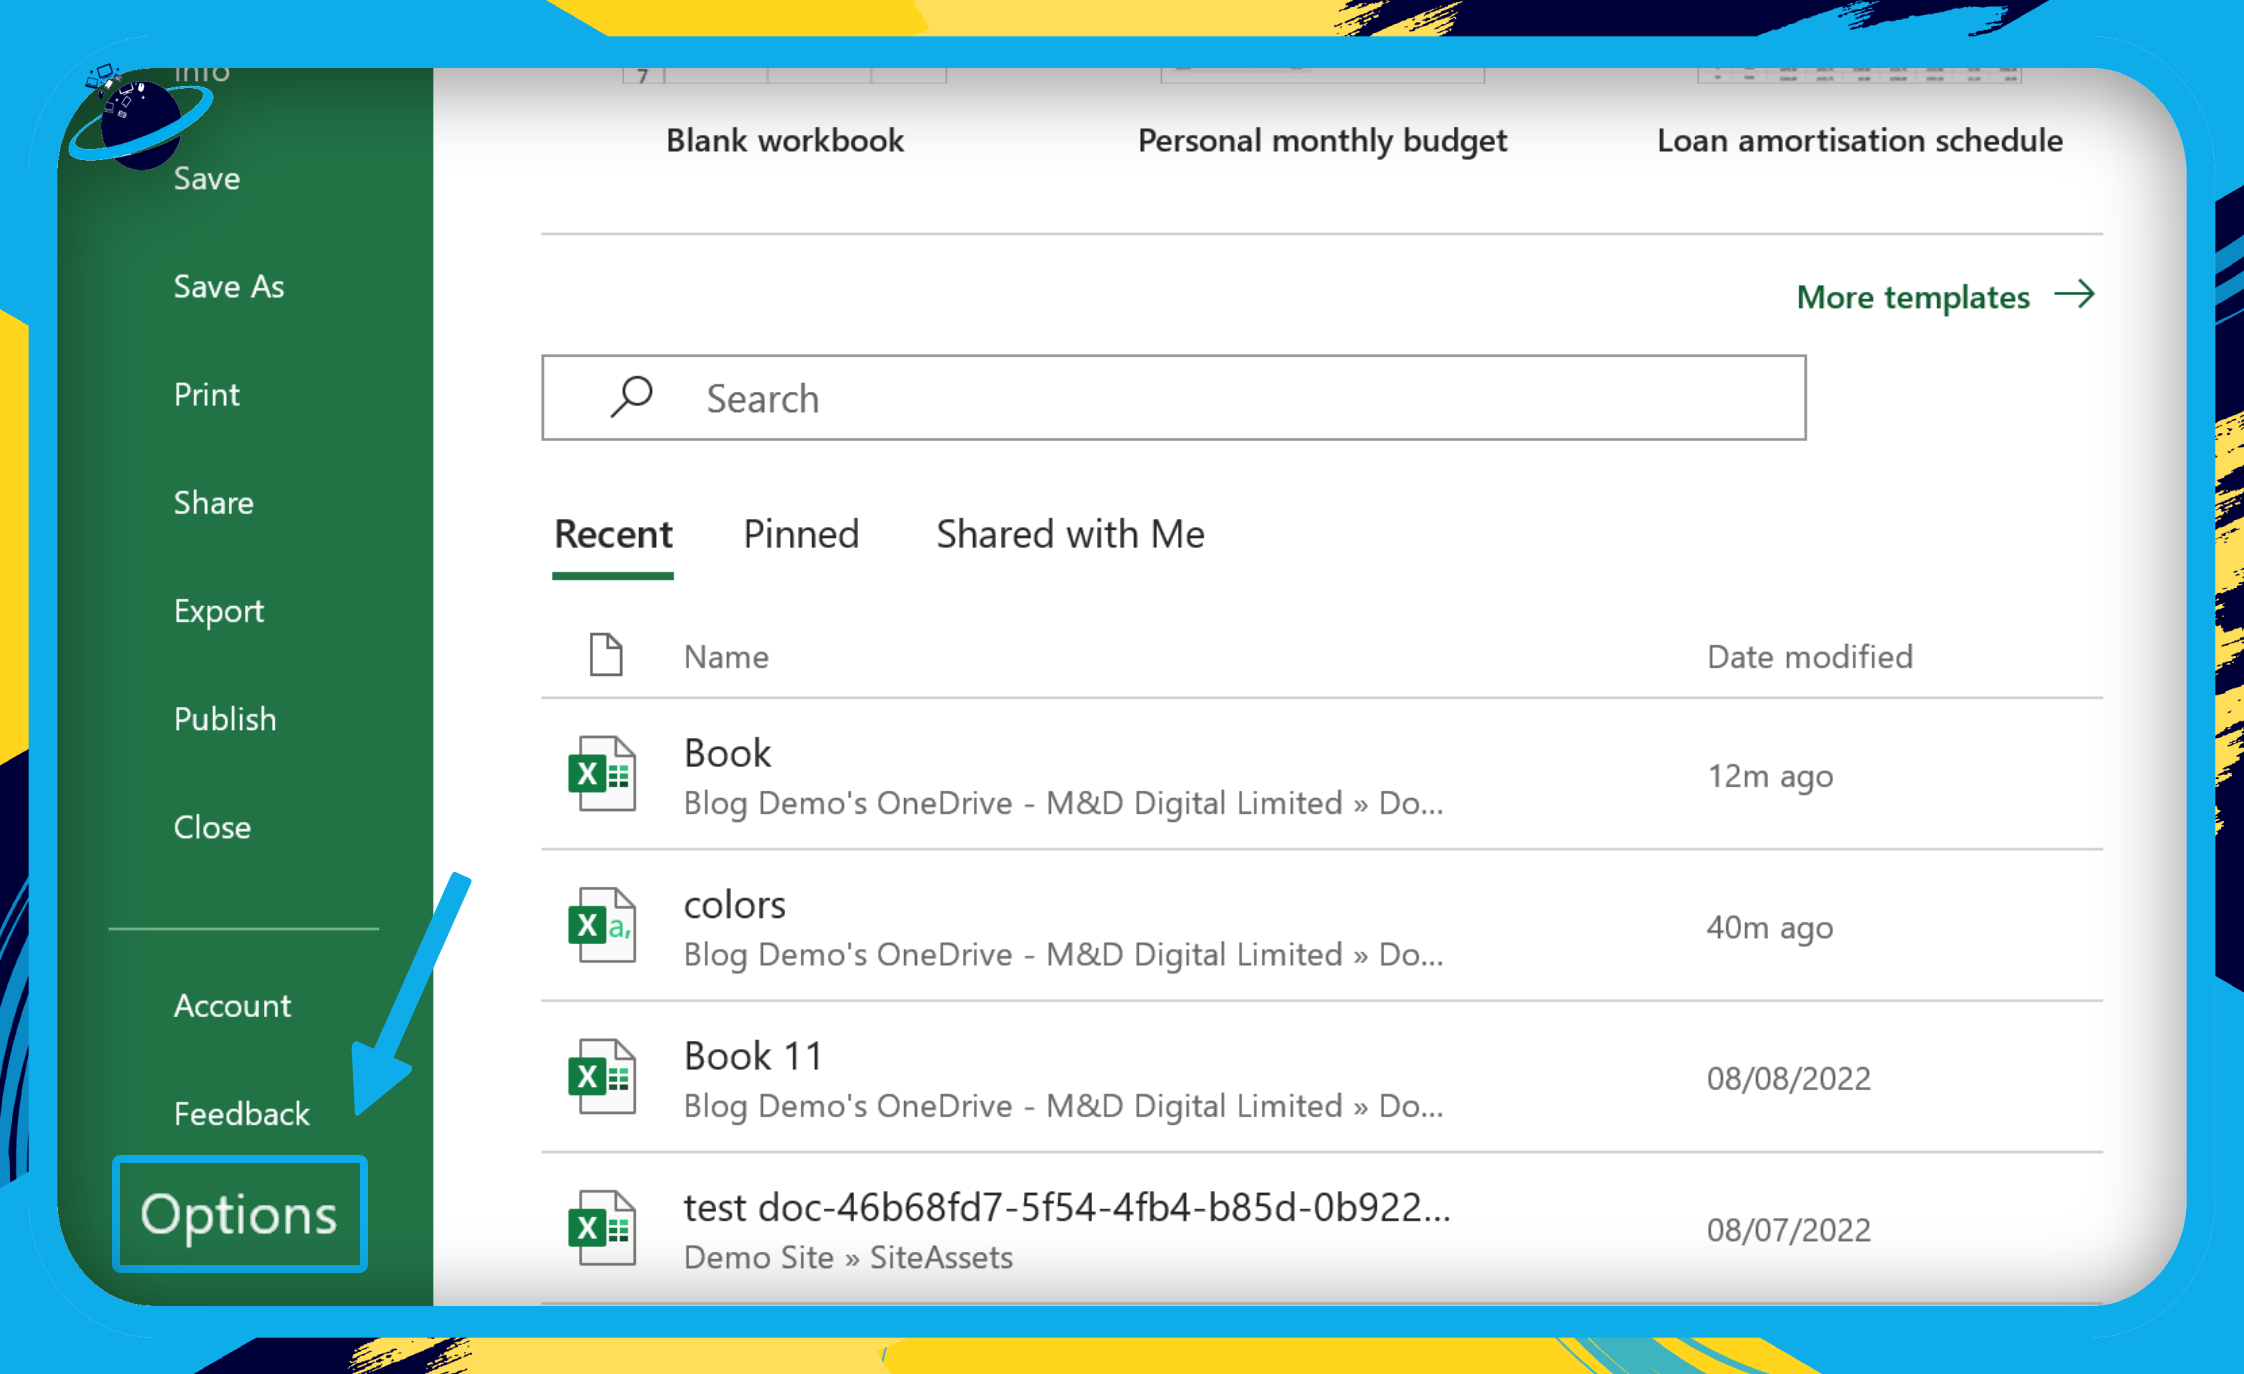
- Click on “Save” in the Options dialog box. (1)
- Go down and click the “Delete cached files” button. (2)
- Finally, click “Delete Cached Files” again when prompted to confirm.
Solution 2: Delete cached files in the Office Upload Center
Please note that the Microsoft Office Upload Center is being replaced and may not appear.
- Alternatively, click on “Start.”
- After that click on “Microsoft Office.”
- Next, click on “Microsoft Office Tools.”
- Now click “Microsoft Office Upload Center.”
- Type “Upload Center” into your Windows search bar.
- In the Upload Center, click on “Settings.”
- Now click the “Delete Cached Files” button.
- Finally, when you are shown a prompt, click on “Delete cached information.”
That’s it for this Blog thank you for taking time out to read our content, please feel free to email our team about how it went if you followed the steps or if you need more help with the questions we answered in this Blog.