Moving data and files from place to place can be quite complicated if the most efficient ways are not known. Below is a step-by-step guide on how to easily move data and files from Google Drive to Microsoft SharePoint.
Unfortunately, there are no free apps available to make this movement of documents easier. This could be because of the complexity of moving files across apps or possibly because of the size files can become. The process below is therefore the quickest and most efficient way to move files from Google Drive to SharePoint without needing to spend on it.
There are however some programmes you can install to do this move for you, but they are priced based on the number of users/amount of data you need to move over. These would be good for larger companies with a lot of data to move over. You will find these by searching for something along the lines of ‘Google Drive to SharePoint migration’ into the internet. They all have their own processes and instructions on their individual websites for you to follow. If you are interested in these, go to the bottom of the page.
Step by Step guide to migrate data between Google Drive and SharePoint (for free)
- Open Google Drive.
- Select ‘Team Drives’ if this is where you have the files to move saved or if it is a personally saved document, you want moving go into ‘My Drive’.
- Open the folder you want to move, if you do not have the things in a folder move on to the next step.
- Select all the documents which you wish to move.
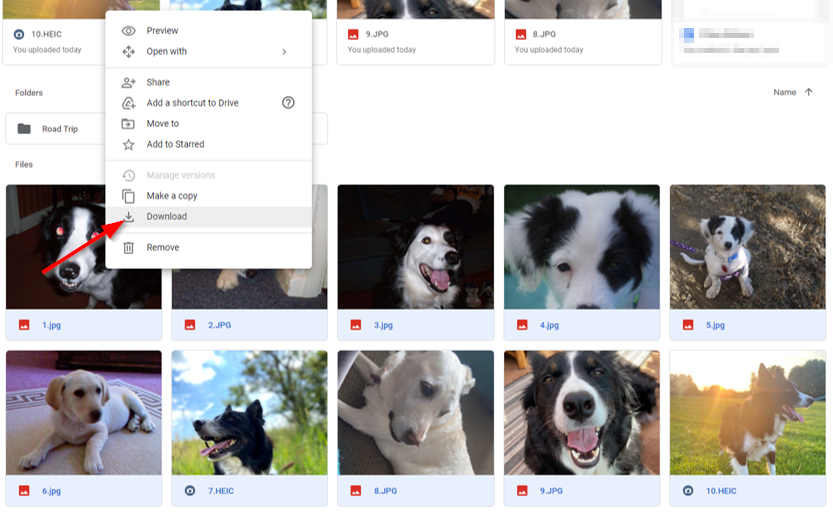
- Right click on the selected documents and press ‘download’.
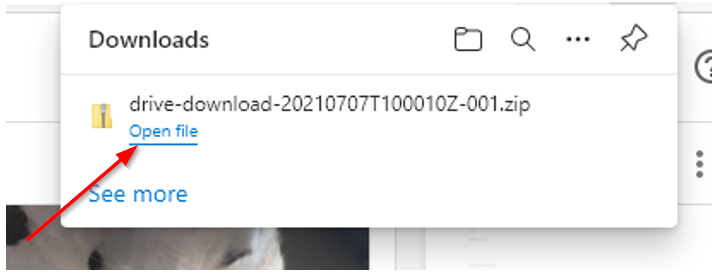
- Once downloaded they get compressed into a ‘.zip’ file. On the top right-hand side of the screen an option will come up to open these files. Select ‘open files’.
- In another tab, sign into your Microsoft 365 account.
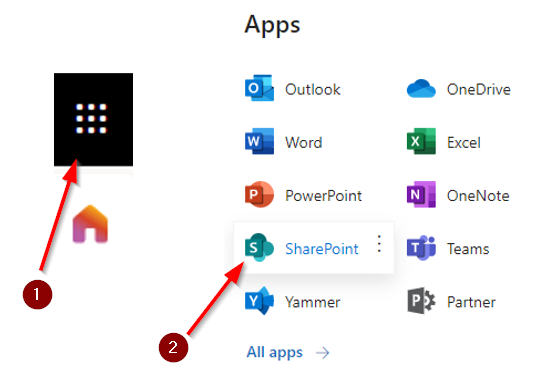
- Open the app launcher and select SharePoint.
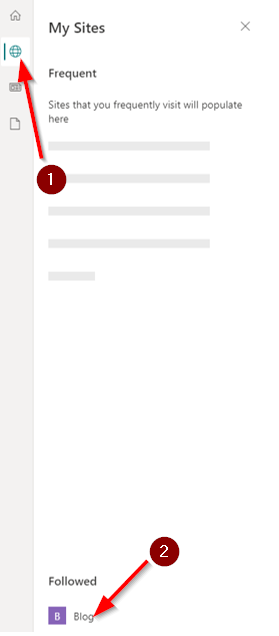
- Find the SharePoint site where the files are to be uploaded.
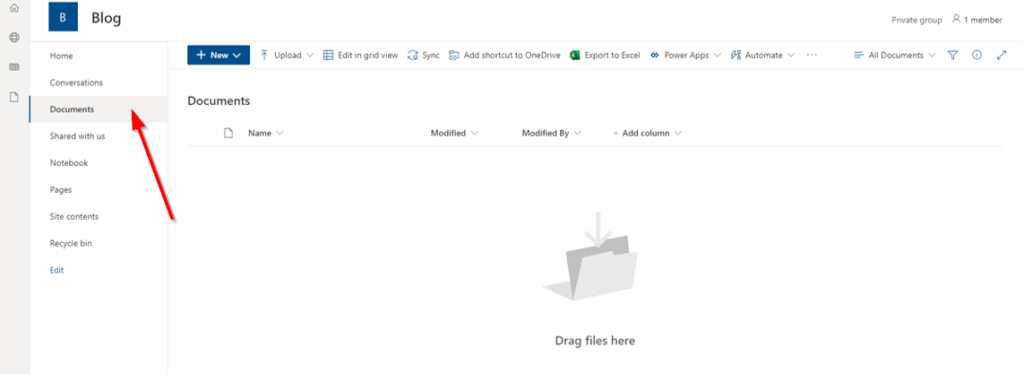
- Choose ‘Documents’ on the site menu.
- Go to the file explorer which was opened in step 6 and select all the files in there.
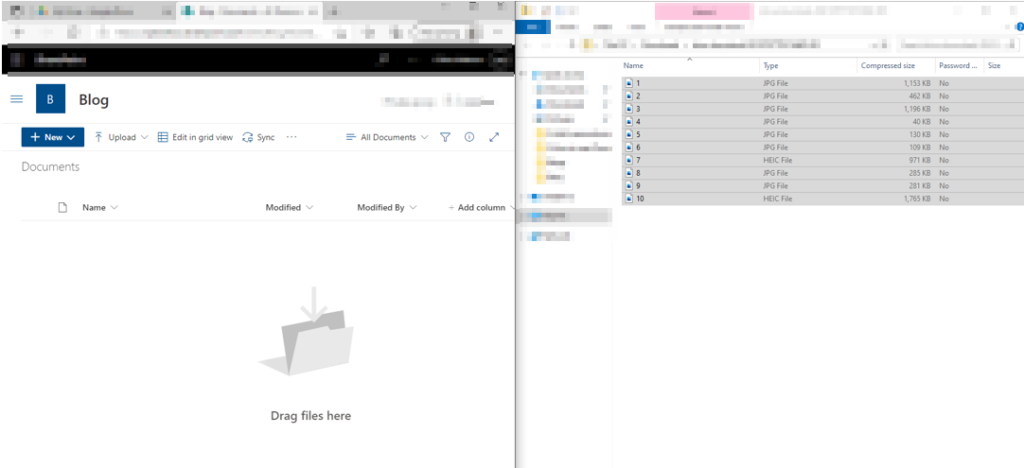
- Drag the files selected into the documents folder on your site. If easier, have the two tabs open side by side to allow a simple grab and drop movement. If the grab and drop method does not work go to the next step for an alternative.
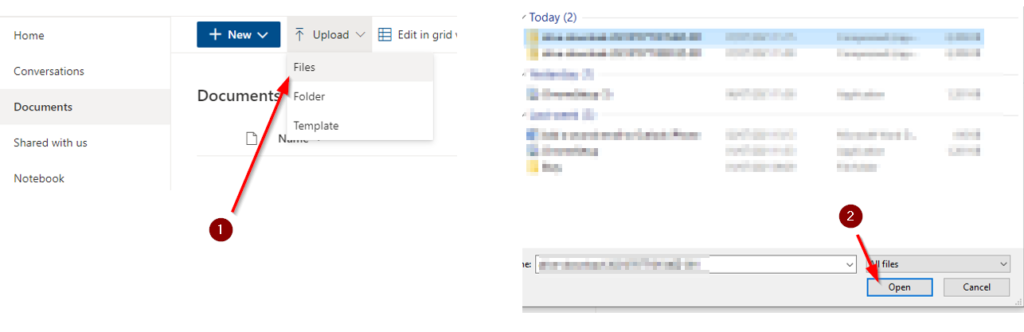
- Step 11/12 alternative: When on the site, choose the upload button. Select files and then choose your files that you want to add before pressing ‘open’.
The files will now appear in the site showing up as the same as the folder that was selected. If you click on this folder, each individual file will be inside.

Step by Step guide to migrate data between Google Drive and SharePoint (with photos)
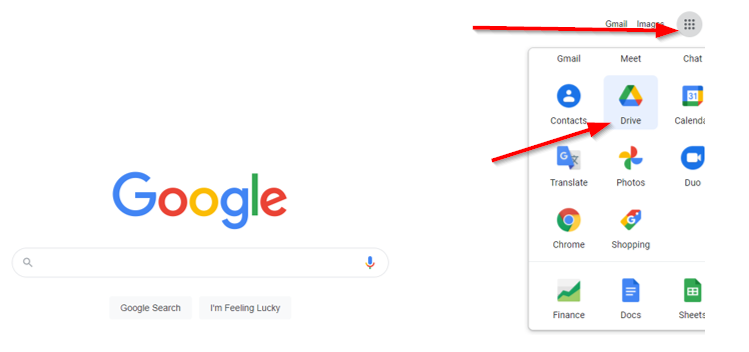
Step 1) Open Google Drive from the drop-down menu.
Step 2) Select ‘Team Drives’ if this is where you have the files to move saved. If it is a personally saved document you want moving go into ‘My Drive’. (The ‘Team Drives’ option is directly underneath the ‘My Drive’ option if you have a team drive.)
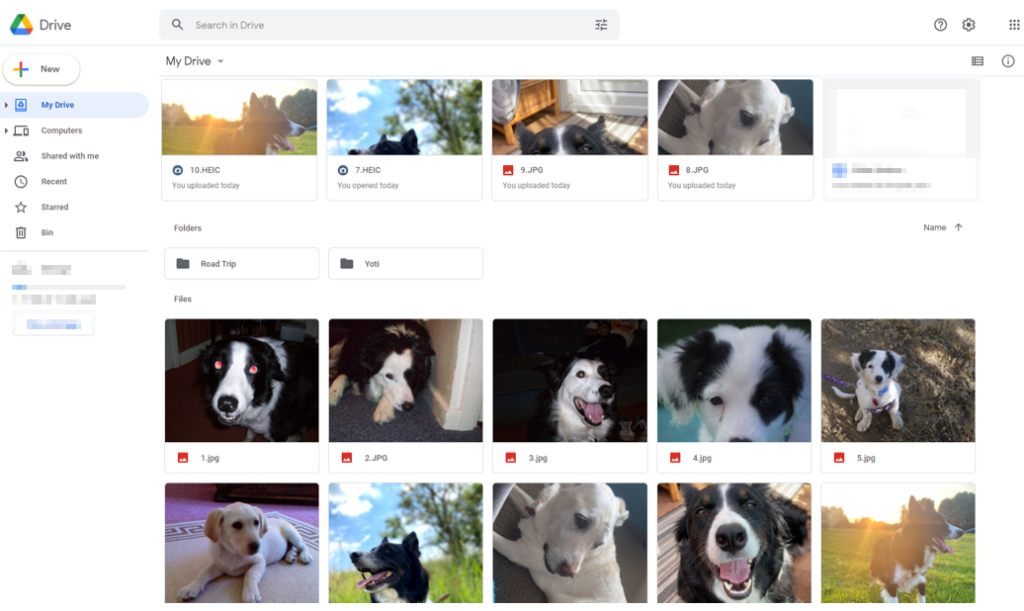
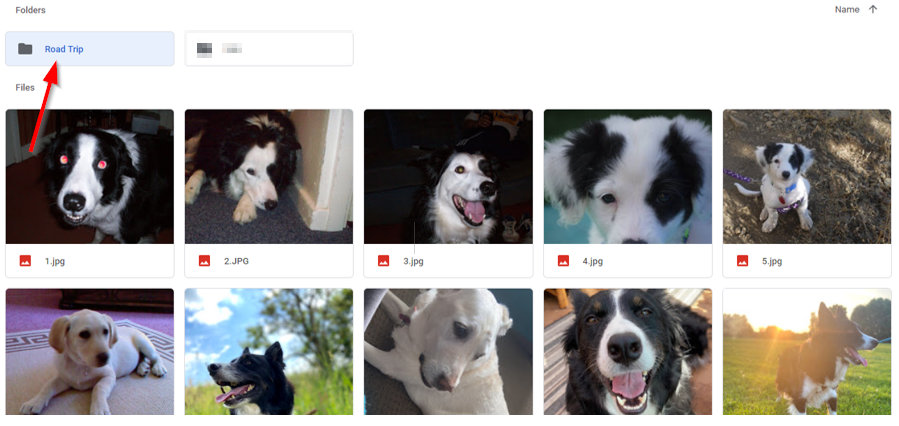
Step 3) Open the folder you want to move, if you do not have the things in a folder move on to the next step.
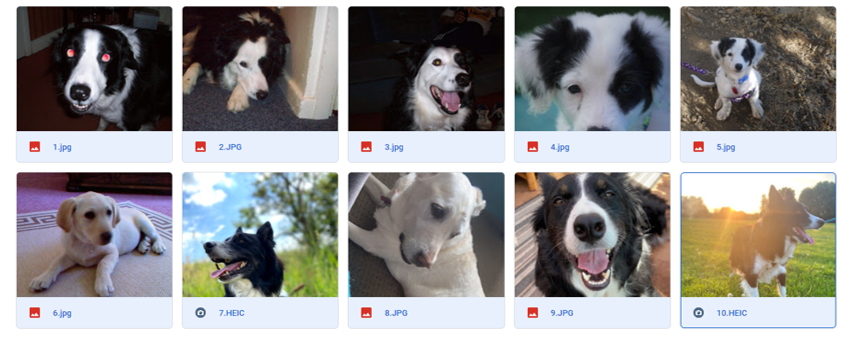
Step 4) Select all the files which you wish to move. These could be documents, spreadsheets, photos, or anything else that you may need to move. (Once selected they will have a little blue square around. To select multiple documents, either drag your mouse across all of them to create a big box around them or keep holding down ‘Ctrl’ and individually click on the wanted documents.)
Step 5) Right click on the selected documents and choose ‘Download’.
Step 6) Once downloaded they get compressed into a ‘.zip’ file. On the top right-hand side of the screen an option will come up to open these files. Select ‘Open file’.
Step 7) Sign into your Microsoft 365 account as normal.

Step 8) Open the app launcher in the top left-hand corner and select SharePoint.
Step 9) Find the SharePoint site where the files are to be uploaded.
Step 10) Choose ‘Documents’ on the site menu.
Step 11) Go to the file explorer which was opened in step 6 and select all the files in there.

Step 12) Drag the files selected into the documents folder on your site. (If easier have the two tabs open side by side to allow a simple grab and drop movement as seen below.)
Step 11/12 alternative) When on the site, choose the upload button. Select files, choose your files that you want to add and then click ‘open’.
The files will now appear in the site showing up as the same as the folder that was selected. If you click on this folder, each individual file will be inside.
   |
Data Migration Websites (paid) to migrate data from Google Drive to SharePoint
Below are three different data migration websites which all offer slightly different packages.
CloudFuze to migrate data from Google Drive to SharePoint
- Multi-user migration
- Keeps folder structure
- Keeps sharing permissions
- Transfer unlimited terabytes of data
- Track migration status
- Pay for a one-off use or for annual use
- Customer service support teams
- Ask quote to get the pricing for you
| Website: https://www.cloudfuze.com/ |
| Pricing: https://www.cloudfuze.com/pricing/ |
Cloudiway to migrate data from Google Drive to SharePoint
- Automated Tools
- Uses Azure Framework
- Can be moved to SharePoint/OneDrive or both
- Can migrate files/folders/permissions/metadata
- When possible, google docs will be converted in Office 365 format
- $9.50 (£6.90) per user license – Mailbox or File
- $14 (£10.16) per user license – Migration Bundle (which includes: mailbox, files, online archives)
- $50 (£36.30) per team – Teams Migration (which includes: unlimited users, choice of teams to migrate, shared drives, channel conversations, sites, files, OneNote, planner, and permissions)
| Pricing: https://cloudiway.com/pricing/ |
BitTitan to migrate data from Google Drive to SharePoint
- Includes planning and strategy guide
- There is no way of monitoring the migration
- Can migrate files/folders/metadata/shortcuts/permissions/version(up to 25)
- Uses Azure for security and safety
- $12 (£8.71) per user – Mailbox Migration (50GB data limit, range of supported end points)
- $15 (£10.89) per user – User Migration (mailbox, documents, archives automatic outlook configuration, no limit for amount of data)
- $25 (£18.15) per user – Tenant Migration (move/consolidate M365 tenants, exchange/OneDrive/SharePoint/teams included)
- $48 (£34.85) per team – Collaboration Migration (teams/channels/conversation history/chats + more included, 100GB data limit, monitored and manageable, Autodiscover and import of teams)
- $25 (18.15) per document library – Shared Document Migration (files/folders/permissions/versions/metadata included, will migrate to Google drive/SharePoint/Office 365, 50GB data limit)
- $114 (£82.76) per 10GB – Public Folder Migration (emails/calendars/contacts/files included, can migrate to a shared mailbox)
- $5 (£3.63) per user – Hybrid Exchange Management (Autodiscover users/data, automate batching, monitor/manage multiple batches long term)
| Pricing: https://www.bittitan.com/pricing/ |