Microsoft Excel is a spreadsheet editor and creation tool providing various means to organise data, calculate values and display information. Amongst its vast array of features is data validation. For data to be valid it must be as expected. In Excel, data validation allows us to set cells to only accept certain forms of input — or specific values from a list, such as a dropdown.
In this blog post, we’re going to demonstrate how you can create dropdown lists in Excel. As well as giving the steps below, we’ll walk through the process step by step with screenshots, so you can follow along as we create our demo dropdown.
Solution:
- Open your Excel spreadsheet document
- Select the cells you’d like to add dropdowns to
- Navigate to the Data tab
- Open the Data validation tool
- Set the accepted value to Lists
- Enter values for you dropdown separated by commas
- Ensure your dropdowns work by inputting data to your cells with them
Buy Microsoft 365, offering an email inbox, OneDrive storage, world-class security, and the Office suite (Excel included) for as little as $6.99 per month. Use this link for the best pricing, straight from Microsoft directly.
In this post, we will be providing a step-by-step guide to creating dropdown lists in Excel. If you struggled to follow the brief solution, we recommend following along. We’ll be providing images to help you out along the way.
Quick links:
Creating a dropdown list in Excel (Desktop)
Step 1 – Open your spreadsheet
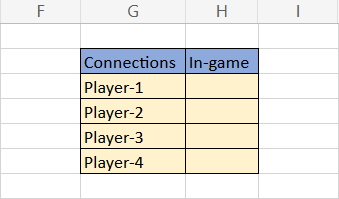
- You’ll need to have some data ready to turn into a dropdown, if you’re just seeing how things work- feel free to copy what we have.
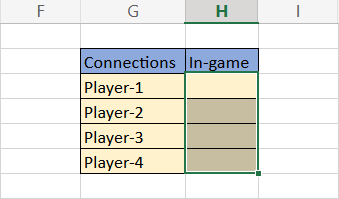
Step 2 – Select the cells you’d like to convert
- If your cells are not close to one another, you can ctrl click to select multiple cells, regardless of their distance from one another. Otherwise, click, hold and drag the mouse to multi-select as usual.
Step 3 – Open the data validation menu via the data tab
- From the upper tab bar, navigate to the Data tab and locate the icon shown below. Clicking it will open the Data validation tool we need to proceed.

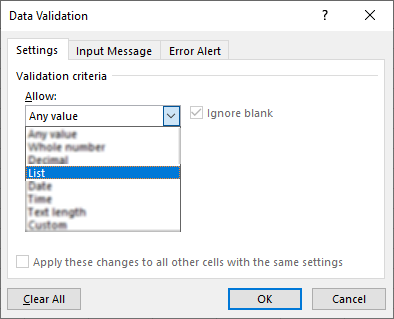
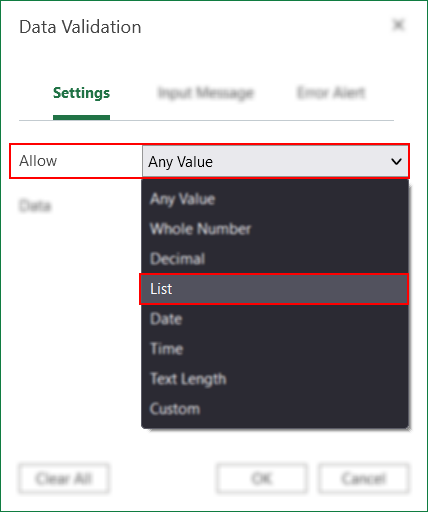
Step 4 – Configure accepted values to a list
- Open the Allow: dropdown and select List. This will allow us to input the selectable values for our dropdown.
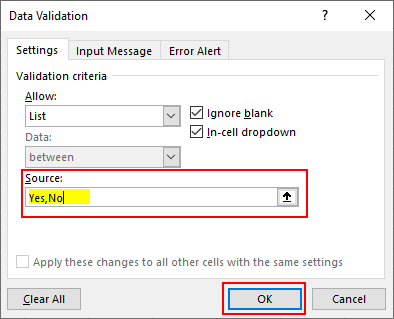
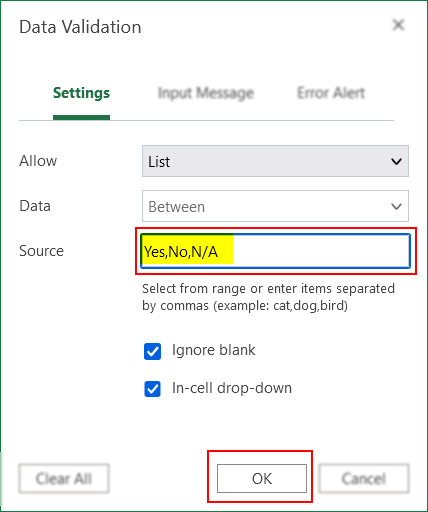
Step 5 – Input dropdown list values
- Using the Source: textbox, input each value, separated by a comma. If you don’t separate each value with a comma Excel will likely mistake it for one large value.
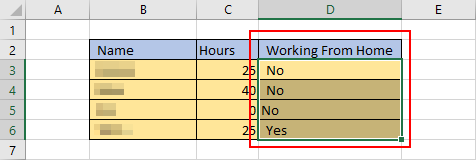
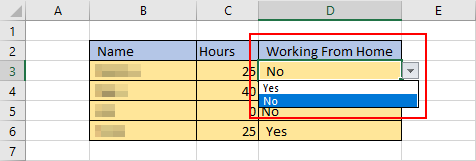
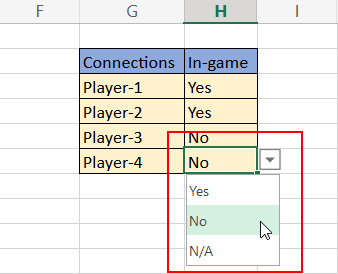
Step 6 – Test your dropdown lists
- To ensure everything is set up correctly, have a look at your cells. Ensure they are working as expected, and that the values are displayed as you intended.

Creating a dropdown list in Excel (Online)
Step 1 – Open your spreadsheet
- You’ll need to have some data ready to turn into a dropdown, if you’re just seeing how things work- feel free to copy what we have.
Step 2 – Select the cells you’d like to convert
- If your cells are not close to one another, you can ctrl click to select multiple cells, regardless of their distance from one another. Otherwise, click, hold and drag the mouse to multi-select as usual.
Step 3 – Open the data validation menu via the data tab
- From the upper tab bar, navigate to the Data tab and locate the icon shown below. Clicking it will open the Data validation tool we need to proceed.

Step 4 – Configure accepted values to a list
- Open the Allow dropdown and select List. This will allow us to input the acceptable values for our dropdown.
Step 5 – Input dropdown list values
- Using the Source: textbox, input each value, separated by a comma. If you don’t separate each value with a comma Excel will likely mistake it for one large value.
Step 6 – Test your dropdown lists
- To ensure everything is set up correctly, have a look at your cells. Ensure they are working as expected, and that the values are displayed as you intended.
End note
Recap
Excel is a powerful platform utilized for the creation of spreadsheets. Amongst many of its various configuration options is the ability to configure cells, which store data, to function as dropdowns. This allows users to control the data that can be input into the cell. Dropdown cells are created via the data validation tool, which can be used to limit the accepted values a cell will take. This is an application of data validation; it allows us to ensure the data we receive is only what we expect to receive.
Buy Microsoft 365, offering an email inbox, OneDrive storage, world-class security, and the Office suite (Excel included) for as little as $6.99 per month. Use this link for the best pricing, straight from Microsoft directly.
Farewell
As usual, this section is dedicated to thanking readers for their support. We’d be pleased to know you found this post useful and/or informative. If you have any more Office 365 related queries, please consult our related articles (listed below). However, if you have other queries, consider looking at the rest of the site. We’re frequently posting new stuff each week and may just have the guide or troubleshooting tips you need. Regardless, we wish you a good day/night. Farewell readers.
Our related articles:
- Excel: Can’t adjust column width: Troubleshooting steps – Spreadsheets are vastly useful, and with Excel’s protect feature, they’re more secure than ever. Despite this, it can sometimes be a little problematic. When cells are locked within a protected spreadsheet, you lose the ability to change them in certain ways. This was intended to prevent inadvertent and/or malicious changes to your work by other users. Fortunately, locks and protection can be turned off in most cases. Stay and read along to find out about locking and unlocking cells, merging cells, manually adjusting cell dimensions and enabling protection for your sheets. All whilst we break down how you should enact the provided solutions.
- How to set default date format in Excel web app – Is collaboration between regions causing your team destructive formatting inconsistencies? We’ve put together a step-by-step guide with pictures to show you how you can alter the default date format for the web version of Excel. We additionally discuss the importance of consistent formatting, and what exactly date formats are. As such, if this sounds like an issue you’re facing, we urge you to read along.
- How to stop Excel rounding numbers – On your worksheet, some numbers with one or more decimal places may seem to be rounded. This can happen when the column isn’t large enough for the whole number if it isn’t the consequence of using a rounding function. It can also happen if the format is configured to display fewer decimal places than the real value has. In this blog, we will be looking at solutions to help users resolve Microsoft Excel rounding numbers and find possible solutions to help prevent the error from occurring again. We will also address some of the issues that can cause Microsoft Excel rounding numbers so users are more aware of what they are dealing with and what approaches they need to take to resolve Microsoft Excel rounding numbers.
- Excel won’t let me type: Causes and Fixes – Within Microsoft Excel, you as the user may sometimes encounter issues that, though relatively simple to solve, can prove unfathomably frustrating. One such issue is when, seemingly out of nowhere, you are not able to type within the cells of your spreadsheet anymore. More often than not, the issue that prevents you from typing within the application of Microsoft Excel are add-ins. In case you’re unaware, add-ins are provided in order to offer Excel a wider field of application, making it accessible on the likes of Mac, iPad, or a browser, as opposed to the conventional Windows usage.