With default settings, all folders in a SharePoint site have the same permissions. With this setup, all users — depending on permission level — can access everything within a site. If you want to control access to certain areas of your SharePoint site, giving unique permissions to a folder is one way of doing it. In this blog post, I’m going to explain how you can give unique permissions to a folder in SharePoint Online.
Using the steps below, you can give unique permissions to a folder in SharePoint:
- Navigate to Office.com > sign in using your Microsoft credentials > open SharePoint
- Open the site where you store the folder
- Locate the folder in your site
- Select the folder > click the three vertical dots (⋮) > click Manage access
- Click Advanced
- Click Stop Inheriting Permissions
- Select user groups using check boxes > click Edit User Permissions or Remove User Permissions
- Click Grant Permissions
- Enter names/email addresses/group name > Check/uncheck additional options > select permission level > click Share
Please note you must be a site owner to follow these steps. You cannot control folder access if you are not a site owner.
The steps above break permission inheritance and instruct on editing, removing, and granting permissions to users. This blog post’s a bit of a walkthrough with screenshots of each step. I’ll explain each step in a greater detail, including how permissions work and how you can create new groups.
   |
How To Give Unique Permissions To A Folder In SharePoint Online
With no customization, folders in SharePoint inherit the permissions of their parent folder. With default settings, users in the three pre-made SharePoint groups — Members, Owners, and Visitors — have access to everything stored in a SharePoint site (although the visitor group permissions are view-only). With that in mind, I would recommend giving unique permissions to folders containing important and confidential items.
Follow the steps below to give unique permissions to a folder in SharePoint Online:
- Navigate to Office.com > sign in using your Microsoft credentials > open SharePoint
- Open the site where you store the folder
- Locate the folder in your site
- Select the folder > click the three vertical dots (⋮) > click Manage access
- Click Advanced
- Click Stop Inheriting Permissions
- Select user groups using check boxes > click Edit User Permissions or Remove User Permissions
- Click Grant Permissions
- Enter names/email addresses/group name > Check/uncheck additional options > select permission level > click Share
I’m going to demonstrate the process above, taking screenshots along the way. I’ll also explain the finer points in more detail, such as how permissions work and how you can create your own groups to save time.
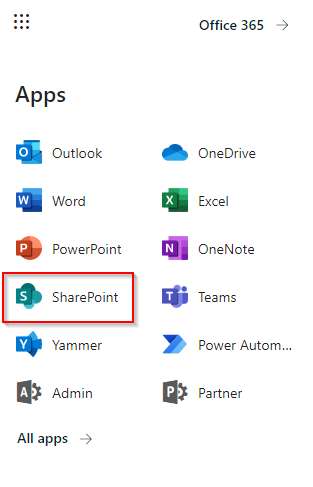
1. Navigate to Office.com > sign in using your Microsoft credentials > open SharePoint
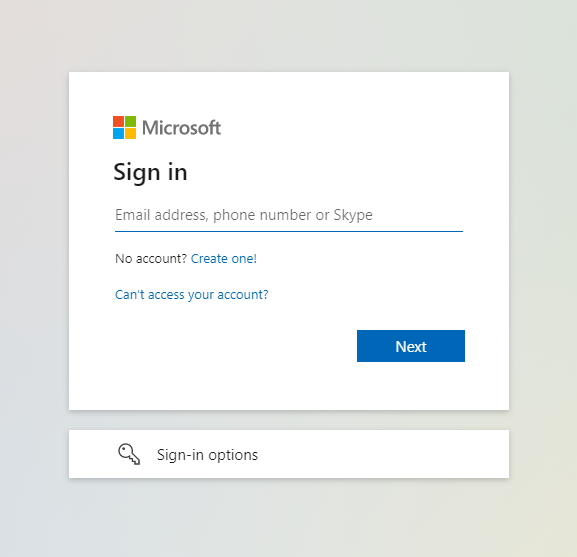
Use any browser to navigate to Office.com. Once you’re there, sign in using your Microsoft 365 credentials.
Once you’re all signed in, open up the app launcher and click SharePoint to open the SharePoint application.
2. Open the site where you store the folder
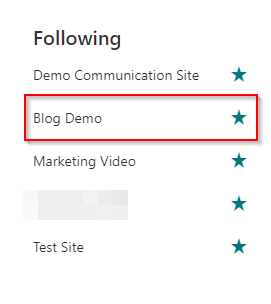
Open up the SharePoint site where you’re storing the folder you want to give unique permissions to. In my case, I’ll be demonstrating using our Blog Demo team site.
3. Locate the folder in your site
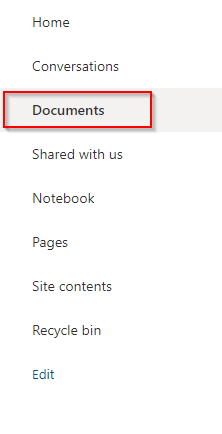
Locate the folder in your SharePoint site. If you have the default setup, it’s likely to be in ‘Documents’.
4. Select the folder > click the three vertical dots (⋮) > click Manage access

After clicking Manage access, a new menu will open. This menu tells you links that are giving access to the folder in question — for example, if one of the site’s users has shared the file with a colleague or an external party — as well as the users and groups that have direct access.
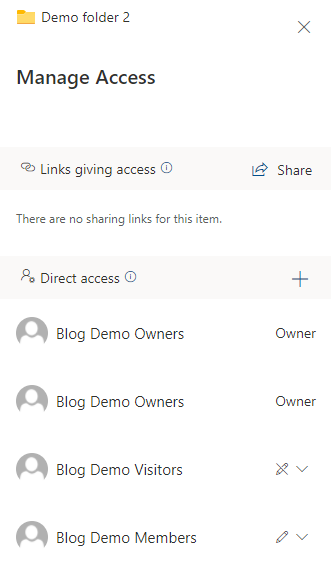
You will see something similar to the screenshot above, with owners, members, and visitors all having access to the folder.
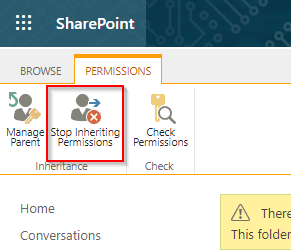
5. Click Advanced
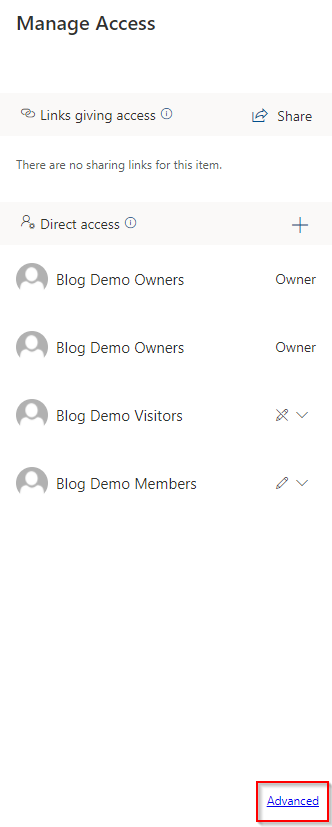
At the bottom of the ‘manage access’ menu, there’s a text link to the advanced access control settings.
If you’re not seeing the text link, this means you don’t have have the necessary privileges. If this is the case, you could ask a site owner to give you the privileges you need.
6. Click Stop Inheriting Permissions
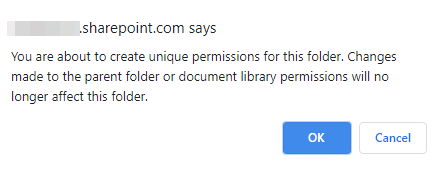
When you first get into the advanced permissions, you’ll see a banner like the one below.

The banner explains that the folder inherits permissions from its parent (which is Documents in our case). By clicking Stop Inheriting Permissions, we break this connection and can set unique permissions for this folder.
When you click Stop Inheriting Permissions, you might get a browser pop-up confirming you want to complete this action. Just click OK or the equivalent to break the permission inherence.
7. Select user groups using check boxes > click Edit User Permissions or Remove User Permissions
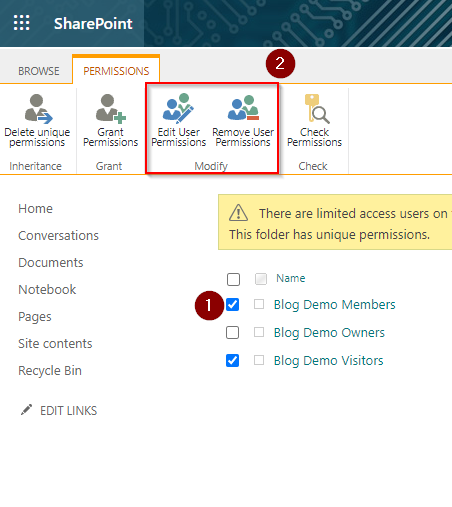
Select the groups that you want to change/remove permissions for using the check boxes. When you do so, options that were previously grayed out — Edit User Permissions and Remove User Permissions — are usable.
If you want to remove permissions, click Remove User Permissions and users in those groups will immediately lose access to the folder. However, if you want the users/groups to keep access but with different privileges, click Edit User Permissions. This will open another menu, which I’ve included a screenshot of below.

In this menu, you can set the permissions for the users/groups you’ve selected. Your options are:
- Full Control
- Design
- Edit
- Contribute
- Read
- Restricted View
After choosing the permissions for the users/groups, click OK. This will take you back to the previous screen, which now reflects the permission changes. For this blog post, I set the permission as ‘Restricted View’, which lets people view documents but not download them.

8. Click Grant Permissions
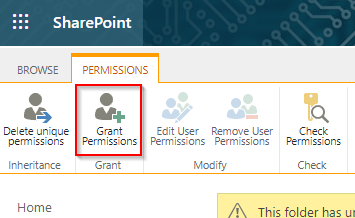
If you want to grant permissions rather than revoking or modifying existing permissions, click Grant Permissions.
9. Enter names/email addresses/group name > Check/uncheck additional options > select permission level > click Share
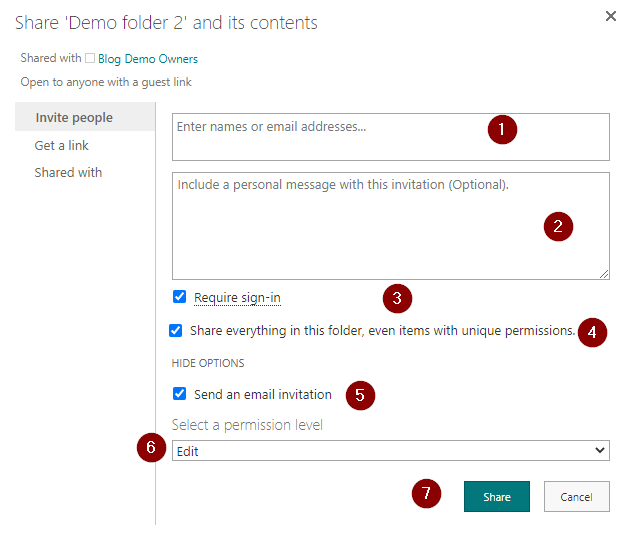
After clicking Grant Permissions, a new child window will open. Here you can grant people access to the folder in question.
First, enter the names/email addresses of the users you want to grant folder access to. You can also give access to an entire group, rather than individuals. If you want to grant access to numerous users, creating and adding a group is a simpler process than adding everyone individually.
I wrote a blog post — How To Create A New Group In SharePoint — that walks you through creating a group and adding users to it. If you’re granting many users access, create a group and then add the group instead of adding individuals. By doing that, you make it easier to quickly control and remove access in the future.
Optionally, include a message explaining what the folder is for the users you’re inviting. Then there are a few other settings you can check/uncheck:
- Require sign-in: This requires users to sign in to their account before they can access the folder and its contents.
- Share everything in this folder, even items with unique permissions: Exactly what it says on the tin.
- Send an email invitation: Choose whether you want users to receive and email about the permissions you’ve granted them.
- Select permission level: This is particularly important. Choose a permission level for the users you’re granting folder access to.
Finally, click Share to grant access to the folder in question.
By following the steps above, you’ve broken permission inheritance and dictated who can access the folder in question. This is handy for folders that contain confidential items that you don’t want every member of your site accessing.
Thanks for reading! I hope you’ve found my blog post useful. Please feel free to leave a comment below and I’ll reply as soon as possible.
   |