During large workshops and webinars, you can find numerous breakout rooms with participants who need to move from one room to another. Moving rooms can be helpful for briefings and presentations that apply to particular teams within your organization.
Currently, there is no option for attendees to move freely between breakout rooms in Microsoft Teams. The participants who can move between breakout rooms are organizers and managers.
Fortunately, there is a workaround that requires all participants to become managers.
In this article, you will learn how to move between breakout rooms, learn more about participants, and discover who managers are and what they can do.
 Table of Contents Table of Contents– What are breakout rooms? – Who are the participants? – Can presenters manage breakout rooms? – How to move between breakout rooms. – Future updates to breakout rooms. – Conclusion. |
What are breakout rooms?
A breakout room is a separate space outside the main lobby where smaller groups can participate in focused activities. A focused activity could be a brainstorming session or a presentation designed for a particular department.
You can record breakout rooms independently of the main lobby, and organizers can assign presenters to run the room. However, only organizers and managers can create and manage breakout rooms.
| Read more: Are breakout rooms in Teams recorded? |

Who are the participants?
The participants are anyone who is taking part in the meeting. That could be an organizer, presenter, or an attendee. Below you will find a comprehensive list of options available for each role.
Attendee:
| – Share audio |
| – Share video |
| – Use the chat feature |
| – View shared PowerPoint files |
| – Use an app |
Presenter:
| – All of the above + |
| – Share content |
| – Take control of all PowerPoint presentations |
| – Mute or remove attendees |
| – Admit attendees from the lobby |
| – Change participant roles |
| – Record rooms |
| – Enable and disable live transcription |
| – Add and remove apps |
| – Edit app settings |
Organizer & Manager:
| – All of the above + |
| – Create, edit, and remove breakout rooms |
| – Edit meeting options |
Can presenters manage breakout rooms?
No, presenters can run a breakout room, but only organizers and managers can manage them. By ‘run,’ we mean present and manage the attendees within the meeting (mute, remove, etc.). By ‘manage,’ we mean to create or remove breakout rooms and assign participants.
How to move between breakout rooms
This section will focus on how to move between breakout rooms in Microsoft Teams. We will accomplish this by setting all participants to the manager role (Desktop version required). To start this guide, you will need two breakout rooms to work with. Read our guide on How to set up breakout rooms in Teams.
| Note: please leave the breakout rooms closed as settings must be changed to enable room management. |
- Assign participants to your breakout rooms if you choose to do so manually.
- Make sure that ‘Who can present?‘ in ‘More‘ > ‘Meeting options‘ is set to ‘Everyone.’
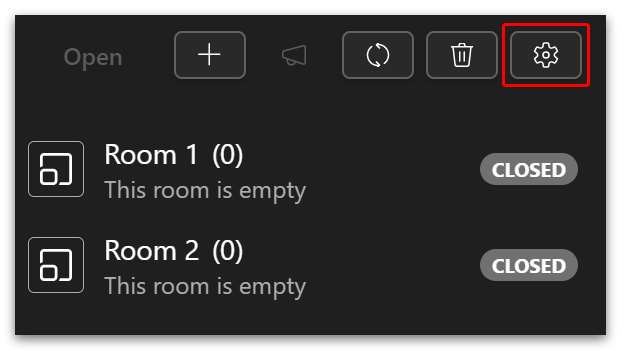
- Then, click on the settings icon.
- Click to toggle on the ‘Assign presenters to manage rooms‘ option.
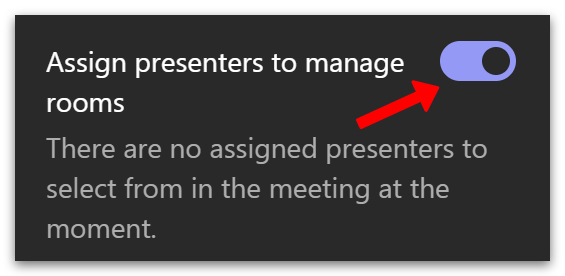
- Click the back arrow < to save changes.

| Note: to set presenters to managers, they must be invited to the meeting directly via the app, not via an invitation link. |
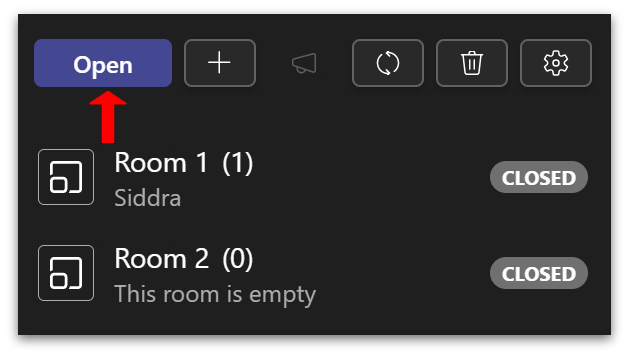
- Finally, ‘Open‘ the rooms.
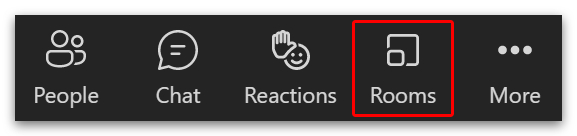
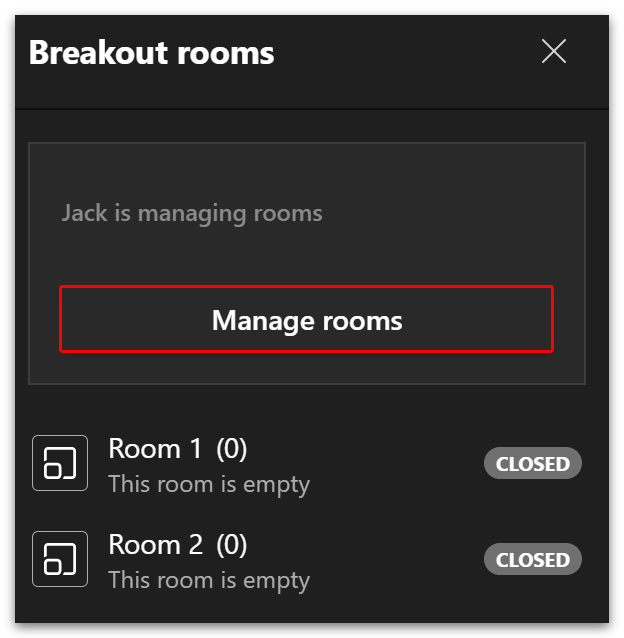
All participants inside the breakout room should now have the option to ‘Manage rooms,’ allowing them to move between rooms. To manage a room, the presenters must do the following:
- Click ‘Rooms‘ on the top menu.
- Click ‘Manage rooms.’
- Click ‘Take over.’
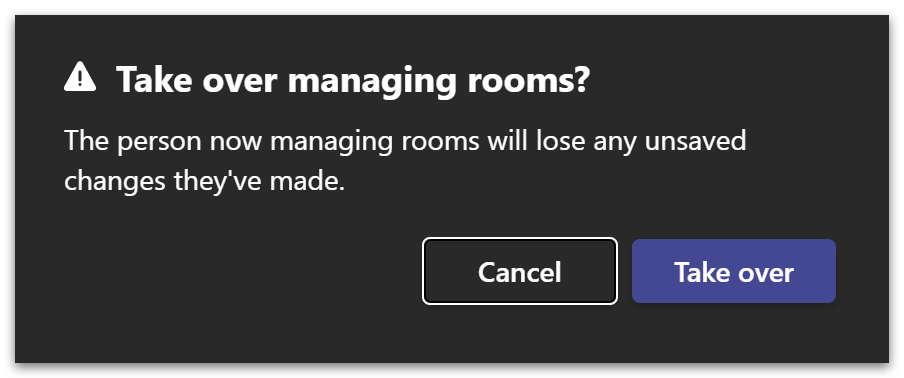
| Note: only one person can manage breakout rooms at any given time. Presenters must ‘Take over‘ every time they wish to change rooms, unless they still have the manager’s role. |
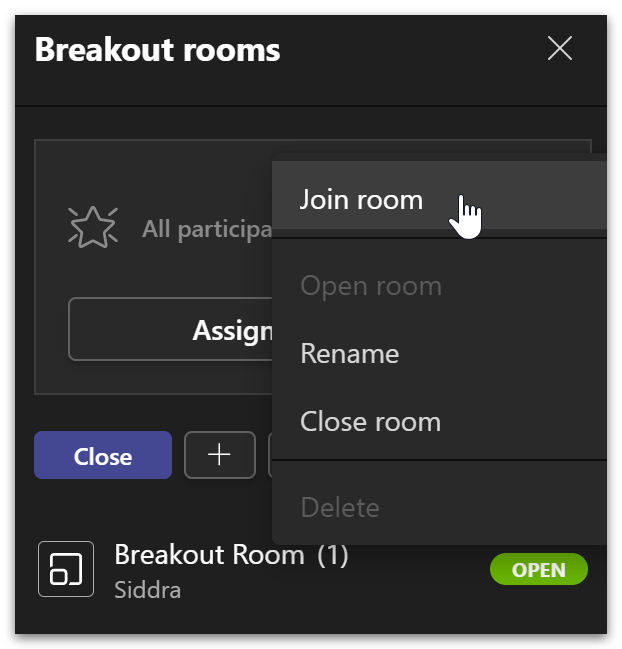
- To move rooms, right-click a new room and select ‘Join room‘ from the drop-down menu.
Future updates to breakout rooms
Unfortunately, there are no road-mapped updates to Microsoft Teams for moving between rooms. However, there are some scheduled updates for setting up breakout rooms before the meeting begins. The feature for ‘pre-meeting’ breakout rooms is due for May 2022.
Another update to breakout rooms is due in June 2022 and will expand the use of breakout rooms to Android. Click the link for a complete list of future updates for Microsoft Teams.
UPDATE: Organizers can now create breakout rooms in advance.
Conclusion
While functional, the solution given in this tutorial may be inelegant and sometimes impractical. We advise that meetings run in this way are made using trusted participants from within the organization.
Giving manager roles to untrusted participants could lead to breakout rooms being mismanaged. Unfortunately, there is no other way for participants to move between breakout rooms without being assigned by the organizer or manager.
Thanks for reading.