If you participate in Teams meetings (not standard calls), you may have encountered breakout rooms. Breakout rooms serve as sub-meetings and can be utilized to manage an exceptionally crowded meeting better. Albeit, some organizers would simply like a private chat from time to time.
Pre-assigning breakout rooms for a Teams meeting is quite simple; however, you will require a PC running the desktop client for Microsoft Teams. If you’d like to get started, try the following steps.
- Schedule a meeting
- Name your meeting
- Invite participants
- Save your meeting
- Open the meeting
- Enter the “Breakout rooms” tab
- Click “Create rooms”
- Set a room count
- Click “Assign participants”
- Assign members manually or automatically
Whether you’re pre-assigning breakout rooms or setting them up mid-meeting, the following step-by-step guides will definitely help. If you’re having trouble with a step, refer to the screenshots I have provided. Our screenshots are intended to give visual clarity to our guide’s steps.
I have provided several links for your benefit. If you’re looking for something specific, you can use the links to access the most relevant content quickly.
- How to pre-assign breakout rooms in Teams
- How to assign breakout rooms during meetings in Teams
- Blog post recap
How to pre-assign breakout rooms in Teams
You can pre-assign breakout rooms in Teams; however, it’s not possible on every Teams version. Breakout rooms are created and managed on the desktop client of Microsoft Teams. Hence, you cannot depend upon the browser and mobile variants for this task. If you have not installed the desktop client, you can download its installer here.
The following guide is only compatible with the Microsoft Teams desktop client. Do not attempt this process with the browser or mobile version.
Step 1 — Schedule a meeting
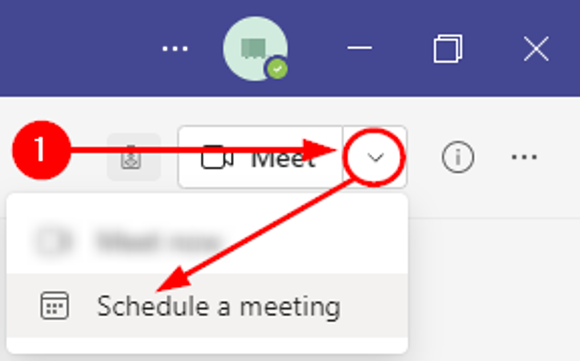
Breakout rooms cannot be pre-assigned unless you schedule and (by extension) set up the meeting beforehand. You can schedule a meeting via the dropdown in the top right; click the downward-facing arrow followed by “Schedule a meeting.”
Step 2 — Set up your meeting
Set up your meeting. You don’t need to do a lot. Name your meeting appropriately and invite its required and optional participants. As you can see, I have named my meeting “Blog Demo” and invited four colleagues.

Step 3 — Edit your meeting
If you were paying attention during the last step, you should have noticed a lack of fields regarding breakout rooms. Don’t worry, that’s normal. We need to edit our newly created meeting— where we will begin creating breakout rooms. In your current chat, you should be able to access a link to your meeting. Select it.

Step 4 — Create breakout rooms
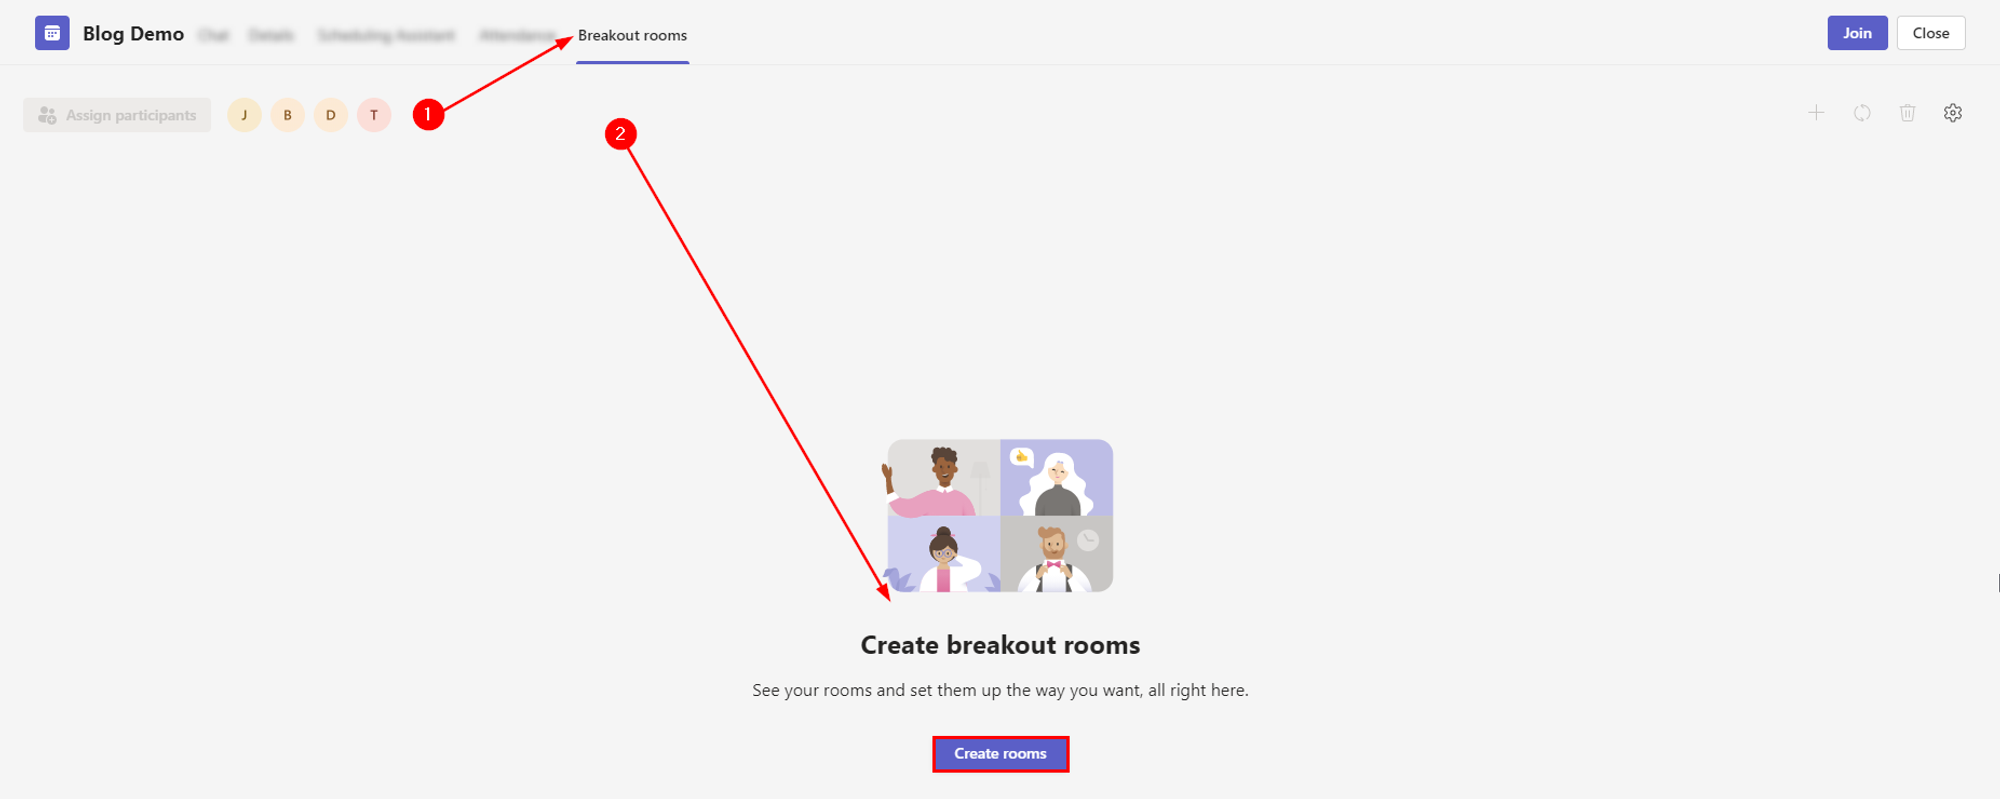
You should see a new entry in the tab bar of your meeting’s settings: “Breakout rooms.” Select the new entry to access its relevant page. Next, find and select the “Create room” button located near the center of the page. Teams will create a prompt asking how many breakout rooms you would like to make; I created two, though you can create up to fifty.
Step 5 — Select assign participants
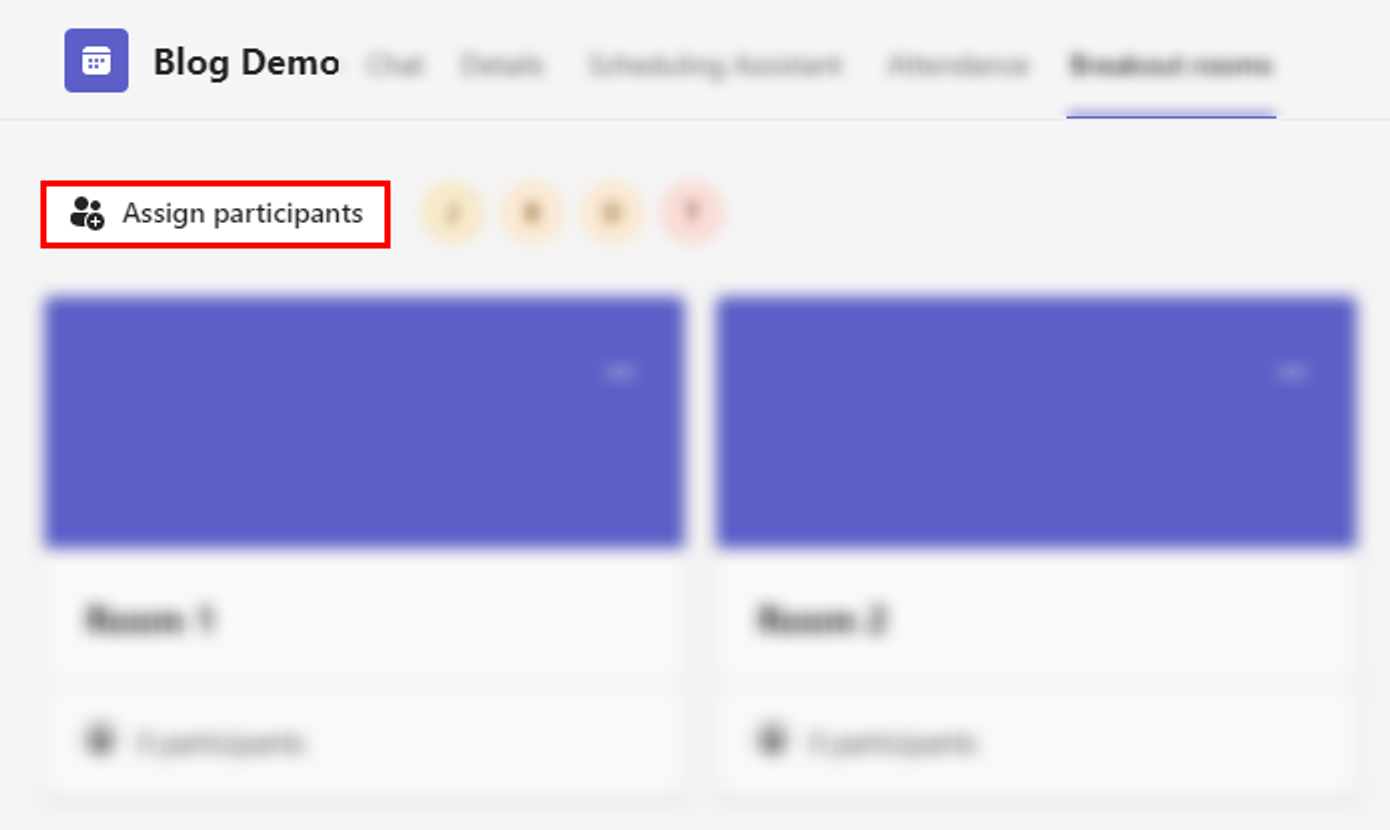
Alright. We have breakout rooms, but there’s still one more thing— our rooms need populating. Under the tab bar, you will find a button labeled “Assign participants.” Please select the button to generate the menu we require.
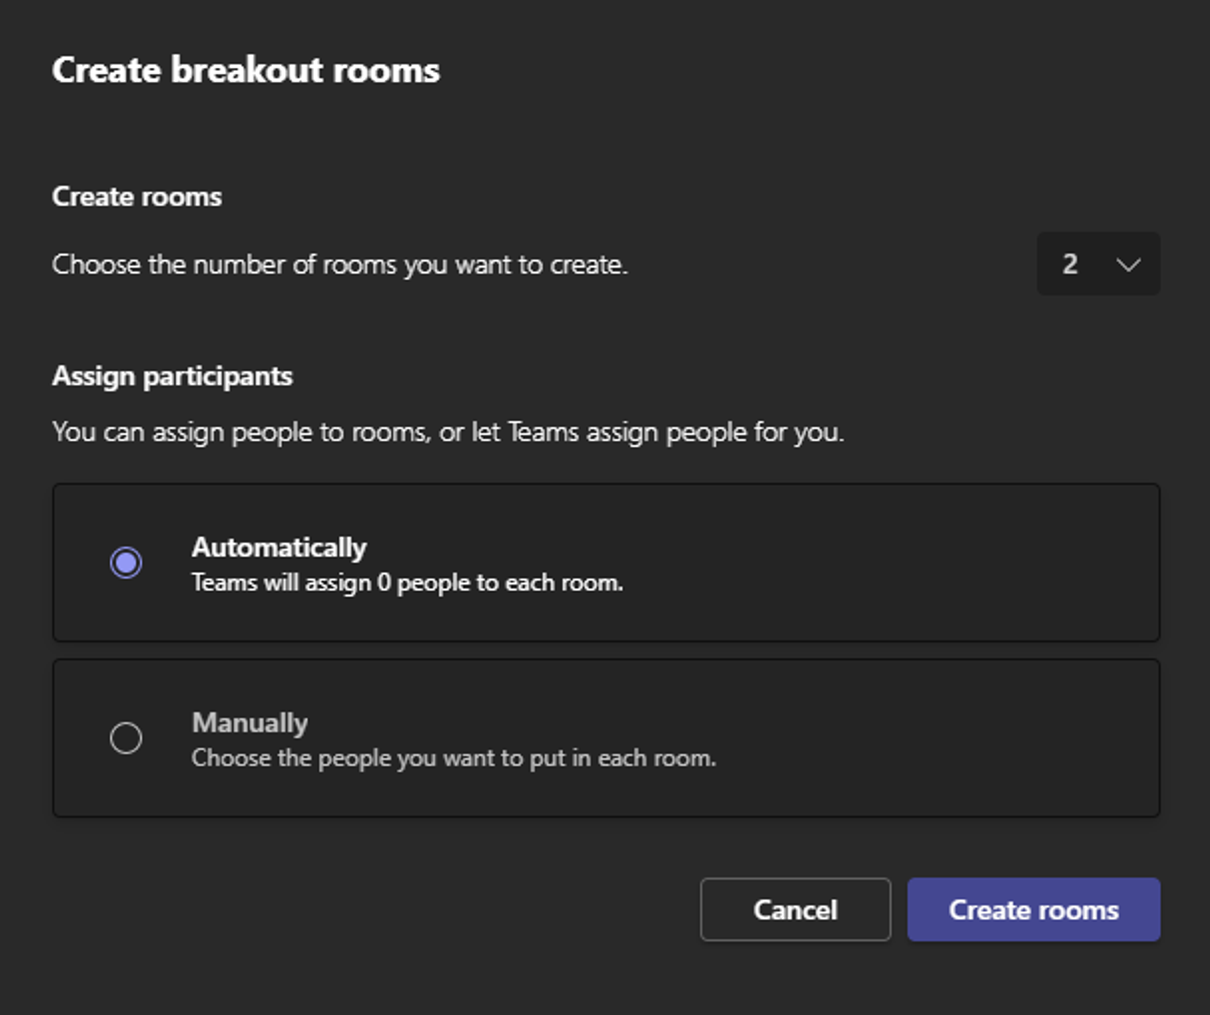
Step 6 — choose an assignment method
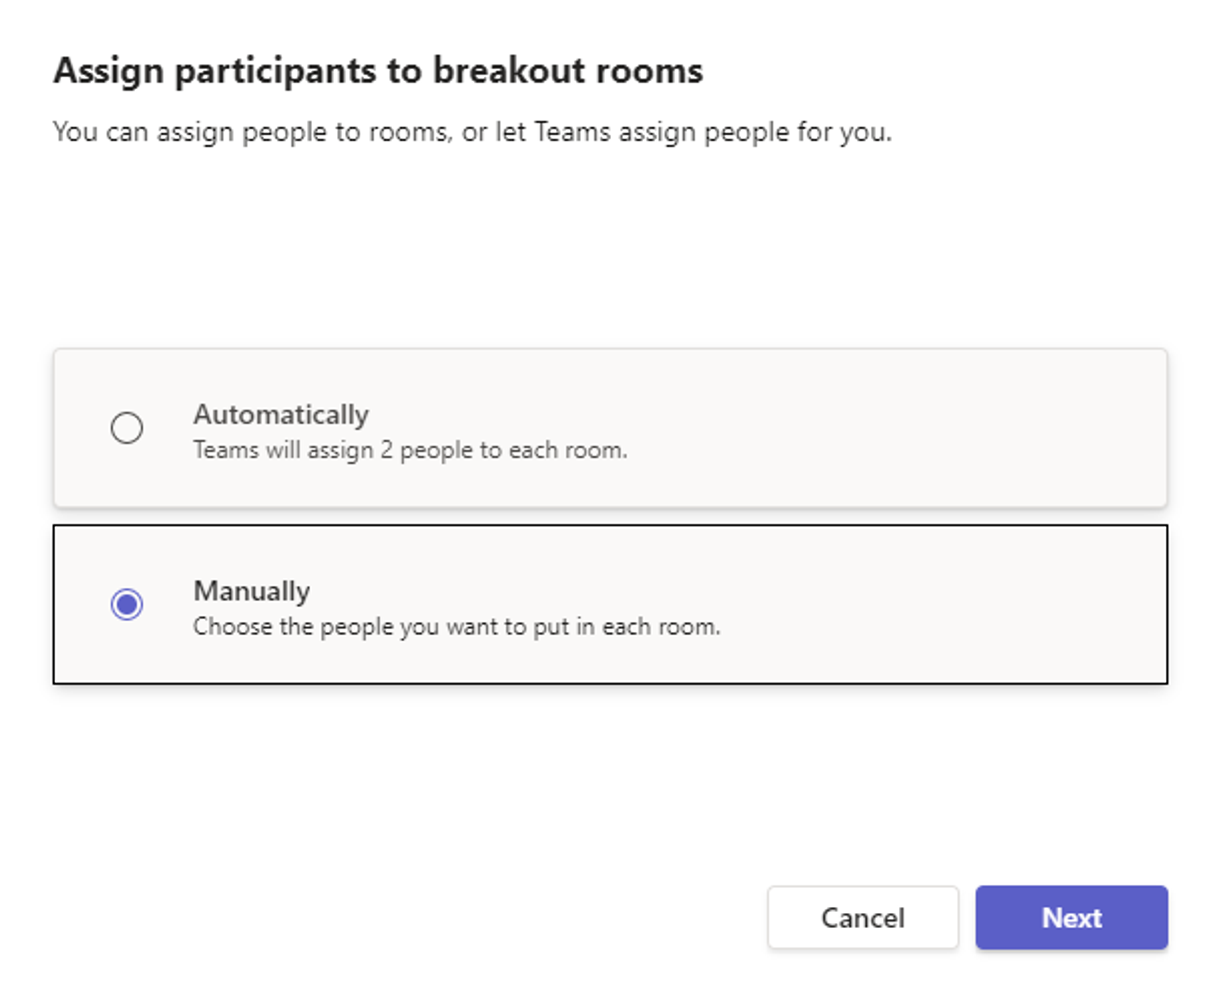
Teams will ask if you would rather “Automatically” or “Manually” assign members. If you choose “Automatically,” you can click “Next” and conclude the guide here. Otherwise, click “Next” and proceed to the next step.
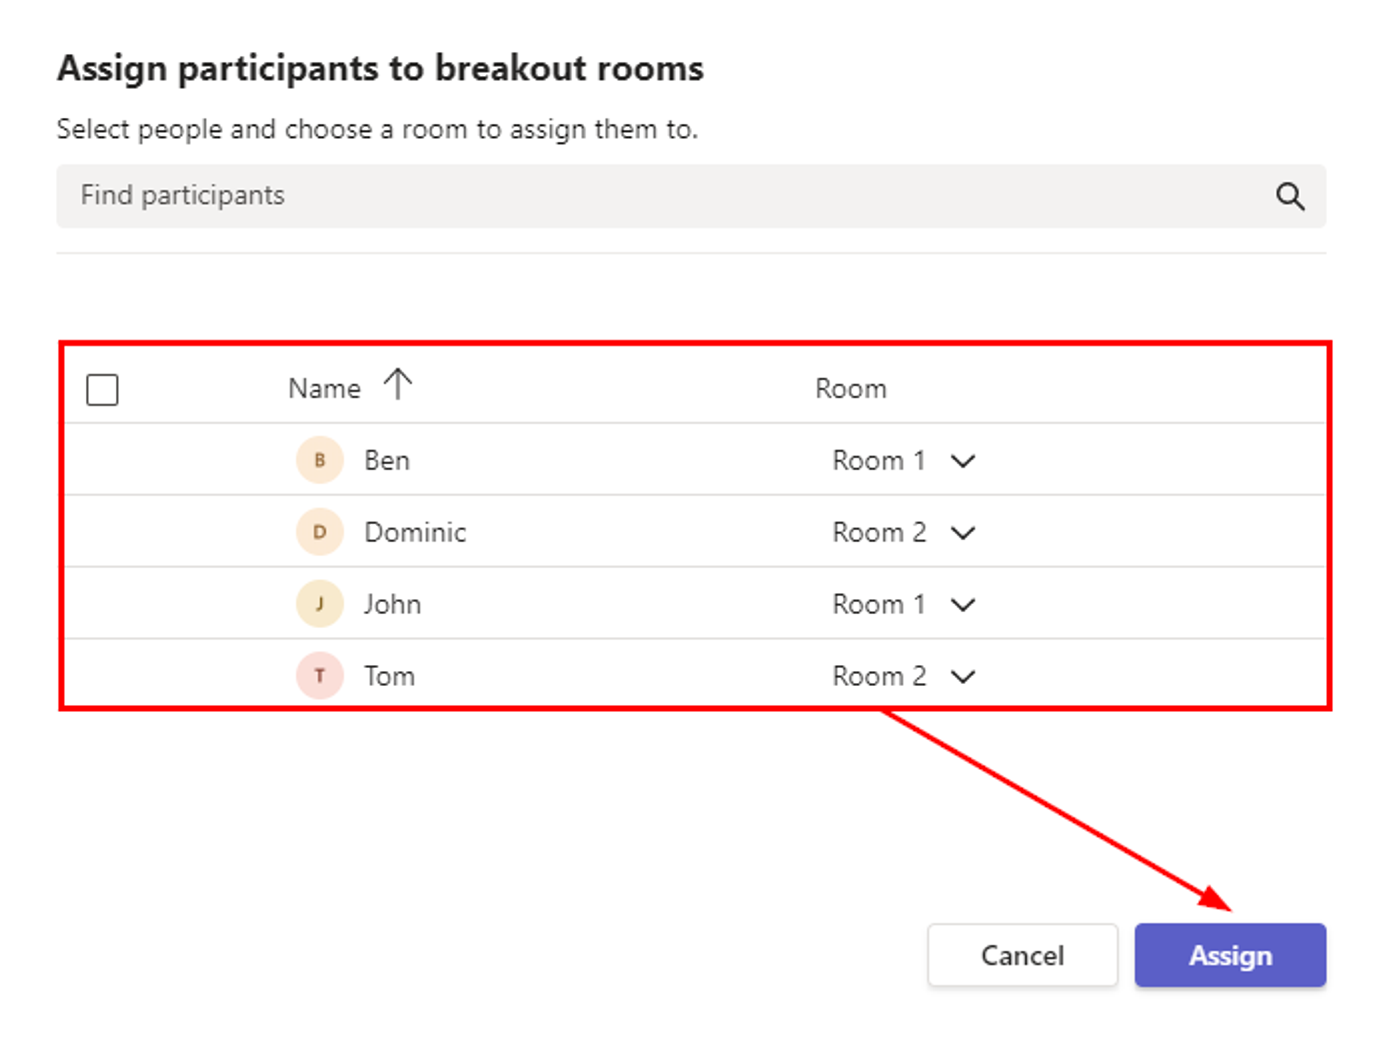
Step 7 — Assign users to their rooms
You will find a list of users on the left: your meeting’s participants. The right side uses a dropdown that determines the room Teams should send a user to. Once you’re sure of your choice, click “Assign.”
Step 8 — Join the meeting
The meeting and its breakout rooms are ready. Click “Join.”


How to assign breakout rooms during meetings in Teams
If you forget to pre-assign breakout rooms, you can still create rooms mid-meeting— this is especially helpful when you didn’t intend to use breakout rooms.
The following guide is only compatible with the Microsoft Teams desktop client. Do not attempt this process with the browser or mobile version.
Step 1 — Select rooms via the action bar
The meeting window features an action bar with several buttons. Find and select the “Rooms” button. After doing so, Teams will present a menu to you.

Step 2 — Select an assignment method
Here, you can specify the number of breakout rooms needed. In addition, you can automatically assign users to different rooms or manually assign each user one by one.
Blog post recap
Meeting organizers who use the desktop client for Microsoft Teams are able to set up breakout rooms. Although most meeting organizers create their breakout rooms during their meetings, they’re equally capable of pre-assigning you to one. If you would like to pre-assign breakout rooms, you will have to use a scheduled meeting as opposed to a “Meet now” meeting.
Thank you for taking the time to read this post. If you have any questions, please leave a comment below— we’d be happy to help you out. If you’re a fond user of the Microsoft 365 suite, consider checking out the rest of our posts. I’ve left linked some related topics below.
- How to turn off the cameras of all attendees in a Teams meeting — Although you can’t force attendees to keep their cameras on, you can force your attendees to keep their cameras off. This guide will tell you how.
- How to view poll results in Microsoft Teams — It’s easy to start a poll in Teams, yet it can be tricky to find your results.
- How to test your camera in Teams without joining a meeting — Teams allows you to test your camera without joining a meeting— this post will help you get started.
- A complete guide to testing your audio before a Teams meeting — If you’re prone to technical difficulties, you should consider testing your audio before entering meetings. The following guide will help you.