If you’ve already got a lot on your plate, planning and preparing meetings can become too much to handle. Microsoft Teams will highlight this by alerting your meeting’s entire member list when you invite additional participants later. But, as you may have noticed, Teams makes no effort to inform you this will happen.
Although meetings occur within Microsoft Teams, adding additional attendees (without alerting everyone) requires us to use Outlook’s desktop client. You can read the brief guide below to find out how:
- Launch Outlook’s desktop client
- Open the Outlook events calendar
- Find and select your meeting
- Click “Open” under the “Meeting” tab
- Add additional participants
- Click send
- Enable the “Send updates only to added or deleted attendees”
- Click “OK”
In the following post, I will detail how you should set about appending your meeting’s attendee list without notifying everyone. To ensure we can do this properly, I’ll first demonstrate how you can create a Teams meeting within Outlook (where the leading guide will take place).
If you experience an issue with either guide, try referring to the screenshots provided below each step. If they prove to be of no use, you can leave a comment at the bottom of this post.
Below, you will find several labeled shortcuts concerning this post’s topics of interest. If you’re looking for something specific, you can use the following links to access relevant content quickly, instead of wasting time scrolling.
- How to create a Teams meeting in Outlook
- How to update a Teams meeting’s members without alerting everyone
- Blog post recap
How to create a Teams meeting in Outlook
Although this guide concerns Microsoft Teams and its meetings, you must understand how to create and edit meetings inside of Outlook, wherein we can achieve the objective of this post. Hence, the step-by-step guide below will instruct you in creating a Teams meeting via Outlook’s desktop application.
The second guide is only compatible with Outlook’s desktop client; though this guide does not share the exact requirements, I recommend you follow along using the desktop client— this keeps things consistent and helps both of us.
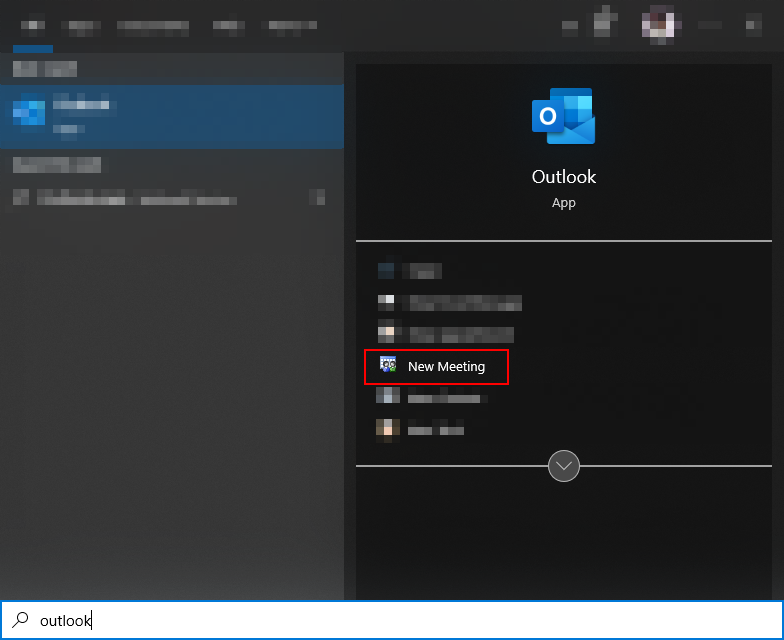
Step 1 — Launch Outlook’s meeting creation tool
OK, it’s time about time we get down to business. Your first task will be launching Outlook’s desktop client. If you have a shortcut on your desktop, double-click it. Otherwise, hit the “Start” key and type “Outlook.” Then, in the “Best match” result card (on the right), select “New Meeting.”
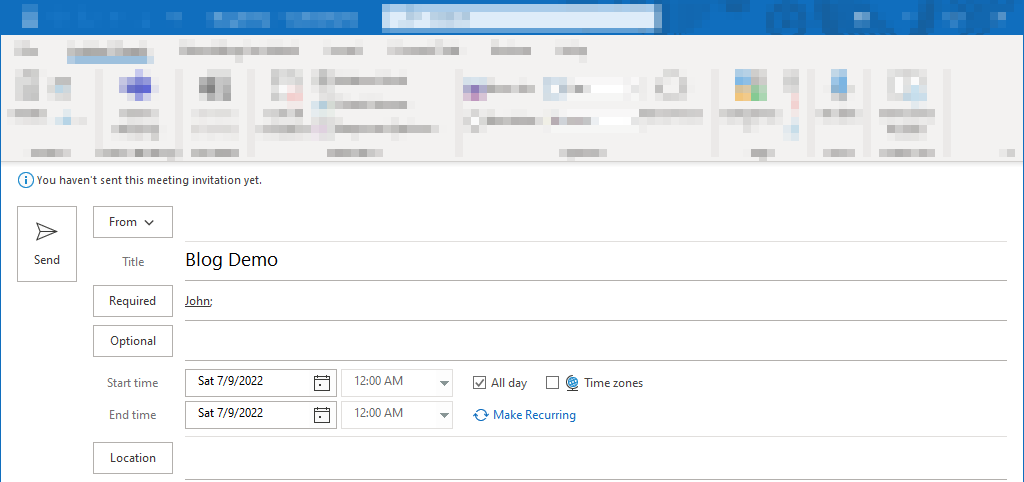
Step 2 — Configure the relevant fields
Great, we’re making progress. You’re currently looking at Outlook’s event/meeting editor window, wherein users can set up and adjust their events and meetings before publishing them to their calendars. I propose you appropriately fill the title field, apply the start date, write a description, and list some attendees.
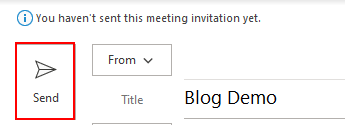
Step 3 — Distribute your invitations
Perfect! You’ve done it: you’re ready to distribute your attendees’ invitations. To do so, look at the top left of the editor and click “Send.” There’s a good chance Outlook will warn you about not having set a location for your meeting; however, this is reasonably unimportant.

How to update a Teams meeting’s members without notifying everyone
Now that you’ve prepared a meeting in Outlook, we can get started on editing it. Fortunately, I have stated what you need to know in the guide below. So by the end, you’ll understand how to update your attendee list without notifying everyone.
You cannot apply the following guide to Outlook’s web or mobile client. Therefore, it would be unwise to attempt to do. With this in mind, please download, install, and use the Outlook desktop client.
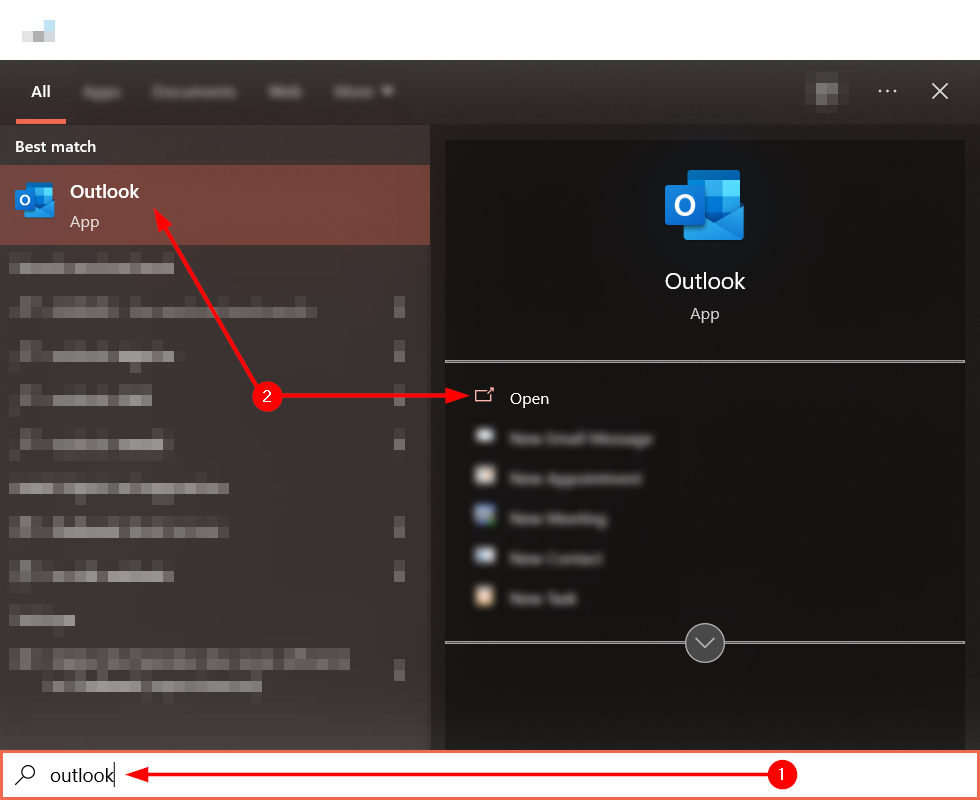
Step 1 — Launch your Outlook desktop client
If you’ve closed Outlook after completing the previous guide or skipped the previous one, you’ll need to get the application open. If you’ve already opened Outlook, proceed to step two. Otherwise, tap the “Start” key, type “Outlook,” and hit the “Enter” key.
Step 2 — Open your Outlook calendar
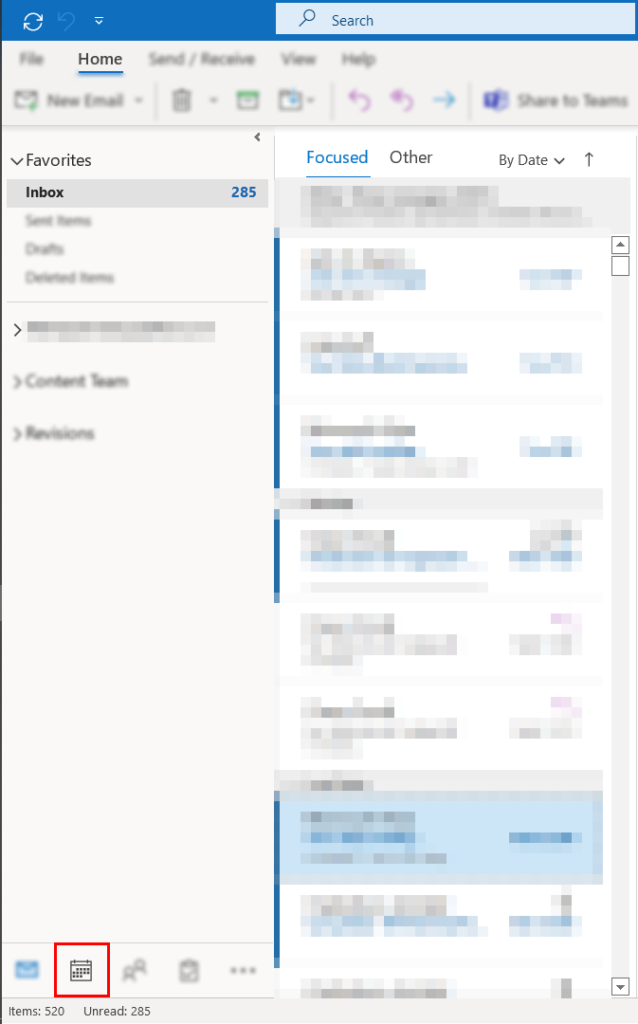
With Outlook open, we can properly get started. Your first objective should be opening Outlook’s calendar. Look at the bottom left side of the window. There are five buttons, one of which will enable you to complete this step: the “Calendar” button resembling a traditional calendar.
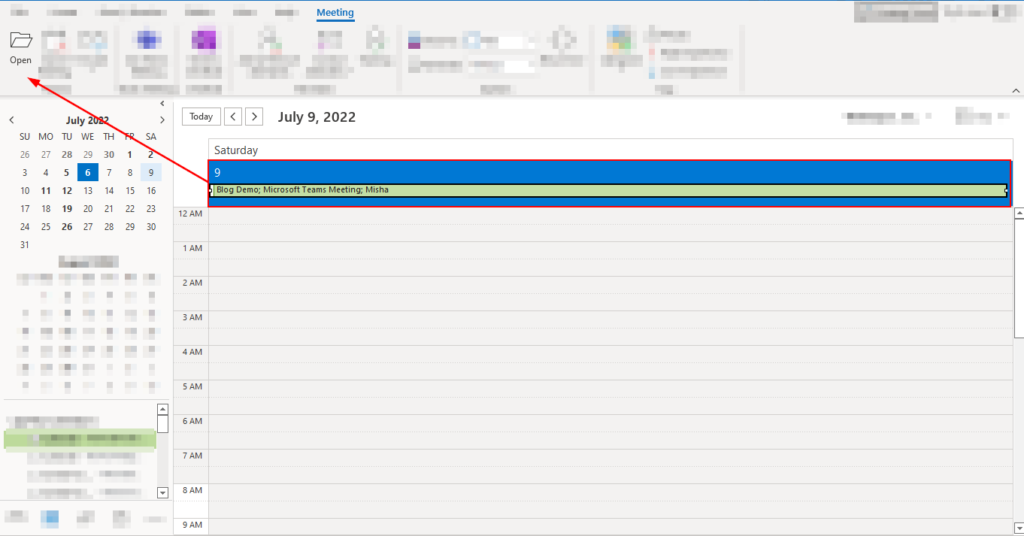
Step 3 — Open your meeting’s configuration window
This page is known as the “Calendar.” The calendar allows us to track, create, edit, accept, and decline events and meetings. Your calendar may be chaotic or somewhat empty, depending on how much your organization schedules meetings and events. While you’re accessing the calendar, find and select your Teams meeting. Then, head to the “Meeting” tab using the ribbon and select “Open.”
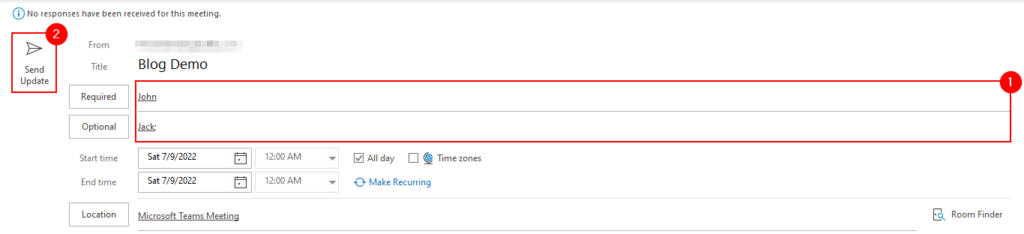
Step 4 — Add extra participants
Now that you’ve reached the event/meeting editor, you can start amending your attendee list— whether that means removing or adding members to the list. Once you have done that, click the “Send update” button— you’ll spot it in the top left of the editor.
Step 5 — Only notify the additional participants
After you attempt to send the update to your meeting, Outlook will stop you. When this occurs, you will need to decide between distributing the news among all meeting attendees or those impacted (via being removed or added).

Blog post recap
Under normal circumstances, updating a meeting’s attendee list will notify each expected participant. Fortunately, we can bypass this by creating and editing Microsoft Teams meetings in Outlook. This plan works due to the prompt Outlook’s desktop client provides, wherein it will ask you to choose between notifying everyone or just the members added to or removed from the meeting.
Thank you for taking the time to read this post. If you enjoyed the content or found our solution helpful, consider returning to the site for your future Microsoft 365 problems. Each writer puts a considerable effort into constructing reliable resources for your benefit— we appreciate your support.