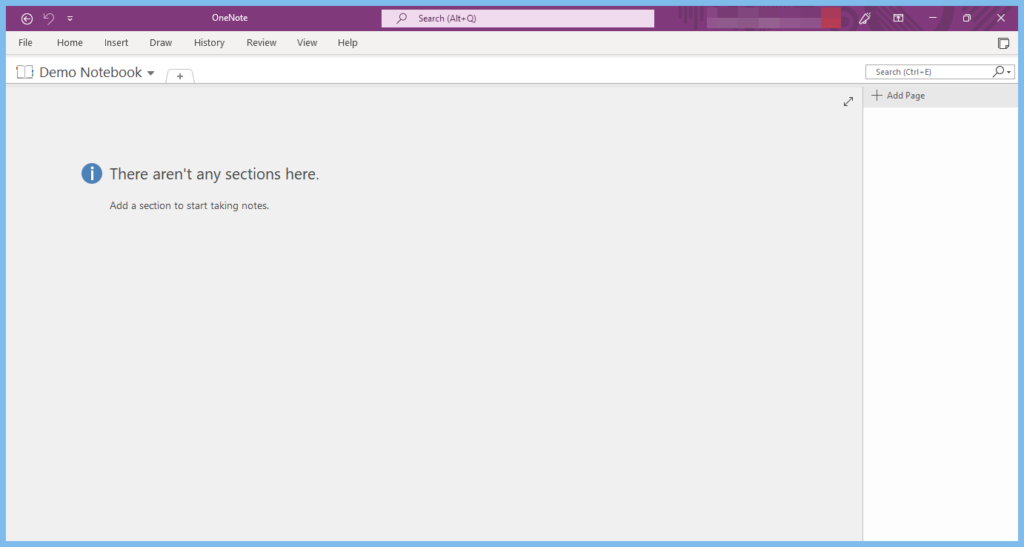
OneNote is the primary note-taking-oriented platform within the Microsoft 365 suite. Within OneNote, users create “Notebooks,” which serve as a collection of “Pages,” each containing numerous notes submitted by the user. When a page is deleted usually (not permanently), OneNote moves the page to a unique recycling bin — exclusive to the Notebook the page once resided within.
Here are the steps to recovering an unsaved/deleted OneNote notebook page:
- Open your Notebook
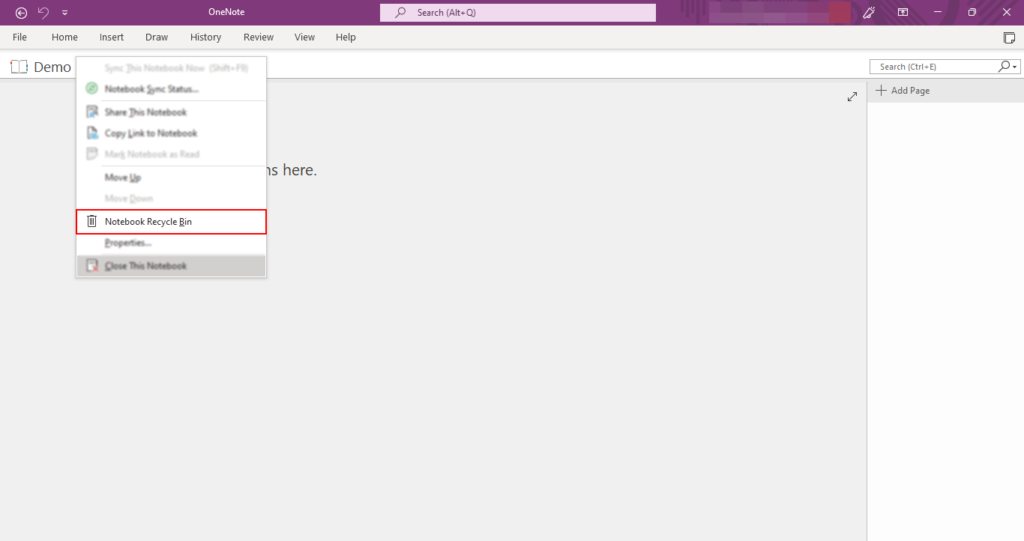
- Right click the Notebook in the tab bar
- Select Notebook Recycle Bin
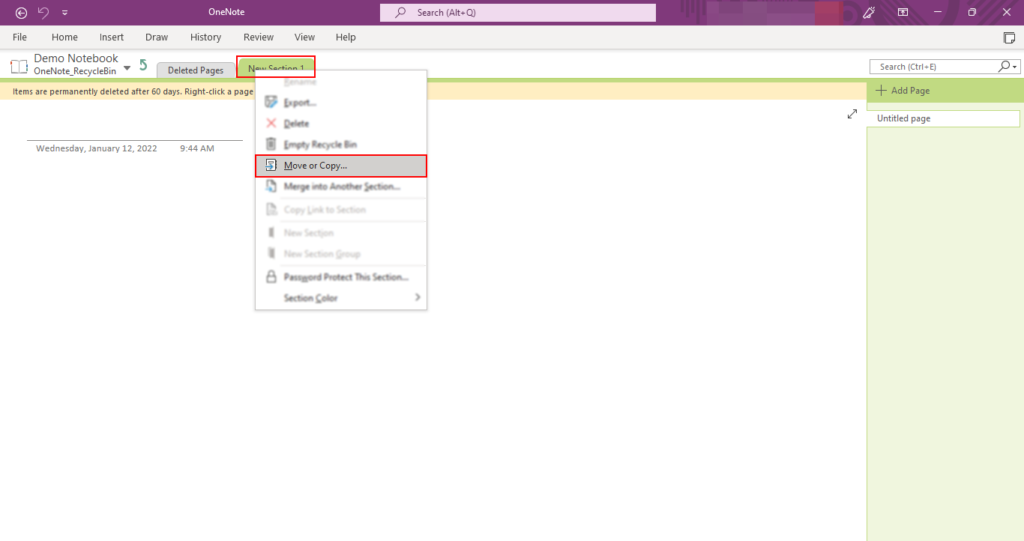
- Right click the deleted page via the tab bar
- Click Move or Copy
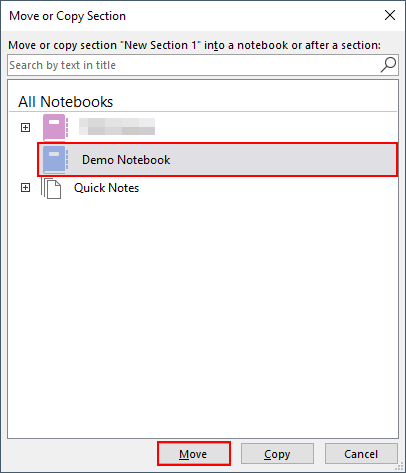
- Select a Notebook and click Move
Provided you haven’t deleted the page in sixty or more days: it will remain within its respective Notebook’s recycling bin. From there, you can move the page back to your Notebook. Alternatively, suppose you stored your Notebook within a SharePoint site instead of being stored locally. In that case, you will find that it is moved to your SharePoint recycling bin after sixty days — instead of being permanently deleted.
Contents:
- [1] How to restore a deleted OneNote Notebook page
- [2] How to restore a deleted OneNote Notebook in SharePoint
- [3] When is it too late to restore a deleted file
- [4] How to restore a “permanently” delete OneNote page
- [5] Recap & Farewell
How to recover a deleted OneNote Notebook page
Step 1 – Open your notebook
When a OneNote page is initially deleted, the page will appear inside of its notebook’s recycle bin. Thus, we must access the page’s notebook, to then access the recycle bin.
Step 2 – Open the notebook recycle bin
By right-clicking your Notebook’s name (under “File“) you are able to access a dropdown; Select the dropdown option: “Notebook Recycle Bin.”
Step 3 – Move your page from the recycle bin
Notebook recycle bins only store pages for 60 days- after that, they are deleted (in some cases moving to the Windows reycle bin). If however, your file is still present, right-click its tab; left-click the “Move or Copy” option in the dropdown.
Step 4 – Specify a page destination
A destination is required when moving pages- this should be a notebook. Select the notebook you would like to restore the page to and click “Move.”

How to recover a deleted OneNote Notebook in SharePoint
Step 1 – Open your SharePoint site’s contents
In some cases, site settings are not immediately accessible; when this happens, you should open “Site contents.” “Site settings” can be accessed via the contents page.
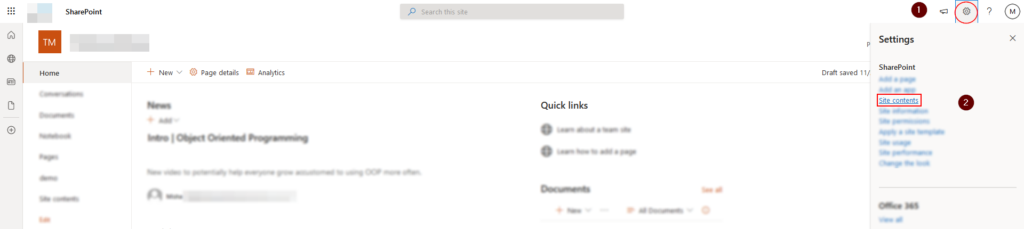
Step 2 – Open site settings
Towards the right side of the Window, you can spot “Site settings” suffixing a cog icon. Clicking the text to the right of the cog will load your Sharepoint site’s settings.

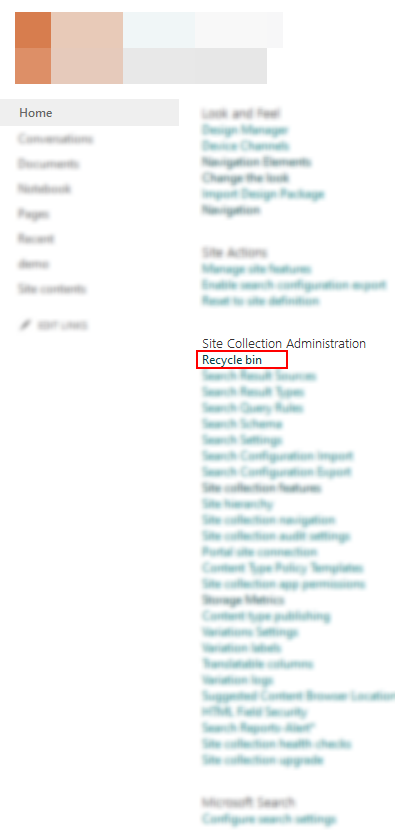
Step 3 – Open the site’s recycle bin
The “Recycle bin” link is under the “Site Collection Administration” category of “Site settings.” Fortunately for both of us, the recycle bin is one of the first things listed in its category.
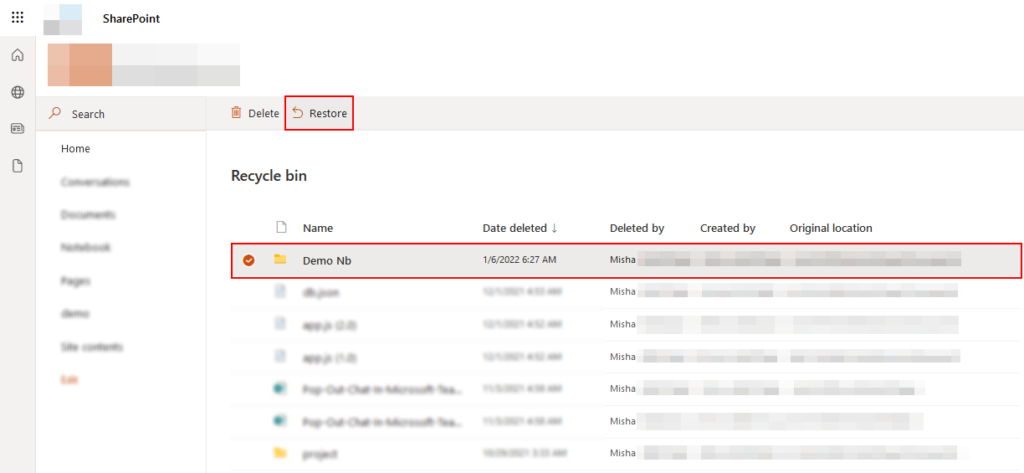
Step 4 – Restore your lost Notebook
Once you post your Notebook, please give it a click. You’ll notice a checkmark appear that indicates that you have selected a document. You can choose to restore at the top of the bar to remove the item from the site’s recycle bin.
When is it too late to recover a deleted file
Locally stored Notebooks
Notebooks stored locally on your machine are sent to your device’s standard recycle bin upon deletion- as is every other locally deleted file on your machine. Files can be restored from this recycle bin after any time unless the bin is “emptied,” which triggers the permanent deletion of the recycle bin’s content.
Notebooks stored on Sharepoint
Notebooks you store on the Sharepoint platform end up in a site-specific recycling bin after their deletion. The deleted Notebook may remain within its respective site’s recycling bin for up to 93 days. If the file is not restored within 93 days, it will be removed from the recycling bin and otherwise made inaccessible.
How to recover a “permanently” deleted OneNote page
When you remove a page from a OneNote notebook’s recycling bin, you do not permanently delete the file as OneNote implies; Instead, you send your deleted file to your device’s default recycling bin. You can either restore the file from the default recycling bin or truly delete it.
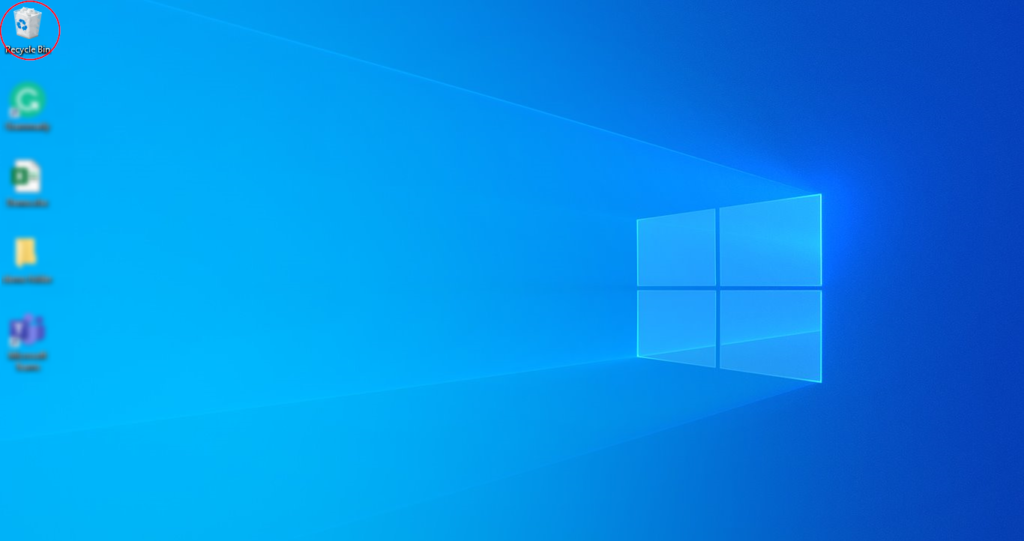
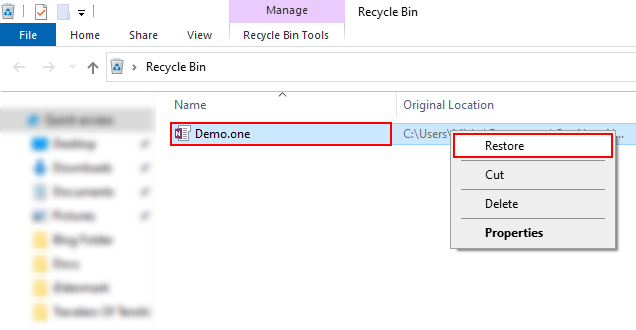
Step 1 – Open the recycling bin
An unaltered desktop will often contain Windows’ recycle bin in the top left corner. The Windows’ recycle bin is identifiable as a waste-paper basket adorned with a recycling icon. You can open the recycling bin by left-clicking its icon twice in swift succession. Suppose you cannot find the recycling bin on your desktop. In that case, you can attempt to open the application via the Windows search function- do so by pressing the “Win“/”Start” key, followed by typing “recycle” and selecting the “Recycle bin” search result.
Step 2 – Select and restore your file
You will need to identify your missing OneNote page within what you will find to be either a desolate blank space or an overrun mess. As shown below, they will share a name with your page- suffixed with OneNote’s associated icon. Select the file with a right-click, followed by choosing “Restore” in the resulting dropdown. You can permanently delete the file by instead selecting “Delete” however, this will make the file unrestorable- thus, I’d like to propose you think carefully before doing so.
Recap & Farewell
Recap
Typically, you can restore a file from your computer’s local recycle bin when you delete it. However, when you store a document via Sharepoint, it’s a little bit more tedious- albeit, you gain 93 days to decide whether or not to restore your file In the days before its impending deletion.
Farewell
Thank you for reading. I hope this post was instrumental in resolving your problem. If you have additional queries or issues regarding the Microsoft 365 suite, please consult the rest of our site, where we frequently post new content and aspire to make all content as useful and comprehensive as possible.
Our related articles:
- OneNote notebooks not syncing across devices: Troubleshooting guide – One of the most favoured perks of cloud storage is the ability to acess your documents anywhere. Thus, frustration when you can achieve this is quite justified. Albeit, your frustration is unncesary since we have a solution, tune in to find out more.
- How to move a OneNote Notebook to SharePoint – If you’re using up too much space on your physical storage deviced you may consider attempting to free up space- assumedly through OneDrive/Sharepoint. Thus, allowing you to save space, and use your documents in a more accessible way.
- How to fix Microsoft 365 admin center login error 0 – If you’ve come across error code 0, you’ve encountered an installation error. Installation errors are often detected when the user account is behaving unusually or your instakatin.
- How to change the location where SharePoint libraries sync on your computer – While convenient, syncing can sometimes get in the way. If you understand that even a little, I recommend giving this post a readas